Home>Arts and Culture>Master The Art Of Drawing Mickey Mouse With These Simple Steps!

Arts and Culture
Master The Art Of Drawing Mickey Mouse With These Simple Steps!
Modified: February 29, 2024
Learn how to draw Mickey Mouse with easy steps and master the art of cartoon drawing. Explore the world of arts and culture with this fun and creative activity!
(Many of the links in this article redirect to a specific reviewed product. Your purchase of these products through affiliate links helps to generate commission for Noodls.com, at no extra cost. Learn more)
Table of Contents
Introduction
Welcome to the magical world of drawing Mickey Mouse! Whether you're a seasoned artist or just starting your artistic journey, learning to draw this beloved Disney character can be a delightful and rewarding experience. Mickey Mouse, with his iconic ears and cheerful personality, has captured the hearts of audiences worldwide for generations. In this step-by-step guide, you'll discover how to bring this timeless character to life on paper.
Drawing Mickey Mouse is not only a fun activity but also a fantastic way to enhance your artistic skills. As you embark on this creative endeavor, you'll develop a deeper understanding of shapes, proportions, and the art of capturing expression through simple lines and curves. By following the simple steps outlined in this guide, you'll gain valuable insights into the fundamentals of character illustration, setting the stage for further exploration and artistic growth.
Whether you're creating a special gift for a Disney enthusiast, adding a touch of whimsy to your sketchbook, or simply seeking a delightful pastime, mastering the art of drawing Mickey Mouse will undoubtedly bring joy and satisfaction. So, grab your drawing tools, unleash your creativity, and let's embark on a magical journey to bring everyone's favorite mouse to life on the page!
Step 1: Gather Your Materials
Before you begin your artistic adventure of drawing Mickey Mouse, it's essential to gather the right materials. Having the proper tools at your disposal will not only make the process more enjoyable but also contribute to the quality of your final masterpiece. Here's a list of materials to ensure you're well-equipped for this creative endeavor:
-
Drawing Paper: Select a smooth, high-quality paper that is suitable for sketching and drawing. A standard letter-size or A4 sheet will work perfectly for this project.
-
Pencils: Invest in a set of good-quality pencils with varying lead hardness, such as 2H, HB, and 2B. These will allow you to achieve different line weights and shading effects.
-
Eraser: A soft, kneaded eraser is ideal for making precise corrections and adjustments without damaging the paper.
-
Sharpener: Keep a sharp pencil at all times by having a reliable pencil sharpener within reach.
-
Ruler: While Mickey Mouse's charm lies in his organic, free-flowing form, a ruler can come in handy for creating straight lines and maintaining proportions, especially if you decide to add any background elements to your drawing.
-
Reference Image: Having a clear reference image of Mickey Mouse, whether it's a classic illustration or a screenshot from a cartoon, will guide you in capturing his iconic features accurately.
Once you've gathered these materials, you're all set to embark on the next step of bringing Mickey Mouse to life on paper. With your tools at the ready, let's dive into the enchanting process of sketching the foundational shapes of this beloved character.
Step 2: Start with Basic Shapes
To begin your Mickey Mouse drawing, start by sketching the basic shapes that form the foundation of his iconic appearance. Mickey's design revolves around simple, recognizable forms, making it an ideal subject for artists of all skill levels. Follow these steps to capture the essence of Mickey Mouse through fundamental shapes:
1. Head and Ears
Commence by drawing a large, slightly flattened circle to represent Mickey's head. Next, add two smaller circles on top of the head circle to depict his trademark round ears. Ensure that the ear circles are positioned symmetrically on either side of the head, maintaining the classic Mickey Mouse silhouette.
2. Facial Guidelines
Within the head circle, lightly sketch a vertical line intersected by a horizontal line, creating a cross that divides the circle into four equal sections. These guidelines will aid in placing Mickey's facial features accurately and maintaining proper proportions.
Read more: How To Draw Mickey Mouse
3. Snout and Muzzle
Beneath the horizontal guideline, draw a small oval shape to outline Mickey's snout. Connect the snout to the bottom of the head circle with two curved lines, forming his endearing muzzle. These simple shapes lay the groundwork for Mickey's characteristic facial structure.
4. Body and Limbs
Extend from the head circle to sketch a larger oval or bean-like shape to represent Mickey's body. Then, add two smaller ovals on either side of the body to indicate his arms. Finally, draw two shorter, slightly curved lines below the body to outline Mickey's legs.
By starting with these basic shapes, you establish a solid framework for your Mickey Mouse drawing, setting the stage for adding intricate details and refining the character's appearance. With the foundational forms in place, you're ready to progress to the next step and infuse your Mickey Mouse illustration with personality and charm.
Step 3: Add the Details
With the foundational shapes of Mickey Mouse sketched out, it's time to infuse personality and character into your drawing by adding essential details. This step is where Mickey truly begins to come to life on the page, as his distinctive features and expressions take shape. Follow these guidelines to add the defining details that make Mickey Mouse instantly recognizable:
1. Facial Features
Start by focusing on Mickey's endearing facial features. Begin with his expressive eyes, drawing two large, circular shapes along the horizontal guideline within the head circle. Ensure that the eyes are evenly spaced and symmetrical. Next, add Mickey's characteristic button-like nose, a small circular shape positioned at the center where the vertical and horizontal guidelines intersect. Finally, draw a wide, cheerful smile beneath the nose, capturing Mickey's trademark grin.
Read more: How To Draw Step By Step
2. Ears and Head
Refine the shape of Mickey's ears, ensuring that they maintain a circular form and align proportionally with the head. Add subtle details to the ears, such as internal curves or lines to convey depth and dimension. Pay attention to the placement of the ears, as they contribute significantly to Mickey's iconic silhouette.
3. Clothing and Gloves
Mickey Mouse is often depicted wearing his signature red shorts and oversized yellow shoes. Sketch the outline of his shorts, ensuring they fall just below the waistline of the body shape. Add the iconic buttons to the front of the shorts, emphasizing Mickey's classic attire. For his gloves, draw simple, curved shapes at the end of each arm, capturing the distinct look of Mickey's gloved hands.
4. Tail and Additional Details
If you choose to include Mickey's tail in your drawing, extend a curved line from the lower back area of the body shape and add a few small, rounded shapes at the end to represent the tail's tip. Consider adding any additional details, such as Mickey's iconic white gloves or any background elements that complement the character.
By incorporating these essential details, you'll bring an unmistakable charm and vibrancy to your Mickey Mouse illustration. Each element contributes to capturing the essence of this beloved character, allowing you to celebrate Mickey's timeless appeal through your artistic interpretation. With the details in place, your drawing is now ready for the next phase of refinement and enhancement.
Step 4: Refine Your Drawing
After adding the foundational shapes and essential details to your Mickey Mouse illustration, it's time to refine and enhance the overall appearance of your drawing. This crucial step involves fine-tuning the lines, adjusting proportions, and adding depth to bring your artwork to its full potential.
1. Line Refinement
Begin by carefully going over the initial sketch, refining the lines to create a cleaner and more polished look. Pay attention to the contours of Mickey's features, such as his head, ears, and facial elements, ensuring that the lines flow smoothly and accurately depict the character's iconic appearance. Consider using varying line weights to add dimension and emphasis where needed, such as outlining the outer edges with slightly bolder lines and using lighter strokes for internal details.
2. Proportional Adjustment
Take a moment to evaluate the proportions of your Mickey Mouse drawing. Make any necessary adjustments to ensure that the head, body, and limbs are harmoniously balanced. Refining the proportions will contribute to the overall visual appeal and likeness to the beloved character. Pay close attention to the positioning of facial features, the size of the ears in relation to the head, and the overall symmetry of the illustration.
3. Facial Expression
Mickey Mouse is known for his expressive and cheerful demeanor, so refining the facial expression is key to capturing his lively personality. Focus on enhancing the curvature of his smile, the placement of his eyes, and the overall warmth conveyed through his expression. Fine-tune the details to evoke the timeless charm and positivity that define Mickey's character, ensuring that your drawing radiates the same joy and charisma associated with this beloved icon.
4. Texture and Detailing
Consider adding texture and subtle detailing to certain elements of your drawing to enrich the visual impact. For instance, you may choose to emphasize the texture of Mickey's gloves, the stitching on his shorts, or the subtle fur-like texture on his snout. Adding these nuanced details can elevate the overall quality of your artwork, infusing it with depth and dimension.
By focusing on these refinements, you'll elevate your Mickey Mouse drawing to a new level of artistry, capturing the essence of this timeless character with precision and charm. With the refinement stage complete, your drawing is now ready for the final touches that will bring it to life in vibrant color and shading.
Step 5: Add Color and Shading
As you transition to the final phase of bringing your Mickey Mouse drawing to life, the addition of color and shading will infuse vibrancy and depth into your artwork. Whether you opt for traditional coloring mediums such as colored pencils and markers or prefer digital tools, the careful application of color and shading will enhance the visual impact of your illustration.
Coloring Mickey's Iconic Features
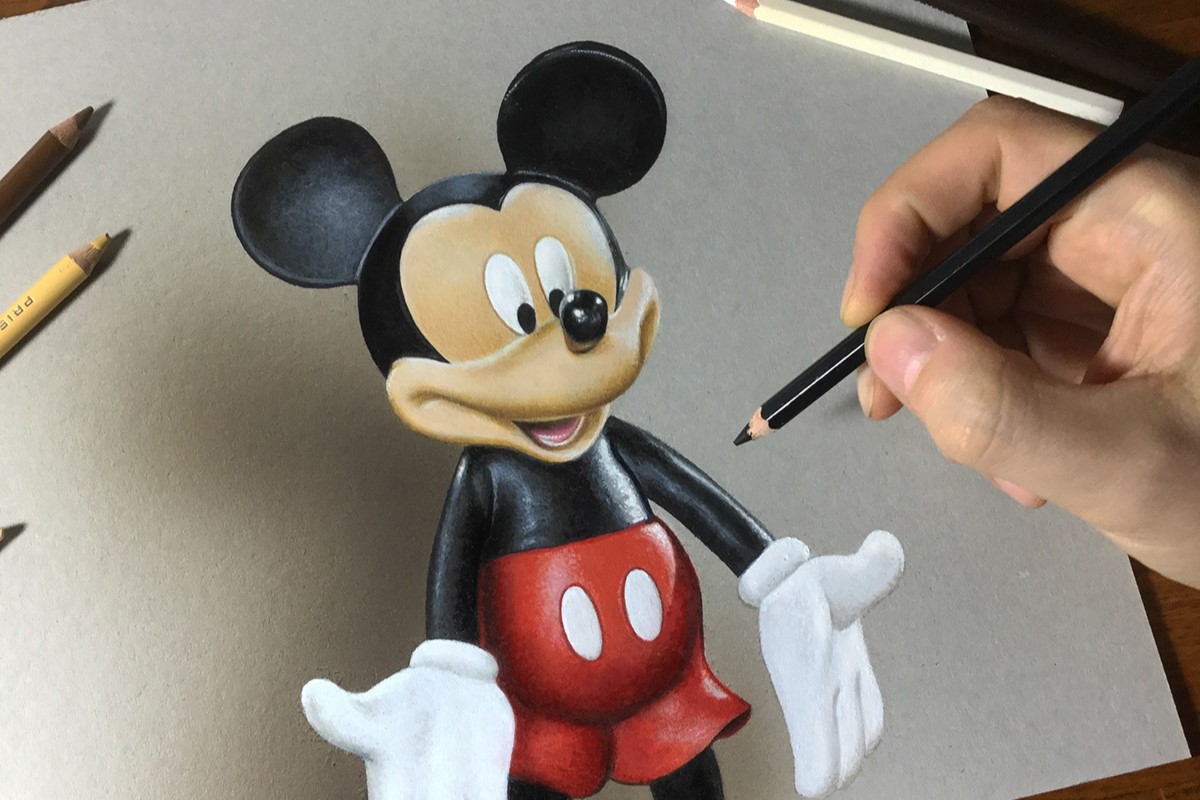
Begin by selecting the appropriate colors to depict Mickey Mouse's classic appearance. For his signature red shorts and yellow shoes, choose hues that closely resemble the iconic attire associated with this beloved character. When coloring Mickey's face and body, consider using light flesh tones to convey his cheerful and friendly demeanor. Pay close attention to the color of his gloves, ensuring they reflect the distinct white hue that complements his ensemble.
Shading for Dimension and Depth
Shading plays a pivotal role in adding dimension and realism to your Mickey Mouse drawing. Utilize varying degrees of pressure when applying shading to create gradients and depth, particularly in areas where shadows naturally fall. Consider the source of light in your composition and apply shading accordingly to accentuate Mickey's three-dimensional form. Focus on areas such as the underside of his ears, the folds of his clothing, and the contours of his face to evoke a sense of depth and volume within your illustration.
Blending and Texturing Techniques
Experiment with blending techniques to seamlessly merge different shades and create smooth transitions between colors. Whether you're using blending stumps for traditional media or digital blending tools, mastering these techniques can elevate the overall polish and realism of your artwork. Additionally, consider incorporating texturing methods to enhance specific elements of your drawing, such as adding subtle fur-like textures to Mickey's snout or creating a tactile feel for his clothing and accessories.
Embracing Creativity and Personalization
While staying true to Mickey Mouse's classic color palette is essential for capturing his recognizable appearance, don't hesitate to infuse your own creative flair into the coloring and shading process. Consider experimenting with subtle variations in color tones, highlighting certain details with strategic pops of brightness, or exploring unconventional shading techniques to impart a unique touch to your rendition of Mickey Mouse.
By skillfully applying color and shading, you'll breathe life into your Mickey Mouse drawing, transforming it into a vibrant and captivating portrayal of this beloved character. With the addition of color and shading, your artistic journey of bringing Mickey Mouse to life on paper reaches a delightful culmination, celebrating the timeless charm and enduring legacy of this iconic Disney icon.
Conclusion
As you put the finishing touches on your Mickey Mouse drawing, take a moment to revel in the artistic journey you've embarked upon. Through each step of this process, from sketching the foundational shapes to infusing personality and charm into your illustration, you've honed your artistic skills and celebrated the timeless allure of this beloved Disney character.
Drawing Mickey Mouse is not merely an exercise in replicating a familiar figure; it's a testament to the enduring magic of art and creativity. As you meticulously added details to capture Mickey's iconic features, refined the lines to evoke his timeless charm, and brought the illustration to life with vibrant color and shading, you've woven a narrative of joy and creativity on the canvas of your imagination.
Beyond the technical aspects of drawing, this endeavor has offered a journey of nostalgia and inspiration. Mickey Mouse, with his endearing smile and timeless appeal, embodies the spirit of imagination and optimism. In bringing him to life through your art, you've tapped into the rich tapestry of storytelling and creativity that has captivated audiences for generations.
Whether this drawing serves as a personal keepsake, a gift for a fellow Disney enthusiast, or simply a delightful addition to your artistic portfolio, it stands as a testament to your passion for creativity. Embrace the sense of accomplishment that comes with each stroke of the pencil and each carefully chosen hue, for in this process, you've not only captured the essence of Mickey Mouse but also nurtured your own artistic spirit.
As you reflect on this journey, remember that the art of drawing is a celebration of expression and interpretation. Your rendition of Mickey Mouse is a unique reflection of your creativity, infused with your personal touch and artistic sensibility. Let this experience inspire you to continue exploring new subjects, honing your skills, and finding joy in the boundless world of artistic expression.
So, as you gaze upon your completed Mickey Mouse drawing, adorned with vibrant colors and brimming with character, take pride in the masterpiece you've created. Let it serve as a reminder of the magic that unfolds when creativity meets imagination, and may it inspire you to embark on countless more artistic adventures, each one as enchanting and fulfilling as the journey that brought Mickey Mouse to life on your canvas.


