Home>Automotive>Quick And Easy DIY Fix For Car Oil Leaks – No Mechanic Needed!
Automotive
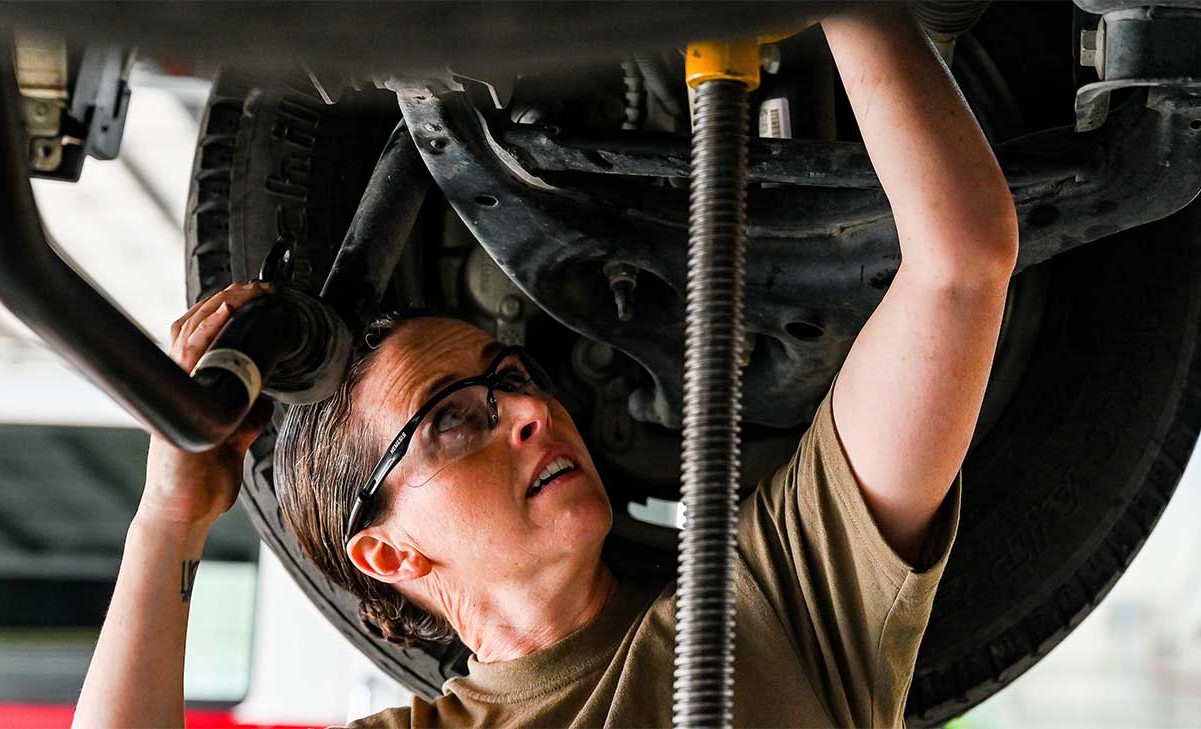
Quick And Easy DIY Fix For Car Oil Leaks – No Mechanic Needed!
Published: January 23, 2024
Learn how to quickly and easily fix car oil leaks with our DIY guide. No mechanic needed! Keep your automotive troubles at bay.
(Many of the links in this article redirect to a specific reviewed product. Your purchase of these products through affiliate links helps to generate commission for Noodls.com, at no extra cost. Learn more)
Table of Contents
Introduction
Car oil leaks can be a frustrating and messy issue for many vehicle owners. Discovering a puddle of oil beneath your car can quickly lead to feelings of concern and stress. However, there's no need to panic. With the right knowledge and tools, you can address this problem with confidence, all without the need to visit a mechanic. In this guide, we will explore a quick and easy do-it-yourself (DIY) fix for car oil leaks that can save you time and money.
Understanding the common causes of car oil leaks and learning how to identify them is the first step in resolving this issue. By gaining a better understanding of the root cause, you can effectively address the problem and prevent it from recurring. Additionally, we will provide a comprehensive step-by-step guide, along with a list of essential tools and materials needed for the DIY fix. This will equip you with the necessary information to tackle the issue head-on.
It's important to note that addressing oil leaks promptly is crucial for maintaining the overall health and performance of your vehicle. Ignoring oil leaks can lead to more severe mechanical problems and potential safety hazards. By taking a proactive approach and learning how to handle oil leaks on your own, you can ensure the longevity and reliability of your car.
So, whether you're a seasoned DIY enthusiast or someone who's never attempted car repairs before, this guide is designed to empower you with the knowledge and confidence to tackle oil leaks in a quick and efficient manner. By following the steps outlined in this article, you'll be able to resolve oil leaks without the need for a mechanic, saving both time and money in the process. Let's dive in and discover the straightforward yet effective solutions for addressing car oil leaks.
Understanding Car Oil Leaks
Car oil leaks can stem from various sources within the vehicle's engine and its components. Understanding the common causes of oil leaks is crucial for effectively identifying and addressing the issue. Here are some key factors to consider when it comes to understanding car oil leaks:
-
Worn Gaskets and Seals: Over time, the gaskets and seals in the engine can degrade, leading to oil leaks. These components are essential for maintaining a tight seal between various engine parts. When they become worn or damaged, oil can escape and accumulate beneath the vehicle.
-
Loose or Damaged Oil Drain Plug: The oil drain plug is responsible for sealing the oil pan and preventing leaks. If this plug becomes loose or damaged, it can result in oil seepage. Additionally, improper installation of the oil drain plug during an oil change can lead to leaks.
-
Cracked Oil Pan: The oil pan, located beneath the engine, can suffer damage from road debris or impact, leading to cracks or punctures. This damage can cause oil to leak out, creating a visible puddle beneath the vehicle.
-
Degraded Oil Filter: A worn or improperly installed oil filter can result in oil leaks. Over time, the rubber gasket of the oil filter can deteriorate, compromising its ability to maintain a secure seal. This can lead to oil seepage around the filter.
-
Excessive Oil Pressure: In some cases, excessive oil pressure within the engine can cause gaskets and seals to fail, resulting in leaks. This can be attributed to various factors, including a malfunctioning oil pressure relief valve or a clogged oil passage.
By understanding these common causes of car oil leaks, vehicle owners can proactively inspect their vehicles for signs of oil leakage and take the necessary steps to address the issue. Identifying the source of the leak is the first step in implementing an effective DIY fix, which we will explore in the subsequent sections.
Understanding the underlying reasons for oil leaks empowers car owners to take a proactive approach in maintaining their vehicles. With this knowledge, individuals can confidently diagnose and resolve oil leaks, ultimately ensuring the longevity and reliability of their cars.
Quick and Easy DIY Fix for Car Oil Leaks
When it comes to addressing car oil leaks, a quick and easy do-it-yourself (DIY) fix can save time and money, all without the need for a mechanic. One of the most straightforward DIY solutions for minor oil leaks involves using a high-quality engine oil stop leak additive. These additives are designed to rejuvenate and swell gaskets and seals, effectively sealing small leaks without the need for extensive mechanical work.
Engine oil stop leak additives work by conditioning and softening the gaskets and seals, allowing them to expand and form a tighter seal. This can effectively prevent oil from seeping out and creating unsightly puddles beneath the vehicle. Additionally, these additives are compatible with various types of engine oils and are safe to use in both gasoline and diesel engines.
When selecting an engine oil stop leak additive, it's essential to choose a reputable product from a trusted manufacturer. Reading customer reviews and product descriptions can provide valuable insights into the effectiveness of the additive. Additionally, opt for an additive that is specifically formulated to address oil leaks, ensuring that it targets the root cause of the issue.
The application of engine oil stop leak additives is a simple and hassle-free process. Typically, the additive is poured directly into the engine oil through the oil filler cap. Once added, the vehicle is driven as usual, allowing the additive to circulate throughout the engine and reach the affected gaskets and seals. Over time, the additive works to rejuvenate the gaskets and seals, effectively sealing minor leaks and preventing further oil seepage.
It's important to note that while engine oil stop leak additives can effectively address minor oil leaks, they may not be suitable for more extensive or severe leaks. In such cases, it's recommended to seek professional assistance to assess and repair the issue. However, for minor leaks that result in small oil puddles, utilizing a high-quality engine oil stop leak additive can provide a quick and cost-effective solution.
By incorporating a reputable engine oil stop leak additive into your DIY approach, you can effectively address minor oil leaks without the need for complex mechanical repairs. This straightforward solution empowers vehicle owners to take proactive measures in maintaining their cars, ultimately contributing to enhanced performance and longevity.
Tools and Materials Needed
To successfully execute the DIY fix for car oil leaks using an engine oil stop leak additive, you will need the following tools and materials:
-
Engine Oil Stop Leak Additive: This is the primary component required for addressing minor oil leaks. It is essential to select a high-quality engine oil stop leak additive from a reputable manufacturer. Ensure that the additive is compatible with your vehicle's engine type (gasoline or diesel) and is specifically formulated to address oil leaks.
-
Funnel: A funnel will facilitate the smooth and mess-free pouring of the engine oil stop leak additive into the engine oil compartment. It is essential to use a clean funnel to prevent any foreign particles from entering the engine.
-
Rag or Cloth: Having a clean rag or cloth on hand is useful for wiping any spills or drips that may occur during the application of the engine oil stop leak additive. This will help maintain a clean working environment and prevent oil stains.
-
Gloves: It is advisable to wear protective gloves, such as disposable latex or nitrile gloves, when handling the engine oil stop leak additive. This will protect your hands from direct contact with the additive and the engine oil.
-
Vehicle Owner's Manual: The owner's manual provides valuable information about the location of the oil filler cap and other relevant details specific to your vehicle. It is important to refer to the manual to ensure proper application of the engine oil stop leak additive.
-
Safety Glasses: While not directly related to the application of the additive, safety glasses are a recommended precautionary measure. In the event of any unexpected splashes or spills, safety glasses can protect your eyes from potential contact with the additive.
-
Clean, High-Quality Engine Oil: It is beneficial to have clean engine oil on hand, as topping up the engine oil after applying the stop leak additive may be necessary, depending on the vehicle's oil level. Additionally, fresh engine oil complements the effectiveness of the additive.
By gathering these essential tools and materials, you will be well-prepared to carry out the DIY fix for minor car oil leaks using an engine oil stop leak additive. Ensuring that you have everything readily available before beginning the process will contribute to a smooth and efficient application, ultimately aiding in the effective resolution of the oil leak issue.
Step-by-Step Guide to Fixing Car Oil Leaks
-
Prepare the Vehicle: Begin by ensuring that the vehicle is parked on a level surface and that the engine is turned off. This provides a safe and stable environment for addressing the oil leak.
-
Locate the Oil Filler Cap: Refer to the vehicle owner's manual to locate the oil filler cap, which grants access to the engine oil compartment. The manual provides specific details tailored to your vehicle, ensuring accurate identification of the oil filler cap's position.
-
Wear Protective Gear: Prior to handling the engine oil stop leak additive, put on protective gloves and safety glasses. These precautions safeguard against direct contact with the additive and provide protection in the event of unexpected splashes or spills.
-
Open the Oil Filler Cap: Carefully remove the oil filler cap to access the engine oil compartment. Set the cap aside in a secure location to prevent misplacement.
-
Insert the Funnel: Place a clean funnel into the oil filler opening to facilitate the smooth and precise pouring of the engine oil stop leak additive. The use of a funnel minimizes the risk of spills and ensures that the additive is accurately directed into the engine oil compartment.
-
Pour the Additive: With the funnel in place, carefully pour the recommended amount of engine oil stop leak additive into the engine oil compartment. Refer to the product instructions for the specific quantity required for your vehicle's engine capacity.
-
Replace the Oil Filler Cap: Once the additive has been successfully poured, securely reseal the engine oil compartment by replacing the oil filler cap. Ensure that the cap is tightly fastened to prevent any potential leaks.
-
Drive the Vehicle: Start the vehicle and drive as usual to allow the additive to circulate throughout the engine. The motion of the vehicle facilitates the distribution of the additive, enabling it to reach the affected gaskets and seals.
-
Monitor for Results: Over the course of regular vehicle usage, monitor the area beneath the vehicle for any signs of oil leakage. With the application of the engine oil stop leak additive, you may observe a reduction or cessation of oil leaks, indicating the successful sealing of minor leaks.
By following this step-by-step guide, you can effectively address minor car oil leaks using an engine oil stop leak additive. This DIY approach offers a convenient and cost-effective solution, empowering vehicle owners to proactively maintain their vehicles without the need for extensive mechanical intervention.
Tips for Preventing Future Oil Leaks
Preventing future oil leaks is essential for maintaining the optimal performance and longevity of your vehicle. By implementing proactive measures, you can mitigate the risk of oil leaks and minimize the need for frequent repairs. Here are some valuable tips to help prevent future oil leaks:
-
Regular Maintenance: Adhering to a consistent maintenance schedule is crucial for preventing oil leaks. Regularly scheduled oil changes, along with inspections of gaskets, seals, and the oil pan, can help identify potential issues before they escalate into leaks. Additionally, ensuring that the oil filter is replaced during each oil change contributes to the overall integrity of the oil system.
-
Use High-Quality Engine Oil: Opting for high-quality engine oil that meets the manufacturer's specifications can significantly reduce the likelihood of oil leaks. Quality engine oil maintains proper lubrication and helps preserve the condition of gaskets and seals, minimizing the risk of degradation and leakage.
-
Inspect Gaskets and Seals: Periodically inspecting the condition of gaskets and seals within the engine compartment is essential for early detection of wear or damage. Any signs of deterioration should prompt timely replacement to prevent potential oil leaks.
-
Tighten Oil Drain Plug Securely: When performing oil changes or other maintenance tasks that involve the oil drain plug, ensure that it is securely tightened to the manufacturer's recommended torque specifications. A loose or improperly tightened oil drain plug can lead to oil seepage and leaks.
-
Avoid Overfilling Engine Oil: Overfilling the engine oil can result in excessive pressure within the oil system, potentially leading to leaks. Always adhere to the recommended oil capacity specified in the vehicle owner's manual to prevent overfilling.
-
Address Leaks Promptly: If you notice any signs of oil leaks, address them promptly to prevent further complications. Ignoring minor leaks can lead to exacerbated issues and potential damage to engine components.
-
Protect Against Road Debris: Taking precautions to shield the underside of the vehicle from road debris can help prevent damage to the oil pan, reducing the risk of oil leaks caused by punctures or cracks.
-
Proper Installation of Oil Filter: When replacing the oil filter, ensure that it is correctly installed and securely tightened. A properly installed oil filter with a well-maintained rubber gasket can effectively prevent oil leaks.
By incorporating these preventive measures into your vehicle maintenance routine, you can significantly reduce the likelihood of future oil leaks, contributing to the overall reliability and performance of your car. Regular inspections, adherence to maintenance schedules, and the use of high-quality components are key elements in safeguarding against oil leaks and maintaining the health of your vehicle's oil system.
Conclusion
In conclusion, addressing car oil leaks through a quick and easy do-it-yourself (DIY) fix can be a straightforward and cost-effective endeavor, eliminating the need for extensive mechanical intervention. By understanding the common causes of oil leaks, vehicle owners can accurately identify and address the issue, ultimately contributing to the longevity and reliability of their cars.
The utilization of a reputable engine oil stop leak additive offers a convenient and efficient solution for minor oil leaks, rejuvenating gaskets and seals to form a secure seal and prevent further oil seepage. This approach empowers car owners to take proactive measures in maintaining their vehicles, fostering a sense of confidence and self-reliance in addressing automotive concerns.
Furthermore, the step-by-step guide provided in this article equips individuals with the knowledge and practical instructions necessary to execute the DIY fix with precision and ease. By following these guidelines, vehicle owners can effectively apply the engine oil stop leak additive, monitor its results, and take proactive steps to prevent future oil leaks, ensuring the continued health of their vehicles.
It is essential to emphasize the significance of regular maintenance, the use of high-quality engine oil, and proactive inspections in preventing future oil leaks. By incorporating these preventive measures into their vehicle maintenance routines, car owners can significantly reduce the risk of oil leaks and minimize the need for costly repairs.
Ultimately, the ability to address car oil leaks through a DIY approach not only saves time and money but also instills a sense of empowerment and capability in vehicle owners. By taking proactive measures to maintain their cars, individuals can ensure the optimal performance and reliability of their vehicles, contributing to a safer and more enjoyable driving experience.
In essence, the knowledge and practical insights provided in this guide enable car owners to tackle oil leaks confidently and effectively, fostering a greater sense of control and self-sufficiency in maintaining their vehicles. With the right tools, materials, and knowledge at their disposal, individuals can navigate the process of addressing oil leaks with ease, ultimately preserving the health and functionality of their cars for years to come.