Home>Food and Cooking>How To Debone Chicken Thighs
Food and Cooking
How To Debone Chicken Thighs
Published: February 29, 2024
Learn the art of deboning chicken thighs with our step-by-step guide. Perfect your cooking skills and elevate your culinary expertise with our easy-to-follow instructions. Ideal for food and cooking enthusiasts.
(Many of the links in this article redirect to a specific reviewed product. Your purchase of these products through affiliate links helps to generate commission for Noodls.com, at no extra cost. Learn more)
Table of Contents
Introduction
Deboning chicken thighs is a valuable culinary skill that can elevate your cooking prowess to new heights. Whether you're a home cook looking to impress your family with a delectable dish or a professional chef aiming to create visually stunning and flavorful meals, mastering the art of deboning chicken thighs is a game-changer.
By deboning chicken thighs, you gain the flexibility to experiment with various cooking techniques, such as stuffing the thighs with savory fillings, rolling them into elegant roulades, or simply achieving a more even and efficient cooking process. This skill opens up a world of culinary possibilities, allowing you to unleash your creativity in the kitchen.
Understanding the anatomy of a chicken thigh and learning the proper deboning technique empowers you to take control of your ingredients and customize your dishes to suit your preferences. Additionally, by deboning chicken thighs yourself, you can save money by purchasing whole chicken thighs and deboning them at home, rather than buying pre-deboned cuts at a higher price.
In this comprehensive guide, we will walk you through the step-by-step process of deboning chicken thighs, equipping you with the knowledge and confidence to tackle this task with ease. With the right tools, a bit of patience, and a willingness to learn, you'll soon be on your way to effortlessly deboning chicken thighs like a seasoned culinary pro. So, roll up your sleeves, sharpen your knife, and let's embark on this flavorful journey together.
Read more: How To Draw A Chicken
Tools and Ingredients
Before diving into the art of deboning chicken thighs, it's essential to gather the necessary tools and ingredients to ensure a smooth and efficient process. Here's what you'll need:
Tools:
-
Sharp Paring Knife or Boning Knife: A sharp, narrow-bladed knife is crucial for precision and control when deboning chicken thighs. The blade should be flexible enough to maneuver around the bone and trim excess fat with ease.
-
Cutting Board: A stable and spacious cutting board provides a secure surface for working with the chicken thighs. Opt for a board with a non-slip base to prevent any accidents during the deboning process.
-
Kitchen Shears (Optional): While not essential, kitchen shears can be handy for trimming excess skin and fat from the chicken thighs.
-
Paper Towels: Keeping paper towels nearby allows you to pat the chicken thighs dry, ensuring a better grip and preventing any slipping during the deboning process.
Ingredients:
-
Fresh Chicken Thighs: Select high-quality, fresh chicken thighs for the best results. Whether you prefer bone-in or boneless thighs, ensure that they are fresh and free from any unpleasant odors.
-
Seasonings (Optional): Depending on your recipe or cooking preferences, you may want to have your preferred seasonings on hand to flavor the deboned chicken thighs before cooking.
-
Storage Containers: If you plan to debone the chicken thighs in advance or have leftovers, having suitable storage containers or resealable bags for the deboned meat is essential for maintaining freshness.
By having these tools and ingredients at your disposal, you'll be well-equipped to embark on the deboning process with confidence and efficiency. With everything in place, you're ready to move on to the next step and begin preparing the chicken thighs for deboning.
Step 1: Prepare the Chicken Thighs
Before diving into the intricate process of deboning chicken thighs, it's crucial to properly prepare the chicken thighs to ensure a seamless and efficient deboning experience. Here's a detailed breakdown of the essential steps to prepare the chicken thighs for deboning:
-
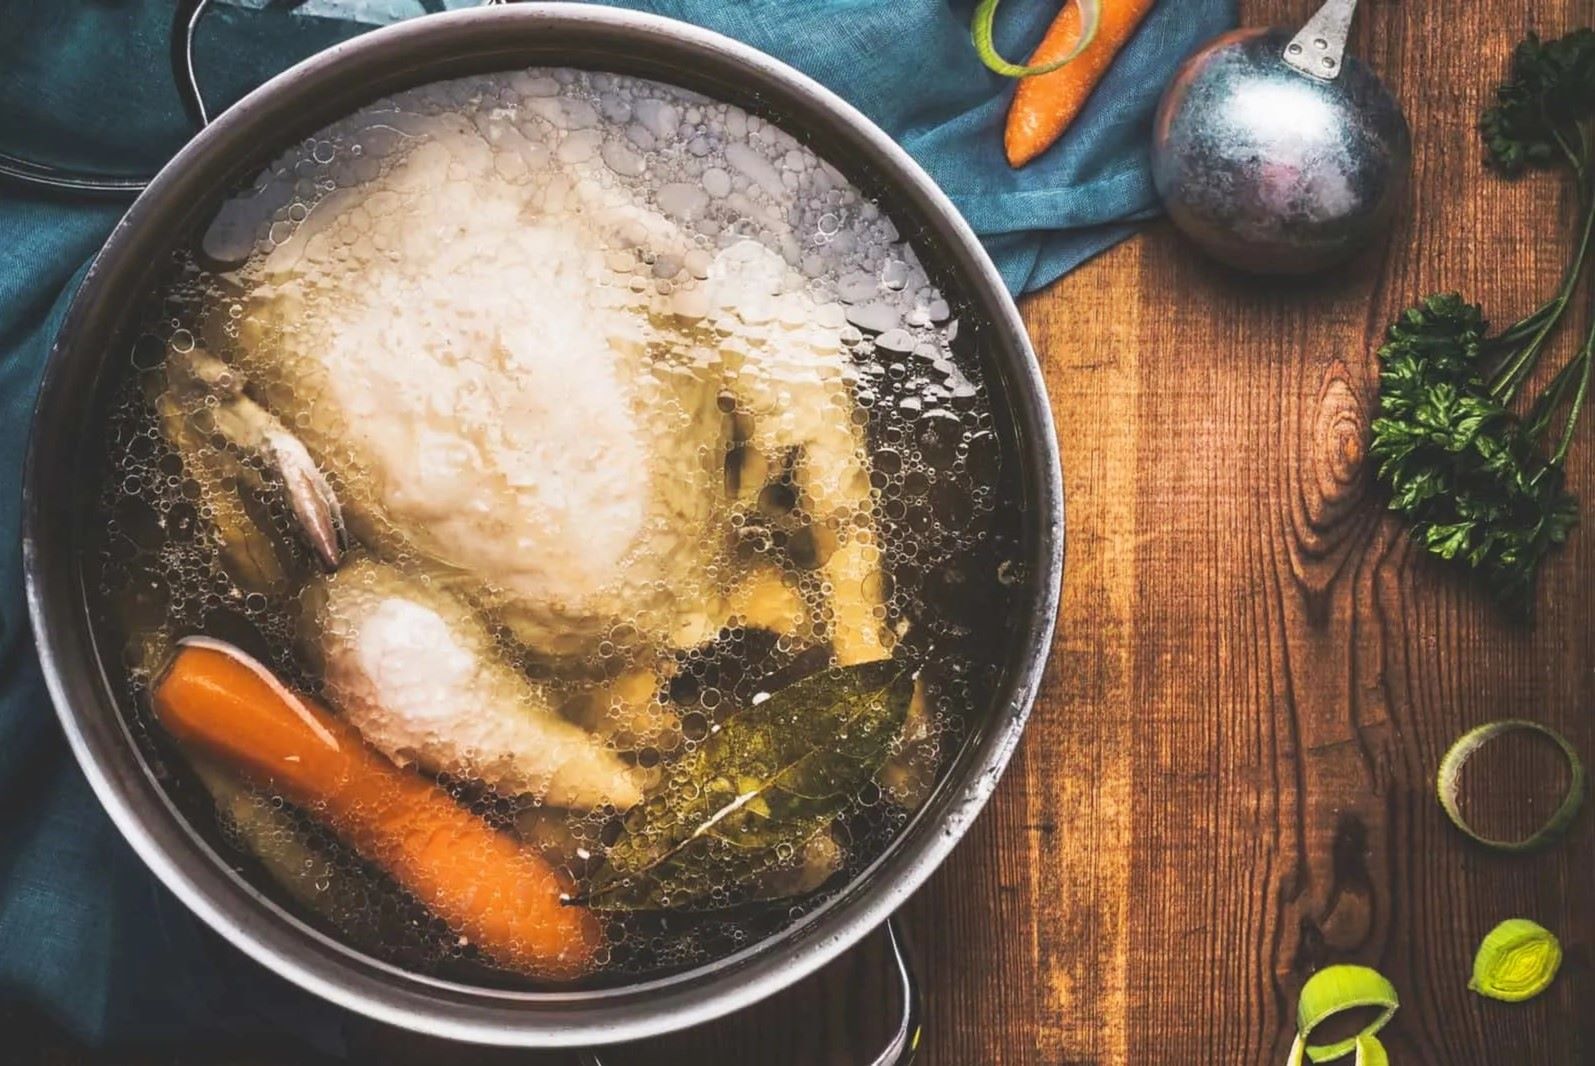
Inspect and Rinse: Begin by carefully inspecting the chicken thighs for any remaining feathers, bone fragments, or unwanted blemishes. Rinse the chicken thighs under cold running water to remove any surface impurities. Pat them dry with paper towels to ensure a clean and manageable working surface.
-
Trim Excess Skin and Fat: Using a sharp paring knife or kitchen shears, trim any excess skin and fat from the chicken thighs. This step not only enhances the visual appeal of the deboned thighs but also allows for a more refined and balanced texture in the final dish.
-
Season (Optional): If your recipe calls for seasoned chicken thighs, now is the ideal time to apply your preferred seasonings. Whether it's a simple blend of salt and pepper or a more elaborate marinade, evenly coat the chicken thighs with the desired seasonings, ensuring that the flavors permeate the meat for a delightful culinary experience.
-
Pat Dry: Once the chicken thighs are trimmed and seasoned, pat them dry with paper towels to remove any excess moisture. Dry chicken thighs provide a better grip and prevent the knife from slipping during the deboning process, allowing for precise and controlled movements.
By meticulously preparing the chicken thighs with these fundamental steps, you set the stage for a successful and rewarding deboning process. With the thighs primed and ready, you're now poised to embark on the next step: removing the skin to unveil the succulent meat beneath.
Read more: How To Reheat Rotisserie Chicken
Step 2: Remove the Skin
Removing the skin from chicken thighs is a crucial step in the deboning process, as it exposes the succulent meat and allows for easier access to the bone. Here's a detailed guide on how to expertly remove the skin from the chicken thighs:
-
Loosen the Skin: Begin by gently loosening the edges of the skin from the meat using your fingers. Take care to avoid tearing the skin, as you want to keep it as intact as possible for a seamless presentation once the deboning is complete.
-
Peel Back the Skin: Once the edges are loosened, carefully peel back the skin from the chicken thighs, working your way around the entire surface. The skin should come off relatively easily, revealing the pristine meat underneath.
-
Trim Excess Skin (Optional): If desired, trim any excess skin that may be attached to the edges of the thighs. This step helps create a clean and uniform appearance, especially if you plan to use the deboned thighs for a visually striking dish.
-
Set Aside the Skin (Optional): If you enjoy the flavor and texture of crispy chicken skin, consider setting aside the removed skin for separate culinary applications. Whether it's rendering the skin for flavorful schmaltz or crisping it up for a delectable garnish, the skin can be repurposed to add depth and richness to your culinary creations.
By delicately removing the skin from the chicken thighs, you unveil the pristine meat, setting the stage for the next phase of the deboning process. With the skin successfully removed, you're now ready to delve into the heart of the matter: locating and extracting the bone from the chicken thighs.
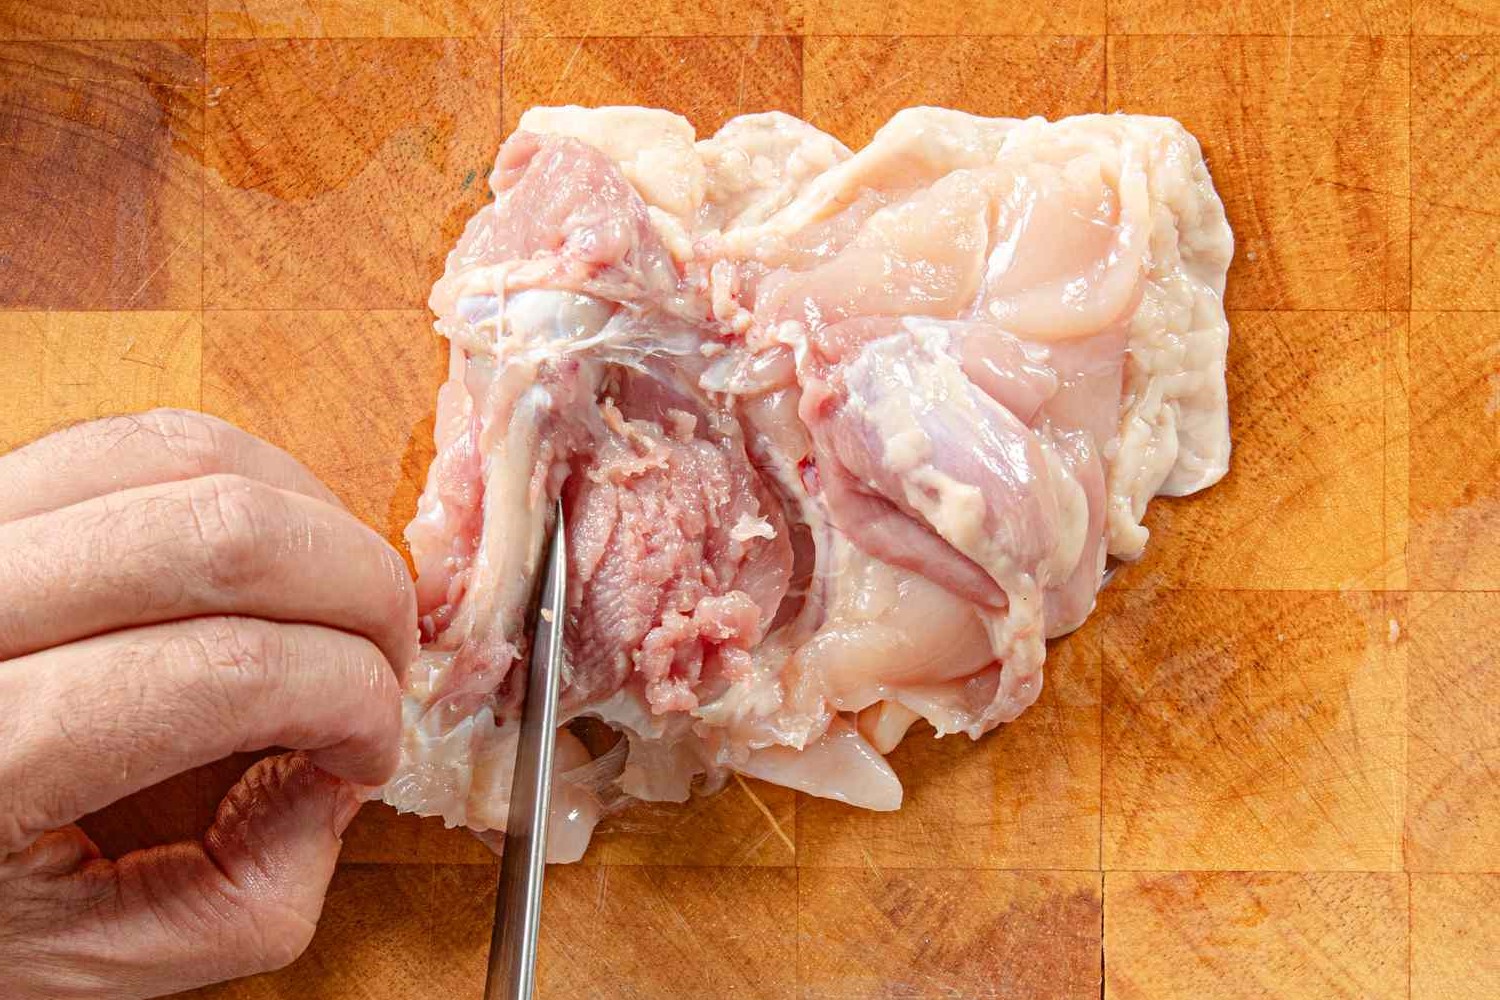
Step 3: Locate the Bone
With the skin removed, the next critical step in the deboning process is to locate the bone within the chicken thighs. This step sets the stage for the precise maneuvering required to extract the bone without damaging the surrounding meat. Here's a detailed guide on how to expertly locate the bone in the chicken thighs:
-
Identify the Bone Structure: Begin by gently feeling the surface of the chicken thigh to locate the bone. The bone typically runs along the center of the thigh, and you should be able to discern its shape and position by applying light pressure with your fingertips.
-
Follow the Natural Contours: As you familiarize yourself with the bone's location, pay attention to the natural contours and edges of the thigh. Understanding the natural shape of the bone and its relationship to the surrounding meat will guide your subsequent movements as you prepare to extract it.
-
Visualize the Bone Pathway: Visualize the pathway of the bone within the thigh, taking note of any curves or joints along its length. This mental map will serve as a valuable reference as you proceed to the next phase of the deboning process.
-
Maintain Gentle Pressure: While locating the bone, maintain gentle and deliberate pressure to avoid applying excessive force that could potentially damage the meat. The goal is to familiarize yourself with the bone's position and structure without causing any unnecessary stress on the surrounding flesh.
By carefully locating the bone within the chicken thighs, you lay the groundwork for the subsequent steps of the deboning process. This preparatory phase sets the stage for the precise and controlled maneuvers required to extract the bone seamlessly, ensuring that the integrity of the meat remains intact. With the bone successfully located, you're now ready to progress to the pivotal stage of cutting around the bone to facilitate its removal.
Step 4: Cut Around the Bone
With the bone located, the next crucial step in the deboning process is to delicately cut around the bone, separating it from the surrounding meat with precision and finesse. This step requires a steady hand and a keen understanding of the bone's positioning within the chicken thigh. Here's a detailed guide on how to expertly cut around the bone to prepare for its removal:
-
Make an Incision: Using a sharp paring knife or boning knife, carefully make an incision along one side of the bone, following its natural contours. Begin with small, controlled movements to create a starting point for the subsequent cuts. The goal is to create a pathway that allows the knife to glide along the bone without damaging the meat.
-
Navigate Around the Bone: As you continue to cut around the bone, maintain a gentle and deliberate approach, ensuring that the knife stays as close to the bone as possible. By navigating the knife along the bone's edges, you gradually separate the meat from the bone, creating a clean and precise separation. Take your time and pay close attention to the texture and resistance encountered as you maneuver around the bone.
-
Utilize Controlled Movements: Employ controlled and fluid movements as you progress around the bone, adjusting the angle of the knife to accommodate any curves or joints along the bone's pathway. The goal is to create a seamless separation that preserves the integrity of the meat while effectively loosening the bone from its surrounding tissue.
-
Exercise Patience and Precision: Throughout this process, patience and precision are paramount. Take the time to assess the depth of the cuts and adjust your technique as needed to ensure a consistent and even separation. By exercising patience and maintaining a steady hand, you pave the way for a successful bone removal in the subsequent step.
By skillfully cutting around the bone, you prepare the chicken thigh for the final phase of the deboning process, setting the stage for the seamless extraction of the bone. This meticulous and controlled approach ensures that the surrounding meat remains intact and ready for a myriad of culinary applications. With the bone effectively loosened from the surrounding tissue, you're now poised to advance to the pivotal stage of removing the bone from the chicken thigh.
Step 5: Remove the Bone
With the bone delicately separated from the surrounding meat, the pivotal moment arrives to extract the bone from the chicken thigh with precision and finesse. This step requires a steady hand, keen attention to detail, and a deep understanding of the bone's positioning within the thigh. Here's a comprehensive guide on how to expertly remove the bone from the chicken thigh:
-
Gently Loosen the Bone: Begin by gently maneuvering the bone to assess its level of detachment from the surrounding meat. Applying subtle and controlled movements, ascertain the degree to which the bone has been loosened during the previous cutting phase. This initial assessment sets the stage for the subsequent extraction process.
-
Secure Grip and Maneuvering: With a firm yet gentle grip on the bone, carefully maneuver it to create additional separation from the surrounding tissue. By maintaining a steady hold and employing delicate movements, you facilitate the gradual release of the bone from its position within the thigh.
-
Navigate the Bone's Pathway: As you continue to work the bone, pay close attention to its natural pathway within the thigh. Adjust your movements to accommodate any remaining connective tissue or ligaments that may still be attached. By navigating the bone's pathway with precision, you ensure a thorough and seamless extraction process.
-
Utilize Supporting Cuts (if necessary): In cases where the bone exhibits resistance or remains partially connected to the meat, consider making strategic supporting cuts to further release it from the surrounding tissue. These supplementary incisions should be executed with care, aiming to facilitate the bone's complete removal without compromising the integrity of the meat.
-
Final Extraction: With the bone effectively loosened and any remaining attachments addressed, gently lift and maneuver it out of the chicken thigh. Exercise patience and attentiveness to ensure a smooth and uninterrupted extraction, allowing the pristine meat to emerge unscathed and ready for a myriad of culinary preparations.
By skillfully removing the bone from the chicken thigh, you achieve a pristine and versatile canvas for culinary creativity. The successful extraction of the bone sets the stage for a myriad of culinary applications, from elegant stuffed preparations to refined roulades and beyond. With the bone now expertly removed, the deboned chicken thigh stands as a testament to your precision and skill, ready to elevate your culinary creations to new heights.
Read more: How To Reheat Chicken In An Air Fryer
Step 6: Trim any Excess Fat
Once the bone has been successfully removed, the next crucial step in the deboning process is to trim any excess fat from the chicken thigh. This step not only enhances the visual appeal of the deboned thigh but also contributes to achieving a more refined and balanced texture in the final dish.
Trimming excess fat from the deboned chicken thigh is a meticulous yet rewarding task that requires attention to detail and a keen eye for precision. Here's a comprehensive guide on how to expertly trim any excess fat from the deboned chicken thigh:
-
Visual Assessment: Begin by visually assessing the deboned chicken thigh to identify any areas of excess fat. Pay close attention to the edges and surface of the meat, noting any protruding or uneven fatty deposits that may detract from the overall presentation and texture.
-
Delicate Trimming: Armed with a sharp paring knife or kitchen shears, delicately trim away any visible excess fat from the chicken thigh. Exercise caution and precision, aiming to create a smooth and uniform appearance while preserving the natural shape and integrity of the meat.
-
Maintain Balance: As you trim the excess fat, strive to maintain a balanced distribution of fat within the meat. While some fat contributes to flavor and succulence, excessive or uneven fat deposits can affect the texture and visual appeal of the deboned thigh. Aim for a harmonious balance that enhances the overall dining experience.
-
Refine the Edges: Pay particular attention to refining the edges of the deboned thigh, ensuring that any irregular or protruding fat deposits are carefully trimmed to create a clean and polished appearance. This attention to detail elevates the visual presentation of the deboned thigh and sets the stage for a refined culinary creation.
-
Evaluate Texture: Throughout the trimming process, evaluate the texture and consistency of the meat, taking note of any areas where fat trimming may enhance the overall mouthfeel and dining experience. By refining the texture through precise fat trimming, you contribute to a more enjoyable and balanced culinary creation.
By meticulously trimming any excess fat from the deboned chicken thigh, you elevate the visual appeal and texture of the meat, setting the stage for a myriad of culinary applications. This final step in the deboning process ensures that the deboned thigh stands as a pristine canvas for culinary creativity, ready to be transformed into a delectable and visually stunning dish.
Conclusion
In conclusion, mastering the art of deboning chicken thighs is a valuable skill that empowers home cooks and professional chefs alike to elevate their culinary creations to new heights. Through the meticulous process of preparing, deboning, and refining the chicken thighs, individuals gain the flexibility to explore a myriad of cooking techniques and flavor profiles, unlocking a world of culinary possibilities.
The journey of deboning chicken thighs begins with the careful preparation of the meat, ensuring that it is trimmed, seasoned, and primed for the subsequent deboning process. By delicately removing the skin, locating the bone, and executing precise cuts to separate the bone from the surrounding meat, individuals embark on a transformative culinary experience that culminates in the extraction of the bone and the meticulous trimming of any excess fat.
The deboned chicken thigh, emerging as a pristine canvas for culinary creativity, stands as a testament to the precision and skill invested in the deboning process. Whether destined for elegant stuffed preparations, refined roulades, or innovative culinary experiments, the deboned thigh embodies the potential for endless culinary exploration and expression.
Beyond the practical advantages of deboning chicken thighs, such as cost-effectiveness and customization, this skill fosters a deeper connection to the ingredients and techniques that define the art of cooking. It encourages individuals to approach their culinary endeavors with creativity, patience, and a profound appreciation for the transformative power of culinary craftsmanship.
As individuals embark on their deboning journey, armed with the essential tools, knowledge, and a dash of culinary curiosity, they open the door to a world of culinary artistry. Each deboned chicken thigh becomes a testament to the dedication and artistry invested in the process, inviting individuals to savor the fruits of their labor and share their culinary creations with others.
In essence, the journey of deboning chicken thighs transcends the realm of culinary technique, evolving into a celebration of creativity, precision, and the timeless art of transforming humble ingredients into extraordinary culinary experiences. With each deboned thigh, individuals embark on a flavorful journey that embodies the essence of culinary craftsmanship and the boundless potential of the culinary arts.