Home>Home and Garden>Master The Art Of Pouring A 400 Sqft Concrete Slab Solo!
Home and Garden
Master The Art Of Pouring A 400 Sqft Concrete Slab Solo!
Published: January 12, 2024
Learn how to pour a 400 sqft concrete slab on your own with our expert tips and techniques. Perfect for home and garden enthusiasts looking to tackle a DIY project.
(Many of the links in this article redirect to a specific reviewed product. Your purchase of these products through affiliate links helps to generate commission for Noodls.com, at no extra cost. Learn more)
Table of Contents
Introduction
Pouring a concrete slab can be a daunting task, especially when you're going at it alone. However, with the right knowledge and preparation, it's entirely possible to master the art of pouring a 400 sqft concrete slab solo. Whether you're looking to create a sturdy foundation for a new outdoor shed, patio, or walkway, or you simply want to expand your DIY skills, this comprehensive guide will walk you through the process step by step.
From planning and preparation to gathering materials and tools, site preparation, formwork and reinforcement, mixing and pouring concrete, finishing the slab, and ensuring proper curing and maintenance, we'll cover everything you need to know to successfully complete this project. By the end of this guide, you'll feel confident and ready to tackle the challenge of pouring a concrete slab on your own.
So, roll up your sleeves, put on your work boots, and get ready to dive into the world of concrete pouring. With a bit of determination and the right guidance, you'll soon be on your way to creating a solid and durable concrete slab that will stand the test of time. Let's get started!
Planning and Preparation
Before you dive into pouring a 400 sqft concrete slab solo, careful planning and thorough preparation are essential to ensure a successful outcome. Here's a detailed breakdown of the crucial steps involved in this initial phase:
-
Assess the Site: Begin by evaluating the area where you intend to pour the concrete slab. Check for any potential obstacles, such as tree roots, rocks, or uneven terrain, which could affect the pouring process. It's important to have a clear understanding of the site's topography and any existing structures that may impact the project.
-
Determine the Dimensions: Measure and mark the exact dimensions of the concrete slab using stakes and string. Ensure that the area is level and free from any debris or vegetation that could interfere with the pouring and curing process.
-
Check Local Regulations: Research and understand the local building codes and regulations pertaining to concrete slab construction. This step is crucial to ensure compliance with any specific requirements related to slab thickness, reinforcement, and permits.
-
Calculate Material Quantities: Based on the dimensions of the slab, calculate the amount of concrete, gravel, and reinforcement materials required for the project. It's advisable to account for a slight overage to accommodate any unexpected variations in the pouring process.
-
Safety Precautions: Prioritize safety by assessing potential hazards and implementing necessary precautions. This includes wearing appropriate personal protective equipment, such as gloves, safety goggles, and sturdy footwear, to minimize the risk of injury during the construction process.
-
Budget and Timeline: Establish a realistic budget and timeline for the project, considering the cost of materials, equipment rentals, and any additional labor required. Setting clear financial and time-related goals will help you stay organized and focused throughout the entire process.
-
Equipment and Tool Acquisition: Make a comprehensive list of the tools and equipment needed for the project, including concrete mixers, wheelbarrows, shovels, and trowels. Ensure that all necessary items are readily available or arrange for their rental or purchase well in advance.
By meticulously addressing these planning and preparation steps, you'll lay a solid foundation for the subsequent stages of pouring a concrete slab solo. With a clear roadmap and a well-thought-out approach, you'll be better equipped to tackle the physical aspects of the project with confidence and efficiency.
Gathering Materials and Tools
Gathering the necessary materials and tools is a critical step in preparing for the solo pouring of a 400 sqft concrete slab. Ensuring that you have all the required items in advance will streamline the construction process and minimize potential delays. Here's a comprehensive list of the essential materials and tools you'll need to have on hand:
Materials:
- Concrete Mix: Purchase high-quality concrete mix in the appropriate quantity based on the slab's dimensions and the desired strength. Opt for a mix that meets the specifications outlined in local building codes and regulations.
- Gravel: Acquire clean, coarse gravel to serve as a base for the concrete slab. The gravel layer will provide essential drainage and support for the concrete.
- Reinforcement: Depending on the size and intended use of the slab, consider incorporating steel rebar or wire mesh reinforcement to enhance its structural integrity and minimize the risk of cracking.
- Forming Material: Obtain durable, straight form boards to create the boundaries of the slab. Plywood, timber, or metal forms are commonly used for this purpose.
- Expansion Joint Material: Invest in expansion joint strips or boards to prevent cracking caused by concrete shrinkage and thermal expansion. These materials will help accommodate natural movements and minimize the likelihood of unsightly cracks.
- Concrete Sealer: Consider purchasing a high-quality concrete sealer to protect the finished slab from moisture penetration, staining, and surface damage.
Tools:
- Concrete Mixer: If you're not opting for ready-mix concrete, rent or purchase a reliable concrete mixer to ensure consistent and thorough blending of the concrete components.
- Wheelbarrow: A sturdy wheelbarrow will facilitate the transportation of concrete mix, gravel, and other materials around the construction site.
- Shovel and Rake: Acquire durable shovels and rakes for spreading and leveling the concrete mix and gravel base.
- Trowels: Invest in both finishing and edging trowels to achieve a smooth and professional surface finish for the concrete slab.
- Level and Measuring Tools: Ensure you have a carpenter's level, measuring tape, and chalk line to maintain accurate dimensions and a level surface during construction.
- Safety Gear: Prioritize safety by obtaining personal protective equipment, including gloves, safety goggles, and a dust mask, to safeguard yourself during the construction process.
By procuring these materials and tools ahead of time, you'll be well-prepared to tackle the physical aspects of pouring a concrete slab solo. This proactive approach will contribute to a smoother and more efficient construction process, ultimately leading to a high-quality finished product.
Site Preparation
Proper site preparation is crucial for laying the groundwork for a successful concrete slab. This phase involves clearing and leveling the designated area, ensuring optimal conditions for the subsequent pouring and curing process. Here's a detailed breakdown of the site preparation process:
-
Clearing the Area: Begin by removing any vegetation, debris, or obstructions from the site. Use a shovel, rake, and wheelbarrow to clear the area thoroughly, creating a clean and unobstructed canvas for the concrete slab.
-
Excavation and Grading: If the site exhibits uneven terrain or requires adjustment to meet the desired elevation, excavation and grading are necessary. Use a shovel and a grading rake to level the ground, ensuring a uniform surface for the concrete slab.
-
Compaction: After grading the site, compact the soil using a plate compactor or a hand tamper. This step is essential for achieving a stable and solid foundation, minimizing the risk of settling or shifting after the concrete is poured.
-
Establishing Formwork: Set up the formwork to define the boundaries of the concrete slab. Secure the form boards in place using stakes, ensuring that they are level, straight, and accurately aligned with the dimensions of the slab.
-
Consider Drainage: Assess the site's drainage needs and make provisions for proper water runoff. Incorporate a slight slope into the slab's design to facilitate water drainage away from structures or undesired areas.
-
Vapor Barrier Installation: In areas with high moisture levels, consider installing a vapor barrier beneath the slab to prevent moisture from seeping into the concrete. This protective layer helps preserve the integrity of the concrete and minimizes the risk of moisture-related issues.
-
Verify Dimensions and Alignment: Double-check the dimensions and alignment of the formwork, ensuring that it accurately reflects the intended size and shape of the concrete slab. Use a measuring tape and level to confirm precise measurements and alignment.
By meticulously executing these site preparation steps, you'll create an optimal foundation for pouring the concrete slab. This thorough and methodical approach sets the stage for a seamless transition to the subsequent phases of formwork and reinforcement, ultimately leading to the successful completion of the project.
Formwork and Reinforcement
Once the site is meticulously prepared, the next crucial phase involves the careful construction of formwork and the strategic reinforcement of the concrete slab. This stage is essential for defining the shape and dimensions of the slab while ensuring its structural integrity and durability. Here's a detailed breakdown of the formwork and reinforcement process:
Formwork Construction
- Material Selection: Choose high-quality, straight form boards, such as plywood, timber, or metal, to create the perimeter of the concrete slab. Ensure that the formwork material is sturdy and capable of withstanding the pressure exerted by the concrete mix.
- Secure Assembly: Position the form boards along the marked perimeter of the slab, securing them in place with stakes driven into the ground. Use a level to confirm that the formwork is perfectly horizontal and aligns with the specified dimensions.
- Corner Bracing: Install diagonal bracing at the corners of the formwork to prevent shifting or misalignment during the concrete pouring process. This additional reinforcement enhances the stability and accuracy of the formwork structure.
- Joint Sealing: Seal the joints between form boards using caulk or specialized joint sealing materials to prevent concrete leakage and maintain the integrity of the slab's edges.
Reinforcement Placement
- Rebar Installation: If the design calls for reinforcement, place steel rebar or wire mesh within the formwork to strengthen the concrete slab. Position the reinforcement material at the specified depth and spacing, ensuring comprehensive coverage throughout the slab's surface.
- Elevated Supports: Use rebar chairs or supports to elevate the reinforcement material, maintaining its position at the center of the concrete slab's thickness. This elevation ensures that the reinforcement remains encapsulated within the concrete, maximizing its effectiveness.
- Overlap and Splicing: If multiple rebar pieces are required, ensure proper overlap and splicing according to engineering specifications. This practice guarantees a continuous and robust network of reinforcement throughout the slab.
Inspection and Adjustment
- Quality Check: Conduct a thorough inspection of the formwork and reinforcement, verifying their alignment, placement, and compliance with the project's design requirements. Address any discrepancies or issues promptly to maintain the integrity of the construction.
- Final Adjustments: Make any necessary adjustments to the formwork and reinforcement, ensuring that they are precisely positioned and securely anchored. Attention to detail at this stage contributes to the overall strength and longevity of the concrete slab.
By meticulously executing the formwork and reinforcement process, you establish a solid foundation for the subsequent stages of mixing and pouring the concrete. This careful attention to detail and precision lays the groundwork for a durable and resilient concrete slab, setting the stage for a successful construction endeavor.
Mixing and Pouring Concrete
With the site meticulously prepared and the formwork and reinforcement in place, the focus now shifts to the critical phase of mixing and pouring the concrete for the 400 sqft slab. This stage demands precision, efficiency, and a keen eye for detail to ensure the successful creation of a durable and structurally sound foundation. Here's a comprehensive guide to the mixing and pouring process:
Concrete Mix Preparation
-
Quality Concrete Mix: Begin by acquiring a high-quality concrete mix that aligns with the project's specifications and local building codes. Opt for a mix that offers the appropriate strength and durability for the intended use of the slab.
-
Water Measurement: Follow the manufacturer's guidelines to determine the precise water-to-concrete ratio for the mix. Consistency in water measurement is crucial, as it directly impacts the concrete's workability and final strength.
-
Additives and Admixtures: If necessary, incorporate concrete additives or admixtures to enhance specific properties of the mix, such as workability, setting time, or durability. Follow the recommended dosage and thoroughly blend these components into the mix.
Mixing Process
-
Utilize a Reliable Mixer: Whether using a portable concrete mixer or a wheelbarrow for manual mixing, ensure that the equipment is clean, functional, and capable of achieving a thorough and homogeneous blend.
-
Gradual Addition of Materials: Gradually introduce the concrete mix into the mixer, followed by the precise addition of gravel and water. This gradual approach facilitates uniform blending and prevents the formation of lumps or inconsistencies in the mix.
-
Thorough Mixing: Operate the mixer or manually blend the components until the concrete achieves a uniform texture and color. Pay close attention to the consistency of the mix, aiming for a cohesive and workable material that is free from segregation.
Read more: How To Make Concrete In Minecraft
Pouring Process
-
Strategic Placement: Begin pouring the mixed concrete into the prepared formwork, starting from one corner and working systematically to ensure even distribution. Avoid abrupt stops and starts to maintain a consistent surface finish.
-
Consistent Depth: Maintain a consistent pouring depth throughout the slab, using rakes and shovels to level the concrete and eliminate air pockets. This practice contributes to the uniformity and structural integrity of the finished slab.
-
Vibration and Consolidation: Employ a concrete vibrator to eliminate trapped air and ensure proper consolidation of the concrete within the formwork. This step minimizes the risk of voids and enhances the overall strength of the slab.
-
Edge Finishing: Pay special attention to the edges of the slab, ensuring that the concrete is adequately consolidated and smoothly finished to achieve clean and defined boundaries.
By meticulously following these guidelines for mixing and pouring concrete, you'll lay the groundwork for a solid and resilient 400 sqft slab. This phase demands attention to detail and a methodical approach to achieve a professional-quality finished product.
Finishing the Concrete Slab
Once the concrete is poured and leveled, the finishing phase plays a crucial role in achieving a smooth, durable, and visually appealing surface for the slab. This stage involves a series of meticulous steps aimed at refining the concrete's texture, appearance, and overall quality. Here's a comprehensive guide to the essential aspects of finishing a concrete slab:
Initial Surface Smoothing
After the concrete is poured into the formwork, use a bull float to initially smooth the surface. This tool, typically made of wood, magnesium, or aluminum, is used to level the concrete and eliminate any high spots. By carefully maneuvering the bull float across the surface, you'll create a uniform plane while simultaneously compacting the concrete.
Edging and Jointing
Next, focus on edging the slab to define its boundaries and create clean, crisp edges. Utilize a hand edger to round off the edges, preventing chipping and promoting a professional finish. Additionally, use a grooving tool to create contraction joints, which help control cracking by inducing controlled, uniform cracks at specified locations.
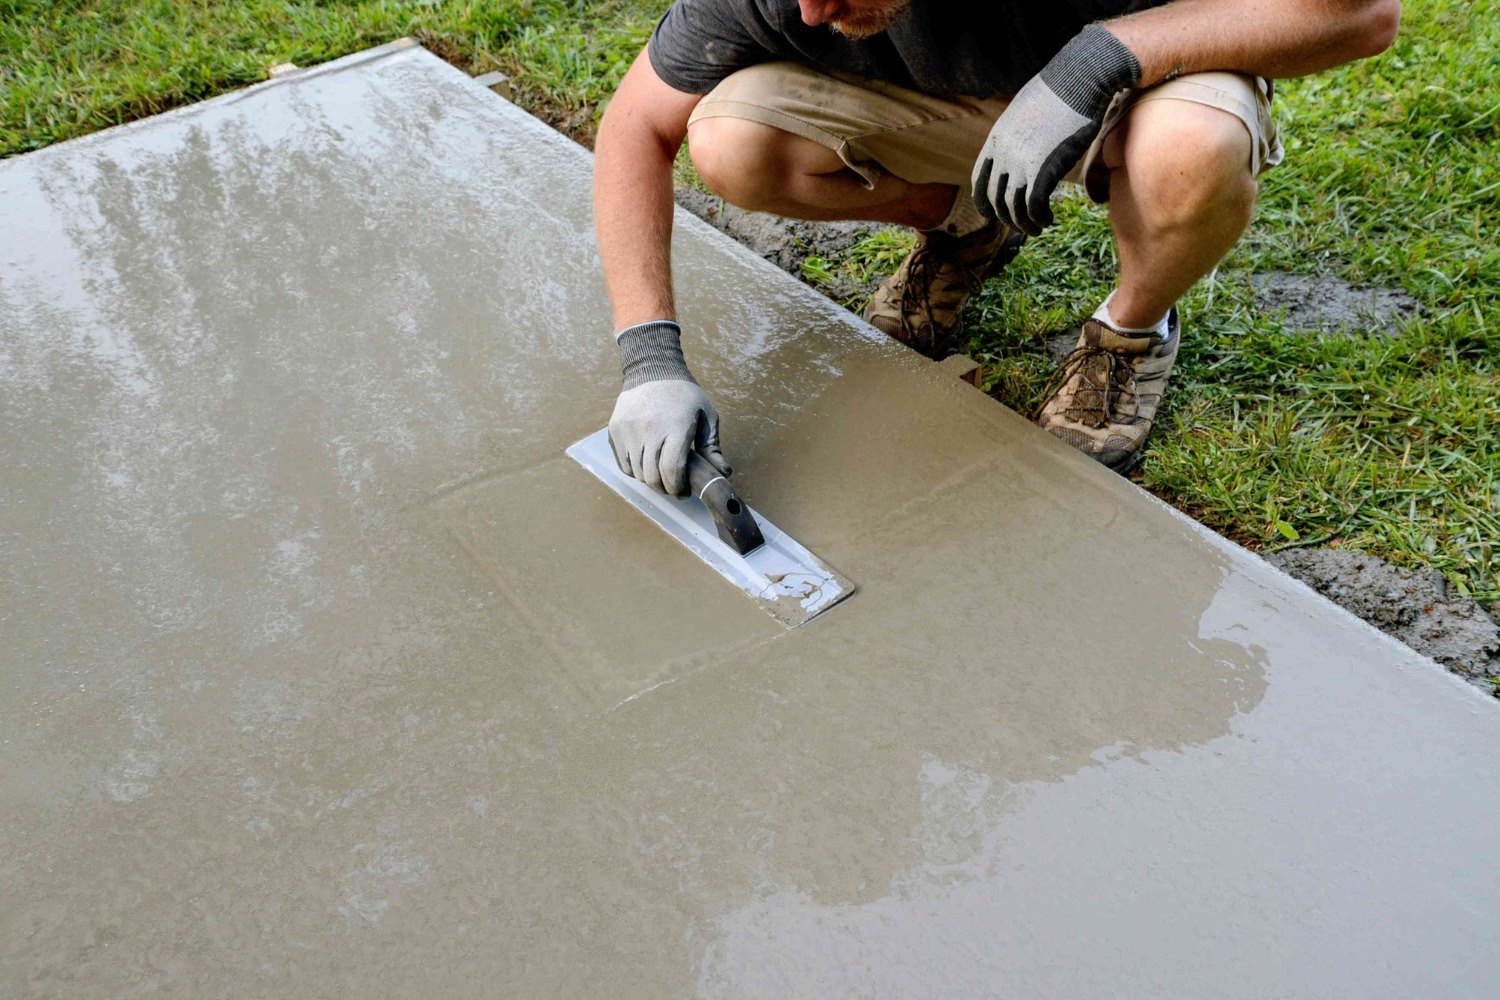
Floating and Troweling
Following the initial smoothing and edging, proceed to use a float to further refine the surface. A float is a flat tool that is pushed and pulled across the concrete, leveling and compacting it to prepare for the final finishing with a trowel. The troweling process involves using a steel trowel to achieve a smooth, dense surface. Begin with a steel hand trowel and progress to a larger power trowel for larger areas, ensuring a consistent and polished finish.
Surface Texture and Pattern
Depending on the intended use and aesthetic preferences, consider incorporating specific textures or patterns into the concrete surface. This can be achieved through a variety of techniques, such as broom finishing, which provides a non-slip texture suitable for outdoor applications, or stamped patterns that mimic the appearance of natural materials like stone or brick.
Curing and Sealing
After the finishing process is complete, it's crucial to prioritize the curing and sealing of the concrete slab. Apply a high-quality curing compound to retain moisture and promote proper hydration of the concrete, enhancing its strength and durability. Once the slab has sufficiently cured, consider applying a protective sealer to safeguard the surface from stains, moisture penetration, and surface damage, prolonging its lifespan and maintaining its appearance.
By meticulously executing these finishing steps, you'll transform the freshly poured concrete into a resilient, visually appealing slab that meets your specific requirements. The attention to detail and precision applied during this phase will contribute to the long-term performance and aesthetic appeal of the concrete slab, ensuring its suitability for various applications and environments.
Curing and Maintenance
Curing and maintenance are critical aspects of ensuring the long-term durability and structural integrity of the concrete slab. Proper curing is essential to facilitate the hydration process, allowing the concrete to achieve its maximum strength and resistance to cracking. Additionally, ongoing maintenance practices contribute to preserving the slab's appearance and performance over time.
Curing Process
Following the completion of the finishing phase, the curing process begins to promote optimal concrete hydration. Curing involves maintaining adequate moisture levels and controlling temperature conditions to support the concrete's gradual strength development. Several effective curing methods can be employed, including:
-
Water Curing: This method involves keeping the concrete surface consistently moist by applying a continuous water spray, damp burlap, or wet fabric. Maintaining moisture saturation for an extended period supports the concrete's internal chemical reactions, enhancing its overall strength and durability.
-
Curing Compounds: Liquid curing compounds can be applied to the concrete surface to form a protective film that retains moisture and facilitates proper curing. These compounds help prevent premature evaporation and ensure uniform hydration, promoting robust concrete properties.
-
Plastic Sheeting: Covering the concrete slab with plastic sheeting or polyethylene film creates a barrier that traps moisture, promoting a controlled curing environment. This approach is particularly effective in preventing moisture loss in hot or windy conditions.
Maintenance Practices
In addition to thorough curing, implementing proactive maintenance practices is essential for preserving the appearance and functionality of the concrete slab. Regular maintenance efforts contribute to extending the slab's service life and minimizing the need for extensive repairs. Key maintenance considerations include:
-
Sealant Reapplication: Periodically reapply a high-quality concrete sealer to protect the surface from staining, moisture intrusion, and wear. This proactive measure safeguards the concrete against environmental factors and enhances its longevity.
-
Routine Cleaning: Regularly clean the concrete slab using mild detergents and a non-abrasive brush or mop to remove dirt, debris, and potential contaminants. This practice helps maintain the slab's aesthetic appeal and prevents the accumulation of substances that could compromise its integrity.
-
Crack Monitoring and Repair: Monitor the slab for any signs of cracking or damage, addressing minor cracks promptly to prevent them from expanding. Utilize appropriate concrete repair materials and techniques to address surface imperfections and maintain the slab's structural soundness.
By prioritizing thorough curing and implementing proactive maintenance measures, you can ensure that the concrete slab remains resilient, visually appealing, and structurally sound over its lifespan. These practices contribute to the long-term performance and durability of the slab, allowing it to withstand environmental challenges and serve its intended purpose effectively.
Conclusion
In conclusion, mastering the art of pouring a 400 sqft concrete slab solo is a challenging yet rewarding endeavor that demands meticulous planning, precise execution, and a keen eye for detail. From the initial stages of site preparation and formwork construction to the critical phases of mixing, pouring, and finishing the concrete, this comprehensive guide has provided valuable insights into the intricacies of this construction project.
By meticulously adhering to the planning and preparation steps, including site assessment, material calculation, and safety considerations, individuals embarking on this journey can lay a solid foundation for a successful solo concrete pouring experience. The careful gathering of materials and tools, coupled with thorough site preparation and strategic formwork and reinforcement placement, sets the stage for the seamless transition to the concrete mixing and pouring phases.
The mixing and pouring process, detailed in this guide, underscores the importance of precision and attention to detail, emphasizing the significance of consistent water-to-concrete ratios, thorough mixing, and strategic pouring techniques. Furthermore, the finishing phase, encompassing surface smoothing, edging, troweling, and curing, plays a crucial role in shaping the concrete slab's durability, aesthetics, and long-term performance.
The guide's comprehensive coverage of curing and maintenance practices underscores the commitment to preserving the concrete slab's integrity and appearance over time. By prioritizing effective curing methods and implementing proactive maintenance measures, individuals can ensure that their concrete slab remains resilient, visually appealing, and structurally sound throughout its service life.
Overall, the successful completion of a 400 sqft concrete slab solo represents a significant achievement, showcasing the individual's dedication to craftsmanship, attention to detail, and the ability to overcome complex construction challenges. Whether the slab serves as the foundation for a new structure or enhances outdoor living spaces, the knowledge and skills gained from this experience can empower individuals to undertake future projects with confidence and expertise.
In essence, mastering the art of pouring a concrete slab solo is not merely a construction endeavor; it is a testament to the individual's determination, resourcefulness, and commitment to creating enduring, high-quality structures. With the insights and guidance provided in this guide, individuals are well-equipped to embark on their solo concrete pouring journey, laying the groundwork for successful, satisfying construction experiences.