Home>Arts and Culture>How To Decorate A Graduation Cap

Arts and Culture
How To Decorate A Graduation Cap
Published: February 26, 2024
Learn how to decorate a graduation cap with creative arts and culture ideas. Express your individuality and celebrate your achievement with unique cap designs.
(Many of the links in this article redirect to a specific reviewed product. Your purchase of these products through affiliate links helps to generate commission for Noodls.com, at no extra cost. Learn more)
Table of Contents
Choosing a Theme
Selecting a theme for your graduation cap is an exciting opportunity to express your personality and celebrate your achievements. The theme you choose can reflect your interests, aspirations, or a memorable experience from your academic journey. Here are some steps to help you choose the perfect theme for your graduation cap:
-
Reflect on Your Journey: Consider the significant moments, challenges, and triumphs you've experienced throughout your academic career. Whether it's a favorite class, a meaningful extracurricular activity, or a personal accomplishment, reflecting on these experiences can inspire a theme that holds deep personal significance.
-
Explore Your Passions: Think about your hobbies, interests, and passions outside of academics. Whether it's music, art, sports, or travel, incorporating these elements into your graduation cap theme can showcase your multifaceted identity and add a unique flair to your design.
-
Seek Inspiration: Browse through social media platforms, such as Pinterest and Instagram, for inspiration. You'll find a myriad of creative ideas, from inspirational quotes to pop culture references, that can spark your imagination and help you narrow down your theme options.
-
Consider Future Goals: If you have specific career aspirations or future goals, consider incorporating elements related to your chosen field of study or profession. This can serve as a visual reminder of your ambitions and the exciting journey that lies ahead.
-
Embrace Individuality: Don't be afraid to think outside the box and embrace your individuality. Your graduation cap is a canvas for self-expression, so feel empowered to choose a theme that resonates with your unique personality and experiences.
By carefully considering these factors, you can confidently select a theme that encapsulates the essence of your academic journey and sets the stage for a memorable and meaningful graduation cap design.
Read more: How To Wash A Baseball Cap
Gathering Materials
Gathering the right materials is a crucial step in bringing your graduation cap design to life. By ensuring that you have the necessary supplies, you can embark on the creative process with confidence and enthusiasm. Here's a comprehensive guide to gathering materials for decorating your graduation cap:
1. Graduation Cap
The foundation of your project is, of course, the graduation cap itself. Ensure that you have a clean and undamaged cap that serves as a blank canvas for your design. If you haven't already obtained your cap, check with your academic institution or local retailers to secure one in advance.
2. Adhesive Materials
Selecting the appropriate adhesive materials is essential for securing decorations to your cap. Consider using strong, yet removable, adhesive options such as double-sided tape, adhesive dots, or craft glue. These options allow for easy application and removal, ensuring that your cap remains intact while also allowing for future use of the cap.
3. Decorative Elements
Gather an assortment of decorative elements to bring your design concept to life. This may include glitter, rhinestones, fabric, sequins, stickers, and other embellishments that align with your chosen theme. Consider exploring local craft stores or online retailers to find a diverse selection of decorative elements that resonate with your vision.
Read more: How To Wear Graduation Hood
4. Crafting Tools
Having the right tools at your disposal can streamline the decorating process. Ensure that you have scissors for cutting fabric and paper, a ruler for precise measurements, and any specialized tools required for your specific design, such as stencils or paintbrushes. Additionally, having a clean workspace with protective coverings can help maintain organization and prevent any accidental messes.
5. Protective Gear
When working with adhesives, paints, or other potentially messy materials, it's important to protect your clothing and work area. Consider using aprons, disposable gloves, and a drop cloth or newspapers to safeguard against spills and splatters. This not only keeps your surroundings tidy but also ensures that your graduation attire remains pristine.
By gathering these materials in advance, you can approach the decoration process with ease and focus on bringing your creative vision to fruition. With careful preparation and a well-curated selection of materials, you're poised to transform your graduation cap into a personalized masterpiece that reflects your unique style and accomplishments.
Planning the Design
Planning the design of your graduation cap is a pivotal stage that sets the tone for the entire decorating process. By approaching this step with thoughtful consideration and creativity, you can craft a visually captivating and meaningful design that resonates with your personal narrative. Here's a detailed exploration of the essential aspects involved in planning the design of your graduation cap:
1. Conceptualization
Begin by conceptualizing the overall look and feel you want to achieve with your graduation cap design. Consider how you can visually represent your chosen theme through colors, imagery, and symbolism. Whether it's a minimalist and elegant design or a vibrant and intricate composition, envisioning the end result will guide your subsequent decisions and creative choices.
Read more: How To Hang A Tapestry
2. Sketching and Drafting
Translating your conceptual ideas into tangible sketches and drafts allows you to visualize the layout and composition of your design. Use a pencil and paper to outline the placement of key elements, such as text, images, and decorative accents. This initial sketching phase provides a foundation for refining your design and ensures that you have a clear roadmap for the decorating process.
3. Color Palette Selection
Carefully select a cohesive color palette that harmonizes with your theme and overall aesthetic. Consider the emotional impact of different colors and their symbolic significance. Whether you opt for bold and vibrant hues or a more subdued and elegant scheme, the chosen colors will play a pivotal role in conveying the essence of your design and evoking the desired visual impact.
4. Balance and Composition
Achieving a harmonious balance and compelling composition is essential for a visually striking graduation cap design. Pay attention to the arrangement of elements, ensuring that the overall layout is visually appealing and well-proportioned. Experiment with different placements and configurations to find the most effective composition that effectively communicates your chosen theme.
5. Incorporating Text and Imagery
Integrating meaningful text and imagery into your design can infuse it with personal significance and storytelling elements. Whether it's a motivational quote, a symbol of achievement, or a representation of your future aspirations, carefully consider how these elements can enrich the narrative of your graduation cap design and resonate with both you and your audience.
Read more: How To Hang Heavy Pictures
6. Iterative Refinement
Embrace the iterative nature of the design process by refining and fine-tuning your initial concepts. This may involve making adjustments to the layout, experimenting with different decorative elements, or seeking feedback from peers and mentors. Iterative refinement allows you to elevate the visual impact of your design and ensure that it authentically reflects your vision.
By meticulously planning the design of your graduation cap, you lay the groundwork for a captivating and deeply personal creation that celebrates your academic journey and individuality. This preparatory phase sets the stage for the hands-on execution of your design, empowering you to bring your creative vision to life with confidence and purpose.
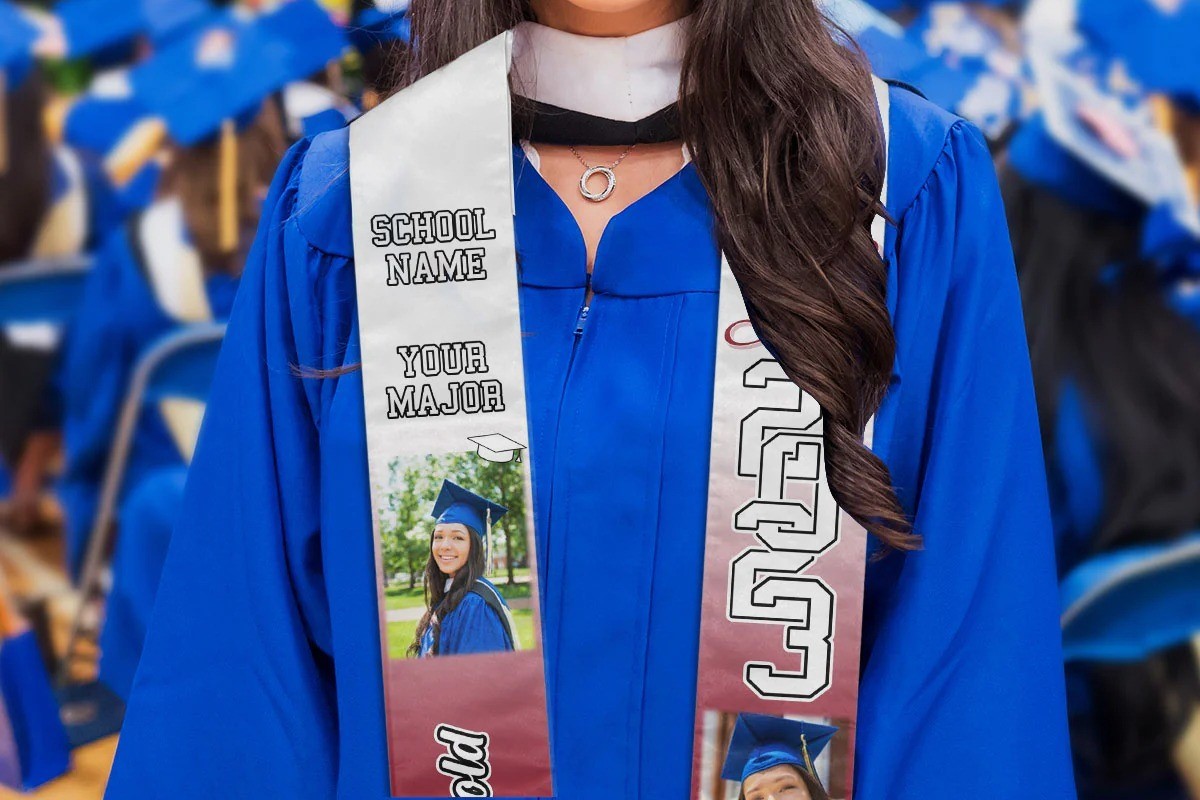
Adding Personal Touches
Adding personal touches to your graduation cap design is a transformative process that elevates the visual impact and emotional resonance of your creation. By infusing your design with elements that hold deep personal significance, you can craft a graduation cap that authentically reflects your unique journey and aspirations. Here's a comprehensive exploration of the essential steps involved in adding personal touches to your graduation cap design:
-
Incorporating Symbolism: Consider integrating symbols or imagery that hold personal meaning. Whether it's a representation of your cultural heritage, a symbol of resilience, or an emblem of your future endeavors, incorporating meaningful symbolism adds layers of depth and significance to your design.
-
Showcasing Achievements: If you've achieved notable milestones or received academic accolades, consider incorporating visual representations of these accomplishments. This could include academic honors, leadership roles, or extracurricular achievements, serving as a proud testament to your hard work and dedication.
-
Personalized Quotes or Mantras: Infuse your design with motivational quotes, personal mantras, or affirmations that have inspired you throughout your academic journey. Selecting quotes that resonate with your values and aspirations adds a powerful and introspective dimension to your graduation cap, allowing it to serve as a source of inspiration for both yourself and others.
-
Photographic Memories: For a truly personalized touch, consider incorporating small photographs or printed memories onto your cap. This could include snapshots from significant moments during your academic tenure, cherished memories with friends and mentors, or snapshots that encapsulate the essence of your educational experience.
-
Customized Monograms or Initials: Adding your initials, monogram, or a personalized insignia can infuse your graduation cap with a sense of individuality and ownership. Whether it's elegantly integrated into the design or prominently displayed, your personalized insignia serves as a distinctive mark of identity and pride.
-
Incorporating Hobbies and Interests: If you have specific hobbies, passions, or interests that have enriched your academic journey, consider integrating elements related to these pursuits into your design. Whether it's a musical instrument, a sports motif, or a nod to your artistic talents, showcasing your diverse interests adds a vibrant and multifaceted dimension to your graduation cap.
By thoughtfully incorporating these personal touches into your graduation cap design, you infuse your creation with a profound sense of individuality and authenticity. Each element serves as a testament to your unique experiences, values, and aspirations, culminating in a visually captivating and deeply personal masterpiece that encapsulates the essence of your academic journey.
Attaching Decorations securely
Ensuring that the decorations on your graduation cap are securely attached is essential for preserving the integrity of your design throughout the commencement ceremony and beyond. By employing the right techniques and materials, you can confidently adorn your cap with embellishments while safeguarding against potential mishaps. Here's a comprehensive guide to securely attaching decorations to your graduation cap:
1. Selecting Reliable Adhesives
Choose adhesives that are specifically designed for the materials you plan to use. For lightweight decorations such as paper cutouts, stickers, or fabric appliques, double-sided tape or adhesive dots offer a secure yet removable option. For heavier embellishments like rhinestones or metal charms, opt for a strong adhesive glue that is compatible with both the decorations and the cap material.
Read more: How To Hang Canvas On Wall
2. Applying Adhesives Strategically
Prior to attaching decorations, ensure that the surface of the graduation cap is clean and free of any debris or oils that may hinder adhesion. Apply the chosen adhesive to the back of each decoration with precision, focusing on the edges and corners to ensure a secure bond. Avoid excessive use of adhesive to prevent any unsightly residue or seepage around the decorations.
3. Allowing Adequate Drying Time
After attaching each decoration, allow sufficient time for the adhesive to fully dry and set. This step is crucial for ensuring that the decorations remain firmly in place and do not shift or detach during handling or wear. Follow the manufacturer's guidelines for the recommended drying duration, and consider allowing extra time for larger or heavier decorations.
4. Reinforcing with Stitching (Optional)
For added security, particularly with fabric or embroidered decorations, consider reinforcing the attachment points with discreet stitching. Using a needle and thread that matches the decoration's color, carefully sew around the edges or through the center of the decoration, anchoring it to the cap fabric. This method provides an extra layer of reinforcement and minimizes the risk of detachment.
5. Avoiding Excessive Weight and Overhang
While it's tempting to adorn your cap with an array of decorations, it's important to consider the overall weight and balance. Avoid clustering heavy or oversized decorations in one area, as this may strain the cap's structure and compromise its stability. Additionally, refrain from attaching decorations that extend beyond the edges of the cap, as they may catch on clothing or accessories.
By following these guidelines and exercising care during the attachment process, you can confidently embellish your graduation cap with a diverse array of decorations while ensuring that they remain securely affixed. This meticulous approach not only enhances the visual impact of your design but also provides peace of mind, allowing you to proudly showcase your personalized creation throughout the celebratory occasion.