Home>Arts and Culture>How To Draw A Skeleton
Arts and Culture
How To Draw A Skeleton
Published: February 28, 2024
Learn how to draw a realistic skeleton with step-by-step instructions. Perfect for art enthusiasts and those interested in arts and culture. Unlock your creativity today!
(Many of the links in this article redirect to a specific reviewed product. Your purchase of these products through affiliate links helps to generate commission for Noodls.com, at no extra cost. Learn more)
Table of Contents
Introduction
Drawing a skeleton may seem like a daunting task, but with the right guidance and a bit of practice, it can be an incredibly rewarding and fascinating artistic endeavor. Whether you're an aspiring artist, a student studying anatomy, or simply someone with a passion for the macabre, learning how to draw a skeleton can provide valuable insights into the human form and its underlying structure.
The human skeleton, with its intricate network of bones and joints, has long been a subject of fascination and study in various fields, including art, medicine, and anthropology. From the graceful curve of the spine to the delicate intricacies of the hand and foot bones, each part of the skeleton offers a unique challenge and an opportunity to delve into the complexities of human anatomy.
In this comprehensive guide, we will explore the step-by-step process of drawing a skeleton, breaking down the task into manageable and approachable stages. By following along and practicing the techniques outlined in this tutorial, you will gain a deeper understanding of skeletal anatomy and develop your artistic skills in the process.
So, gather your drawing materials, clear a workspace, and let's embark on a captivating journey into the realm of skeletal artistry. Whether you're aiming for a realistic representation or a stylized interpretation, this guide will equip you with the knowledge and confidence to bring a skeleton to life on the page. Let's dive in and uncover the secrets of drawing the human skeleton with creativity and precision.
Read more: How To Create A Spooky Skeleton Hand Drawing
Materials Needed
To embark on the artistic endeavor of drawing a skeleton, it's essential to gather the right materials that will facilitate the creative process and enable you to bring your vision to life on the page. Here's a comprehensive list of the materials you'll need to begin your skeletal masterpiece:
-
Drawing Paper: Select a smooth, sturdy paper that can withstand the various techniques and erasures involved in the drawing process. A heavier weight paper will prevent wrinkling and provide a stable surface for intricate details.
-
Pencils: Invest in a range of graphite pencils, including H, HB, and B grades, to achieve varying levels of darkness and precision in your sketches. Additionally, a set of mechanical pencils can offer consistent line widths for detailed work.
-
Eraser: A high-quality eraser is indispensable for refining your skeleton drawing, whether it's correcting minor mistakes or creating highlights on the skeletal structure. Consider using a kneaded eraser for precise adjustments and a standard eraser for broader areas.
-
Fine-tip Pens: Fine-tip pens, such as Micron pens, are ideal for outlining and adding intricate details to your skeleton drawing. Their consistent ink flow and archival quality ensure that your lines remain crisp and enduring.
-
Ruler: A ruler or straight edge will aid in creating straight, accurate lines for the skeletal framework and maintaining proportional relationships between different parts of the skeleton.
-
Reference Material: While it's valuable to develop an understanding of skeletal anatomy, having visual references, such as anatomical drawings, photographs, or skeletal models, can provide invaluable guidance and inspiration as you work on your drawing.
-
Lighting: Adequate lighting is crucial for observing details and accurately rendering the shadows and contours of the skeleton. Position your drawing area in a well-lit space to ensure optimal visibility and precision.
By assembling these essential materials, you'll be well-equipped to commence the artistic journey of drawing a skeleton with confidence and creativity. With the right tools at your disposal, you can fully immerse yourself in the intricacies of skeletal anatomy and unleash your artistic expression on the page.
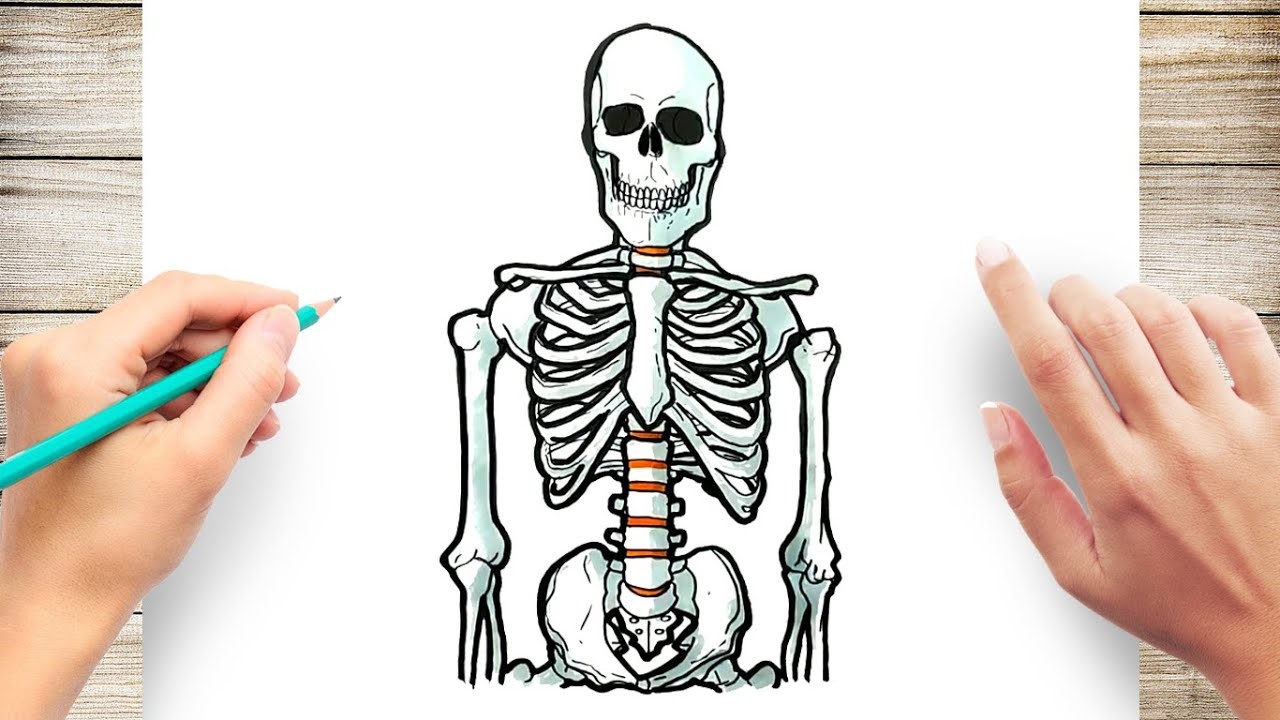
Drawing the Skull
The skull, with its complex structure and distinctive features, serves as the focal point of the human skeleton. When drawing the skull, it's essential to approach it with precision and attention to detail, capturing its unique characteristics and proportions. Here's a step-by-step guide to effectively drawing the skull:
-
Outline the Basic Shape: Begin by lightly sketching the overall shape of the skull using a reference as a guide. Pay close attention to the proportions of the cranium, the eye sockets, the nasal cavity, and the jawline. Use a light pencil to ensure flexibility in making adjustments as you progress.
-
Define the Eye Sockets and Nasal Cavity: Once the basic shape is established, focus on outlining the eye sockets and the nasal cavity. These features contribute to the distinct appearance of the skull and play a crucial role in capturing its anatomical accuracy.
-
Detail the Jawline and Teeth: Proceed to define the jawline, paying attention to its curvature and the placement of the teeth. While the teeth may appear daunting, break down their shapes into simple forms and gradually refine their details.
-
Refine the Contours and Features: With the foundational elements in place, refine the contours of the skull, emphasizing the curves and angles that define its structure. Pay attention to subtle nuances, such as the cheekbones and the ridge of the brow, to add depth and realism to your drawing.
-
Add Shading and Texture: Utilize varying degrees of shading to create depth and dimension within the skull. Consider the direction of light sources and apply shading to accentuate the contours and features, adding a sense of three-dimensionality to your drawing.
-
Fine-Tune and Erase Guidelines: As you progress, refine the details of the skull, erasing any remaining guidelines and adjusting proportions as needed. This stage allows you to focus on achieving a polished and accurate representation of the skull.
By following these steps and approaching the process with patience and attention to detail, you can effectively capture the intricate beauty of the human skull in your drawing. Remember to observe the unique characteristics of the skull and infuse your artistic interpretation with a blend of anatomical precision and creative expression.
Drawing the Spine
The spine, also known as the vertebral column, serves as the central support structure of the human skeleton, providing stability, flexibility, and protection for the spinal cord. When drawing the spine, it's essential to capture its graceful curvature and intricate arrangement of vertebrae with precision and attention to detail. Here's a detailed guide to effectively drawing the spine, a fundamental component of the skeletal anatomy:
-
Outline the Central Line: Begin by sketching a central line that represents the primary axis of the spine. This line serves as a foundational guide for positioning the vertebrae and capturing the overall curvature of the spine. Ensure that the line flows smoothly, reflecting the natural S-shaped curve of the vertebral column.
-
Position the Vertebrae: With the central line in place, proceed to sketch the individual vertebrae along the length of the spine. Start with the cervical vertebrae at the top, followed by the thoracic, lumbar, sacral, and coccygeal vertebrae. Pay attention to the varying sizes and shapes of each vertebra, reflecting their distinct characteristics within the spinal column.
-
Define the Spinous Processes: The spinous processes, the bony projections extending from the posterior aspect of each vertebra, contribute to the unique appearance of the spine. Carefully outline these structures, considering their orientation and alignment along the central line. Emphasize the gradual increase in size from the cervical to the lumbar region.
-
Capture the Intervertebral Discs: Depict the intervertebral discs, which provide cushioning and flexibility between adjacent vertebrae. Use subtle shading and contouring to represent these discs, highlighting their role in maintaining the spacing and mobility of the vertebral column.
-
Emphasize the Curvature: Pay close attention to the natural curvature of the spine, including the cervical lordosis, thoracic kyphosis, and lumbar lordosis. Ensure that the transitions between these spinal regions are accurately represented, conveying the fluidity and resilience of the vertebral column.
-
Refine the Details and Shading: As you progress, refine the details of each vertebra, adding depth and dimension through shading and texture. Consider the play of light and shadow along the curvature of the spine, accentuating its three-dimensional form and anatomical accuracy.
By following these steps and approaching the process with patience and precision, you can effectively capture the elegance and structural integrity of the human spine in your drawing. Remember to observe the unique characteristics of each vertebra and infuse your artistic interpretation with a blend of anatomical accuracy and creative expression.
Drawing the Ribcage
The ribcage, also known as the thoracic cage, forms a vital component of the human skeletal system, providing protection for the delicate organs within the chest cavity while facilitating respiration and movement. When drawing the ribcage, it's essential to capture its distinctive structure and the arrangement of ribs with precision and attention to detail. Here's a detailed guide to effectively drawing the ribcage, a fundamental element of skeletal anatomy:
-
Outline the General Shape: Begin by sketching the general shape of the ribcage, considering its characteristic curvature and the broad outline of the ribcage. Pay attention to the proportions and ensure that the overall form aligns with the anatomical accuracy of the human ribcage.
-
Position the Individual Ribs: Proceed to outline the individual ribs within the ribcage, starting from the sternum and extending laterally to the vertebral column. The ribs exhibit a gentle curvature, with the upper ribs being shorter and gradually increasing in length towards the lower ribs. Capture the subtle tapering and spacing between the ribs to convey their natural arrangement.
-
Define the Sternum and Costal Cartilage: Emphasize the central structure of the sternum, delineating its divisions into the manubrium, body, and xiphoid process. Additionally, consider the presence of costal cartilage, which connects the ribs to the sternum, contributing to the flexibility and elasticity of the ribcage.
-
Depict the True and False Ribs: Differentiate between the true ribs, which directly articulate with the sternum, and the false ribs, which either attach indirectly to the sternum or remain unattached. Pay attention to the nuanced variations in the shapes and orientations of the ribs, reflecting their distinct classifications within the ribcage.
-
Capture the Intercostal Spaces: Highlight the intercostal spaces between adjacent ribs, representing the areas where the intercostal muscles and neurovascular structures are located. These spaces contribute to the flexibility and expansion of the ribcage during breathing, adding depth and realism to your drawing.
-
Refine the Details and Shading: As you progress, refine the details of the ribcage, adding depth and dimension through shading and texture. Consider the play of light and shadow along the contours of the ribcage, accentuating its three-dimensional form and anatomical accuracy.
By following these steps and approaching the process with patience and precision, you can effectively capture the intricate beauty and functional significance of the human ribcage in your drawing. Remember to observe the unique characteristics of the ribcage and infuse your artistic interpretation with a blend of anatomical precision and creative expression.
Read more: How To Draw A Pumpkin
Drawing the Arms and Hands
The arms and hands, with their remarkable dexterity and expressive capabilities, are integral components of the human skeletal system. When drawing the arms and hands, it's essential to capture their intricate anatomical structures and the dynamic range of motion they afford. Here's a detailed guide to effectively drawing the arms and hands, encompassing the complexity and versatility of these vital appendages.
-
Outline the Basic Proportions: Begin by sketching the basic proportions of the arms, considering the length and tapering from the shoulders to the elbows and further to the wrists. Pay attention to the natural curvature of the arms, reflecting the underlying musculature and skeletal framework.
-
Position the Major Landmarks: Proceed to outline the major landmarks of the arms, including the deltoids, biceps, triceps, and the contours of the forearm muscles. These landmarks contribute to the overall form and dynamic movement of the arms, providing a foundation for the subsequent detailing of the hands.
-
Define the Structure of the Hands: Focus on outlining the structure of the hands, encompassing the proportions of the palm, the arrangement of the metacarpal bones, and the articulation of the phalanges. Pay close attention to the subtle variations in finger lengths and the natural curvature of the hand, capturing its graceful and expressive nature.
-
Depict the Articulation of Joints: Emphasize the articulation of the elbow and wrist joints, considering their range of motion and the underlying bony landmarks. The intricate interplay of bones and ligaments in these areas contributes to the fluidity and versatility of arm movements, adding realism to your drawing.
-
Capture the Fingers and Thumb: Proceed to outline the individual fingers and the opposing thumb, considering their proportions, joints, and the subtle curvature of the phalanges. Pay attention to the natural arcs and gestures of the fingers, reflecting their ability to convey emotion and perform intricate tasks.
-
Refine the Muscular Details and Shading: As you progress, refine the muscular details of the arms and hands, adding depth and dimension through shading and texture. Consider the interplay of light and shadow on the contours of the muscles and the subtle nuances of the skeletal landmarks, enhancing the anatomical accuracy of your drawing.
By following these steps and approaching the process with precision and attention to detail, you can effectively capture the grace and functionality of the human arms and hands in your drawing. Remember to observe the unique characteristics of these appendages and infuse your artistic interpretation with a blend of anatomical precision and creative expression.
Drawing the Pelvis
The pelvis, a sturdy and intricate bony structure, serves as a cornerstone of the human skeletal system, providing essential support for the body's weight and serving as a protective enclosure for the internal reproductive and digestive organs. When drawing the pelvis, it's crucial to capture its unique shape, articulations, and functional significance with precision and attention to detail. Here's a comprehensive guide to effectively drawing the pelvis, delving into the anatomical intricacies and artistic nuances of this vital skeletal element.
-
Outline the Basic Form: Commence by sketching the fundamental form of the pelvis, considering its distinctive shape and the broad contours of the ilium, ischium, and pubis bones. Pay close attention to the overall proportions and ensure that the pelvis aligns with the anatomical accuracy of the human skeletal structure.
-
Define the Pelvic Landmarks: Proceed to outline the prominent landmarks of the pelvis, including the iliac crest, the acetabulum (hip socket), and the symphysis pubis. These landmarks contribute to the structural integrity and functional dynamics of the pelvis, providing a foundation for the subsequent detailing of the pelvic structure.
-
Capture the Articulation of Joints: Emphasize the articulation of the hip joints and the sacroiliac joint, considering their range of motion and the underlying bony features. The interplay of these joints and their associated ligaments contributes to the stability and mobility of the pelvis, adding realism and anatomical accuracy to your drawing.
-
Delineate the Pelvic Openings: Focus on delineating the pelvic inlet and outlet, which play crucial roles in facilitating childbirth and accommodating the passage of major blood vessels and nerves. Depict the subtle curvature and dimensions of these openings, reflecting their functional significance within the pelvic structure.
-
Refine the Details and Shading: As you progress, refine the details of the pelvis, adding depth and dimension through shading and texture. Consider the interplay of light and shadow on the contours of the pelvic bones, accentuating their three-dimensional form and anatomical accuracy.
By following these steps and approaching the process with patience and precision, you can effectively capture the robust elegance and functional significance of the human pelvis in your drawing. Remember to observe the unique characteristics of the pelvis and infuse your artistic interpretation with a blend of anatomical precision and creative expression.
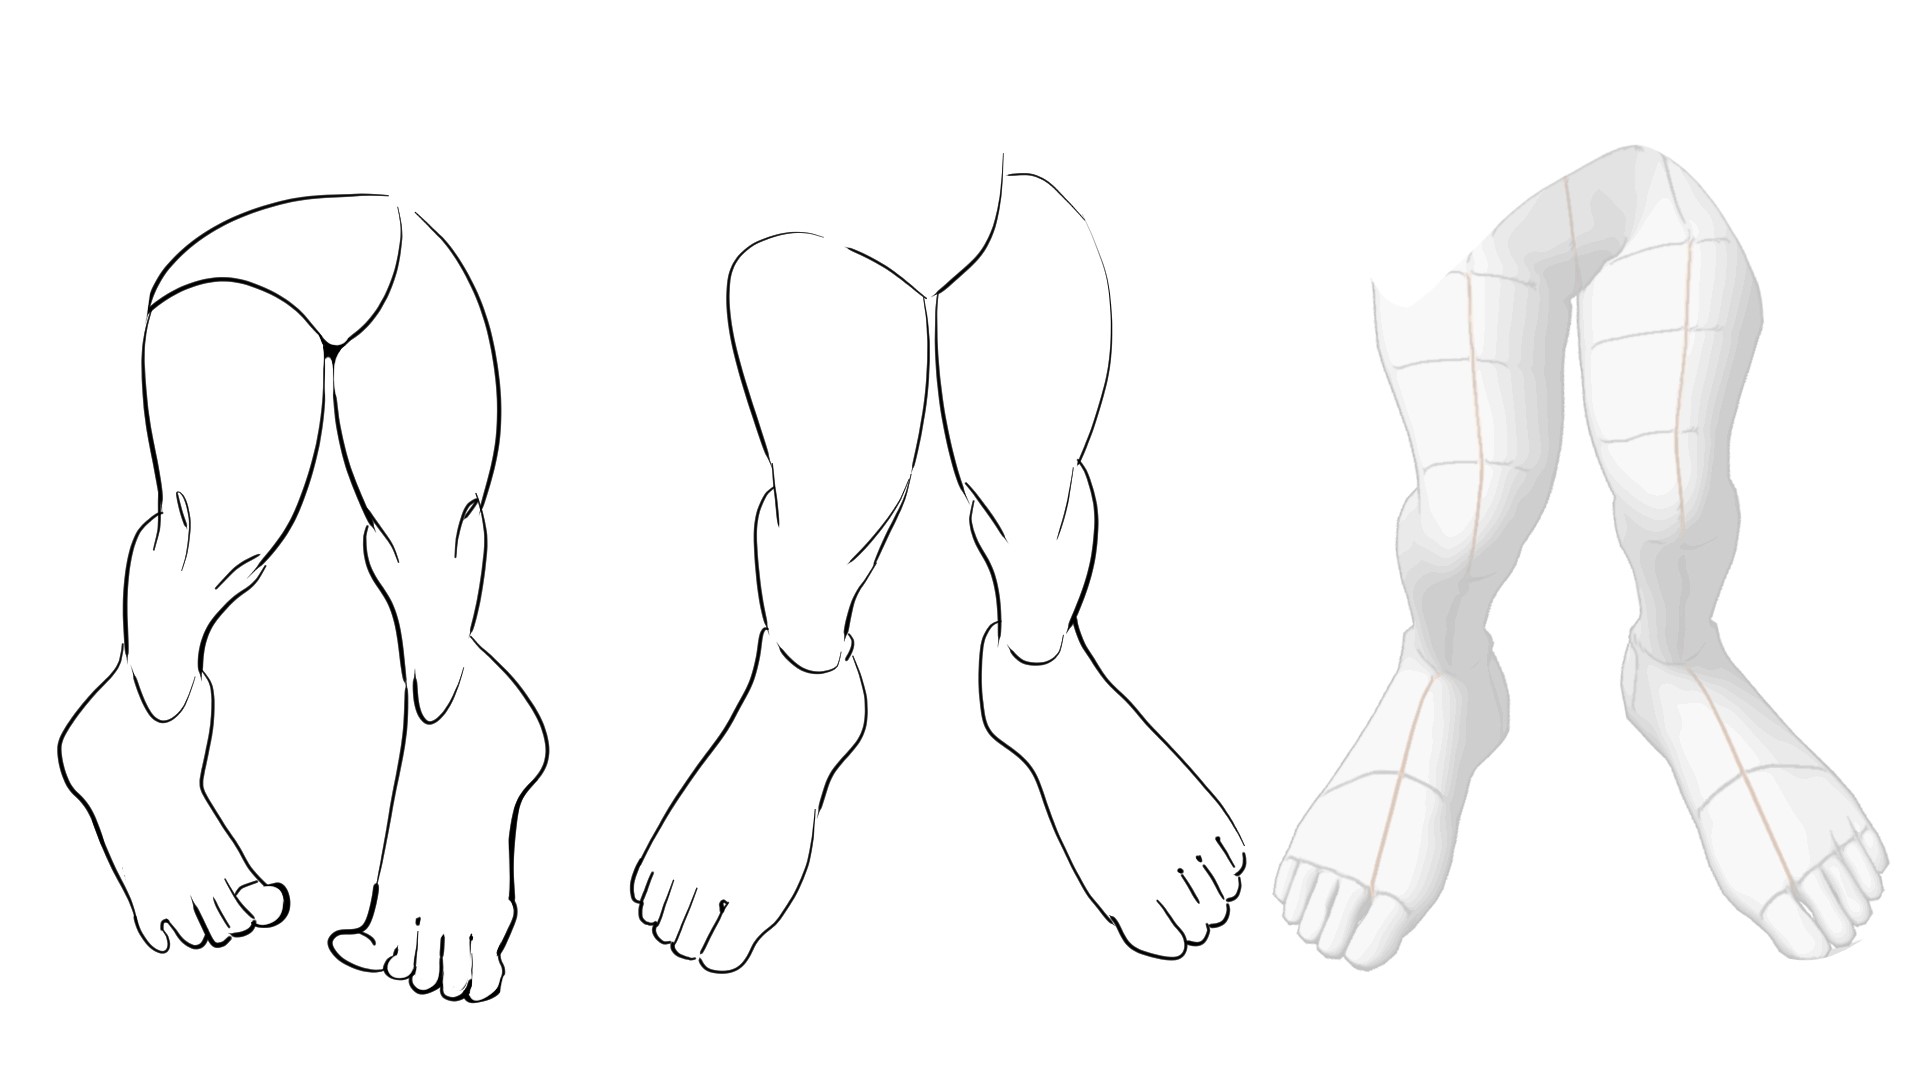
Drawing the Legs and Feet
The legs and feet, with their remarkable capacity for movement and weight-bearing functionality, constitute essential components of the human skeletal system. When undertaking the task of drawing the legs and feet, it is imperative to capture their intricate anatomical structures and the dynamic range of motion they afford. Here's a comprehensive guide to effectively drawing the legs and feet, encompassing the complexity and versatility of these vital lower appendages.
-
Outline the Basic Proportions: Commence by sketching the basic proportions of the legs, considering the length and tapering from the thighs to the knees and further to the ankles. Pay attention to the natural curvature of the legs, reflecting the underlying musculature and skeletal framework.
-
Position the Major Landmarks: Proceed to outline the major landmarks of the legs, including the contours of the quadriceps, hamstrings, and the calf muscles. These landmarks contribute to the overall form and dynamic movement of the legs, providing a foundation for the subsequent detailing of the feet.
-
Define the Structure of the Feet: Focus on outlining the structure of the feet, encompassing the proportions of the sole, the arrangement of the tarsal bones, and the articulation of the phalanges. Pay close attention to the subtle arches and curves of the feet, capturing their graceful and weight-bearing nature.
-
Depict the Articulation of Joints: Emphasize the articulation of the knee and ankle joints, considering their range of motion and the underlying bony landmarks. The intricate interplay of bones and ligaments in these areas contributes to the stability and mobility of leg movements, adding realism to your drawing.
-
Capture the Toes and Arches: Proceed to outline the individual toes and the arches of the feet, considering their proportions, joints, and the subtle curvature of the phalanges. Pay attention to the natural flexion and extension of the toes, reflecting their role in balance and propulsion.
-
Refine the Muscular Details and Shading: As you progress, refine the muscular details of the legs and feet, adding depth and dimension through shading and texture. Consider the interplay of light and shadow on the contours of the muscles and the subtle nuances of the skeletal landmarks, enhancing the anatomical accuracy of your drawing.
By following these steps and approaching the process with precision and attention to detail, you can effectively capture the grace and functionality of the human legs and feet in your drawing. Remember to observe the unique characteristics of these lower appendages and infuse your artistic interpretation with a blend of anatomical precision and creative expression.
Adding Details and Shading
Adding details and shading is a pivotal stage in the process of drawing a skeleton, as it allows for the refinement of anatomical accuracy and the creation of depth and dimension within the artwork. This phase presents an opportunity to infuse the skeletal structure with a sense of realism and visual impact, elevating the drawing from a mere outline to a compelling representation of the human form.
When adding details to the skeletal framework, attention to precision is paramount. It involves meticulously refining the contours of bones, articulations, and anatomical landmarks to ensure a faithful portrayal of the skeletal anatomy. This includes accentuating the subtle curves of the skull, the intricate arrangement of vertebrae in the spine, the distinct shape of the ribcage, the graceful curvature of the pelvis, and the nuanced proportions of the limbs. By focusing on these details, the drawing begins to embody the complexity and elegance of the human skeleton, inviting the viewer to engage with its inherent beauty and structural intricacies.
Shading plays a crucial role in enhancing the three-dimensional quality of the skeletal representation. Through the strategic application of light and shadow, the artist can convey the form, volume, and spatial relationships of the skeletal elements. Shading techniques such as hatching, cross-hatching, and stippling can be employed to create gradations of tone, simulating the play of light on the bone surfaces and emphasizing the contours and recesses of the skeletal structure. By carefully observing the interplay of light and shadow in anatomical references, the artist can imbue the skeleton with a sense of depth and presence, elevating it from a two-dimensional drawing to a lifelike and evocative portrayal of the human form.
Furthermore, the use of shading can evoke a sense of mood and atmosphere within the artwork, contributing to its visual impact and emotive resonance. By considering the direction and intensity of light sources, the artist can create dramatic contrasts and subtle nuances, infusing the skeletal form with a sense of drama and vitality. This interplay of light and shadow not only adds a layer of visual interest to the drawing but also serves to underscore the inherent beauty and complexity of the human skeleton.
In essence, the stage of adding details and shading represents a transformative phase in the process of drawing a skeleton. It is a moment of meticulous observation, artistic interpretation, and creative expression, where the skeletal anatomy is imbued with depth, character, and a profound sense of vitality. Through the thoughtful application of details and shading, the artist breathes life into the skeletal form, inviting the viewer to appreciate the timeless elegance and enduring fascination of the human skeleton.
Read more: How To Draw A Shoe
Conclusion
In conclusion, the art of drawing a skeleton transcends the realms of artistic expression and anatomical study, offering a captivating journey into the intricate beauty and structural elegance of the human form. Through the step-by-step process outlined in this comprehensive guide, aspiring artists and enthusiasts alike have gained valuable insights into the meticulous art of capturing skeletal anatomy on paper. From the graceful curvature of the spine to the delicate intricacies of the hand and foot bones, each stage of the drawing process has unveiled the timeless allure and inherent complexity of the human skeleton.
As the final details and shading are meticulously applied, the skeletal framework comes to life, embodying a harmonious blend of anatomical precision and creative interpretation. The interplay of light and shadow accentuates the three-dimensional quality of the artwork, infusing the skeletal form with a sense of depth, presence, and emotive resonance. The culmination of this artistic endeavor is not merely a representation of bones and joints but a compelling homage to the enduring fascination and profound significance of the human skeleton.
Drawing a skeleton is not merely a technical exercise; it is a celebration of the marvels of human anatomy and a testament to the artist's ability to capture the essence of life within the confines of a blank canvas. It invites us to contemplate the structural marvels that underpin our physical existence, fostering a deeper appreciation for the intricate framework that sustains us. Moreover, it serves as a testament to the timeless allure and enduring fascination of the human skeleton, transcending cultural and temporal boundaries to evoke a sense of wonder and contemplation.
As artists and enthusiasts continue to hone their skills and embark on their artistic journeys, the process of drawing a skeleton stands as a testament to the profound intersection of art and science. It is a testament to the enduring allure and timeless significance of the human skeleton, inviting us to delve into the depths of anatomical intricacies while embracing the boundless creativity that breathes life into the skeletal form. In essence, the art of drawing a skeleton is a testament to the enduring fascination and timeless elegance of the human form, inviting us to explore the delicate balance between precision and creativity, and to celebrate the enduring marvels of skeletal anatomy.