Home>Technology and Computers>How To Take Apart A PS4 Controller
Technology and Computers
How To Take Apart A PS4 Controller
Published: March 7, 2024
Learn how to disassemble a PS4 controller with our step-by-step guide. Explore the inner workings of this essential piece of technology and computers. Unlock the secrets of your controller today!
(Many of the links in this article redirect to a specific reviewed product. Your purchase of these products through affiliate links helps to generate commission for Noodls.com, at no extra cost. Learn more)
Table of Contents
Introduction
Taking apart a PS4 controller can be a daunting task for many, but with the right tools and a clear understanding of the process, it can be a rewarding and educational experience. Whether you're looking to customize your controller with a new shell or buttons, replace a faulty component, or simply satisfy your curiosity about the inner workings of this essential gaming accessory, this guide will walk you through the step-by-step process of disassembling and reassembling a PS4 controller.
By gaining insight into the internal components and mechanisms of the controller, you can develop a deeper appreciation for the engineering that goes into creating these devices. Additionally, understanding how to disassemble and reassemble a PS4 controller can empower you to troubleshoot and resolve minor issues on your own, potentially saving time and money on repairs.
As we delve into the process, it's important to approach the task with patience and precision. While disassembling the controller, you'll have the opportunity to observe the intricate design and craftsmanship that contribute to its functionality. By following the steps outlined in this guide, you can gain valuable hands-on experience and develop a better understanding of the technology that powers your gaming experiences.
So, gather your tools, set aside some time, and prepare to embark on a journey into the inner workings of the PS4 controller. Whether you're a tech enthusiast, a gaming aficionado, or simply someone looking to learn a new skill, this guide will equip you with the knowledge and confidence to take on the challenge of disassembling and reassembling a PS4 controller.
Read more: How To Factory Reset PS4
Tools Needed
Before embarking on the process of disassembling a PS4 controller, it's essential to gather the necessary tools to ensure a smooth and efficient experience. Here's a comprehensive list of the tools you'll need:
-
Precision Screwdriver Set: A precision screwdriver set is indispensable for removing the small screws that secure the outer casing of the PS4 controller. Look for a set that includes various Phillips and flathead screwdriver tips to accommodate different screw sizes.
-
Plastic Opening Tools: These non-conductive tools are designed to safely pry apart the plastic casing of the controller without causing damage. They help to carefully separate the components without scratching or marring the surfaces.
-
Tweezers: Fine-pointed tweezers are invaluable for handling small components and cables within the controller. They provide precision and control when maneuvering delicate parts during the disassembly and reassembly process.
-
Spudger Tool: A spudger tool, often made of nylon or plastic, is useful for gently prying apart connectors and releasing clips without risking damage to the internal components.
-
Anti-Static Wrist Strap: To prevent the buildup of static electricity that could potentially damage sensitive electronic components, an anti-static wrist strap is recommended. This simple yet effective tool grounds you while working on the controller, minimizing the risk of electrostatic discharge.
-
Clean Workspace: Creating a clean and organized workspace is crucial for keeping track of small components and preventing them from getting lost. A well-lit area with ample space to lay out the controller and its parts will facilitate a methodical disassembly process.
By ensuring that you have these tools at your disposal, you'll be well-prepared to tackle the disassembly of the PS4 controller with confidence and precision. With the right tools in hand, you can approach the task methodically, knowing that you have everything necessary to navigate the intricate internal components of the controller.
Removing the Screws
To begin the disassembly process, the first step is to remove the screws that secure the outer casing of the PS4 controller. Using a precision screwdriver from the set, carefully identify and unscrew the small Phillips head screws located on the back of the controller. It's important to keep track of the screws and organize them in a way that facilitates easy reassembly later on. A magnetic parts tray or a small container can be helpful for this purpose, preventing the tiny screws from rolling away or getting misplaced.
As you remove each screw, take note of its placement and size, as there may be variations in screw length and threading. This attention to detail will be beneficial when reassembling the controller, ensuring that each screw is returned to its original position without causing any issues with the casing or internal components.
Once all the screws have been carefully removed, gently set them aside in the designated container and prepare to move on to the next phase of the disassembly process. With the screws safely accounted for, the controller is now ready for the next steps in accessing its internal components.
With the screws removed, the outer casing of the controller can be separated, revealing the internal components that power its functionality. This marks a significant milestone in the disassembly process, providing a glimpse into the intricate design and engineering that defines the PS4 controller. As you proceed to open the controller casing, take care to handle the components with precision and delicacy, mindful of the intricate mechanisms housed within.
By methodically removing the screws and preparing the controller for the next phase of disassembly, you're laying the groundwork for a thorough exploration of the controller's internal workings. With the outer casing now accessible, the journey into the heart of the PS4 controller continues, offering valuable insights into the technology that drives this essential gaming accessory.
Opening the Controller Casing
With the screws removed, the next step in disassembling a PS4 controller involves delicately opening the controller casing to reveal its internal components. Carefully grip the controller, ensuring that the buttons and triggers are facing upward. Gently pry apart the two halves of the casing, taking note of any resistance and proceeding with caution to avoid damaging the plastic tabs that secure the casing.
As you begin to separate the casing, be mindful of the ribbon cable that connects the front and back panels of the controller. This delicate cable must be carefully disconnected to fully separate the casing halves. Using a pair of tweezers or a spudger tool, gently release the connector that secures the ribbon cable, taking care not to apply excessive force that could damage the connector or the cable itself.
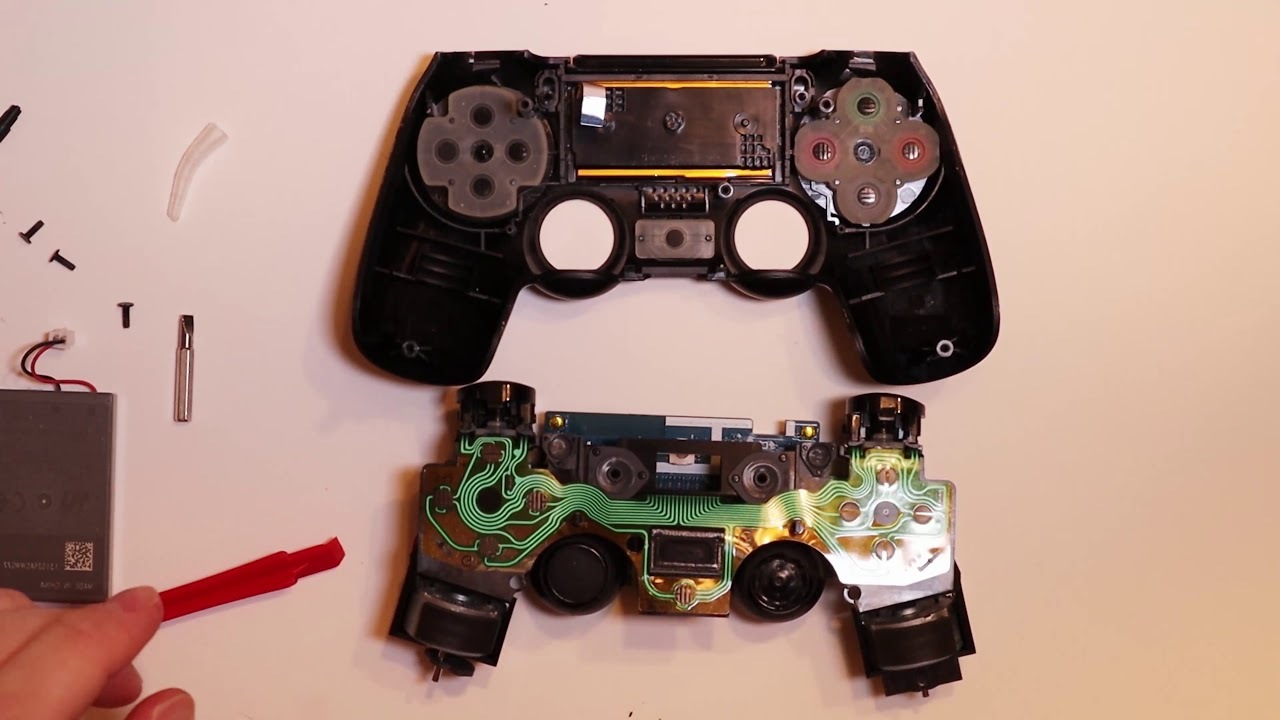
Once the ribbon cable is safely disconnected, set the front panel of the casing aside, exposing the internal components housed within the back panel. Take a moment to observe the intricate layout of the internal components, including the circuit board, buttons, triggers, and rumble motors. This vantage point offers a unique perspective on the technology that powers the controller, providing valuable insights into its design and functionality.
As you navigate the internal components, it's important to handle them with care, avoiding unnecessary pressure or manipulation that could lead to damage. By approaching the disassembly process with precision and attentiveness, you can gain a deeper understanding of the craftsmanship and engineering that underpin the PS4 controller's performance.
With the controller casing now open and its internal components exposed, you've reached a pivotal stage in the disassembly process. This newfound perspective into the inner workings of the controller sets the stage for further exploration and, if necessary, component replacement or customization. As you proceed with the disassembly, maintain a methodical approach and a keen eye for detail, ensuring that each component is handled with the utmost care and respect for its intricate design.
By delicately opening the controller casing and gaining access to its internal components, you've embarked on a journey of discovery and hands-on learning. This immersive experience provides a unique opportunity to deepen your appreciation for the technology that defines the gaming experience, setting the stage for the next phase of the disassembly process.
Removing the Internal Components
With the controller casing open, the next phase of disassembly involves removing the internal components to gain a comprehensive view of the controller's intricate design. The internal layout of the PS4 controller consists of a circuit board, buttons, triggers, rumble motors, and a rechargeable battery, all of which contribute to its functionality and tactile responsiveness.
Begin by carefully lifting the circuit board from the back panel of the controller, taking note of the various connectors and cables that are secured to it. The circuit board serves as the central hub of the controller, housing the electronic components responsible for processing input signals from the buttons and transmitting them to the console. As you lift the circuit board, be mindful of any adhesive or clips that may secure it in place, ensuring a gentle and deliberate approach to prevent damage.
Next, focus on the buttons and triggers, which are integral to the tactile feedback and responsiveness of the controller. These components are typically secured to the back panel of the casing and can be carefully lifted and set aside for inspection and potential customization or replacement. Pay close attention to the placement and orientation of each button and trigger, as they will need to be reinstalled in the correct positions during the reassembly process.
The rumble motors, responsible for delivering haptic feedback during gameplay, are also housed within the controller and can be carefully removed to reveal their compact yet essential role in enhancing the gaming experience. These small, vibration-inducing motors contribute to the immersive nature of gaming, and their careful removal provides a closer look at the technology that enriches the player's interaction with the game environment.
Finally, the rechargeable battery, a crucial power source for the controller, can be gently detached from its housing, allowing for a comprehensive inspection and potential replacement if necessary. The battery's secure yet accessible placement within the controller ensures that it can be easily removed and replaced, offering flexibility for maintenance and customization.
As each internal component is methodically removed and set aside for inspection, the intricate design and engineering of the PS4 controller are brought into focus, providing a firsthand look at the technology that drives its performance. By handling each component with precision and care, you gain valuable insights into the craftsmanship and attention to detail that define this essential gaming accessory.
With the internal components now removed and awaiting inspection, the disassembly process reaches a pivotal stage, setting the stage for a deeper understanding of the controller's inner workings and the potential for customization or maintenance. This hands-on exploration of the controller's internal components offers a unique opportunity to engage with the technology that powers the gaming experience, fostering a deeper appreciation for the engineering that goes into creating these innovative devices.
Read more: How To Delete Games On PS4
Reassembling the Controller
As you embark on the reassembly of the PS4 controller, it's essential to approach the process with the same level of precision and attentiveness that characterized the disassembly. With the internal components inspected and any necessary maintenance or customization completed, the reassembly phase presents an opportunity to restore the controller to its fully functional state while ensuring that each component is securely and accurately reinstalled.
Begin by carefully placing the rechargeable battery back into its designated housing within the controller casing, ensuring that it is properly aligned and secured. The battery serves as the power source for the controller, and its secure placement is essential for uninterrupted gameplay and long-term functionality.
Next, focus on reattaching the rumble motors to their respective positions within the controller. These compact yet crucial components contribute to the immersive gaming experience by delivering haptic feedback, enhancing the player's interaction with the game environment. Ensure that the rumble motors are firmly and correctly positioned, ready to enrich the gaming experience once the controller is reassembled.
As you proceed with the reassembly, carefully reposition the buttons and triggers onto the back panel of the controller casing, aligning them precisely to ensure optimal tactile responsiveness and functionality. Pay close attention to the orientation and placement of each button and trigger, as their accurate positioning is essential for a seamless gaming experience.
With the internal components securely in place, it's time to reattach the circuit board to the back panel of the controller. Take care to reconnect any cables and secure the board in its designated position, ensuring that all connectors are properly engaged. The circuit board serves as the central hub of the controller, processing input signals and transmitting them to the console, making its secure reinstallation crucial for the controller's functionality.
Finally, delicately reconnect the ribbon cable that bridges the front and back panels of the controller casing, ensuring a secure and stable connection. Once the ribbon cable is properly reattached, carefully align the two halves of the controller casing, gently pressing them together to engage the plastic tabs and secure the casing.
By methodically reassembling the controller and ensuring the secure placement of each internal component, you're poised to restore the PS4 controller to its fully functional state. This meticulous approach to reassembly reflects a deep respect for the technology that powers the gaming experience, ensuring that the controller is ready to deliver seamless gameplay and tactile responsiveness.
As the reassembly phase nears completion, take a moment to appreciate the intricate design and engineering that define the PS4 controller, recognizing the craftsmanship and attention to detail that make it an essential tool for gaming enthusiasts. With the controller now reassembled, it stands ready to once again immerse players in captivating gaming experiences, showcasing the seamless integration of technology and design that defines the modern gaming landscape.
Testing the Controller
With the PS4 controller successfully reassembled, the final phase of the disassembly and reassembly process involves testing the controller to ensure that all components are functioning as intended. This critical step serves as a validation of the meticulous work invested in exploring the inner workings of the controller and reaffirms its readiness to deliver seamless gameplay experiences.
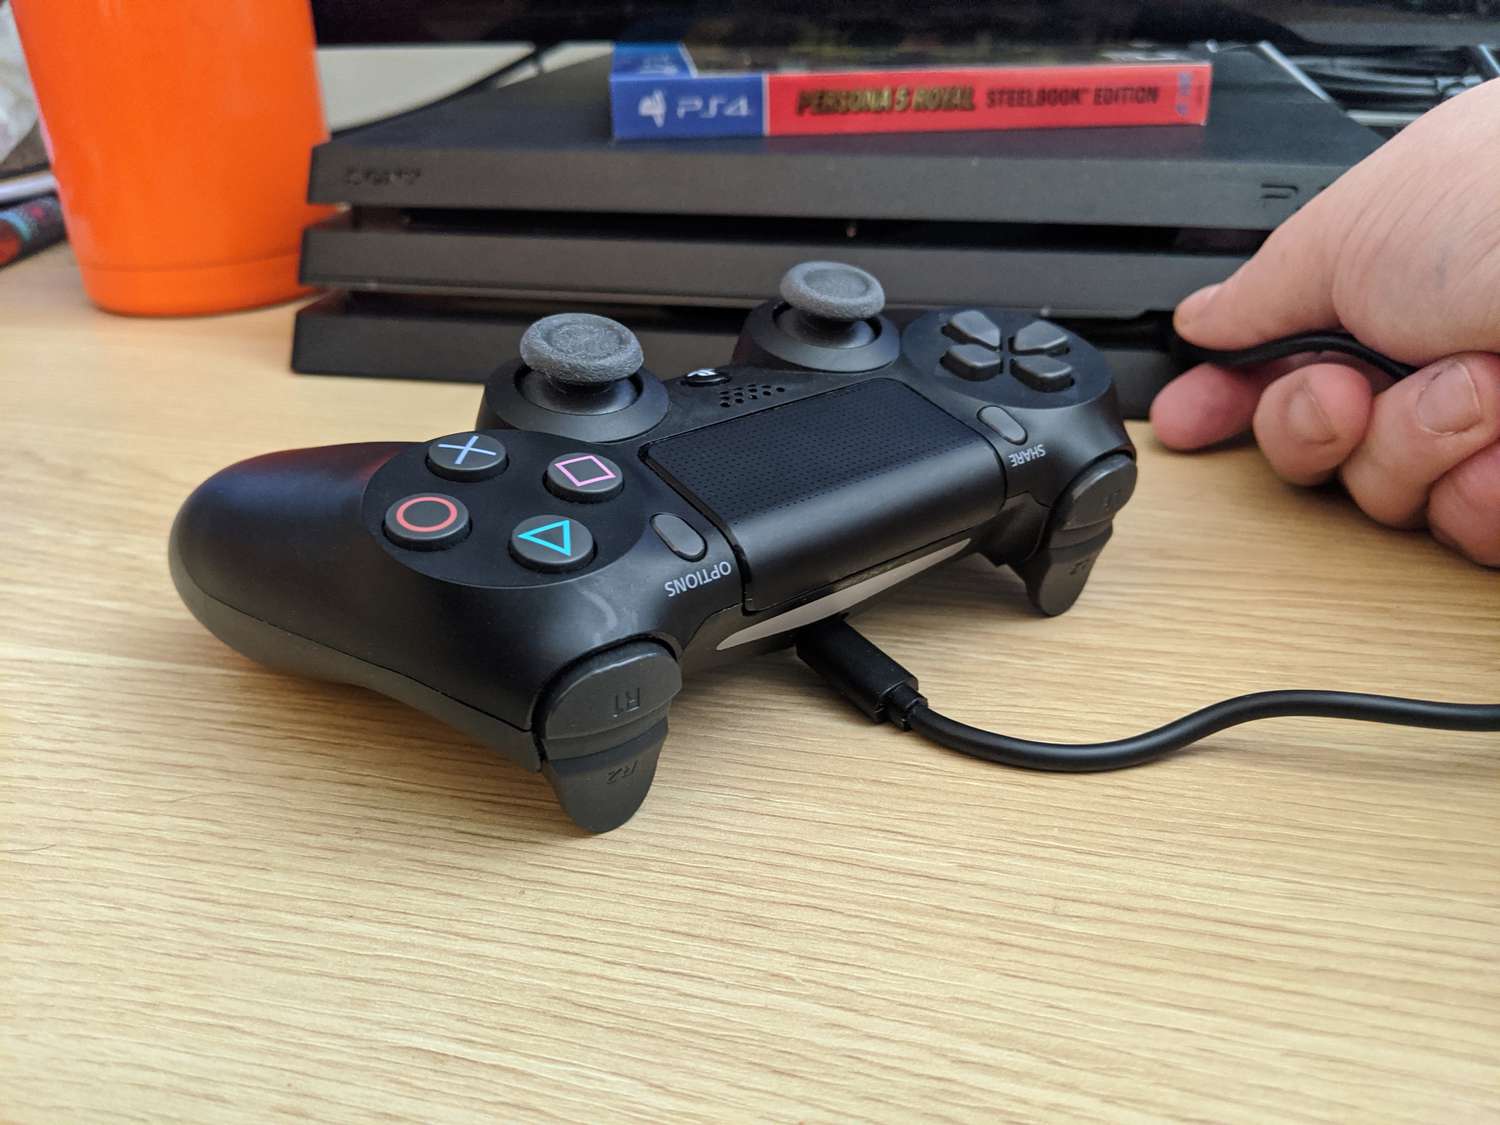
To initiate the testing phase, power on your PlayStation 4 console and ensure that it is in a ready state to receive input from the controller. Once the console is powered up, press the PlayStation button on the controller to establish a connection, verifying that the controller successfully pairs with the console. The illuminated light bar on the controller should indicate a stable connection, signaling its readiness for use.
Next, navigate through the console's menu using the controller, testing each button and trigger to confirm their responsiveness and functionality. Pay close attention to the tactile feedback and responsiveness of the buttons, ensuring that they register input commands accurately and consistently. Test the triggers to verify their smooth operation and responsiveness, essential for precise control in various gaming scenarios.
Engage in gameplay to further assess the controller's performance, immersing yourself in the interactive experiences that showcase its capabilities. Whether navigating through menus, executing precise movements in games, or engaging in intense action sequences, the controller should seamlessly translate your input commands into on-screen actions, delivering a responsive and immersive gaming experience.
During gameplay, pay particular attention to the rumble motors, which enhance the gaming experience by delivering haptic feedback in response to in-game events. The rumble motors should provide subtle yet impactful vibrations, enriching the gameplay and heightening the sense of immersion. Their consistent and nuanced feedback contributes to the overall enjoyment and engagement with the gaming content.
As you thoroughly test the controller in various gaming scenarios, take note of any irregularities or issues that may arise, such as unresponsive buttons, erratic behavior, or inconsistent feedback. Identifying and addressing any such issues promptly ensures that the controller meets the high standards of performance and reliability expected from this essential gaming accessory.
By meticulously testing the controller and evaluating its performance across different gaming experiences, you can confidently affirm its functionality and readiness for extended use. This comprehensive testing phase serves as the final validation of the disassembly and reassembly process, confirming that the controller has been successfully restored to its optimal state, poised to deliver seamless and immersive gaming experiences.
As the testing phase concludes, you can take pride in the hands-on exploration and restoration of the PS4 controller, gaining valuable insights into its inner workings and reaffirming its role as a fundamental tool for gaming enthusiasts. With the controller now validated and ready for use, you can seamlessly transition from the disassembly and reassembly process to fully enjoying the captivating gaming experiences it enables.