Home>Arts and Culture>How To Draw A Christmas Tree
Arts and Culture
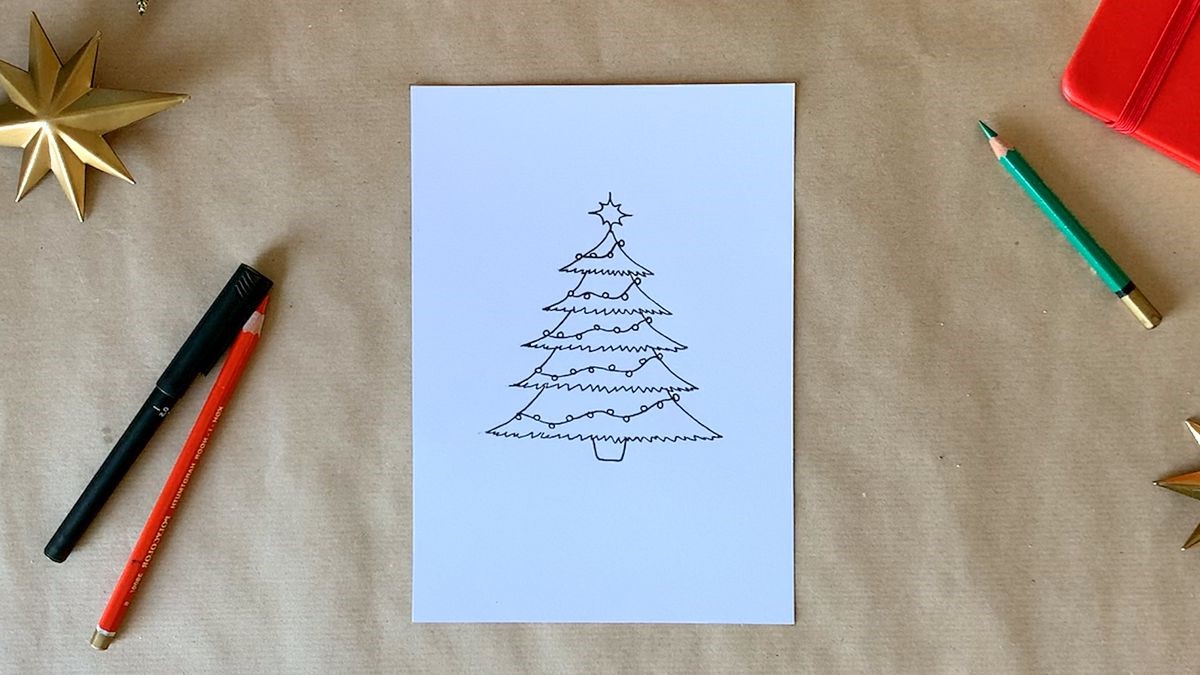
How To Draw A Christmas Tree
Published: February 28, 2024
Learn how to draw a Christmas tree step by step in this easy tutorial. Perfect for arts and culture enthusiasts looking for festive drawing ideas.
(Many of the links in this article redirect to a specific reviewed product. Your purchase of these products through affiliate links helps to generate commission for Noodls.com, at no extra cost. Learn more)
Table of Contents
Introduction
Drawing a Christmas tree is a delightful way to embrace the festive spirit and add a personal touch to your holiday decorations. Whether you're an aspiring artist or simply looking for a fun activity, creating your own Christmas tree illustration can be a rewarding experience. This step-by-step guide will walk you through the process of drawing a classic Christmas tree, complete with lush branches and twinkling ornaments.
As you embark on this artistic journey, remember that there are no strict rules when it comes to drawing a Christmas tree. Each tree is unique, just like the memories and traditions associated with the holiday season. So, feel free to infuse your creativity and add your own flair to the final masterpiece.
With a few simple materials and a dash of imagination, you can bring the enchanting symbol of Christmas into your own hands. So, grab your pencils, paper, and a sprinkle of holiday cheer, and let's dive into the joyful art of drawing a Christmas tree.
Read more: How To Draw A Palm Tree
Materials Needed
To embark on the artistic journey of drawing a Christmas tree, you will need a few essential materials to bring your vision to life. Here's a list of items that will help you create a stunning Christmas tree illustration:
-
Drawing Paper: Begin with a clean sheet of drawing paper that provides a smooth surface for your artwork. Opt for a sturdy paper that can withstand pencil strokes and erasures as you refine your masterpiece.
-
Pencils: A set of quality pencils will be your trusty companions as you sketch and shade the intricate details of the Christmas tree. Consider using a range of pencil grades, from 2H for light outlines to 6B for darker shading.
-
Eraser: An eraser is an indispensable tool for refining your drawing and correcting any stray lines or smudges. Choose a soft, kneaded eraser that can be molded to suit your needs without leaving behind debris.
-
Sharpener: Keep a reliable pencil sharpener on hand to ensure that your pencils are consistently sharp, allowing for precise lines and fine details in your artwork.
-
Ruler: While not mandatory, a ruler can be helpful for creating straight lines and maintaining symmetry in your Christmas tree illustration.
-
Coloring Materials (Optional): If you wish to add a pop of color to your drawing, consider using colored pencils, markers, or watercolors to embellish the Christmas tree with vibrant ornaments and a festive backdrop.
Gather these materials and prepare to unleash your creativity as you embark on the enchanting process of drawing a Christmas tree. With these tools at your disposal, you'll be ready to bring the spirit of the holiday season to life on paper.
Step 1: Draw the Trunk
The first step in drawing a Christmas tree is to lay the foundation by sketching the trunk. Begin by using a sharp pencil to create a vertical line that serves as the central axis of the tree. This line will determine the overall height of the tree and provide a guide for the placement of branches. Keep in mind that the trunk's thickness can vary based on your artistic preference, so feel free to adjust the width to suit your desired aesthetic.
Next, add subtle details to the trunk to infuse it with a natural and realistic appearance. Consider incorporating gentle curves and irregularities to mimic the organic texture of a tree trunk. By adding small knots, creases, and subtle indentations, you can bring depth and character to the trunk, evoking the charm of a genuine evergreen tree.
As you refine the trunk, pay attention to the tapering effect that occurs as you move towards the top. Trees typically exhibit a gradual decrease in width as they ascend, so aim to capture this graceful tapering in your illustration. This gradual narrowing will contribute to the tree's elegant silhouette and create a sense of balance in the overall composition.
To enhance the three-dimensional quality of the trunk, consider adding shading to create depth and dimension. Use your pencil to gently shade one side of the trunk, allowing the opposite side to remain lighter to simulate the play of light and shadow. This shading technique will imbue the trunk with a sense of volume, making it appear more lifelike and substantial.
Remember, the trunk serves as the sturdy anchor for the sprawling branches that will adorn the Christmas tree, so take your time to ensure that it exudes a natural and captivating allure. With the trunk sketched and embellished with intricate details, you have laid the groundwork for the enchanting Christmas tree that will soon grace your artistic creation.
Step 2: Draw the First Layer of Branches
With the sturdy trunk as the anchor of your Christmas tree illustration, it's time to breathe life into the composition by adding the first layer of branches. These foundational branches will form the framework upon which the lush foliage of the tree will flourish, contributing to its full-bodied and festive appearance.
Begin by envisioning the placement of the first layer of branches, considering the natural asymmetry and organic flow that characterizes a real evergreen tree. Using your pencil, sketch a series of gently curving lines extending from the trunk, radiating outward to create a sense of depth and dimension. Embrace the irregularity of nature as you vary the length and angle of the branches, allowing them to gracefully extend in different directions.
As you draw the branches, pay attention to the spacing between each one, aiming for a harmonious distribution that avoids overcrowding or excessive clustering. This thoughtful arrangement will contribute to the balanced and visually appealing structure of the Christmas tree, allowing ample space for the subsequent layers of branches to unfurl.
To infuse the branches with a lifelike quality, consider adding subtle details such as small twigs, tiny protrusions, and delicate bends that mimic the organic intricacies of real tree branches. These nuanced touches will impart a sense of authenticity to your illustration, evoking the enchanting beauty of a natural evergreen adorned with the spirit of the holiday season.
As you refine the first layer of branches, take the opportunity to incorporate shading to create depth and volume. Use your pencil to add gentle shading beneath the branches, subtly indicating the presence of shadow and enhancing the three-dimensional quality of the tree. This shading technique will imbue the branches with a sense of depth, making them appear more substantial and contributing to the overall realism of the illustration.
With the first layer of branches sketched and adorned with intricate details, you have set the stage for the verdant splendor that will soon adorn your Christmas tree. The foundation is now in place, and the tree is poised to flourish with the addition of subsequent layers of branches, bringing it one step closer to becoming a captivating symbol of holiday cheer.
Step 3: Draw the Second Layer of Branches
As you progress in the creation of your Christmas tree illustration, the addition of the second layer of branches will infuse your artwork with depth and lushness, bringing the tree to life with a captivating sense of fullness and vibrancy.
Visualize the placement of the second layer of branches, envisioning them as an extension of the foundational branches while introducing a sense of density and opulence to the tree's foliage. With your pencil, delicately sketch a series of gracefully arching lines that emanate from the trunk, intertwining with the existing branches to create a rich and layered canopy of greenery. Embrace the organic asymmetry of nature as you vary the length and curvature of the branches, allowing them to intertwine and overlap in a natural and visually compelling manner.
As you draw the second layer of branches, consider the interplay of light and shadow, envisioning how the foliage would cascade and overlap to create pockets of depth and dimension within the tree. By incorporating subtle variations in the thickness and density of the branches, you can evoke the captivating interplay of light filtering through the lush foliage, infusing your illustration with a sense of enchanting realism.
To imbue the branches with a lifelike quality, add intricate details such as delicate clusters of needles, tiny buds, and subtle bends that capture the organic intricacies of real tree branches. These nuanced touches will bestow a sense of authenticity upon your illustration, evoking the timeless allure of a natural evergreen adorned with the festive spirit of the holiday season.
As you refine the second layer of branches, seize the opportunity to introduce shading to enhance the depth and volume of the tree. With your pencil, delicately shade beneath the layers of branches, creating subtle gradients that convey the presence of shadow and contribute to the three-dimensional quality of the tree. This shading technique will bestow the branches with a sense of depth and substance, enriching the overall realism of your artwork.
With the addition of the second layer of branches, your Christmas tree illustration is poised to exude a captivating sense of lushness and vitality, drawing the viewer into a world of festive enchantment. The tree now stands adorned with layers of verdant beauty, ready to embrace the final embellishments that will elevate it into a timeless symbol of holiday cheer.
Read more: How To Grow Mangrove Trees Minecraft
Step 4: Draw the Third Layer of Branches
As you delve into the intricate art of drawing a Christmas tree, the addition of the third layer of branches will infuse your illustration with a captivating sense of lushness and depth, bringing the tree to life with a rich and opulent canopy of greenery.
Visualize the placement of the third layer of branches, envisioning them as a continuation of the intricate foliage that adorns the tree, contributing to its full-bodied and vibrant appearance. With your pencil, delicately sketch a series of gracefully curving lines that extend from the trunk, intertwining with the existing branches to create a luxuriant and layered expanse of greenery. Embrace the natural asymmetry of nature as you vary the length and curvature of the branches, allowing them to intertwine and overlap in a visually compelling manner.
As you draw the third layer of branches, consider the interplay of light and shadow, envisioning how the foliage would cascade and overlap to create pockets of depth and dimension within the tree. By incorporating subtle variations in the thickness and density of the branches, you can evoke the captivating interplay of light filtering through the lush foliage, infusing your illustration with a sense of enchanting realism.
To imbue the branches with a lifelike quality, add intricate details such as delicate clusters of needles, tiny buds, and subtle bends that capture the organic intricacies of real tree branches. These nuanced touches will bestow a sense of authenticity upon your illustration, evoking the timeless allure of a natural evergreen adorned with the festive spirit of the holiday season.
As you refine the third layer of branches, seize the opportunity to introduce shading to enhance the depth and volume of the tree. With your pencil, delicately shade beneath the layers of branches, creating subtle gradients that convey the presence of shadow and contribute to the three-dimensional quality of the tree. This shading technique will bestow the branches with a sense of depth and substance, enriching the overall realism of your artwork.
With the addition of the third layer of branches, your Christmas tree illustration is poised to exude a captivating sense of lushness and vitality, drawing the viewer into a world of festive enchantment. The tree now stands adorned with layers of verdant beauty, ready to embrace the final embellishments that will elevate it into a timeless symbol of holiday cheer.
Step 5: Add Details
With the foundational structure of the Christmas tree sketched and adorned with layers of lush branches, it's time to infuse the illustration with captivating details that will elevate it into a timeless symbol of holiday cheer. As you embark on this final step, consider the following elements to add depth, charm, and festive allure to your artwork.
Ornaments and Decorations
Envision the Christmas tree adorned with an array of ornaments, each adding a touch of sparkle and personality to the illustration. From delicate baubles and shimmering tinsel to radiant lights and intricate figurines, the ornaments will infuse the tree with a sense of festive opulence. Delicately sketch the ornaments, allowing them to dangle from the branches and reflect the joyous spirit of the holiday season.
Garland and Ribbons
Introduce the element of whimsy by incorporating garlands and ribbons cascading throughout the tree. These graceful embellishments can weave through the branches, adding a sense of movement and elegance to the composition. Whether adorned with twinkling lights or adorned with festive patterns, the garlands and ribbons will bestow the tree with a captivating sense of holiday enchantment.
Read more: How To Draw A Shoe
Star or Tree Topper
At the pinnacle of the tree, envision the crowning glory—a radiant star or an ornate tree topper. This iconic element serves as the focal point of the illustration, symbolizing the culmination of holiday traditions and the spirit of celebration. Whether it's a gleaming starburst or a majestic angel, the tree topper will bestow the artwork with a sense of grandeur and festive significance.
Presents and Gifts
To evoke the joy of giving and receiving, consider adding presents and gifts nestled beneath the tree. Sketch intricately wrapped packages adorned with ribbons and bows, infusing the illustration with a sense of anticipation and delight. The presence of gifts beneath the tree will evoke the heartwarming traditions of the holiday season, adding a touch of narrative charm to the artwork.
Snow or Glitter
To evoke the enchanting ambiance of a winter wonderland, consider adding delicate touches of snow or glitter to the illustration. Gently sketch snowflakes drifting amidst the branches or sprinkle glitter to capture the glistening allure of a frost-kissed landscape. These subtle details will infuse the artwork with a sense of magical whimsy, transporting the viewer into a world of holiday splendor.
As you add these enchanting details to your Christmas tree illustration, allow your creativity to flourish, infusing the artwork with your unique artistic vision and the timeless charm of the holiday season. With each delicate stroke and thoughtful embellishment, the illustration will blossom into a captivating symbol of festive joy, ready to enchant and delight all who behold it.
Conclusion
As you conclude your artistic journey of drawing a Christmas tree, take a moment to revel in the enchanting creation that now graces your canvas. The process of bringing this timeless symbol of holiday cheer to life has not only honed your artistic skills but has also allowed you to immerse yourself in the joyous spirit of the season. With each carefully sketched branch, delicately rendered ornament, and whimsically added detail, you have woven a tapestry of festive enchantment that captures the essence of the holiday season.
Your Christmas tree illustration stands as a testament to the power of creativity and imagination, serving as a visual ode to the traditions, memories, and warmth that define this special time of year. Whether adorned with twinkling lights, shimmering ornaments, or a radiant star atop its boughs, your artwork embodies the timeless allure of the holiday season, evoking a sense of wonder and delight in all who behold it.
As you reflect on the artistic process, remember that the beauty of drawing a Christmas tree lies not only in the final masterpiece but also in the journey of creation itself. Each pencil stroke and thoughtful embellishment has allowed you to infuse the illustration with your unique artistic voice, transforming a blank canvas into a captivating symbol of festive joy. The act of drawing a Christmas tree becomes a celebration of tradition, creativity, and the enduring magic of the holiday season.
Whether you choose to display your artwork as a cherished decoration, share it with loved ones, or simply revel in the satisfaction of artistic accomplishment, your Christmas tree illustration serves as a reminder of the boundless creativity and joy that the holiday season inspires. It stands as a testament to the power of art to evoke emotion, kindle nostalgia, and bring people together in the shared embrace of tradition and celebration.
As you bid farewell to this artistic endeavor, carry with you the memories of the creative process, the joy of bringing a beloved symbol to life, and the enduring spirit of the holiday season that permeates your artwork. Let your Christmas tree illustration serve as a beacon of festive cheer, a testament to the timeless traditions that unite us, and a reminder of the enduring magic that infuses the holiday season with warmth, wonder, and enchantment.