Home>Home and Garden>How To Clean Front Load Washer
Home and Garden
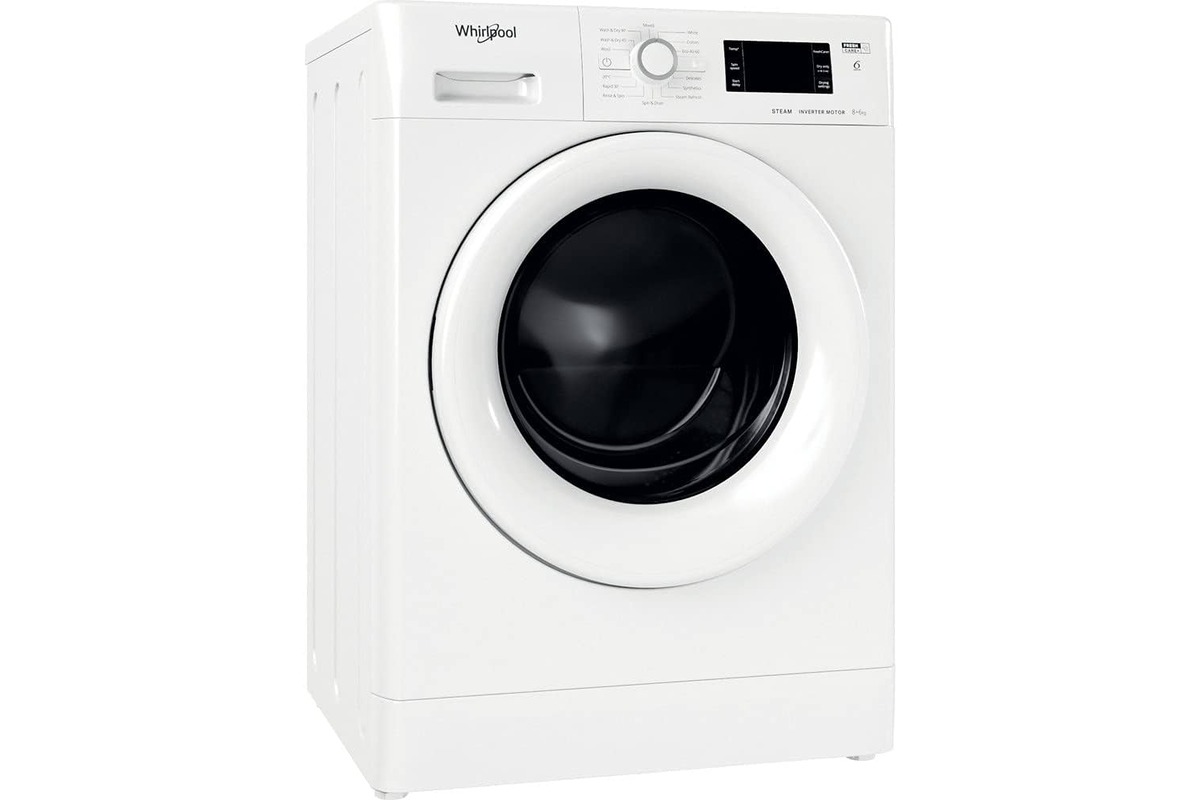
How To Clean Front Load Washer
Published: March 1, 2024
Learn how to effectively clean your front load washer with our expert tips and tricks. Keep your home and garden in top shape with our easy-to-follow cleaning guide.
(Many of the links in this article redirect to a specific reviewed product. Your purchase of these products through affiliate links helps to generate commission for Noodls.com, at no extra cost. Learn more)
Table of Contents
Introduction
Cleaning a front load washer is an essential task that often gets overlooked in our regular cleaning routines. Over time, front load washers can develop unpleasant odors and accumulate residue from detergent and fabric softener, leading to potential mold and mildew growth. This not only affects the cleanliness of your laundry but can also impact the overall performance of the machine. Fortunately, with a few simple steps, you can keep your front load washer fresh and clean, ensuring that it continues to operate efficiently.
Regular maintenance of your front load washer not only eliminates odors and residue but also extends the lifespan of the appliance, saving you money in the long run. By following a few straightforward cleaning procedures, you can maintain a hygienic and odor-free washing machine, providing you with peace of mind and clean laundry every time.
In this comprehensive guide, we will walk you through the step-by-step process of cleaning your front load washer, covering everything from gathering the necessary supplies to running a cleaning cycle. By the end of this article, you will have the knowledge and confidence to effectively clean your front load washer, ensuring that it remains in optimal condition for years to come. So, let's dive in and discover the simple yet effective methods to keep your front load washer sparkling clean and odor-free.
Read more: How To Clean The Tub Of Your LG Washer
Step 1: Gather Your Supplies
Before embarking on the cleaning process for your front load washer, it's crucial to gather the necessary supplies. Having the right tools and cleaning agents at hand will streamline the process and ensure thorough cleaning. Here's a comprehensive list of supplies you'll need:
1. White Vinegar:
White vinegar is a versatile and effective natural cleaner that helps dissolve mineral deposits, mold, and mildew. It's an essential component for cleaning a front load washer, as it effectively eliminates odors and residue.
2. Baking Soda:
Baking soda is renowned for its deodorizing and abrasive properties, making it an excellent choice for scrubbing away grime and residue from the washer's interior surfaces.
3. Microfiber Cloth:
A soft microfiber cloth is ideal for wiping down the gasket, door seal, and exterior of the washer. Its gentle texture ensures that surfaces are cleaned without causing damage.
Read more: How To Reset Whirlpool Washer
4. Q-Tips or Small Brush:
These tools are essential for reaching tight spaces and crevices, such as the detergent dispenser and the nooks around the door seal.
5. Hot Water:
Hot water is effective for dissolving and rinsing away residues, leaving the interior of the washer clean and fresh.
6. Gloves:
Wearing gloves is advisable to protect your hands from any residual grime or cleaning agents during the process.
7. All-Purpose Cleaner (Optional):
If there are stubborn stains or buildup, an all-purpose cleaner can be used in conjunction with the other supplies to ensure a thorough cleaning.
By ensuring that you have these supplies on hand, you'll be well-prepared to tackle the cleaning process effectively. With these tools and cleaning agents at your disposal, you can proceed to the next steps with confidence, knowing that your front load washer will receive a comprehensive and thorough cleaning.
Read more: How To Unclog A Washer Drain
Step 2: Clean the Gasket and Door Seal
Cleaning the gasket and door seal of your front load washer is a crucial step in maintaining a hygienic and odor-free appliance. Over time, these areas can accumulate dirt, grime, and moisture, providing an ideal environment for mold and mildew growth. By following these simple yet effective cleaning steps, you can ensure that the gasket and door seal remain clean and free from unpleasant odors.
-
Inspect the Gasket: Start by carefully inspecting the rubber gasket around the door of the washer. Look for any visible residue, mold, or mildew growth. Pay close attention to the folds and crevices where moisture and debris tend to accumulate.
-
Prepare a Cleaning Solution: In a small bowl, mix equal parts of white vinegar and hot water. This solution is highly effective in dissolving mold, mildew, and soap scum, while also eliminating odors. For stubborn stains or buildup, you can add a small amount of baking soda to the solution to enhance its cleaning power.
-
Soak a Microfiber Cloth: Dip a clean microfiber cloth into the prepared cleaning solution. Wring out any excess liquid to prevent dripping, as excessive moisture can lead to further mold growth.
-
Thoroughly Wipe the Gasket: Gently wipe the entire rubber gasket with the dampened cloth, paying special attention to the folds and grooves. Ensure that you reach into all the crevices to remove any accumulated grime and residue. The acidic properties of the vinegar will help dissolve any mold or mildew, while the cloth's gentle texture prevents damage to the rubber seal.
-
Use Q-Tips or Small Brush: For hard-to-reach areas and tight crevices, utilize Q-tips or a small brush to ensure thorough cleaning. These tools allow you to access areas that may be challenging to reach with a cloth, ensuring that no residue is left behind.
-
Dry the Gasket: Once the gasket is thoroughly cleaned, use a dry microfiber cloth to wipe away any remaining moisture. Leaving the gasket dry is essential in preventing mold and mildew from reoccurring.
By following these steps, you can effectively clean the gasket and door seal of your front load washer, eliminating any accumulated grime, mold, or mildew. This not only ensures a hygienic washing environment but also contributes to the longevity and optimal performance of your appliance. Regular maintenance of the gasket and door seal is key to preventing unpleasant odors and maintaining a clean and efficient front load washer.
Step 3: Clean the Detergent Dispenser
Cleaning the detergent dispenser of your front load washer is an essential step in maintaining a hygienic and efficient laundry appliance. Over time, residue from detergents and fabric softeners can accumulate in the dispenser, leading to mold growth and unpleasant odors. By following these detailed cleaning steps, you can ensure that the detergent dispenser remains clean and free from buildup, contributing to the overall cleanliness of your washer.
-
Remove the Dispenser Drawer: Start by removing the detergent dispenser drawer from the front load washer. Most dispensers can be easily removed by pressing a release button or lever. Once removed, inspect the drawer for any visible residue or mold growth. Pay attention to the compartments where detergent, bleach, and fabric softener are dispensed.
-
Soak in a Cleaning Solution: Prepare a cleaning solution by mixing equal parts of hot water and white vinegar in a small container. Submerge the detergent dispenser drawer in the solution, ensuring that all compartments are fully covered. The acidic properties of vinegar help dissolve residue and eliminate odors, while hot water aids in loosening any stubborn buildup.
-
Scrub and Rinse: Use a small brush or scrubbing sponge to gently scrub the interior and exterior of the dispenser drawer. Pay close attention to any visible residue or discoloration, focusing on areas where detergent and fabric softener are dispensed. Thoroughly rinse the dispenser drawer with hot water to remove any loosened residue and cleaning solution.
-
Inspect and Dry: After cleaning and rinsing, carefully inspect the dispenser drawer for any remaining residue or mold. If necessary, repeat the cleaning process to ensure thorough removal. Once clean, use a dry cloth to wipe the dispenser drawer, ensuring that it is completely dry before reinserting it into the washer.
-
Clean the Dispenser Cavity: While the dispenser drawer is removed, take the opportunity to clean the cavity where the dispenser sits. Use a damp cloth or sponge to wipe down the cavity, removing any accumulated residue or mold. Ensure that the cavity is completely dry before reinserting the clean dispenser drawer.
By following these detailed steps, you can effectively clean the detergent dispenser of your front load washer, preventing mold growth and eliminating residue that can lead to unpleasant odors. Regular maintenance of the detergent dispenser contributes to a clean and hygienic laundry environment, ensuring that your front load washer operates efficiently and provides fresh, clean laundry with every wash.
Step 4: Run a Cleaning Cycle
Running a cleaning cycle is a pivotal step in maintaining the cleanliness and optimal performance of your front load washer. This process involves using a combination of natural cleaning agents and hot water to thoroughly clean the interior of the washer, eliminating any lingering odors, residue, and mold or mildew growth. By following these detailed steps, you can ensure that your front load washer remains fresh, hygienic, and free from unpleasant odors.
-
Prepare the Cleaning Solution:
Begin by preparing a cleaning solution using white vinegar and baking soda. In a measuring cup, mix 2 cups of white vinegar with 1/4 cup of baking soda. The combination of these natural cleaning agents creates a powerful solution that effectively dissolves residue and eliminates odors. -
Pour the Solution into the Detergent Dispenser:
Open the detergent dispenser drawer and pour the prepared cleaning solution into the detergent compartment. This ensures that the cleaning solution is distributed throughout the interior of the washer during the cleaning cycle. -
Select the Cleaning Cycle:
Consult your washer's user manual to determine the appropriate cleaning cycle. Many front load washers have a specific cleaning or maintenance cycle designed to thoroughly clean the interior. If your washer does not have a designated cleaning cycle, select the hottest and longest wash cycle available. -
Run the Cleaning Cycle:
Start the cleaning cycle, allowing the washer to run through the entire wash and rinse process. The combination of hot water and the cleaning solution effectively cleans and sanitizes the interior, dissolving residue and eliminating odors. The agitation and spinning action of the washer ensure that the cleaning solution reaches all interior surfaces, including the drum and gasket. -
Additional Cleaning Steps:
For stubborn residue or persistent odors, consider adding an extra rinse cycle after the cleaning cycle is complete. This helps ensure that any remaining cleaning solution or loosened residue is thoroughly rinsed away, leaving the interior of the washer fresh and clean. -
Wipe Down the Interior:
Once the cleaning cycle and any additional rinse cycles are complete, use a clean microfiber cloth to wipe down the interior surfaces of the washer. Pay special attention to the drum, gasket, and door seal, ensuring that any loosened residue or mold is removed.
By running a thorough cleaning cycle, you can effectively maintain the cleanliness and optimal performance of your front load washer. This process not only eliminates odors and residue but also contributes to a hygienic laundry environment, ensuring that your washer continues to provide fresh and clean laundry with every wash. Regular maintenance and cleaning cycles are essential for preserving the longevity and efficiency of your front load washer, providing you with peace of mind and a reliable laundry appliance.
Step 5: Wipe Down the Exterior
Maintaining the exterior cleanliness of your front load washer is just as important as cleaning its interior components. Over time, the exterior surfaces can accumulate dust, detergent splatters, and general grime, detracting from the overall appearance of the appliance. Additionally, regular wiping of the exterior helps prevent the transfer of dirt and residue onto freshly laundered clothes. By following these simple yet effective steps, you can ensure that the exterior of your front load washer remains clean and presentable.
-
Prepare a Cleaning Solution:
Begin by preparing a mild cleaning solution using warm water and a small amount of gentle liquid detergent. Avoid using harsh or abrasive cleaners, as they can damage the finish of the washer. The mild cleaning solution effectively removes surface dirt and grime without causing any damage. -
Dampen a Microfiber Cloth:
Dip a soft microfiber cloth into the prepared cleaning solution. Wring out any excess liquid to ensure that the cloth is damp but not dripping. Microfiber cloths are gentle on the exterior surfaces and effectively trap dirt and residue without scratching or damaging the finish. -
Wipe the Exterior Surfaces:
Starting from the top of the washer, gently wipe down the exterior surfaces with the dampened microfiber cloth. Pay attention to areas that are prone to splatters and dust accumulation, such as the control panel, door, and the top of the washer. Use light, circular motions to lift and remove any surface dirt and grime. -
Focus on Detailing:
For areas with stubborn stains or dried-on residue, such as around the detergent dispenser or control knobs, use a soft-bristled brush or a dampened cotton swab to gently scrub and remove the buildup. Take care to avoid excessive moisture around electronic components and controls. -
Dry and Polish:
Once the exterior surfaces are thoroughly wiped down and any stubborn residue is removed, use a dry microfiber cloth to buff and polish the surfaces. This step not only removes any remaining moisture but also leaves the exterior with a clean and polished appearance. -
Inspect and Touch Up:
After wiping down and drying the exterior, take a moment to inspect the surfaces for any missed spots or lingering residue. Touch up any remaining areas with the dampened microfiber cloth, ensuring that the entire exterior is clean and free from dirt and grime.
By incorporating these steps into your cleaning routine, you can effectively maintain the exterior cleanliness of your front load washer, ensuring that it remains visually appealing and free from surface dirt and residue. A clean exterior not only enhances the overall aesthetic of the appliance but also reflects your commitment to maintaining a hygienic and well-kept laundry environment.
Read more: Imposter Syndrome How To Display Front End
Step 6: Leave the Door Open
After completing the cleaning process for your front load washer, it's essential to establish a simple yet effective routine that contributes to the ongoing cleanliness and maintenance of the appliance. Leaving the washer door open after each use is a crucial practice that helps prevent the development of mold, mildew, and unpleasant odors. This step allows for proper ventilation and drying of the interior components, ensuring that moisture is minimized and the growth of odor-causing bacteria is inhibited.
Leaving the door ajar or fully open after each laundry cycle allows the interior of the washer, including the drum and gasket, to air out and dry thoroughly. This simple act helps prevent the accumulation of moisture, which can lead to the development of mold and mildew over time. By allowing air to circulate within the washer, any residual moisture from the previous wash is effectively evaporated, reducing the risk of unpleasant odors and maintaining a fresh and hygienic interior.
In addition to preventing mold and mildew, leaving the door open also contributes to the longevity and optimal performance of the front load washer. By minimizing moisture retention, this practice helps preserve the integrity of internal components, such as the drum, gasket, and seals. Over time, consistent ventilation and drying reduce the likelihood of issues related to mold-related damage and ensure that the washer continues to operate efficiently.
To establish this routine, simply leave the door of the front load washer open immediately after removing the freshly laundered clothes. Allow the interior to air out for a few hours or until completely dry before closing the door. By incorporating this practice into your laundry routine, you contribute to the ongoing cleanliness and maintenance of your front load washer, ensuring that it remains odor-free, hygienic, and in optimal working condition for years to come.
By following these comprehensive steps, you can effectively clean and maintain your front load washer, ensuring that it continues to provide fresh and clean laundry while operating efficiently. Incorporating these practices into your regular cleaning routine not only preserves the longevity of the appliance but also contributes to a hygienic and odor-free laundry environment.
Conclusion
In conclusion, maintaining a clean and odor-free front load washer is essential for ensuring hygienic and efficient laundry cycles. By following the comprehensive steps outlined in this guide, you can effectively preserve the cleanliness and optimal performance of your appliance. From gathering the necessary supplies to implementing a routine for ongoing maintenance, each step plays a crucial role in preventing mold and mildew growth, eliminating residue, and preserving the longevity of the washer.
Regular cleaning of the gasket and door seal, along with the detergent dispenser, not only eliminates odors but also contributes to a hygienic laundry environment. The use of natural cleaning agents such as white vinegar and baking soda ensures thorough cleaning without the use of harsh chemicals, promoting a safer and eco-friendly approach to maintenance.
Running a dedicated cleaning cycle with a combination of natural cleaning agents and hot water effectively sanitizes the interior of the washer, ensuring that any lingering odors and residue are eliminated. This process not only contributes to a fresh and clean laundry environment but also aids in preventing the transfer of dirt and residue onto freshly laundered clothes.
Additionally, maintaining the exterior cleanliness of the washer through gentle wiping and detailing ensures that the appliance remains visually appealing and free from surface dirt and grime. This practice not only enhances the overall aesthetic of the washer but also reflects a commitment to maintaining a hygienic and well-kept laundry environment.
Lastly, the simple yet effective practice of leaving the washer door open after each use contributes to ongoing maintenance by allowing for proper ventilation and drying of the interior components. This routine helps prevent the development of mold, mildew, and unpleasant odors, ultimately preserving the longevity and optimal performance of the appliance.
By incorporating these practices into your regular cleaning routine, you can ensure that your front load washer continues to provide fresh and clean laundry while operating efficiently. With a commitment to ongoing maintenance and cleanliness, you can enjoy a hygienic and odor-free laundry environment, providing peace of mind and a reliable laundry appliance for years to come.