Lifestyle
How To Clean Vans
Published: March 3, 2024
Learn the best methods for cleaning your vans and keeping them looking fresh. Discover lifestyle tips for maintaining your favorite footwear.
(Many of the links in this article redirect to a specific reviewed product. Your purchase of these products through affiliate links helps to generate commission for Noodls.com, at no extra cost. Learn more)
Table of Contents
Introduction
Vans are more than just a mode of transportation; they are an expression of personal style and a reflection of the adventures they've embarked on. Whether you use your vans for skateboarding, hiking, or simply cruising around town, they inevitably accumulate dirt, mud, and other debris over time. Cleaning your vans not only maintains their appearance but also prolongs their lifespan, ensuring that they continue to accompany you on countless more journeys.
Cleaning vans is a simple yet rewarding task that allows you to reconnect with your trusty companions. By investing a little time and effort, you can restore your vans to their former glory, ready to tackle the next escapade. In this comprehensive guide, we will walk you through the step-by-step process of cleaning your vans, inside and out, to ensure they remain a source of pride and comfort.
So, gather your cleaning supplies and let's embark on this journey to revive and rejuvenate your beloved vans. Whether they've trekked through muddy trails or endured the hustle and bustle of city life, it's time to show your vans some well-deserved care and attention. Let's dive into the materials needed and the step-by-step cleaning process to bring back the sparkle and freshness to your cherished footwear.
Read more: How To Lace Vans
Materials Needed
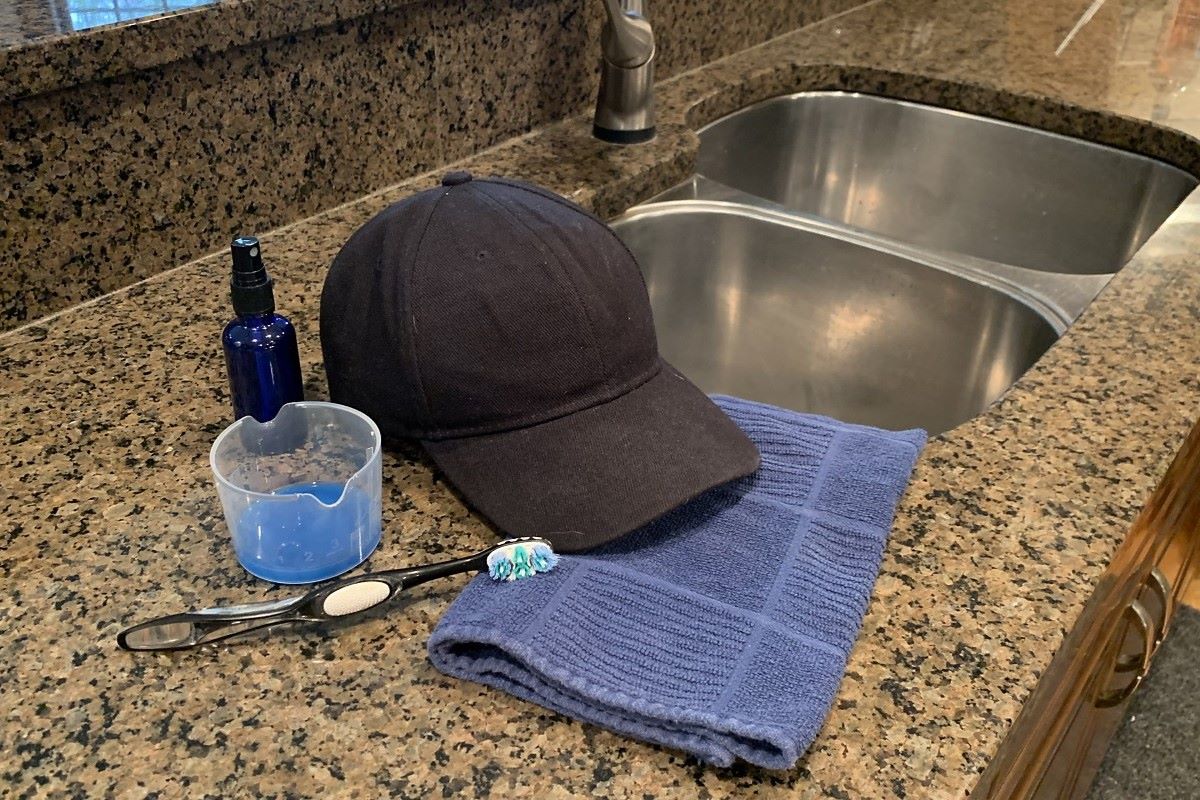
Before embarking on the journey to restore your vans to their pristine condition, it's essential to gather the necessary materials. Here's a comprehensive list of items you'll need to ensure a thorough and effective cleaning process:
1. Mild Detergent or Shoe Cleaner:
Select a gentle, non-abrasive detergent or specialized shoe cleaner suitable for the material of your vans. Avoid harsh chemicals that may damage the fabric or leather.
2. Soft-Bristled Brush:
A soft-bristled brush, such as a shoe brush or an old toothbrush, will help remove stubborn dirt and stains without causing damage to the material.
3. Water:
Have access to clean water for rinsing and diluting the cleaning solution.
4. Microfiber Cloth or Sponge:
Utilize a soft microfiber cloth or sponge to apply the cleaning solution and gently scrub the surface of your vans.
5. Toothpicks or Cotton Swabs:
These small tools are handy for reaching crevices and intricate areas, ensuring a thorough cleaning process.
6. White Vinegar (Optional):
For particularly tough stains or odors, white vinegar can be used as a natural and effective cleaning agent.
7. Newspaper or Paper Towels:
Prepare these for stuffing inside the shoes during the drying process to help maintain their shape and absorb excess moisture.
Read more: How To Clean A Toaster
8. Odor Neutralizer (Optional):
If your vans have developed unpleasant odors, consider using an odor neutralizing spray or powder to freshen them up.
9. Waterproofing Spray (Optional):
For canvas or fabric vans, a waterproofing spray can help protect them from moisture and extend their longevity.
10. Shoe Trees (Optional):
Invest in shoe trees to help maintain the shape of your vans during storage and drying.
By ensuring you have these materials at your disposal, you'll be well-equipped to tackle the cleaning process with confidence and precision. With the right tools and a little elbow grease, you'll soon witness your vans undergo a remarkable transformation, ready to accompany you on countless more adventures.
Step 1: Remove Dirt and Debris
The first step in revitalizing your beloved vans involves the thorough removal of dirt, mud, and debris that have accumulated over time. This initial cleaning stage sets the foundation for a more effective and comprehensive cleaning process, ensuring that the exterior and interior surfaces are ready to receive a deeper cleanse.
Begin by removing the shoelaces from your vans. This simple step allows for easier access to the tongue and ensures that no area is left untouched during the cleaning process. Next, gently tap the shoes together to dislodge loose dirt and debris, allowing them to fall away from the surface. For stubborn dirt and mud, utilize a soft-bristled brush to carefully brush away the buildup, paying particular attention to the seams and textured areas where dirt tends to hide.
To address more intricate areas and hard-to-reach spots, such as the eyelets and grooves of the outsole, employ toothpicks or cotton swabs. These tools enable you to meticulously remove debris without causing damage to the material. Additionally, for fabric or canvas vans, consider using a lint roller to effectively lift away any remaining particles and restore the surface to its original cleanliness.
For the interior of your vans, gently tap them upside down to dislodge any loose debris, ensuring that the insoles are removed beforehand. Once the majority of loose dirt has been expelled, use a handheld vacuum cleaner with a brush attachment to thoroughly clean the interior, paying attention to the seams and corners where dirt tends to accumulate.
By meticulously removing dirt and debris from both the exterior and interior of your vans, you set the stage for a more effective and rewarding cleaning process. This preparatory step not only enhances the overall cleanliness of your vans but also ensures that subsequent cleaning efforts yield optimal results, allowing you to fully appreciate the transformation that awaits your cherished footwear.
Read more: How To Clean Birkenstocks
Step 2: Clean the Exterior
Cleaning the exterior of your vans is a crucial step in restoring their appearance and prolonging their lifespan. Whether your vans are made of canvas, leather, or synthetic materials, each surface requires specific care to ensure a thorough and gentle cleaning process.
Canvas Vans:
For canvas vans, begin by creating a cleaning solution using a mild detergent or specialized shoe cleaner diluted in water. Dip a soft-bristled brush or sponge into the solution and gently scrub the exterior of the shoes in a circular motion, paying attention to stained or soiled areas. Avoid using excessive force to prevent damage to the fabric.
To address stubborn stains, consider applying a paste of baking soda and water to the affected areas, allowing it to sit for a few minutes before gently scrubbing with a brush. This natural cleaning method effectively lifts away tough stains without compromising the integrity of the canvas.
After cleaning, rinse the exterior of the vans with clean water to remove any residual cleaning solution. Ensure thorough rinsing to prevent soap residue from accumulating on the fabric. Once rinsed, gently pat the shoes with a clean, dry cloth to remove excess moisture.
Leather Vans:
When cleaning leather vans, it's essential to use a specialized leather cleaner or a mild detergent specifically formulated for leather. Apply the cleaning solution to a soft cloth and gently wipe the exterior of the shoes, focusing on stained or soiled areas. Avoid saturating the leather with excessive moisture, as this can lead to damage or discoloration.
For scuff marks or stubborn stains on leather, a mixture of white vinegar and water can be used to gently spot clean the affected areas. After spot cleaning, wipe the shoes with a damp cloth to remove any residual vinegar solution, followed by thorough drying with a clean, dry cloth.
Synthetic Vans:
For synthetic material vans, a mild detergent or specialized shoe cleaner diluted in water can effectively clean the exterior surfaces. Use a soft-bristled brush or sponge to gently scrub the shoes, paying attention to areas with visible dirt or stains. After cleaning, rinse the shoes with clean water and pat them dry with a clean cloth.
Regardless of the material, it's important to allow your vans to air dry naturally, away from direct heat or sunlight, to prevent damage to the fabric or leather. Stuff the shoes with newspaper or paper towels to help maintain their shape and absorb excess moisture during the drying process.
By following these tailored cleaning methods for canvas, leather, and synthetic material vans, you can effectively restore the exterior of your beloved footwear, ensuring they remain a testament to your adventures and personal style.
Read more: How To Wash Squishmallows
Step 3: Clean the Interior
Cleaning the interior of your vans is a crucial step in maintaining their overall cleanliness and ensuring a comfortable and hygienic wearing experience. Over time, the interior of your vans can accumulate dirt, sweat, and odors, necessitating a thorough cleaning process to restore freshness and comfort.
Begin by removing the insoles from your vans to access the interior more effectively. If the insoles are removable, gently hand wash them with a mild detergent, rinse thoroughly, and allow them to air dry completely before placing them back into the shoes. For non-removable insoles, use a soft-bristled brush or cloth dampened with a mild detergent solution to gently scrub the insoles, paying particular attention to stained or odorous areas. Once cleaned, allow the insoles to air dry completely before reinserting them into the shoes.
Next, using a handheld vacuum cleaner with a brush attachment, thoroughly vacuum the interior of your vans to remove loose dirt, dust, and debris. Pay close attention to the seams, corners, and crevices where dirt tends to accumulate. For fabric or canvas interiors, a lint roller can be used to effectively lift away any remaining particles and restore the interior to its original cleanliness.
To address odors within the vans, consider using a natural odor neutralizing spray specifically designed for footwear. Alternatively, a mixture of water and white vinegar can be lightly spritzed inside the shoes to combat unpleasant odors. Ensure that the interior of the vans is adequately ventilated during and after the cleaning process to facilitate the dissipation of any lingering odors.
For vans with fabric or canvas interiors, a gentle cleaning solution of mild detergent and water can be applied to a soft cloth or sponge to wipe down the interior surfaces. Avoid oversaturating the fabric with excessive moisture to prevent damage and promote quicker drying. For leather or synthetic interiors, a damp cloth can be used to gently wipe down the interior surfaces, followed by thorough drying with a clean, dry cloth.
By meticulously cleaning the interior of your vans, you not only maintain their overall cleanliness but also ensure a comfortable and odor-free wearing experience. With a refreshed interior, your vans are ready to accompany you on new adventures, providing both style and comfort every step of the way.
Step 4: Dry and Air Out
After the thorough cleaning process, it's crucial to ensure that your beloved vans are adequately dried and aired out to maintain their integrity and prevent the development of mold or mildew. Proper drying and airing out also contribute to the overall freshness and longevity of your footwear, ensuring that they remain ready for your next adventure.
Begin by stuffing your clean vans with newspaper or paper towels to help maintain their shape and absorb excess moisture from the cleaning process. This step is particularly important for canvas or fabric vans, as it aids in preventing the material from losing its form and assists in the absorption of residual moisture.
Next, place your stuffed vans in a well-ventilated area away from direct heat or sunlight. Exposing your shoes to direct heat sources, such as radiators or hair dryers, can cause damage to the material and compromise their structural integrity. Instead, opt for a naturally ventilated space, allowing air to circulate around the shoes and facilitate the drying process.
For leather vans, it's essential to avoid direct sunlight and excessive heat, as these can lead to discoloration and damage to the leather. Instead, place the shoes in a cool, dry area with ample airflow to allow for gradual and natural drying.
Throughout the drying process, periodically replace the newspaper or paper towels inside the shoes to ensure maximum absorption of moisture. This simple step helps expedite the drying process and prevents the development of unwanted odors or mold.
Additionally, consider using a shoe tree specifically designed for your vans to help maintain their shape during the drying process. Shoe trees not only aid in preserving the form of the shoes but also assist in the absorption of moisture, contributing to a more efficient and thorough drying experience.
By allowing your vans to air dry naturally and thoroughly, you ensure that they maintain their structural integrity and cleanliness. Once completely dry, gently brush the exterior of the shoes with a soft-bristled brush to fluff up the fabric or restore the texture of leather, leaving your vans looking refreshed and ready for your next escapade.
With the completion of the drying and airing out process, your revitalized vans are now prepared to accompany you on new journeys, embodying both style and functionality. By following these essential steps, you can ensure that your cherished footwear remains a reliable and enduring companion for countless adventures to come.
Conclusion
As you conclude the comprehensive cleaning process for your cherished vans, take a moment to appreciate the transformation that has taken place. The journey from removing stubborn dirt and debris to delicately cleaning both the exterior and interior of your vans has not only revitalized their appearance but also extended their lifespan. By investing time and effort into this cleaning ritual, you have reaffirmed your commitment to preserving the integrity and comfort of your beloved footwear.
The meticulous care and attention given to your vans during the cleaning process reflect the value you place on not just their physical condition, but also the memories and experiences they have accompanied you through. Each scuff mark removed, every stubborn stain conquered, and all traces of dirt banished symbolize a renewed readiness for the adventures that lie ahead.
With the proper materials and a methodical approach, you have not only restored the cleanliness of your vans but also ensured their continued comfort and functionality. The removal of dirt and debris from both the exterior and interior surfaces has not only enhanced their aesthetic appeal but also contributed to a hygienic and odor-free wearing experience.
As your freshly cleaned vans air out and dry, they stand as a testament to the care and attention you have bestowed upon them. The preservation of their shape, texture, and overall cleanliness during the drying process further underscores your commitment to maintaining their quality and longevity.
With the completion of this revitalizing journey, your vans are now poised to embark on new escapades, ready to accompany you through the twists and turns of life. Whether it's a leisurely stroll through the city streets, an exhilarating hike in the great outdoors, or a thrilling skateboarding session, your vans are prepared to carry you through each experience with style and comfort.
As you lace up your freshly cleaned vans, take a moment to appreciate the journey you've undertaken to restore and rejuvenate them. The pride and satisfaction that accompany this process serve as a reminder of the enduring bond between you and your cherished footwear, a bond that continues to grow with each adventure they accompany you on.
So, step into your revitalized vans, knowing that they not only reflect your personal style but also embody the care and attention you've dedicated to them. With every step, your vans carry you forward, ready to create new memories and embrace new experiences, just as they have always done.