Home>Home and Garden>How To Clean Hokas

Home and Garden
How To Clean Hokas
Published: March 3, 2024
Learn the best tips for cleaning Hokas at home and keeping your footwear in top condition. Discover effective methods for maintaining your shoes in our comprehensive guide.
(Many of the links in this article redirect to a specific reviewed product. Your purchase of these products through affiliate links helps to generate commission for Noodls.com, at no extra cost. Learn more)
Table of Contents
Introduction
Hokas are renowned for their exceptional comfort and performance, making them a popular choice for runners, hikers, and outdoor enthusiasts. However, with regular use, these beloved shoes can accumulate dirt, mud, and odors, detracting from their appeal and functionality. To maintain the pristine condition of your Hokas and prolong their lifespan, regular cleaning is essential. In this comprehensive guide, we will walk you through the step-by-step process of effectively cleaning your Hokas, ensuring that they remain fresh, clean, and ready for your next adventure.
Cleaning your Hokas not only enhances their appearance but also plays a crucial role in preserving their structural integrity. By removing dirt and debris, you can prevent premature wear and tear, ultimately extending the longevity of your beloved footwear. Whether you've recently returned from a muddy trail run or simply want to refresh your everyday sneakers, this cleaning process is designed to cater to all types of Hoka shoes, from the rugged trail runners to the stylish urban sneakers.
By following these simple yet effective cleaning steps, you can restore your Hokas to their former glory, allowing you to continue enjoying their unparalleled comfort and support. So, gather your cleaning supplies and let's dive into the process of revitalizing your Hokas, ensuring that they remain a reliable companion for your active lifestyle.
Materials Needed
Before embarking on the journey to revive your beloved Hokas, it's essential to gather the necessary materials to ensure a thorough and effective cleaning process. Here's a comprehensive list of items you'll need:
-
Mild Soap or Detergent: Opt for a gentle, non-abrasive soap or detergent. Avoid harsh chemicals or bleach, as they can damage the fabric and compromise the integrity of your shoes.
-
Soft-Bristled Brush: A soft-bristled brush, such as a shoe brush or an old toothbrush, is ideal for gently scrubbing away dirt and grime from the surface of your Hokas.
-
Water: Access to clean, lukewarm water is essential for the hand-washing phase of the cleaning process. Ensure that you have a steady supply of water for rinsing your shoes thoroughly.
-
Microfiber Cloth or Sponge: A soft microfiber cloth or sponge is perfect for dabbing and gently wiping the shoes during the cleaning process. These materials are gentle on the fabric and help to remove excess soap and dirt.
-
Insoles: If your Hokas have removable insoles, it's beneficial to take them out during the cleaning process. This allows for a more thorough cleaning and ensures that no dirt or odors are trapped beneath the insoles.
-
Laces: Remove the laces from your Hokas before cleaning them. This will enable you to clean the entire surface of the shoes, including the areas beneath the laces.
-
Ventilated Drying Area: After cleaning, your Hokas will need to air dry in a well-ventilated area. Ensure that you have a suitable space for drying, away from direct sunlight or heat sources.
By gathering these essential materials, you'll be well-prepared to embark on the cleaning journey, restoring your Hokas to their pristine condition. With these items at your disposal, you can proceed with confidence, knowing that you have everything you need to revitalize your cherished footwear.
Step 1: Remove Insoles and Laces
The first step in the process of cleaning your Hokas involves the removal of the insoles and laces. This initial preparatory step is crucial as it allows for a more thorough and effective cleaning of the entire shoe, ensuring that no dirt or odors are overlooked.
Begin by carefully removing the insoles from your Hokas. Most Hoka models feature removable insoles, designed to provide additional support and cushioning. Gently take out the insoles and set them aside for cleaning. This step is essential as it enables you to address any accumulated dirt or moisture underneath the insoles, preventing potential odor buildup and maintaining the overall hygiene of your shoes.
Next, focus on the laces. Untie the laces and proceed to remove them from your Hokas. By doing so, you create unobstructed access to the entire surface of the shoes, including the areas beneath the laces. This facilitates a comprehensive cleaning process, allowing you to address any dirt, stains, or debris that may have accumulated in these often-overlooked areas.
Once the insoles and laces have been removed, take a moment to inspect the interior of your Hokas. Check for any loose debris or dirt particles that may have collected inside the shoes. Gently tap the shoes together or use a soft brush to dislodge any loose dirt, ensuring that the interior is free from any foreign particles that could compromise the cleanliness and comfort of your Hokas.
By diligently following this first step and removing the insoles and laces, you set the stage for a thorough and effective cleaning process. This preparatory phase lays the foundation for revitalizing your Hokas, ensuring that every nook and cranny of your beloved footwear receives the attention it deserves. With the insoles and laces removed, you are now ready to proceed to the next step, where the cleaning process truly begins.
Step 2: Brush Off Dirt and Debris
With the insoles and laces removed, it's time to address the accumulated dirt and debris on the surface of your Hokas. This crucial step sets the stage for a thorough cleaning process, ensuring that your shoes are free from any external particles that may compromise their appearance and longevity.
Begin by using a soft-bristled brush to gently dislodge any loose dirt, mud, or debris from the exterior of your Hokas. A shoe brush or an old toothbrush works well for this purpose, allowing you to target specific areas and intricate details without causing damage to the fabric or materials. Take care to brush in a consistent, sweeping motion, working from the top of the shoes downwards. This approach helps to dislodge dirt and debris effectively, preventing it from being ground further into the fabric during the subsequent cleaning steps.
Pay special attention to the outsole and midsole areas, as these regions often accumulate the most dirt and mud during outdoor activities. Use the brush to carefully remove any lodged stones, mud clumps, or debris from the grooves and crevices of the outsole, ensuring that the traction and performance of your Hokas are not compromised by foreign particles.
As you brush off the dirt and debris, take a moment to inspect the entire surface of your Hokas. Look for any stubborn stains, particularly in high-traffic areas such as the toe box and heel. If you encounter persistent stains or marks, gently work the brush over these areas, applying slightly more pressure to dislodge the debris without causing damage to the fabric or materials.
By diligently brushing off the accumulated dirt and debris, you prepare your Hokas for the subsequent cleaning steps, ensuring that the surface is free from any loose particles that could hinder the effectiveness of the hand-washing process. With this essential preparatory step complete, your Hokas are now ready to undergo the next phase of the cleaning process, bringing them one step closer to a revitalized and refreshed state.
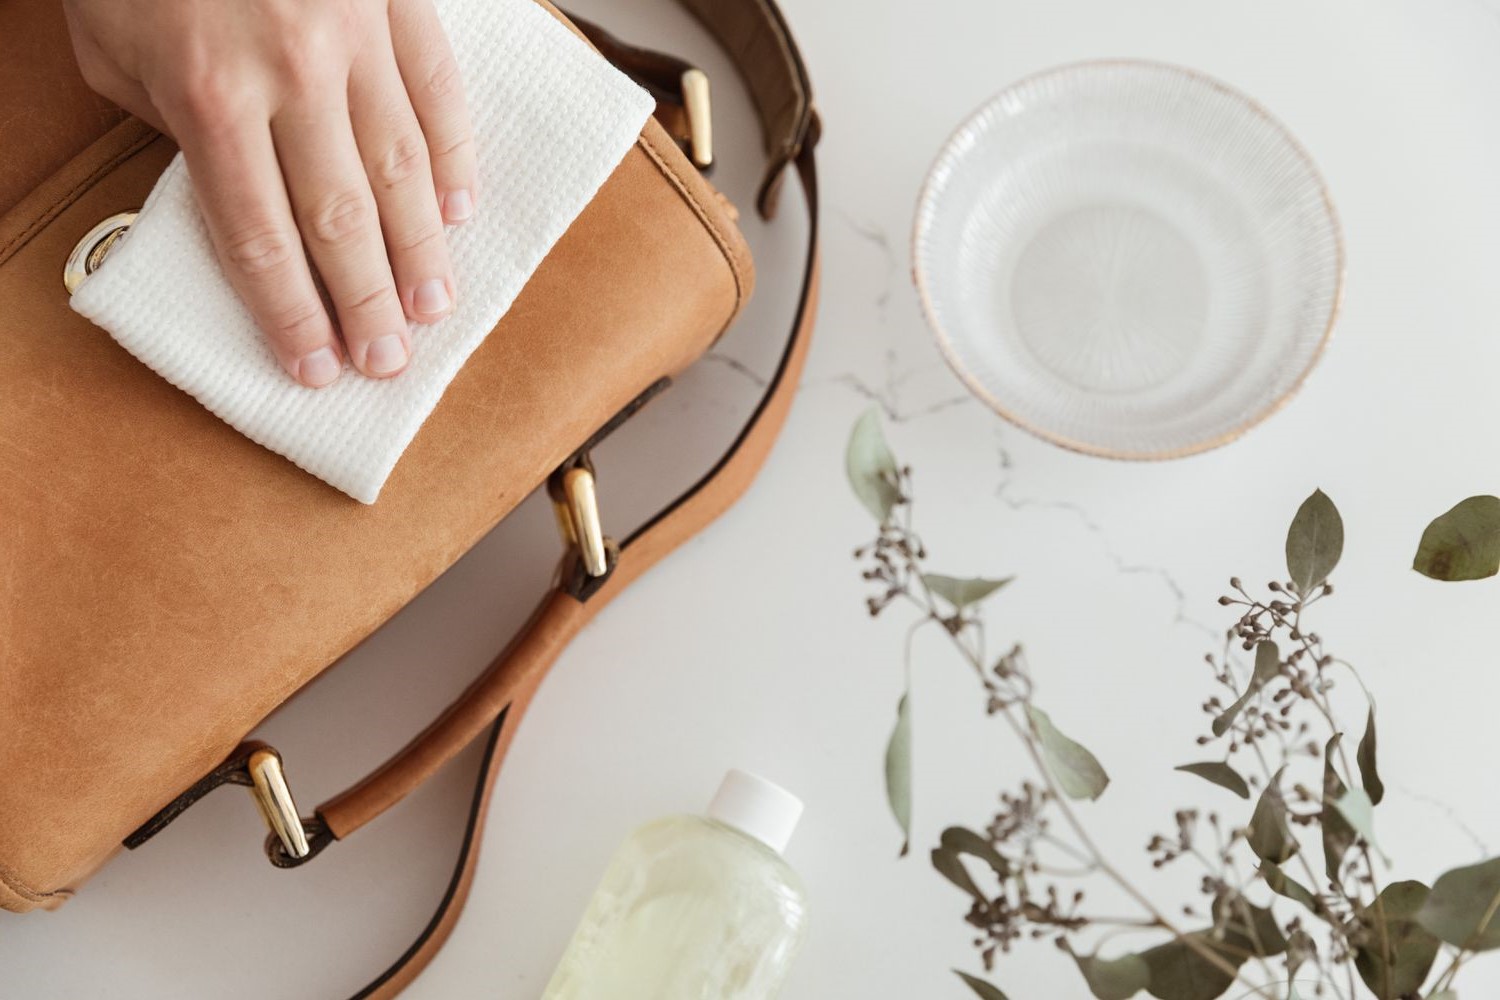
Step 3: Hand Wash with Mild Soap
With the preparatory steps completed and the accumulated dirt and debris brushed off, your Hokas are now ready for the gentle yet effective hand-washing phase. This crucial step involves the use of mild soap or detergent to cleanse the fabric and materials, ensuring that your shoes emerge fresh, clean, and revitalized.
Begin by preparing a cleaning solution using lukewarm water and a small amount of mild soap or detergent. It's essential to avoid harsh chemicals or bleach, as these can compromise the integrity of the fabric and materials. Instead, opt for a gentle, non-abrasive soap that is suitable for hand-washing delicate items.
Dip a soft microfiber cloth or sponge into the cleaning solution, ensuring that it is damp but not saturated. Gently wring out any excess water to prevent over-soaking your Hokas during the hand-washing process. The goal is to create a mildly soapy solution that can effectively lift dirt and stains without saturating the shoes.
With the damp cloth or sponge in hand, begin to gently scrub the entire surface of your Hokas, focusing on areas that exhibit visible dirt, stains, or discoloration. Use gentle, circular motions to work the cleaning solution into the fabric, paying particular attention to high-traffic areas such as the toe box, heel, and sides of the shoes.
As you hand-wash your Hokas, take care to maintain a gentle touch, avoiding excessive scrubbing or harsh agitation. The goal is to lift dirt and stains without causing damage to the fabric or compromising the structural integrity of your shoes. If you encounter stubborn stains, continue to work the cleaning solution into the affected areas, allowing the mild soap to penetrate and lift the debris effectively.
Once you have thoroughly hand-washed the entire surface of your Hokas, take a moment to rinse the shoes with clean, lukewarm water. Use a separate damp cloth or sponge to remove any residual soap, ensuring that your Hokas are free from any soapy residue. This rinsing step is crucial in preventing the accumulation of soap that could lead to potential discoloration or stiffness in the fabric.
After rinsing, gently pat your Hokas with a dry, clean cloth to remove excess moisture. Avoid wringing or squeezing the shoes, as this can distort their shape and compromise their structural integrity. Instead, use a gentle dabbing motion to absorb the moisture, allowing your Hokas to air dry in their natural form.
By meticulously hand-washing your Hokas with a mild soap solution, you effectively lift dirt, stains, and odors, restoring the freshness and cleanliness of your beloved footwear. With this essential cleaning phase complete, your Hokas are now poised for the final steps of the revitalization process, bringing them one step closer to their former pristine condition.
Read more: How To Clean A Toaster
Step 4: Rinse and Air Dry
After the meticulous hand-washing process, the next crucial step in revitalizing your Hokas involves thorough rinsing and proper air drying. This pivotal phase ensures that your shoes are free from any residual soap or moisture, allowing them to regain their pristine condition and structural integrity.
Begin by rinsing your hand-washed Hokas with clean, lukewarm water. Use a gentle, steady stream of water to thoroughly remove any lingering soap or cleaning solution from the fabric and materials. Pay close attention to areas that may have accumulated soap during the hand-washing process, ensuring that your Hokas are completely free from any soapy residue.
As you rinse your Hokas, take a moment to inspect the shoes for any remaining dirt or stains. If you notice any persistent spots, gently work the affected areas with a damp cloth or sponge to lift any remaining debris. This additional rinsing step helps to ensure that your Hokas emerge from the cleaning process fresh, clean, and free from any residual contaminants.
Once your Hokas have been thoroughly rinsed, it's time to prepare them for the crucial air-drying phase. Begin by gently patting the shoes with a dry, clean cloth to remove excess moisture. Avoid applying excessive pressure or wringing the shoes, as this can distort their shape and compromise their structural integrity. Instead, use a gentle dabbing motion to absorb the moisture, allowing your Hokas to retain their original form.
With your Hokas now free from excess moisture, it's essential to find a suitable drying area. Choose a well-ventilated space away from direct sunlight or heat sources, as excessive heat can damage the fabric and materials of your shoes. Ensure that the drying area allows for adequate airflow, promoting the natural evaporation of moisture from your Hokas.
Place your hand-washed and rinsed Hokas in the chosen drying area, allowing them to air dry completely. It's important to be patient during this phase, as rushing the drying process can lead to potential damage or stiffness in the fabric. Depending on the ambient humidity and airflow, your Hokas may take several hours to fully air dry, so allow ample time for this crucial step.
As your Hokas air dry, take a moment to appreciate the progress made in revitalizing your beloved footwear. The thorough rinsing and proper air drying ensure that your Hokas emerge from the cleaning process fresh, clean, and ready for your next adventure. With this essential phase complete, your Hokas are now poised for the final step in the revitalization process, bringing them one step closer to their former pristine condition.
Step 5: Reinsert Insoles and Laces
With your freshly cleaned and thoroughly dried Hokas in hand, it's time to complete the revitalization process by reinserting the insoles and laces. This final step not only restores your shoes to their fully assembled state but also ensures that they are ready to provide the exceptional comfort and support that Hoka footwear is renowned for.
Begin by retrieving the clean and dry insoles that were set aside during the initial preparatory phase. Carefully reinsert the insoles into their respective positions within your Hokas, ensuring a snug and secure fit. Take a moment to align the insoles properly, ensuring that they sit flush against the interior of the shoes, providing the optimal cushioning and support for your feet.
Next, turn your attention to the laces. With the insoles securely in place, proceed to rethread the laces through the eyelets of your Hokas. Take care to lace the shoes in a manner that provides a comfortable and secure fit, allowing for personalized adjustment based on your individual preferences. Whether you prefer a snug, performance-oriented fit for your runs or a more relaxed feel for casual wear, the reinsertion of the laces allows you to tailor the fit of your Hokas to your liking.
As you reinsert the laces, take a moment to appreciate the revitalized appearance of your Hokas. The combination of thorough cleaning, gentle hand-washing, and proper air drying has rejuvenated the fabric and materials, restoring their vibrant colors and pristine condition. With the insoles and laces back in place, your Hokas are now poised to accompany you on your next adventure, whether it's a challenging trail run, a leisurely hike, or a casual stroll through the urban landscape.
By completing the reinsertion of the insoles and laces, you have brought the revitalization process full circle, ensuring that your Hokas are ready to deliver the exceptional comfort, performance, and style that have made them a beloved choice for active individuals. With this final step complete, your freshly cleaned and rejuvenated Hokas are now prepared to support you on your journey, providing the comfort and reliability that only Hoka footwear can deliver.
Conclusion
In conclusion, the process of cleaning and revitalizing your Hokas is not only a practical endeavor but also a testament to the care and appreciation you have for your beloved footwear. By following the comprehensive steps outlined in this guide, you have embarked on a journey to preserve the integrity, cleanliness, and longevity of your Hokas, ensuring that they remain a reliable companion for your active lifestyle.
Through the meticulous removal of insoles and laces, the gentle brushing off of dirt and debris, the thorough hand-washing with a mild soap solution, and the proper rinsing and air drying, you have effectively restored your Hokas to their former glory. The attention to detail and the commitment to maintaining the pristine condition of your footwear reflect your dedication to both quality and performance.
As you reinsert the insoles and laces, you are not only completing the revitalization process but also preparing your Hokas to accompany you on countless future adventures. Whether it's conquering challenging trails, embarking on urban explorations, or simply enjoying the comfort of a well-maintained pair of shoes, your revitalized Hokas are ready to support you every step of the way.
The revitalization process goes beyond mere cleaning; it symbolizes the bond between you and your Hokas, acknowledging the countless miles traveled, the challenges overcome, and the memories made. It is a testament to the enduring quality and craftsmanship of Hoka footwear, as well as a reflection of your commitment to caring for the tools that enable your active pursuits.
As you lace up your freshly cleaned and rejuvenated Hokas, take a moment to appreciate the journey you've embarked upon. The revitalization process not only ensures the cleanliness and longevity of your shoes but also reaffirms the value of proper maintenance and care. Your Hokas are more than just footwear; they are a reflection of your dedication to your active lifestyle and a testament to the enduring bond between you and your trusted companions.
With your Hokas now revitalized and ready for the next adventure, you can stride forward with confidence, knowing that your cherished footwear will continue to provide the exceptional comfort, support, and performance that have made them an integral part of your active pursuits. So, lace up, step out, and let your revitalized Hokas carry you toward new horizons, knowing that they are as ready for the journey ahead as you are.