Home>Lifestyle>Say Goodbye To Foot Calluses With The Ultimate DIY Remover!
Lifestyle
Say Goodbye To Foot Calluses With The Ultimate DIY Remover!
Published: February 27, 2024
Say goodbye to foot calluses and achieve smooth, soft skin with our ultimate DIY remover! Transform your lifestyle with this effective and easy solution.
(Many of the links in this article redirect to a specific reviewed product. Your purchase of these products through affiliate links helps to generate commission for Noodls.com, at no extra cost. Learn more)
Table of Contents
Introduction
Welcome to the ultimate guide on bidding farewell to foot calluses with a powerful DIY remover! If you've ever experienced the discomfort of foot calluses, you know how they can hinder your daily activities and cause discomfort. Whether it's from wearing ill-fitting shoes, standing for extended periods, or engaging in high-impact activities, calluses can be a real nuisance. However, fear not, as we're about to embark on a journey to discover an effective and natural solution to tackle this common foot woe.
In this comprehensive guide, we'll delve into the intricacies of foot calluses, understand their underlying causes, and unveil the ultimate DIY callus remover that can restore your feet to their natural, smooth state. Say goodbye to the days of discomfort and hello to the freedom of pain-free, callus-free feet!
So, if you're ready to take the first step towards achieving soft, supple soles, join us as we explore the world of foot care and discover the transformative power of a DIY callus remover. Get ready to bid adieu to foot calluses and embrace the joy of walking with confidence and comfort. Let's embark on this journey together and unveil the secrets to achieving beautifully smooth and callus-free feet.
Read more: How To Say Goodbye In Japanese
Understanding Foot Calluses
Foot calluses, also known as tylomas, are thickened and hardened areas of skin that develop as a result of repeated friction, pressure, or irritation. These toughened patches typically form on the soles of the feet, particularly on weight-bearing areas such as the heels, balls of the feet, and along the edges of the toes.
The development of foot calluses is the body's natural defense mechanism in response to excessive pressure or friction. When the skin is subjected to repetitive stress or rubbing, it thickens and hardens to protect the underlying tissues from damage. This process is the skin's way of adapting to the stress it experiences, creating a barrier to prevent injury and further discomfort.
Several factors contribute to the formation of foot calluses. Ill-fitting footwear, such as shoes that are too tight or have inadequate cushioning, can create excessive pressure points on the feet, leading to the development of calluses. Additionally, prolonged standing or walking on hard surfaces, participating in high-impact activities, or even certain foot deformities can also contribute to the formation of calluses.
It's important to note that while foot calluses are the body's way of protecting itself, they can also cause discomfort and pain, especially when they become excessively thick or develop in sensitive areas. In some cases, calluses may even crack, leading to further discomfort and potential infection if not properly managed.
Understanding the underlying causes of foot calluses is crucial in effectively addressing and preventing their occurrence. By recognizing the factors that contribute to their development, individuals can take proactive measures to alleviate discomfort and promote overall foot health. Now that we've gained insight into the nature of foot calluses, let's explore the ultimate DIY callus remover and discover the steps to achieving smooth, callus-free feet.
The Ultimate DIY Callus Remover
Say goodbye to expensive salon treatments and chemical-laden products, as we unveil the ultimate DIY callus remover that harnesses the power of natural ingredients to restore your feet to their smooth and supple state. This DIY solution not only effectively eliminates calluses but also nourishes and rejuvenates the skin, leaving your feet feeling pampered and revitalized.
The star of this DIY callus remover is none other than the humble yet potent combination of Epsom salt, apple cider vinegar, and soothing essential oils. Epsom salt, renowned for its therapeutic properties, works wonders in softening tough callused skin, making it easier to remove. Meanwhile, apple cider vinegar, celebrated for its natural exfoliating and antibacterial properties, helps to gently slough off dead skin cells and combat any potential microbial concerns. To elevate the experience, the addition of essential oils such as lavender or tea tree oil not only imparts a delightful aroma but also contributes their antibacterial and soothing attributes to the mixture.
This DIY callus remover not only effectively eliminates calluses but also nourishes and rejuvenates the skin, leaving your feet feeling pampered and revitalized. The gentle yet potent nature of these natural ingredients ensures that your skin is treated with care, without the harsh effects of synthetic chemicals.
By harnessing the power of these natural ingredients, you can create a luxurious foot soak that not only targets calluses but also provides a spa-like experience in the comfort of your own home. This DIY callus remover is a testament to the effectiveness of natural remedies in addressing common foot concerns, offering a safe and affordable alternative to commercial products.
Now that we've uncovered the secret to a natural and effective DIY callus remover, it's time to delve into the step-by-step guide to removing foot calluses and discover the transformative potential of this simple yet powerful solution. Let's embark on this journey to achieving beautifully smooth and callus-free feet, all through the magic of natural ingredients and a touch of DIY ingenuity.
Step-by-Step Guide to Removing Foot Calluses
1. Prepare the DIY Callus Remover
Begin by gathering the ingredients for the DIY callus remover. You will need Epsom salt, apple cider vinegar, essential oils (such as lavender or tea tree oil), a basin or tub large enough to soak your feet, and warm water. Combine approximately 1/4 cup of Epsom salt with enough warm water to fill the basin, and add 1/4 cup of apple cider vinegar. For a delightful fragrance and added benefits, incorporate a few drops of your chosen essential oil.
2. Soak Your Feet
Once the DIY callus remover solution is prepared, immerse your feet in the soothing mixture. Allow your feet to soak for 15-20 minutes, allowing the Epsom salt and apple cider vinegar to work their magic in softening and exfoliating the callused skin. Use this time to relax and unwind as the natural ingredients begin their transformative process.
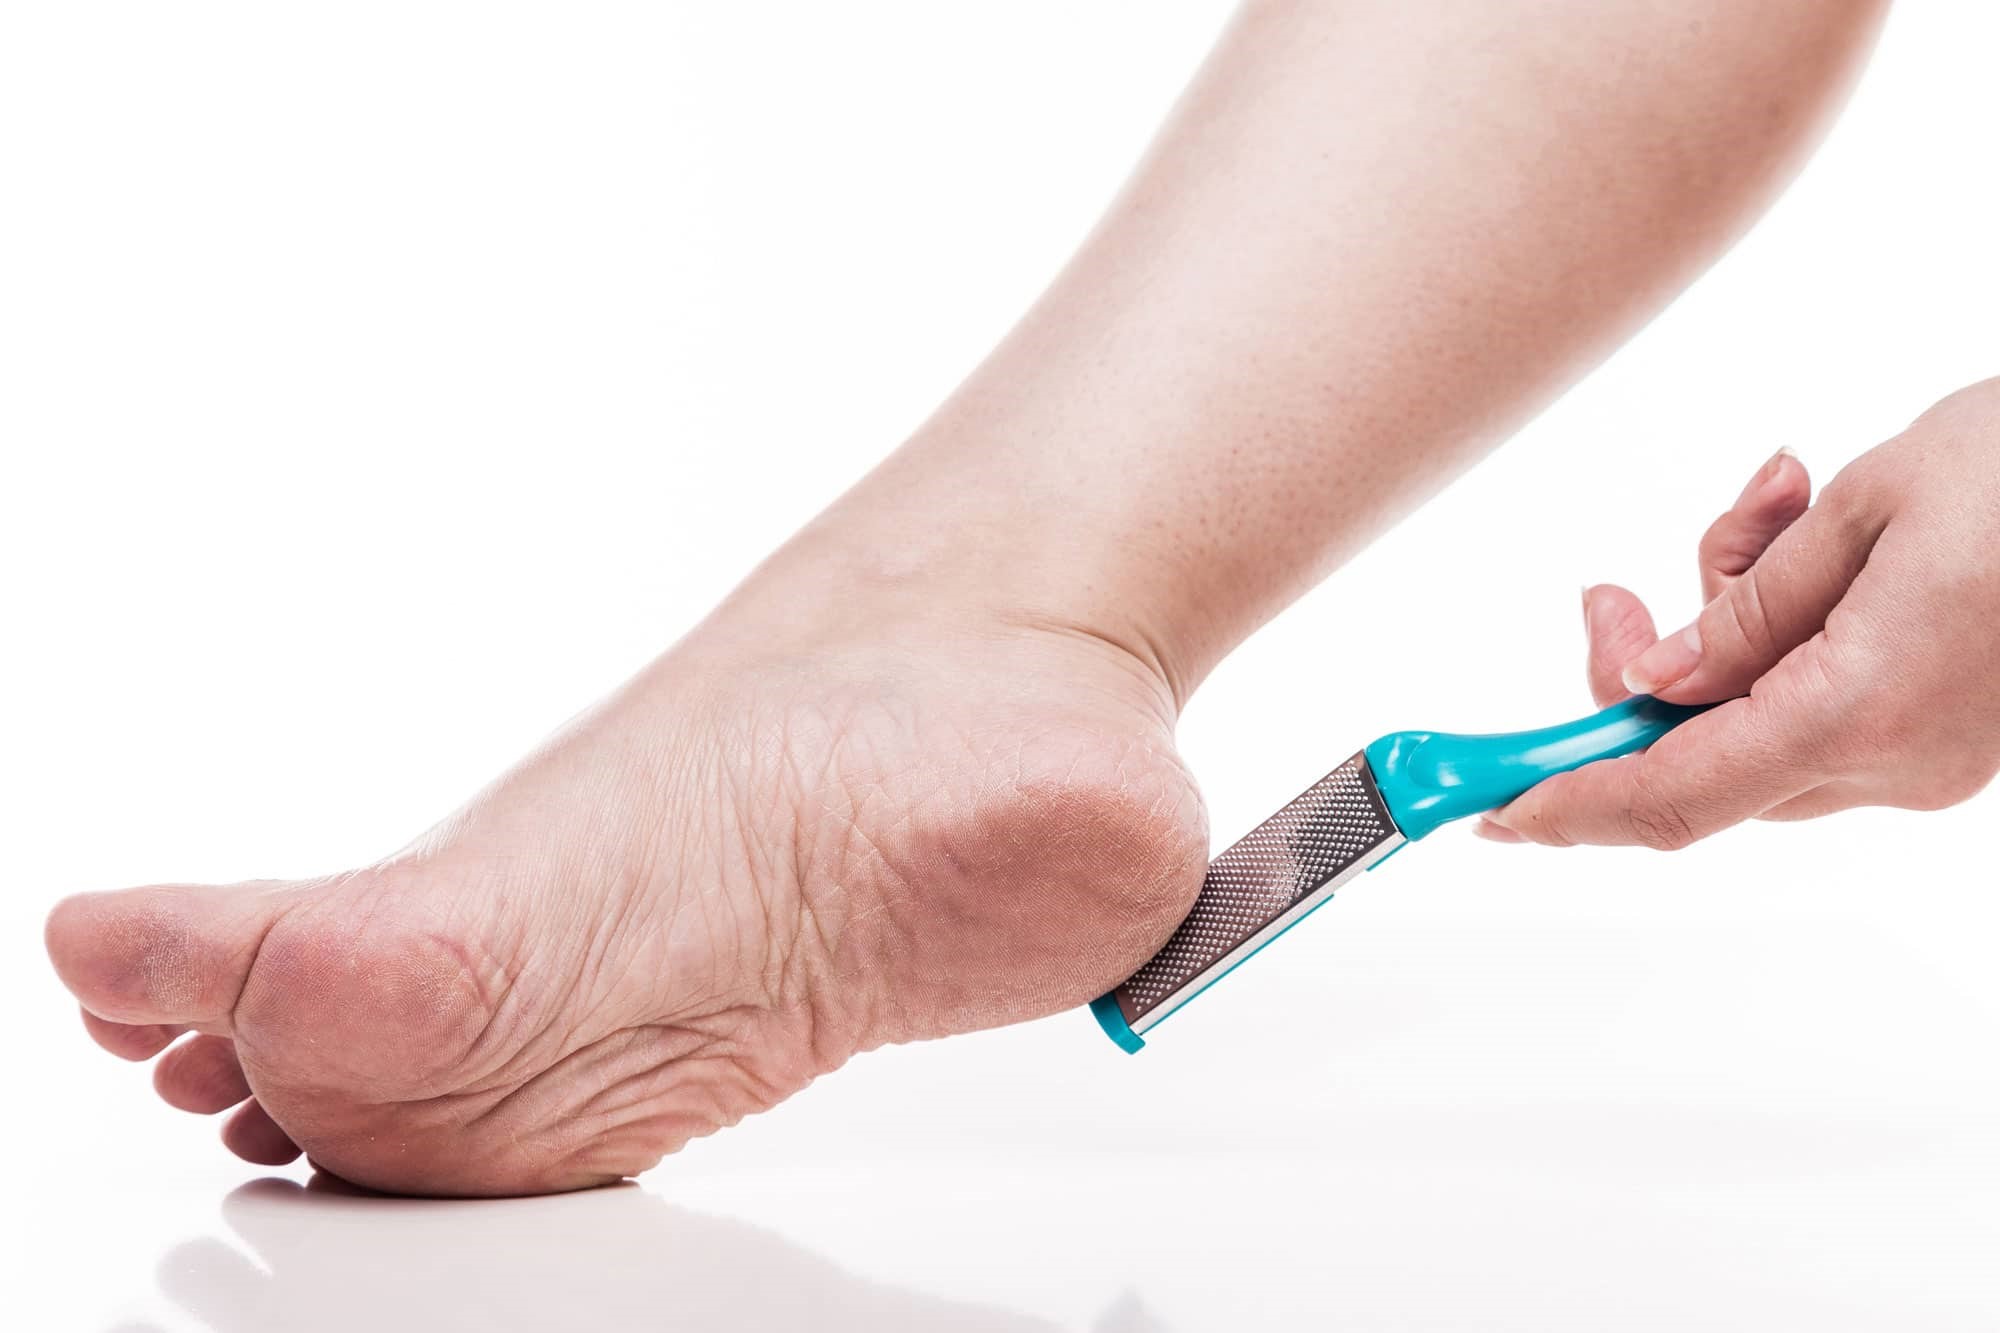
3. Gently Exfoliate
After the soaking period, gently exfoliate the callused areas using a pumice stone or foot file. With the softened skin, you can carefully buff away the dead skin cells, gradually reducing the thickness of the calluses. Exercise caution and avoid excessive pressure to prevent irritation or discomfort.
4. Rinse and Pat Dry
Once you've exfoliated the callused areas, rinse your feet with warm water to remove any remaining residue. Pat your feet dry with a soft towel, taking care to be gentle and thorough. You'll immediately notice the difference in the texture of your skin, as the callused areas become noticeably smoother and more supple.
5. Moisturize and Nourish
To complete the process, apply a rich moisturizer or foot cream to nourish and hydrate your newly rejuvenated skin. Opt for a product that contains natural emollients and soothing ingredients to provide long-lasting hydration and promote overall foot health. Gently massage the moisturizer into your skin, paying extra attention to the areas where calluses were present.
6. Repeat as Needed
For optimal results, consider incorporating this DIY callus remover into your regular foot care routine. Depending on the severity of your calluses, you may need to repeat the process over several days to achieve the desired level of smoothness and softness. Consistency is key in maintaining the health and appearance of your feet.
By following this step-by-step guide, you can effectively remove foot calluses using the natural and rejuvenating DIY callus remover. Embrace the transformative power of this simple yet potent solution, and revel in the joy of having beautifully smooth and callus-free feet.
Tips for Preventing Foot Calluses
Preventing foot calluses is essential for maintaining the overall health and comfort of your feet. By implementing proactive measures and making simple adjustments to your daily routine, you can significantly reduce the likelihood of developing calluses and promote the long-term well-being of your feet.
-
Wear Properly Fitted Shoes: Ensure that your footwear provides adequate support and cushioning, with ample room for your toes to move freely. Ill-fitting shoes can create pressure points and friction, leading to the formation of calluses. Opt for shoes that accommodate the natural shape of your feet and provide sufficient padding to minimize stress on specific areas.
-
Use Protective Padding: If you are prone to developing calluses in certain areas, consider using protective padding, such as moleskin or gel inserts, to alleviate pressure and reduce friction. These specialized pads can help distribute the weight more evenly and prevent the formation of calluses in vulnerable areas.
-
Keep Feet Clean and Dry: Maintaining proper foot hygiene is crucial in preventing the buildup of calluses. Regularly wash and thoroughly dry your feet, paying attention to the spaces between the toes. Moisture can exacerbate friction and contribute to the development of calluses, so keeping your feet clean and dry is essential.
-
Moisturize Regularly: Hydrated skin is more supple and less prone to developing calluses. Incorporate a moisturizing routine into your daily regimen, focusing on the heels and other areas susceptible to calluses. Choose a nourishing foot cream or lotion that contains emollients and natural oils to keep your skin soft and resilient.
-
Trim Toenails Carefully: Overgrown toenails can cause discomfort and contribute to the formation of calluses. Keep your toenails trimmed to an appropriate length, and file any rough edges to prevent them from rubbing against the inside of your shoes.
-
Gradually Break in New Shoes: When introducing new footwear into your wardrobe, gradually break them in to allow the shoes to adapt to the shape of your feet. This can help minimize friction and pressure points, reducing the risk of developing calluses during the initial wear.
-
Regularly Exfoliate: Incorporate gentle exfoliation into your foot care routine to remove dead skin cells and prevent the buildup of thickened skin. Use a mild exfoliating scrub or a pumice stone to maintain the smooth texture of your feet and minimize the likelihood of callus formation.
By integrating these practical tips into your daily life, you can proactively prevent the development of foot calluses and promote the overall health and comfort of your feet. Embrace these simple yet effective strategies to ensure that your feet remain smooth, supple, and free from the discomfort of calluses.
Conclusion
In conclusion, the journey to achieving beautifully smooth and callus-free feet begins with a deep understanding of foot calluses and the implementation of effective solutions. Foot calluses, often a result of repetitive friction and pressure, can cause discomfort and hinder daily activities. However, with the ultimate DIY callus remover, comprised of natural ingredients such as Epsom salt, apple cider vinegar, and essential oils, individuals can bid farewell to foot calluses and embrace the joy of pain-free, rejuvenated feet.
The step-by-step guide to removing foot calluses provides a comprehensive approach to utilizing the DIY callus remover, offering a transformative experience that softens, exfoliates, and nourishes the skin. By following this simple yet powerful process, individuals can achieve remarkable results, restoring their feet to a smooth and supple state. Furthermore, the tips for preventing foot calluses serve as proactive measures to maintain foot health and minimize the likelihood of callus formation, empowering individuals to take charge of their foot care regimen.
As we conclude this journey, it's essential to emphasize the significance of consistent foot care and the remarkable potential of natural remedies in addressing common foot concerns. The DIY callus remover not only eliminates calluses but also provides a luxurious and rejuvenating experience, all within the comfort of one's home. By embracing the power of natural ingredients and simple yet effective techniques, individuals can revel in the joy of having beautifully smooth and callus-free feet.
In the realm of foot care, the journey doesn't end here. It's a continuous commitment to nurturing and pampering our feet, ensuring that they remain healthy, comfortable, and free from the discomfort of calluses. By incorporating the knowledge gained from this guide into our daily routines, we can embark on a path towards sustained foot health and well-being.
So, as we bid adieu to foot calluses and embrace the transformative power of the ultimate DIY callus remover, let's take each step with confidence, knowing that our feet are well-cared for and ready to carry us through life's adventures, free from the burden of calluses. Here's to the joy of walking with comfort, confidence, and the radiant glow of beautifully smooth and callus-free feet.