Home>Home and Garden>How To Unclog A Washer Drain
Home and Garden
How To Unclog A Washer Drain
Published: March 4, 2024
Learn how to unclog a washer drain with our expert tips and tricks. Keep your home and garden in top shape with our easy DIY solutions.
(Many of the links in this article redirect to a specific reviewed product. Your purchase of these products through affiliate links helps to generate commission for Noodls.com, at no extra cost. Learn more)
Table of Contents
Introduction
Dealing with a clogged washer drain can be a frustrating and inconvenient experience. When your washing machine is unable to drain properly, it can disrupt your daily routine and lead to potential water damage. However, with the right knowledge and tools, you can effectively address this issue and restore your washer's functionality.
In this comprehensive guide, we will walk you through the step-by-step process of unclogging a washer drain. Whether you're a seasoned DIY enthusiast or a novice homeowner, this article will equip you with the essential information to tackle this common household problem.
A clogged washer drain can result from various factors, including the accumulation of lint, debris, soap scum, and even foreign objects such as coins or small articles of clothing. Over time, these obstructions can impede the flow of water, leading to drainage issues and potential overflows. By understanding the underlying causes of a clogged washer drain, you can take targeted measures to address the problem effectively.
By following the methods outlined in this guide, you can save time and money by resolving the issue on your own, without the need to rely on professional assistance. Additionally, maintaining a clear washer drain is essential for the optimal performance of your washing machine, ensuring that it operates efficiently and prolonging its lifespan.
Now, let's delve into the essential tools and materials you'll need to unclog your washer drain and restore your laundry routine to seamless functionality.
Tools and materials needed
When it comes to unclogging a washer drain, having the right tools and materials at your disposal is crucial for a successful outcome. Here's a comprehensive list of items you'll need to effectively address a clogged washer drain:
-
Screwdriver: A screwdriver is essential for removing the access panel on the front or back of your washing machine. This will allow you to access the drain pump and other components to inspect for clogs.
-
Bucket and towels: Before starting the unclogging process, it's important to have a bucket and towels on hand to contain any standing water that may spill out during the procedure. This will help prevent water damage to your floors and surrounding areas.
-
Pliers: Pliers are useful for disconnecting the drain hose from the washer, providing access to the drain pump and drain filter. They can also be handy for removing any debris or obstructions from the hose.
-
Drain snake or auger: A drain snake or auger is a flexible tool designed to navigate through the drain pipe, effectively breaking up and removing clogs. This tool is particularly useful for dislodging stubborn blockages that are impeding the flow of water.
-
Plunger: A standard household plunger can be effective in dislodging minor clogs within the washer drain. It creates pressure and suction to help clear obstructions and restore proper drainage.
-
Chemical drain cleaner (optional): In some cases, a chemical drain cleaner can be used to dissolve organic matter and clear minor clogs. However, it's important to use these products with caution and follow the manufacturer's instructions carefully.
-
Gloves and protective eyewear: When working on unclogging a washer drain, it's advisable to wear gloves and protective eyewear to safeguard yourself from potential exposure to debris, cleaning agents, or standing water.
By ensuring that you have these essential tools and materials readily available, you'll be well-prepared to tackle the task of unclogging your washer drain effectively. With the right equipment at your disposal, you can proceed with confidence and address the issue in a timely manner, restoring your washing machine's functionality and preventing potential water damage.
Step 1: Locate the washer drain
The first step in addressing a clogged washer drain is to locate the specific components associated with the drainage system of your washing machine. This crucial step allows you to gain access to the key areas where potential clogs may be present, enabling you to proceed with targeted unclogging methods.
-
Access Panel: Depending on the make and model of your washing machine, the washer drain may be accessed through either the front or back panel. In some cases, the access panel is located at the front of the machine, typically at the bottom. Alternatively, for top-loading washers, the access panel may be situated at the back. Using a screwdriver, carefully remove the screws securing the access panel in place to reveal the inner workings of the washer.
-
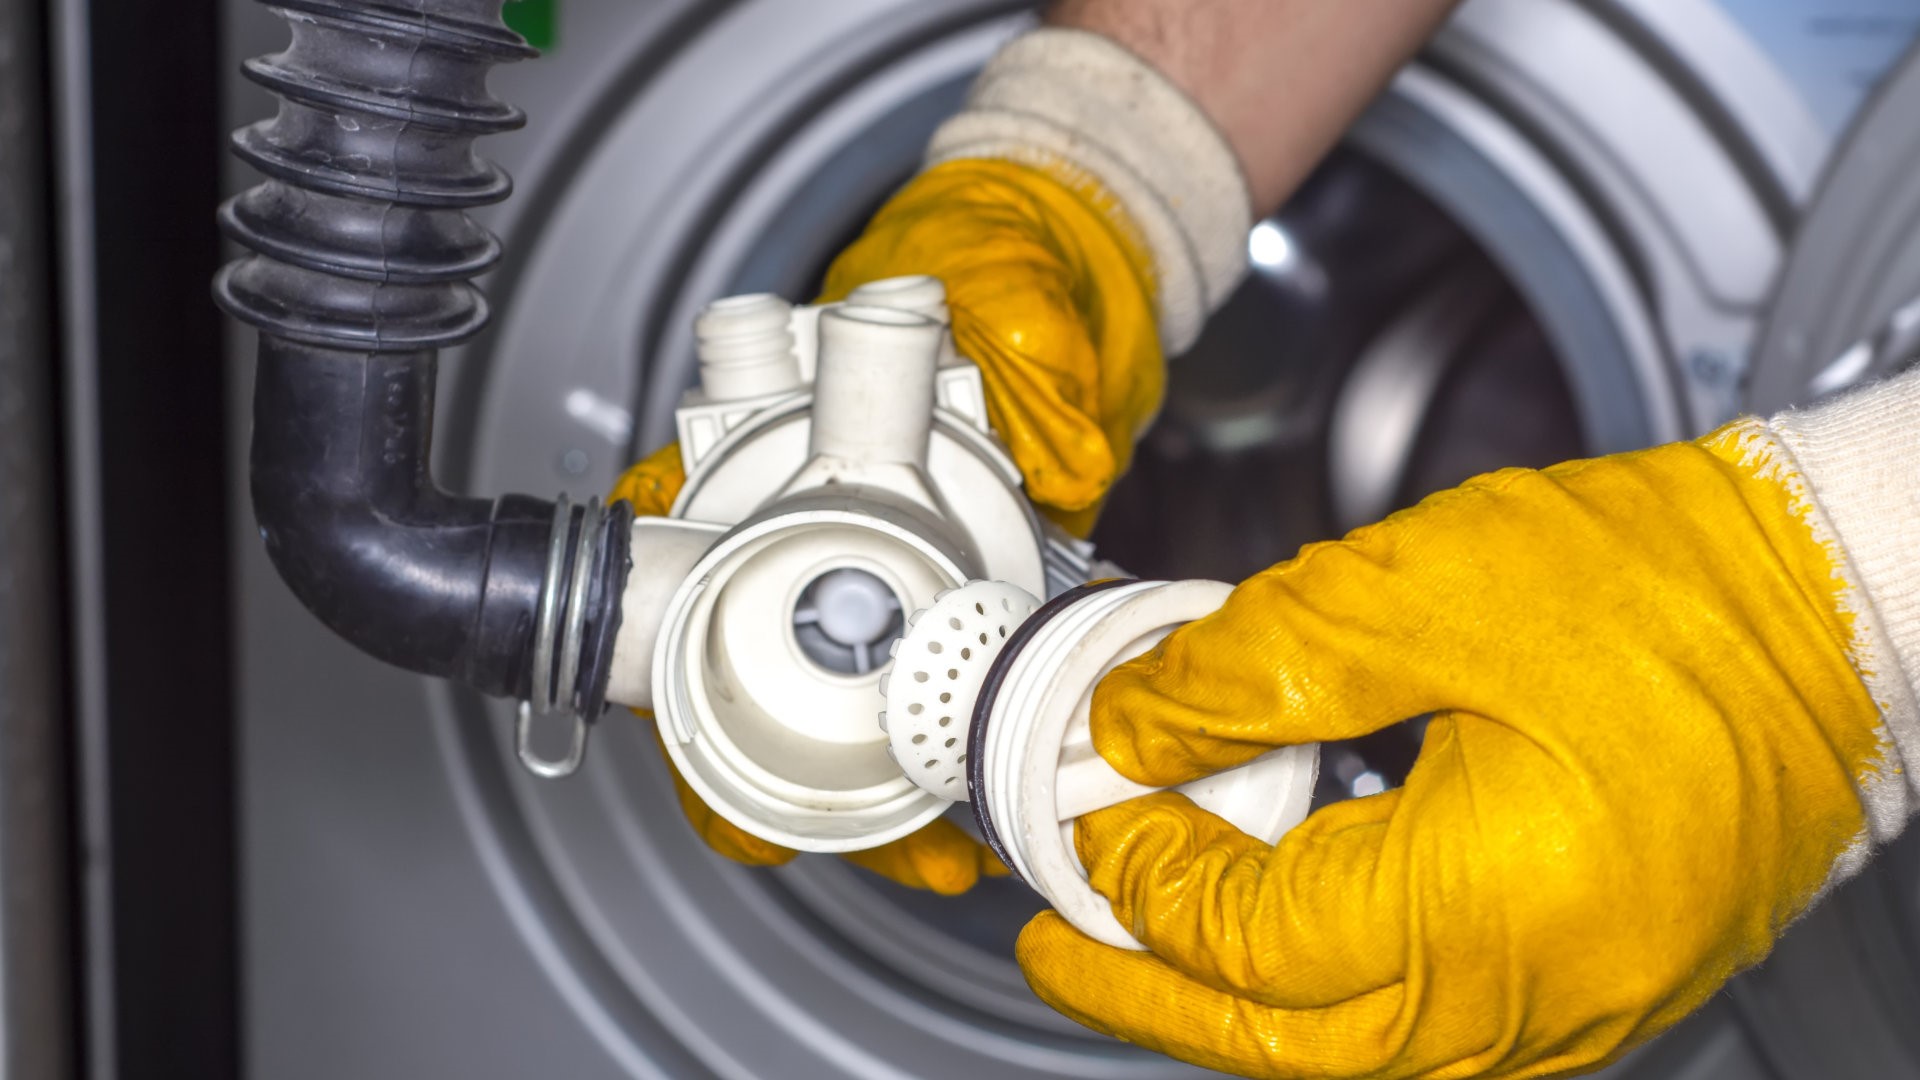
Drain Pump and Filter: Once the access panel is removed, you'll be able to locate the drain pump and filter. The drain pump is responsible for expelling water from the washing machine during the drainage cycle, while the drain filter captures debris and prevents it from entering the drain hose. The drain pump and filter are integral components of the washer drain system, and they are common areas where clogs can occur.
-
Drain Hose: The drain hose is another essential element to identify when locating the washer drain. This hose is responsible for carrying the wastewater from the washing machine to the external drainage point. It is typically connected to the drain pump and may extend to a standpipe, utility sink, or other designated drainage outlet. By tracing the path of the drain hose, you can pinpoint potential areas of blockage or obstruction.
-
Observation and Inspection: As you locate the washer drain components, take the opportunity to visually inspect the area for any visible signs of debris, buildup, or foreign objects. Look for accumulations of lint, soap residue, or small items that may have inadvertently entered the drain system. This initial observation can provide valuable insights into the nature of the clog and guide your subsequent unclogging efforts.
By effectively locating the washer drain and its associated components, you lay the groundwork for targeted and efficient unclogging strategies. This foundational step sets the stage for the subsequent actions you'll take to clear the drain and restore proper functionality to your washing machine.
Step 2: Remove any visible debris
After locating the washer drain and its key components, the next crucial step in addressing a clogged washer drain is to remove any visible debris that may be obstructing the flow of water. This proactive approach allows you to directly target and eliminate tangible obstructions, laying the groundwork for more comprehensive unclogging methods if necessary.
Drain Pump and Filter Inspection
Begin by focusing on the drain pump and filter, which are pivotal elements of the washer's drainage system. Carefully inspect the drain pump and filter for any visible accumulation of lint, fabric remnants, or foreign objects that may have impeded the drainage process. Use a flashlight to illuminate the area and conduct a thorough visual examination to identify any potential obstructions.
Clearing the Drain Pump and Filter
If you spot any visible debris within the drain pump or filter, use a pair of pliers or gloved hands to carefully remove the obstructions. Exercise caution to avoid damaging the components while dislodging the debris. Clearing the drain pump and filter of any visible debris is an essential initial step in restoring unimpeded water flow and addressing the clogged washer drain.
Drain Hose Examination
Next, shift your attention to the drain hose, tracing its path from the washing machine to the external drainage point. Inspect the length of the drain hose for any visible blockages, such as accumulated lint, soap residue, or foreign objects. If you identify any tangible obstructions within the drain hose, carefully remove them using gloved hands or pliers, ensuring that the pathway for water drainage is clear and unobstructed.
Thorough Cleaning
Once you have removed any visible debris from the drain pump, filter, and hose, take the opportunity to perform a thorough cleaning of these components. Use a damp cloth to wipe down the surfaces, removing any residual buildup or grime that may contribute to future clogs. This proactive maintenance approach helps to prevent future drainage issues and ensures the optimal performance of the washer drain system.
By diligently removing any visible debris from the drain pump, filter, and hose, you pave the way for subsequent unclogging methods to effectively address the underlying causes of the clog. This proactive approach sets the stage for comprehensive maintenance and restoration of your washing machine's drainage functionality.
Step 3: Use a drain snake or auger
When dealing with a stubborn clog in your washer drain, employing a drain snake or auger can be a highly effective method to dislodge and remove the obstruction. These specialized tools are designed to navigate through the drain pipe, breaking up and clearing blockages that may be impeding the flow of water. By utilizing a drain snake or auger, you can target the clog directly, facilitating the restoration of proper drainage within your washing machine.
Understanding the Drain Snake and Auger
A drain snake, also known as a plumbing snake or drain auger, is a flexible tool designed to navigate through the twists and turns of drain pipes. It features a coiled metal cable with a corkscrew-like tip that can penetrate and dislodge obstructions within the pipe. The auger, on the other hand, is a similar tool that may have a rotating blade or corkscrew mechanism, allowing it to break up and clear clogs effectively.
Application of the Drain Snake or Auger
To use a drain snake or auger to unclog your washer drain, begin by feeding the tool into the drain pipe through the access point or opening. Carefully guide the snake or auger into the pipe, applying gentle pressure to navigate past the obstruction. As you maneuver the tool through the drain pipe, you may encounter resistance as it encounters the clog. With a steady and controlled motion, continue to feed the snake or auger into the pipe, allowing it to penetrate and dislodge the obstruction.
Breaking Up the Clog
As the drain snake or auger encounters the clog, its design allows it to effectively break up and dislodge the obstruction. The coiled cable or rotating mechanism can exert force against the clog, gradually loosening and clearing the blockage within the drain pipe. By employing a back-and-forth motion and adjusting the angle of the tool, you can target the clog from different directions, enhancing the effectiveness of the unclogging process.
Retrieving the Obstruction
In some cases, as you maneuver the drain snake or auger, you may feel a sudden release of resistance, indicating that the clog has been successfully dislodged. Carefully retract the tool from the drain pipe, ensuring that it does not pull the dislodged debris back into the pipe. Once the tool is removed, inspect the end for any remnants of the obstruction, and carefully discard any debris that may have been retrieved during the unclogging process.
Testing the Drainage
After using the drain snake or auger to address the clog, it's essential to test the washer drain to verify that the obstruction has been effectively cleared. Run a short cycle on your washing machine, allowing water to drain through the system. Monitor the drainage process to ensure that the water flows freely and without any signs of backup or obstruction. By conducting this test, you can confirm that the clog has been successfully addressed, restoring proper functionality to your washer drain.
By utilizing a drain snake or auger to address a clogged washer drain, you can effectively target and remove stubborn obstructions within the drain pipe. This method provides a proactive and targeted approach to restoring proper drainage, allowing you to maintain the optimal functionality of your washing machine.
Step 4: Use a plunger
When faced with a clogged washer drain, a standard household plunger can serve as a surprisingly effective tool to dislodge minor obstructions and restore proper drainage. The plunging method creates pressure and suction within the drain pipe, helping to dislodge and clear the clog without the need for harsh chemicals or specialized equipment. This approach is particularly useful for addressing minor blockages and maintaining the smooth operation of your washing machine.
Preparation and Application
To begin using a plunger to unclog your washer drain, ensure that the drain pump and filter have been inspected and any visible debris has been removed. With the drain hose connected and the access panel reinstalled, fill the washing machine with a small amount of water to create a sufficient seal within the drain pipe.
Place the plunger over the drain opening, ensuring a tight seal between the plunger cup and the surface of the drain. Apply firm and consistent pressure as you push and pull the plunger in a rhythmic motion. This action creates a back-and-forth flow of water within the drain pipe, generating pressure and suction to dislodge the clog.
Persistence and Observation
As you continue plunging, maintain a steady and persistent rhythm to maximize the effectiveness of the suction and pressure created within the drain pipe. The goal is to dislodge the obstruction and restore unimpeded water flow. During the plunging process, observe the drain hose and surrounding areas for any signs of water movement or potential release of the clog.
Testing the Drainage
After several minutes of plunging, pause to test the washer drain by initiating a short cycle on the washing machine. Observe the drainage process closely, ensuring that the water flows freely and without any signs of backup or obstruction. If the water drains smoothly, it indicates that the plunging method has effectively addressed the minor clog, restoring proper functionality to the washer drain.
Additional Considerations
If the plunger method does not yield the desired results, it may be necessary to revisit the earlier steps and consider employing a drain snake or auger to address more stubborn obstructions. Additionally, exercising caution and patience during the plunging process is essential to prevent potential splashing and ensure the safe and effective unclogging of the washer drain.
By utilizing a plunger to address a clogged washer drain, you can take a proactive and accessible approach to restoring proper drainage within your washing machine. This method provides a simple yet effective means of addressing minor obstructions, allowing you to maintain the optimal functionality of your washer drain.
Step 5: Use a chemical drain cleaner (optional)
In some instances, when dealing with persistent or stubborn clogs in the washer drain, the use of a chemical drain cleaner may be considered as an optional method to address the issue. Chemical drain cleaners are formulated to dissolve organic matter, such as soap scum, hair, and other debris that may contribute to clogs within the drain pipe. It's important to note that the use of chemical drain cleaners should be approached with caution and used in accordance with the manufacturer's instructions.
Before proceeding with the use of a chemical drain cleaner, it's essential to ensure that the washing machine's access panel is securely reinstalled, and any visible debris within the drain pump, filter, and hose has been addressed through previous steps. Additionally, it's advisable to wear protective gloves and eyewear to minimize potential exposure to the chemical cleaner.
When selecting a chemical drain cleaner, opt for a product specifically designed for use in washing machine drains. These cleaners are formulated to effectively target the types of organic matter commonly found in washer drains, providing a targeted approach to addressing the underlying causes of clogs.
To use a chemical drain cleaner, carefully follow the instructions provided by the manufacturer. Typically, this involves pouring the recommended amount of the cleaner into the washer drain or directly into the washing machine drum. Allow the cleaner to work through the drain system for the specified duration, as indicated on the product label.
After the designated period, initiate a short cycle on the washing machine to allow the chemical cleaner to interact with the clog and organic matter within the drain. Monitor the drainage process closely, observing the flow of water to assess whether the chemical cleaner has effectively dissolved the obstruction.
It's important to exercise caution and avoid direct contact with the chemical drain cleaner during the application and testing process. Additionally, ensure that the area is well-ventilated to minimize exposure to fumes from the cleaner.
While the use of a chemical drain cleaner is considered optional and may be effective in addressing certain types of clogs, it's essential to weigh the potential benefits against the associated risks. Chemical cleaners can be harsh and may pose environmental and safety concerns if not used responsibly. If the clog persists after using a chemical drain cleaner, it's advisable to explore alternative unclogging methods or seek professional assistance to address the issue effectively.
By considering the use of a chemical drain cleaner as an optional method to address a clogged washer drain, you can approach the unclogging process with a comprehensive perspective, evaluating the suitability of this method based on the nature of the clog and the specific circumstances involved.
Step 6: Test the washer drain
After performing the necessary unclogging methods to address the washer drain, it is crucial to conduct a comprehensive test to verify that the obstruction has been effectively cleared and that the drainage system is functioning optimally. Testing the washer drain allows you to confirm the success of your unclogging efforts and ensures that your washing machine can resume its normal operation without the risk of potential backups or overflows.
To begin the testing process, initiate a short cycle on your washing machine, allowing water to flow through the system and drain into the designated outlet. As the cycle progresses, closely monitor the drainage process, observing the flow of water from the washing machine and through the drain hose. Pay attention to the speed and consistency of the water drainage, looking for any signs of backup or obstruction.
During the testing phase, it is essential to assess the drainage system's performance under normal operating conditions. Observe the water as it exits the drain hose, ensuring that it flows freely and without any signs of resistance. Additionally, check the surrounding areas for any indications of water backup or leakage, confirming that the drainage system is effectively expelling the wastewater without any adverse effects.
As the cycle nears completion, continue to monitor the drainage process until the washing machine indicates the end of the cycle. At this point, verify that the water has been successfully expelled from the washing machine, leaving the interior drum and components free of standing water. This final confirmation serves as a crucial indicator of the washer drain's functionality and the successful resolution of the clog.
By conducting a thorough test of the washer drain, you can validate the effectiveness of your unclogging efforts and ensure that your washing machine is ready to resume its regular use. If the testing process reveals any lingering issues or signs of continued obstruction, it may be necessary to revisit the earlier unclogging methods or consider seeking professional assistance to address the underlying causes of the clog effectively.
Ultimately, the comprehensive testing of the washer drain provides the assurance that your washing machine's drainage system has been restored to optimal functionality, allowing you to proceed with confidence and peace of mind as you resume your laundry routine.
Conclusion
In conclusion, addressing a clogged washer drain is a manageable task that can be effectively tackled with the right knowledge, tools, and methods. By following the step-by-step guide outlined in this article, homeowners can confidently approach the unclogging process, restore proper drainage functionality to their washing machines, and prevent potential water damage.
The comprehensive approach to unclogging a washer drain begins with the essential step of locating the key components associated with the drainage system. By identifying the access panel, drain pump, filter, and drain hose, homeowners can gain valuable insights into the specific areas where potential clogs may be present, laying the groundwork for targeted unclogging methods.
The subsequent steps, including the removal of visible debris, the use of a drain snake or auger, and the optional application of a chemical drain cleaner, provide homeowners with a range of effective methods to dislodge and clear obstructions within the washer drain. These proactive measures empower homeowners to take control of the unclogging process and restore optimal functionality to their washing machines.
The testing phase serves as the final confirmation of the success of the unclogging efforts, allowing homeowners to verify that the washer drain is functioning smoothly and without any signs of backup or obstruction. This critical step provides the assurance that the washing machine is ready to resume its regular operation, free from the risk of potential overflows or drainage issues.
By approaching the unclogging process with a proactive and comprehensive mindset, homeowners can save time and money by addressing the issue on their own, without the need for professional assistance. Additionally, maintaining a clear washer drain is essential for the optimal performance of the washing machine, ensuring that it operates efficiently and prolonging its lifespan.
In essence, the methods and insights provided in this guide empower homeowners to take proactive measures in maintaining the functionality of their washing machines, addressing clogs effectively, and ensuring a seamless laundry routine. With the right tools, knowledge, and a systematic approach, homeowners can confidently navigate the process of unclogging a washer drain, contributing to the efficient and reliable operation of their home appliances.