Home>Home and Garden>How To Sew A Hole
Home and Garden
How To Sew A Hole
Published: February 29, 2024
Learn how to sew a hole in your clothes with our easy step-by-step guide. Keep your wardrobe looking fresh and save money on repairs. Perfect for home and garden enthusiasts.
(Many of the links in this article redirect to a specific reviewed product. Your purchase of these products through affiliate links helps to generate commission for Noodls.com, at no extra cost. Learn more)
Table of Contents
Introduction
Sewing is a timeless skill that empowers us to mend and create. Whether you're a seasoned seamstress or a novice with a needle, knowing how to sew a hole is a valuable skill. From a beloved sweater with a small tear to a favorite pair of jeans in need of repair, being able to mend garments extends their lifespan and reduces waste.
In this comprehensive guide, we will walk through the step-by-step process of sewing a hole, providing you with the confidence and know-how to tackle this common issue. By following these instructions, you'll be able to seamlessly repair small to medium-sized holes in various fabrics, giving your cherished clothing items a new lease on life.
Sewing a hole is not just about fixing a tear; it's about preserving memories and prolonging the life of your favorite garments. With a few simple tools and a bit of patience, you can transform a damaged piece of clothing into a wearable treasure once again. So, gather your materials and let's embark on this rewarding journey of mending and renewal.
Read more: How To Unlock A Door With A Hole
Materials Needed
To embark on the journey of mending and renewing your beloved garments, you'll need a few essential materials. These items are readily available and relatively inexpensive, making them accessible for anyone looking to repair small to medium-sized holes in various fabrics. Here's what you'll need:
-
Needle: Select a needle appropriate for the fabric you'll be mending. For most garments, a basic hand-sewing needle with a sharp point will suffice. However, if you're working with heavier fabrics such as denim or canvas, a sturdy needle designed for heavy-duty sewing may be necessary.
-
Thread: Choose a thread that closely matches the color of the garment you'll be mending. This ensures that the repaired area blends seamlessly with the rest of the fabric. For added strength, consider using a polyester thread for synthetic fabrics and a cotton thread for natural fibers.
-
Scissors: A pair of sharp scissors is essential for trimming excess thread and neatly cutting any loose fibers around the hole. Opt for small, precise scissors that allow for detailed cutting without causing further damage to the garment.
-
Pins: Sewing pins are invaluable for holding the fabric in place as you work. They prevent shifting and ensure that the hole is aligned properly for seamless mending. Choose fine, sharp pins that can easily be inserted and removed without leaving visible marks on the fabric.
-
Thimble: Protect your fingertips from the pressure of pushing the needle through tough fabrics by using a thimble. This small, protective shield fits over the finger holding the needle, providing a comfortable and secure grip while sewing.
-
Fabric Marker or Chalk: Marking the area around the hole can help guide your sewing and ensure that your stitches are even and precise. A fabric marker or chalk in a contrasting color to the garment will make it easier to see the designated sewing area.
-
Light-Colored Cloth: Placing a light-colored cloth beneath the hole while sewing provides a contrasting background, making it easier to see your stitches and preventing accidental sewing through the back layer of the garment.
By gathering these materials, you'll be well-equipped to embark on the process of mending your cherished garments. With these tools in hand, you'll soon be ready to move on to the next step: preparing the hole for sewing.
Step 1: Prepare the Hole
Before diving into the actual sewing process, it's crucial to prepare the hole and the surrounding area for seamless mending. This step sets the foundation for a successful repair, ensuring that the fabric is properly aligned and the stitches are secure. Here's a detailed guide on how to prepare the hole for sewing:
-
Assess the Damage: Begin by carefully examining the hole and its immediate surroundings. Look for any loose threads, frayed edges, or small fabric pieces that may be sticking out. Gently tug on the edges of the hole to determine the extent of the damage. Understanding the size and nature of the hole will guide your approach to mending it effectively.
-
Trim Loose Threads: Using a pair of sharp scissors, carefully trim any loose threads or frayed edges around the hole. Be mindful not to cut into the surrounding fabric, focusing solely on removing the damaged or protruding threads. This step creates a clean and even edge, making it easier to sew the hole without any obstructions.
-
Align the Fabric: If the hole has caused the fabric to shift or become misaligned, gently manipulate the surrounding area to ensure that the edges of the hole are neatly aligned with each other. Use sewing pins to hold the fabric in place, securing it in its proper position for seamless mending. This alignment is essential for creating a visually cohesive repair.
-
Mark the Sewing Area: With a fabric marker or chalk, lightly mark the perimeter of the hole. This serves as a visual guide for your stitches, ensuring that you stay within the designated area while sewing. The marked outline provides a clear boundary, preventing the stitches from straying beyond the intended mending zone.
-
Reinforce Weak Areas (Optional): If the fabric surrounding the hole appears weak or fragile, consider reinforcing it with a small, discreet patch on the inside of the garment. This additional layer of fabric provides extra support and stability, especially for delicate or heavily worn areas. Use a lightweight, matching fabric for the patch to maintain the garment's original feel and appearance.
By meticulously preparing the hole and its surroundings, you establish a solid foundation for the subsequent sewing steps. This careful preparation ensures that your stitches are secure, the fabric is properly aligned, and the repaired area seamlessly blends with the rest of the garment. With the hole primed for mending, you're now ready to thread the needle and embark on the next phase of the sewing process.
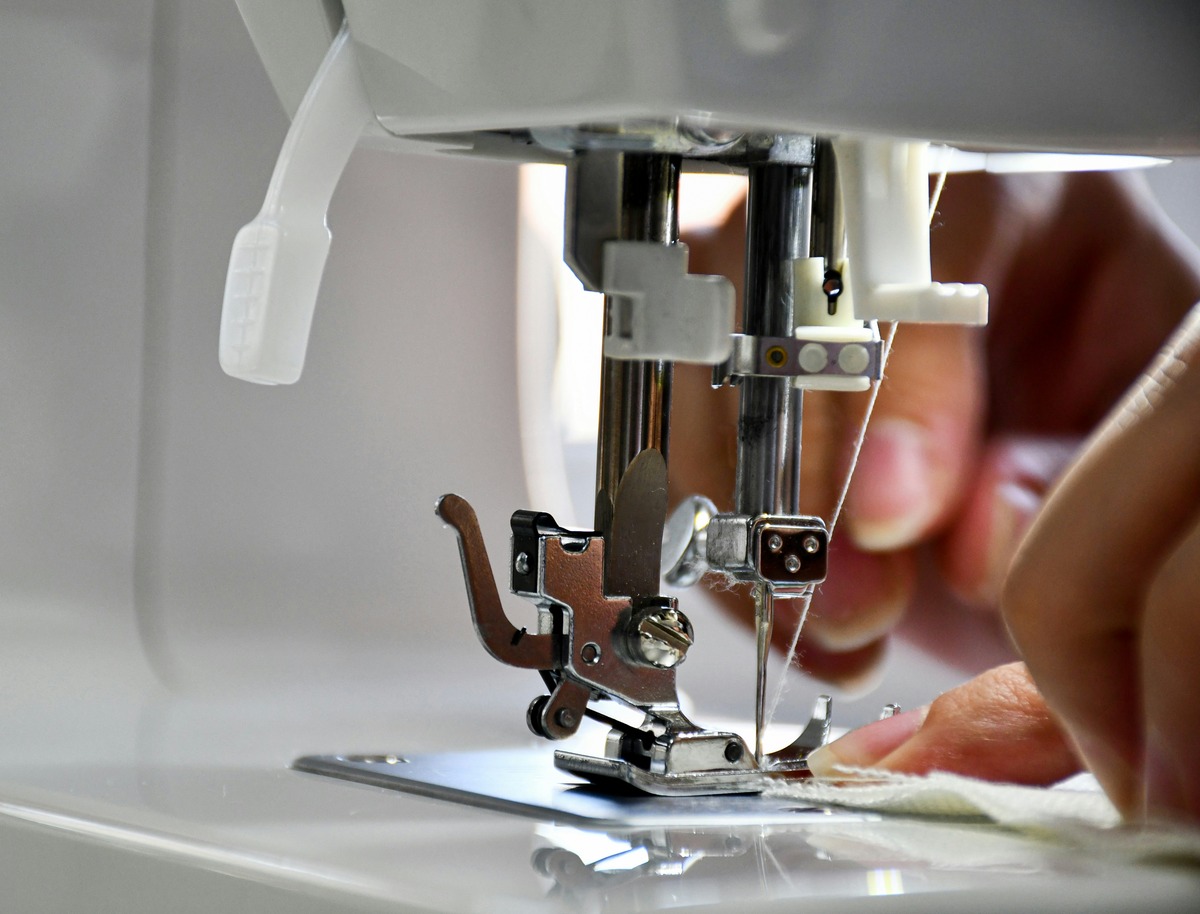
Step 2: Thread the Needle
Threading the needle is a fundamental yet crucial step in the sewing process. It requires precision and patience to ensure that the thread is securely in place, ready to create seamless stitches. Here's a detailed guide on how to thread the needle effectively:
-
Select the Right Thread: Before threading the needle, choose a thread that complements the fabric and matches the color of the garment. Ensure that the thread is of sufficient length, as a shorter thread may require frequent rethreading during the sewing process.
-
Cut the Thread: Using sharp scissors, cut a length of thread that is manageable and easy to work with. A longer thread may lead to tangling and unnecessary complications, while a shorter thread may require frequent rethreading. Aim for a thread length that allows you to sew comfortably without excessive tangling or wastage.
-
Prepare the Needle: Hold the needle between your thumb and index finger, ensuring a firm grip. If the needle has a small eye, gently flatten the end of the thread between your fingers to make it easier to insert into the eye. For needles with larger eyes, you may not need to flatten the thread.
-
Insert the Thread: With a steady hand, guide the end of the thread through the eye of the needle. If necessary, moisten the tip of the thread to stiffen it, making it easier to thread through the eye. Alternatively, using a needle threader can simplify this process, especially for individuals with visual or dexterity challenges.
-
Secure the Thread: Once the thread is through the eye of the needle, leave a small tail of thread extending from the eye. This tail will prevent the thread from slipping out during sewing and provide a starting point for your stitches.
-
Test the Thread: To ensure that the thread is securely in place, gently tug on the tail to confirm that it holds firm. If the thread slips out, rethread the needle to avoid interruptions during the sewing process.
Threading the needle sets the stage for the subsequent sewing steps, ensuring that the thread is securely in place and ready to create seamless stitches. With the needle threaded and the thread securely in place, you're now prepared to move on to the next phase of the sewing process: starting the stitches.
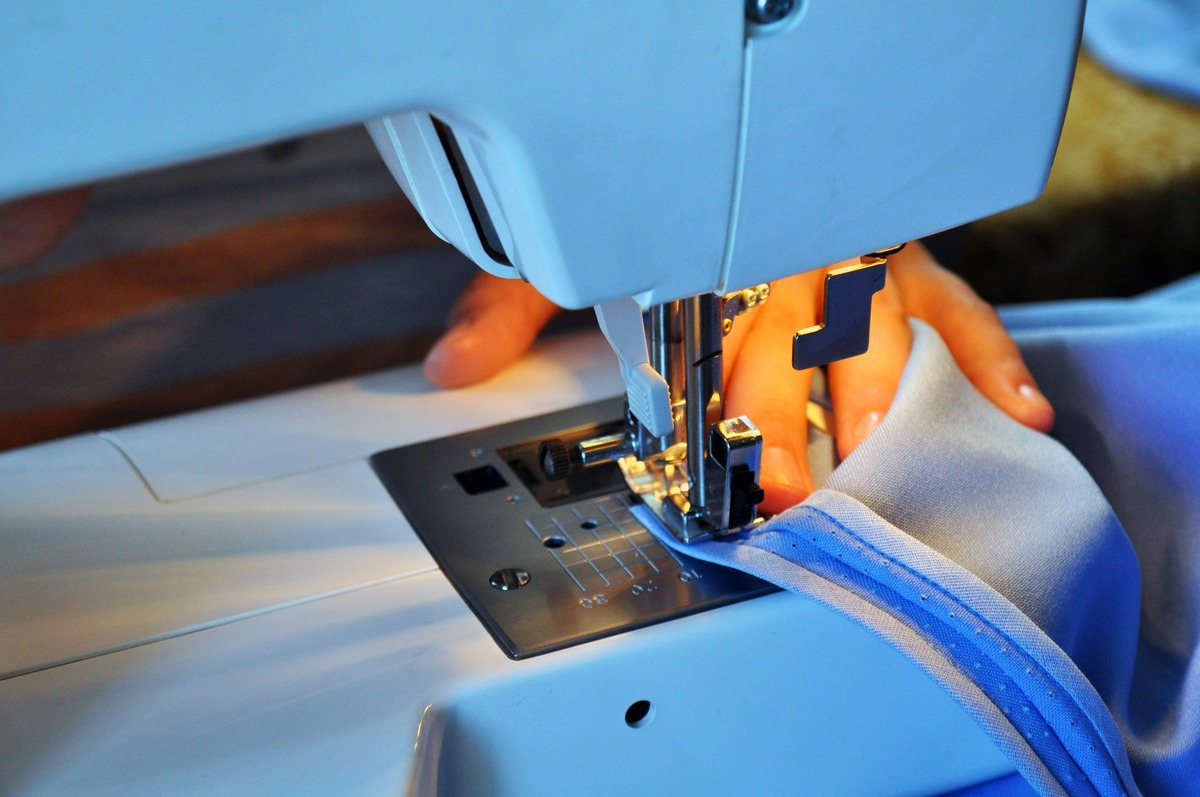
Step 3: Start Sewing
With the hole prepared and the needle threaded, it's time to embark on the pivotal stage of sewing. This step involves creating precise and secure stitches to seamlessly mend the damaged area. Here's a detailed guide on how to start sewing effectively:
-
Position the Needle: Begin by positioning the needle at the edge of the marked sewing area. Insert the needle from the underside of the fabric, bringing it up through the marked perimeter of the hole. Ensure that the needle passes through both layers of the fabric if the garment is double-layered.
-
Create the First Stitch: After bringing the needle through the fabric, gently pull the thread until the tail end is taut, leaving a small loop of thread on the surface. This loop will anchor the first stitch and prevent it from unraveling. Hold the loop in place with your non-dominant hand to maintain tension.
-
Form the Stitch: Once the loop is secured, guide the needle back through the fabric, creating a small, evenly spaced stitch. The length of the stitch will depend on the size of the hole and the desired level of reinforcement. Aim for stitches that are close enough to hold the fabric together but not too tight to cause puckering.
-
Continue Stitching: After forming the first stitch, repeat the process by bringing the needle back up through the fabric, creating another stitch parallel to the first. Maintain a consistent stitch length and spacing to ensure a uniform and visually appealing repair. As you sew, periodically check the tension of the thread to prevent overly tight or loose stitches.
-
Secure the Stitches: As you progress, periodically secure the stitches by gently tugging on the thread to remove any slack. This ensures that the mended area remains taut and the stitches are firmly in place. Secure each stitch before proceeding to the next, maintaining a steady and controlled sewing rhythm.
-
Overlap the Stitches: If the hole is larger or requires additional reinforcement, consider overlapping the stitches to create a stronger mend. Overlapping the stitches distributes the tension across a wider area, reducing the likelihood of the hole reopening over time.
-
Maintain Consistency: Throughout the sewing process, strive for consistency in stitch length, tension, and spacing. Consistent stitches contribute to a professional-looking repair and ensure that the mended area blends seamlessly with the surrounding fabric.
By following these detailed steps, you'll be able to initiate the sewing process with confidence and precision. Starting the stitches effectively sets the stage for a successful and visually seamless repair, breathing new life into your cherished garments. With the sewing process underway, you're well on your way to completing the mending journey and preserving your favorite clothing items for years to come.
Read more: How To Drill A Hole In Ceramic Pot
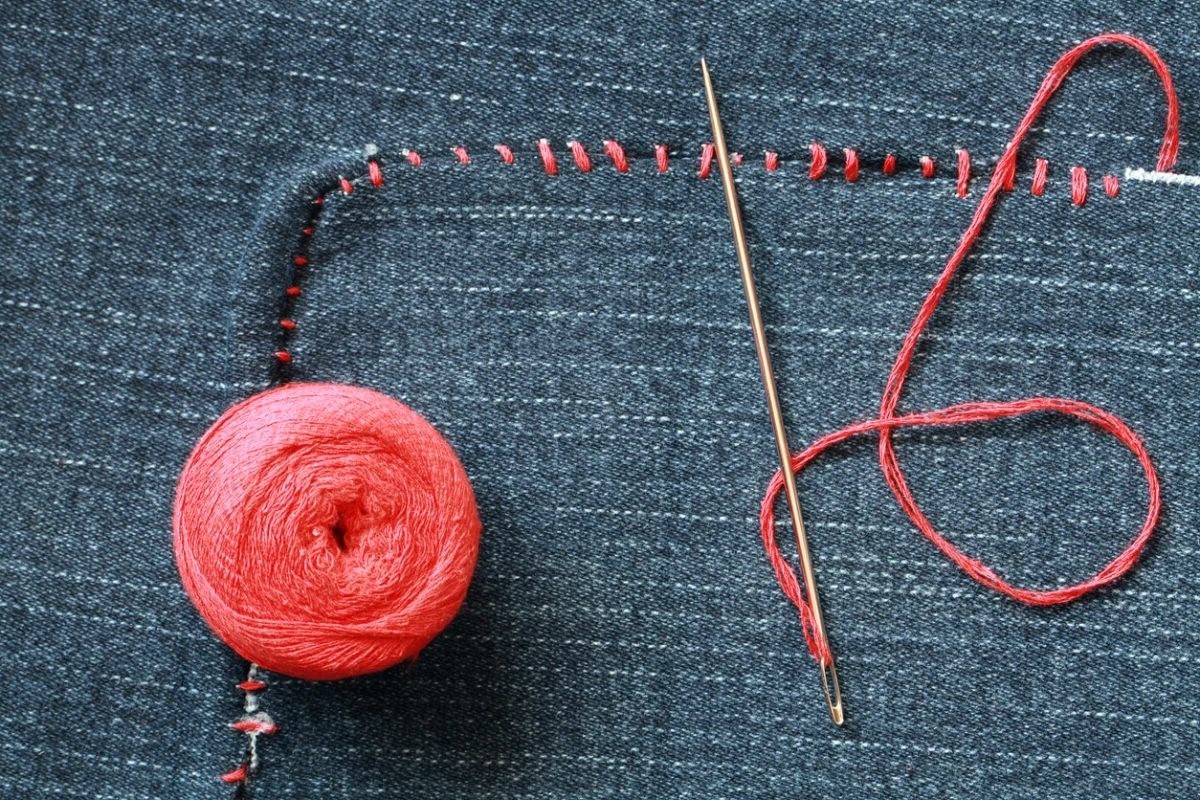
Step 4: Tie Off the Thread
As you near the completion of the sewing process, it's essential to secure the thread to ensure that your meticulous stitches remain intact. Tying off the thread provides a final layer of reinforcement, preventing unraveling and preserving the integrity of your repair. Here's a detailed guide on how to tie off the thread effectively:
-
Complete the Final Stitch: Once you've sewn across the entire perimeter of the hole and are satisfied with the reinforcement, position the needle on the underside of the fabric. Bring the needle up to the surface, ensuring that it emerges close to the last stitch.
-
Create a Small Loop: After bringing the needle through to the surface, leave a small loop of thread on the fabric. This loop will serve as the anchor for tying off the thread, securing the final stitches in place.
-
Pass the Needle Through the Loop: With the loop of thread in place, guide the needle through it to form a simple knot. Gently pull the thread to tighten the knot, ensuring that it sits snugly against the fabric without causing puckering or distortion.
-
Repeat for Added Security: For added reinforcement, consider passing the needle through the loop once more to create a double knot. This extra step further secures the thread and minimizes the risk of the knot coming undone over time.
-
Trim the Excess Thread: After tying off the thread, use sharp scissors to carefully trim the excess thread, leaving a small tail of approximately 1/4 inch. Be mindful not to cut the knot or the surrounding stitches, ensuring that the trimmed thread remains securely in place.
-
Secure the Tail: To prevent the trimmed thread from unraveling, you can secure the tail by applying a small drop of clear fabric glue or fray check. This additional measure ensures that the tail remains neatly in place, maintaining the seamless appearance of the repair.
By following these detailed steps to tie off the thread, you complete the sewing process with a final touch of precision and care. Tying off the thread not only secures your meticulous stitches but also provides a sense of accomplishment as you witness the transformation of a damaged garment into a beautifully mended treasure. With the thread securely tied off and the excess trimmed, your repaired garment is ready to be worn and cherished once again.
Conclusion
In the realm of home and garden care, the art of sewing a hole in a garment transcends mere practicality; it embodies a spirit of preservation and renewal. As we conclude this comprehensive guide, it's evident that the process of mending a hole goes beyond the physical act of sewing. It represents a commitment to sustainability, a celebration of craftsmanship, and a testament to the enduring value of cherished garments.
Through the meticulous preparation of the hole, the precise threading of the needle, the artful creation of stitches, and the final securing of the thread, we've embarked on a journey of transformation. What was once a damaged area on a beloved garment has now been seamlessly mended, breathing new life into the fabric and extending its journey alongside its wearer.
As we reflect on the significance of sewing a hole, we recognize the profound impact of this skill on our relationship with our belongings. The ability to mend and restore garments fosters a sense of connection and responsibility, encouraging us to cherish and care for the items that accompany us through life's moments. Each repaired hole becomes a testament to our dedication to sustainability, as we consciously choose to mend rather than discard, reducing waste and embracing the ethos of mindful consumption.
Moreover, the act of sewing a hole embodies the timeless art of craftsmanship, harkening back to an era when skilled hands and thoughtful precision were revered. In a world often characterized by haste and disposability, the act of mending a garment reintroduces us to the beauty of slow, intentional work. It invites us to savor the process, to honor the traditions of sewing, and to infuse our creations with a piece of ourselves.
Ultimately, as we tie off the thread and admire the seamless repair, we are reminded of the enduring value of our cherished garments. Each mended hole becomes a story of resilience, a testament to the enduring bond between the wearer and the garment. It is a reminder that with a needle, thread, and a touch of care, we can breathe new life into the fabric, preserving its history and extending its journey for years to come.
In the tapestry of home and garden care, the art of sewing a hole stands as a testament to the transformative power of craftsmanship, sustainability, and mindful consumption. As we embrace this timeless skill, we not only mend fabric but also weave a narrative of care, connection, and reverence for the items that accompany us on life's adventures.