Home>Arts and Culture>How To Draw A Bunny
Arts and Culture
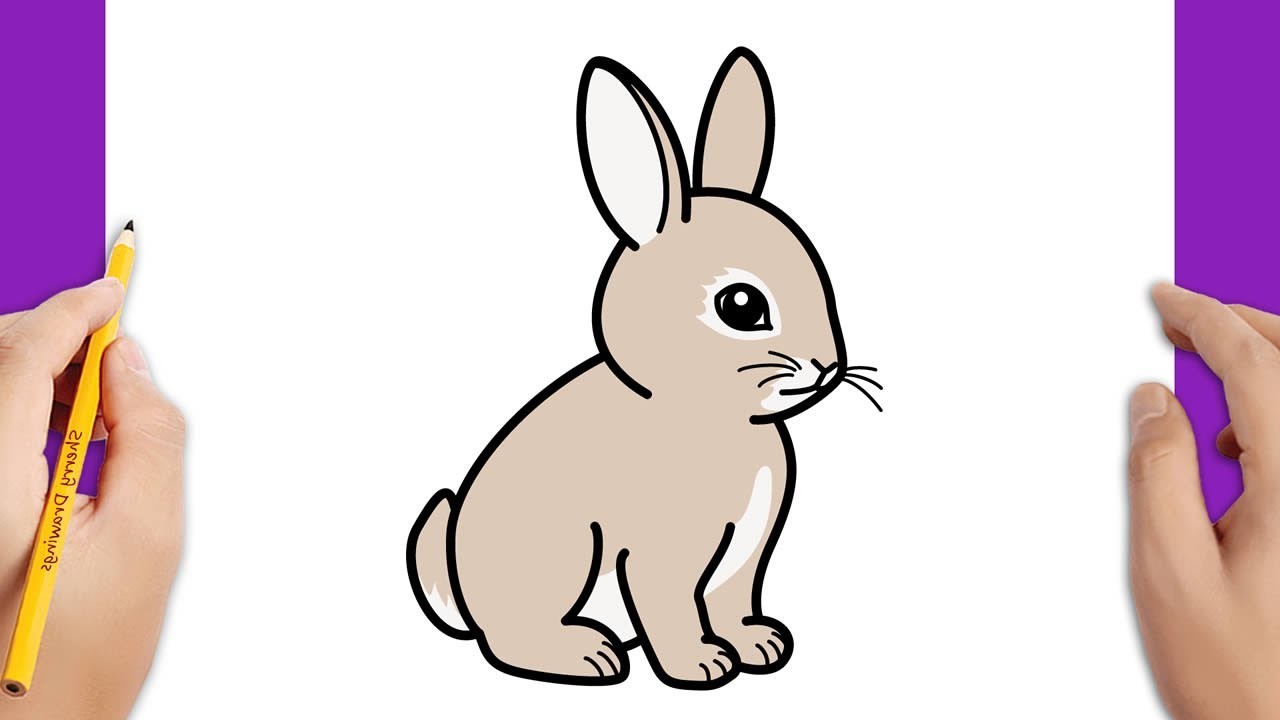
How To Draw A Bunny
Published: February 28, 2024
Learn how to draw a bunny with step-by-step instructions and unleash your creativity in the world of arts and culture. Master the art of bunny drawing today!
(Many of the links in this article redirect to a specific reviewed product. Your purchase of these products through affiliate links helps to generate commission for Noodls.com, at no extra cost. Learn more)
Table of Contents
Introduction
Drawing a bunny can be a delightful and rewarding experience, whether you are an aspiring artist or simply looking for a fun and creative activity. Bunnies are beloved creatures, often associated with charm, innocence, and the joy of springtime. Capturing their endearing features on paper can bring a sense of warmth and whimsy to your artwork.
In this step-by-step guide, you will learn how to draw a bunny in a simple and approachable manner. Whether you are using traditional pencil and paper or digital drawing tools, this tutorial will provide you with the fundamental techniques to create an adorable bunny illustration. By following these easy-to-understand instructions, you will gain confidence in your drawing skills and have the opportunity to unleash your creativity.
So, gather your artistic materials and get ready to embark on a delightful drawing journey. Whether you are creating a bunny character for a children's book, a personalized greeting card, or simply indulging in the joy of sketching, this tutorial will equip you with the essential steps to bring a charming bunny to life on your canvas. Let's dive in and discover the joy of drawing a bunny with simple yet effective techniques.
Read more: How To Draw A Shoe
Materials Needed
To begin your bunny-drawing adventure, you will need a few essential materials to ensure a smooth and enjoyable creative process. Here's a list of items that will help you bring your adorable bunny illustration to life:
-
Drawing Paper: Select a smooth and sturdy paper that is suitable for sketching and erasing. The paper should have enough tooth to hold the graphite or ink without smudging excessively.
-
Drawing Pencils: A set of drawing pencils with varying degrees of hardness (e.g., 2H, HB, 2B, 4B) will allow you to achieve different line weights and shading effects in your bunny drawing.
-
Eraser: A high-quality eraser, such as a kneaded eraser or vinyl eraser, is essential for correcting mistakes and refining details in your artwork.
-
Sharpener: Keep a reliable pencil sharpener on hand to ensure that your drawing pencils are consistently sharp for precise lines and fine details.
-
Reference Images: While drawing from imagination is a wonderful skill to develop, having reference images of real bunnies or bunny illustrations can provide valuable visual guidance and inspiration.
-
Drawing Board: If you prefer to work on a flat and stable surface, a drawing board or a smooth drawing pad will provide the necessary support for your artwork.
-
Optional: Digital Drawing Tools: If you are using digital drawing software and a graphics tablet, ensure that your digital tools are charged and ready for use.
By gathering these materials, you will set the stage for an enjoyable and successful bunny-drawing experience. With the right tools at your disposal, you can fully immerse yourself in the creative process and bring your adorable bunny illustration to life with confidence and ease.
Step 1: Draw the Bunny's Head
To begin your bunny drawing, start by sketching the outline of the bunny's head. Using a light pencil, create a simple oval shape to form the basic structure of the head. This initial shape will serve as the foundation for the bunny's adorable features. Remember to keep your lines light and loose, as you will refine and add details in later steps.
Next, within the oval shape, draw a slightly smaller circle towards the bottom to represent the muzzle of the bunny. This circle will form the basis for the bunny's cute nose and mouth. Ensure that the placement of the muzzle is slightly off-center to create a charming and dynamic look for your bunny character.
Once the basic shapes are in place, lightly sketch a horizontal line across the middle of the head to serve as a guide for the placement of the bunny's eyes. This guideline will help you maintain symmetry and proportion as you continue to develop the facial features.
After establishing the primary shapes and guidelines, you can begin adding the bunny's eyes. Draw two large, expressive ovals along the horizontal line, ensuring that they are evenly spaced and proportionate to the size of the head. These bright, lively eyes will infuse your bunny illustration with personality and charm.
To complete the bunny's head, add the essential details that give it a distinct rabbit-like appearance. Sketch a small triangular shape at the top of the head to represent one of the bunny's ears. Then, mirror this shape on the opposite side to create the second ear. Pay attention to the placement and angle of the ears, as they contribute to the overall character and expression of the bunny.
As you progress through this step, remember that the initial sketching phase allows for experimentation and adjustments. Embrace the creative process and allow your bunny's head to take shape organically. By focusing on the foundational elements of the head, you will set the stage for adding intricate details and bringing your endearing bunny illustration to life.
Step 2: Add the Bunny's Ears
With the foundation of the bunny's head sketched out, it's time to focus on adding the distinctive and endearing ears that will bring your bunny illustration to life. The ears play a pivotal role in defining the character and expression of the bunny, contributing to its overall charm and personality.
Begin by refining the shape and positioning of the bunny's ears. Using light and confident strokes, elongate the triangular shapes that were initially sketched as placeholders. Consider the size and placement of the ears in relation to the head, ensuring that they complement the overall proportions and add a sense of liveliness to your bunny character.
As you refine the ear shapes, pay attention to the subtle details that will enhance their visual appeal. Add gentle curves and subtle folds to the inner edges of the ears, mimicking the natural contours of a real bunny's ears. These delicate details will infuse your illustration with a sense of realism and warmth, capturing the essence of these beloved creatures.
To further accentuate the charm of the bunny's ears, consider incorporating fine lines and shading to create depth and dimension. By gently shading the inner areas of the ears and adding subtle highlights along the outer edges, you can evoke a sense of softness and texture, making the ears appear irresistibly touchable and lifelike.
As you work on refining the bunny's ears, remember to maintain a balance between precision and spontaneity. Embrace the organic nature of the drawing process, allowing the character of the bunny to emerge naturally through your artistic expression. By infusing the ears with a sense of playfulness and warmth, you will create an endearing focal point that captures the hearts of those who behold your delightful bunny illustration.
With the bunny's ears taking shape, you have laid a solid foundation for the next steps in completing your charming bunny drawing. The addition of these distinctive features brings a sense of whimsy and character to your artwork, setting the stage for further refinement and the introduction of additional captivating details. Embrace the joy of bringing your bunny illustration to life, one stroke at a time, and revel in the enchanting presence of this beloved creature on your canvas.
Step 3: Draw the Bunny's Body
As you transition to drawing the bunny's body, you are presented with the opportunity to further enhance the endearing charm of your illustration. The body serves as a vital element in capturing the distinctive form and character of a bunny, allowing you to infuse your artwork with a sense of grace and playfulness.
Begin by extending the outline of the bunny's head to form a smooth and flowing curve, creating the upper contour of the body. This gentle curve should gracefully connect to the lower part of the head, establishing a seamless transition that conveys the bunny's natural elegance and poise. As you craft this foundational line, pay attention to the fluidity of the curve, aiming to evoke a sense of softness and grace in the bunny's posture.
Next, continue to define the body by sketching a rounded shape that extends from the base of the head, representing the bunny's torso. This rounded form should maintain a sense of gentle curvature, reflecting the supple and agile nature of a real bunny's physique. As you refine the shape, consider the proportions and overall balance of the body, ensuring that it harmonizes with the size and character of the bunny's head.
With the basic form of the body established, you can proceed to add the bunny's hind legs, a defining feature that contributes to the endearing appeal of your illustration. Begin by sketching two elongated ovals that taper towards the bottom, capturing the graceful contours of the bunny's hind legs. Pay attention to the positioning of the legs in relation to the body, aiming to convey a sense of natural poise and elegance in the bunny's stance.
As you refine the shape of the hind legs, consider adding subtle details such as the suggestion of paws or the indication of fur texture, infusing your illustration with a touch of realism and warmth. These delicate touches can elevate the visual appeal of your bunny drawing, inviting viewers to connect with the charm and personality of this beloved creature.
By focusing on the intricate details of the bunny's body, you have the opportunity to infuse your illustration with a sense of liveliness and character, capturing the essence of these beloved creatures in your artwork. Embrace the joy of bringing the bunny's body to life, allowing your creative expression to flow seamlessly as you craft a captivating and endearing illustration that celebrates the timeless allure of bunnies.
Read more: How To Draw A Squirrel
Step 4: Add the Bunny's Legs and Tail
With the foundational elements of the bunny's head and body sketched out, it's time to focus on adding the essential features that define the lower portion of the bunny's anatomy. The addition of the bunny's legs and tail plays a crucial role in conveying the creature's grace and charm, contributing to the overall appeal of your endearing illustration.
Begin by extending the lower portion of the bunny's body to create a smooth and flowing curve that transitions into the hind legs. This gentle curve should seamlessly connect to the torso, reflecting the bunny's natural agility and elegance. As you craft this foundational line, pay attention to the fluidity of the curve, aiming to evoke a sense of grace and poise in the bunny's posture.
Next, proceed to sketch the hind legs with a focus on capturing the distinctive contours and proportions that characterize a bunny's lower body. Start by outlining the elongated and tapered shapes of the hind legs, paying close attention to the subtle curves and angles that convey the creature's nimbleness and agility. Ensure that the positioning of the hind legs aligns harmoniously with the overall stance and posture of the bunny, creating a sense of balance and fluidity in the illustration.
As you refine the shape of the hind legs, consider adding subtle details such as the suggestion of paws or the indication of fur texture, infusing your illustration with a touch of realism and warmth. These delicate touches can elevate the visual appeal of your bunny drawing, inviting viewers to connect with the charm and personality of this beloved creature.
Moving on to the tail, envision a fluffy and expressive appendage that complements the bunny's overall form. Sketch a gentle curve extending from the lower part of the bunny's body, forming the basis for the tail. Emphasize the soft and rounded contours of the tail, capturing the essence of the bunny's endearing nature. Consider adding subtle lines or shading to convey the texture and fluffiness of the tail, infusing it with a sense of tactile warmth and charm.
By focusing on the intricate details of the bunny's legs and tail, you have the opportunity to infuse your illustration with a sense of liveliness and character, capturing the essence of these beloved creatures in your artwork. Embrace the joy of bringing the bunny's lower anatomy to life, allowing your creative expression to flow seamlessly as you craft a captivating and endearing illustration that celebrates the timeless allure of bunnies.
Step 5: Add Details and Features
As you approach the final step of drawing your bunny, it's time to infuse your illustration with captivating details and features that will bring your adorable character to life. This stage allows you to add personality and charm to your bunny, elevating it from a simple sketch to a captivating work of art that exudes warmth and whimsy.
Begin by focusing on the facial features of the bunny. Refine the shape of the eyes, adding depth and expression through carefully placed highlights and shading. Consider the placement of the nose and mouth, ensuring that they convey a sense of gentle curiosity and endearing sweetness. Pay attention to the subtle nuances of the bunny's expression, allowing its personality to shine through in the delicate lines and contours of its features.
Moving on to the ears, consider adding intricate details such as the suggestion of fur texture or subtle shading to enhance their visual appeal. Emphasize the softness and warmth of the ears, infusing them with a tactile quality that invites the viewer to connect with the gentle nature of the bunny.
As you refine the bunny's body, take the opportunity to add subtle indications of fur texture, using light strokes to convey the soft and velvety appearance of the bunny's coat. Consider the contours and curves of the body, ensuring that they reflect the natural grace and elegance of these beloved creatures.
When adding details to the bunny's legs and tail, focus on capturing the delicate features that define these areas. Consider the suggestion of paws and the gentle curvature of the tail, infusing them with a sense of liveliness and character. Pay attention to the subtle nuances of movement and form, allowing the bunny's lower anatomy to complement its overall presence with grace and charm.
Throughout this final step, embrace the opportunity to infuse your bunny illustration with a sense of warmth and personality. By adding intricate details and features, you can create a captivating portrayal of this beloved creature, inviting viewers to connect with its endearing nature and timeless allure. Embrace the joy of bringing your bunny to life on the canvas, celebrating the charm and innocence of these beloved creatures through your artistic expression.
Conclusion
In conclusion, the process of drawing a bunny is a delightful and fulfilling artistic endeavor that allows you to capture the endearing charm and innocence of these beloved creatures. Throughout this step-by-step guide, you have embarked on a creative journey that has equipped you with the fundamental techniques to bring a charming bunny to life on your canvas. From sketching the bunny's head and adding its distinctive features to capturing the grace and playfulness of its body, you have delved into the art of creating an adorable bunny illustration with simple yet effective methods.
As you have navigated through the steps, you have not only honed your drawing skills but also embraced the joy of infusing your artwork with warmth, personality, and whimsy. Each stroke of the pencil has allowed you to breathe life into your bunny character, evoking a sense of endearing charm and timeless allure. By focusing on the intricate details and nuances that define a bunny's form, you have celebrated the gentle nature of these beloved creatures, inviting viewers to connect with their irresistible appeal.
Drawing a bunny goes beyond the act of creating a visual representation; it is an opportunity to convey the essence of innocence, grace, and joy through art. As you add the final touches and details to your bunny illustration, you have the chance to infuse it with a sense of warmth and character, inviting others to appreciate the timeless allure of these beloved creatures. Whether you are creating a bunny character for a children's book, a personalized greeting card, or simply indulging in the joy of sketching, the process of drawing a bunny allows you to celebrate the enduring charm of these beloved creatures through your artistic expression.
As you reflect on your creative journey, remember that the art of drawing a bunny extends beyond the technical aspects; it is a celebration of the whimsical and endearing nature of these beloved creatures. Embrace the joy of bringing your bunny to life on the canvas, allowing your artistic expression to capture the essence of innocence and charm. Whether you are a seasoned artist or a novice enthusiast, the act of drawing a bunny offers a delightful and rewarding experience that celebrates the timeless allure of these beloved creatures. So, pick up your pencils, unleash your creativity, and revel in the enchanting presence of bunnies on your canvas.