Home>Arts and Culture>How To Draw An Owl
Arts and Culture
How To Draw An Owl
Published: February 27, 2024
Learn the art of drawing an owl with step-by-step instructions. Explore your creativity and enhance your skills in arts and culture. Start drawing today!
(Many of the links in this article redirect to a specific reviewed product. Your purchase of these products through affiliate links helps to generate commission for Noodls.com, at no extra cost. Learn more)
Table of Contents
Introduction
Drawing is a wonderful form of self-expression and creativity that allows individuals to bring their imagination to life on a blank canvas. Whether you are an aspiring artist or simply looking to explore a new hobby, learning how to draw an owl can be a rewarding and enjoyable experience. Owls are fascinating creatures known for their enigmatic and wise demeanor, making them a popular subject for artists of all skill levels.
In this step-by-step guide, we will delve into the art of drawing an owl, providing you with easy-to-follow instructions and helpful tips to create a stunning representation of this majestic bird. From sketching the basic body shape to adding intricate details, you will embark on a journey that combines artistic flair with a touch of natural beauty.
As you embark on this artistic endeavor, remember that there are no strict rules when it comes to drawing. Each stroke of the pencil is an opportunity to infuse your unique style and personality into the artwork. So, grab your drawing materials and let's spread our wings into the captivating world of owl illustration.
Read more: How To Draw People
Materials Needed
Before diving into the creative process of drawing an owl, it's essential to gather the necessary materials to bring your artistic vision to life. Here's a list of items you'll need to get started:
-
Drawing Paper: Select a smooth, sturdy paper that can withstand pencil strokes and erasures without tearing or smudging. A standard sketch pad or drawing paper will suffice for this project.
-
Pencils: Invest in a set of high-quality drawing pencils with varying lead hardness, such as 2H, HB, 2B, 4B, and 6B. These different grades of pencils will allow you to achieve a range of light and dark tones in your artwork.
-
Eraser: A soft, kneaded eraser is ideal for gently correcting mistakes and lightening pencil marks without damaging the paper's surface.
-
Blending Stump or Tortillon: These tools are used for blending and smudging graphite or charcoal to create smooth, seamless transitions between shades.
-
Reference Image: While drawing from imagination is a valuable skill, having a reference image of an owl can provide helpful guidance on the bird's anatomy, proportions, and distinctive features. You can use a printed photograph or refer to an image on a digital device.
-
Drawing Board: A sturdy drawing board or a hardback surface to support your drawing paper will ensure stability and prevent creases or wrinkles in your artwork.
-
Sharpener: Keep your pencils sharp and ready for precise lines by using a reliable pencil sharpener.
-
Ruler: Although not always necessary, a ruler can aid in creating straight lines and maintaining symmetry in certain aspects of the owl's illustration.
By assembling these essential materials, you'll be well-equipped to embark on the artistic journey of drawing an owl with confidence and creativity. With your workspace prepared and your tools at the ready, let's move on to the first step of bringing this captivating creature to life on paper.
Step 1: Draw the Body
To commence the artistic process of drawing an owl, begin by sketching the basic outline of its body. Using a light pencil, loosely outline the general shape of the owl's body, keeping the lines fluid and adaptable. Start by drawing a large oval or egg-like shape to represent the owl's core body structure. This initial shape will serve as the foundation for the owl's form and will guide the placement of its wings, head, and other defining features.
Next, extend two slightly curved lines downward from the bottom of the oval to create the owl's legs. These lines should taper towards the bottom to form the bird's talons. Remember to maintain a light touch with your pencil, allowing for adjustments and refinements as you progress.
Once the basic body shape and leg structure are in place, focus on adding the owl's distinctive tail feathers. Extend a series of short, rounded lines from the lower part of the body, creating a fan-like arrangement to represent the tail. The number of tail feathers can vary based on your artistic interpretation, but a symmetrical and balanced display is typically visually appealing.
As you refine the body's outline, take a step back to assess the overall proportions and symmetry. Pay attention to the placement of the legs, ensuring they align harmoniously with the body's centerline. Additionally, consider the positioning of the tail feathers in relation to the body, aiming for a balanced and aesthetically pleasing composition.
Throughout this initial stage, maintain a light and adaptable approach to sketching the owl's body. Embrace the fluidity of the creative process, allowing room for adjustments and modifications as you progress. By establishing a solid foundation for the owl's body, you set the stage for adding intricate details and bringing the creature to life with depth and dimension.
With the body outline taking shape, you are ready to transition to the next step in the artistic journey of drawing an owl – adding the wings to further enhance the bird's majestic presence on paper.
Step 2: Add the Wings
With the foundational body structure of the owl sketched onto the paper, the next step involves adding the intricate details of the wings, a defining feature that contributes to the bird's graceful and majestic appearance. Begin by visualizing the positioning of the wings in relation to the body, considering the owl's characteristic wing shape and feather arrangement.
Using a light pencil, delicately outline the broad, rounded shape of the owl's wings, ensuring that they extend outward from the sides of the body with a gentle upward curve. The wings should encompass a substantial portion of the owl's body, reflecting the bird's impressive wingspan and aerial prowess. As you sketch the wing outlines, maintain a fluid and adaptable approach, allowing for adjustments to achieve the desired wing shape and proportion.
Once the basic wing structure is in place, focus on delineating the intricate feather details that adorn the owl's wings. Start by drawing a series of overlapping, curved lines within the wing framework, mimicking the texture and pattern of the owl's feathers. Pay attention to the natural flow and arrangement of the feathers, aiming to capture the essence of the owl's plumage with each delicate stroke of the pencil.
As you progress, consider incorporating subtle variations in shading to convey depth and dimension within the wings. Use a combination of light and dark pencil strokes to create a sense of volume and texture, enhancing the visual impact of the feathers. Additionally, utilize a blending stump or tortillon to gently smudge and blend the pencil marks, achieving a smooth and seamless transition between different areas of the wings.
Throughout this process, maintain a keen eye for symmetry and balance, ensuring that both wings exhibit harmonious proportions and feather arrangements. Take moments to step back and assess the overall appearance of the wings in relation to the owl's body, making any necessary adjustments to achieve a cohesive and visually captivating portrayal.
By infusing the wings with intricate feather details and a sense of graceful movement, you breathe life into the owl's illustration, capturing the essence of this remarkable bird's aerial beauty. With the wings now taking shape, the artistic journey of drawing an owl continues to unfold, inviting you to delve into the next stage of bringing the bird's captivating features to life on paper.
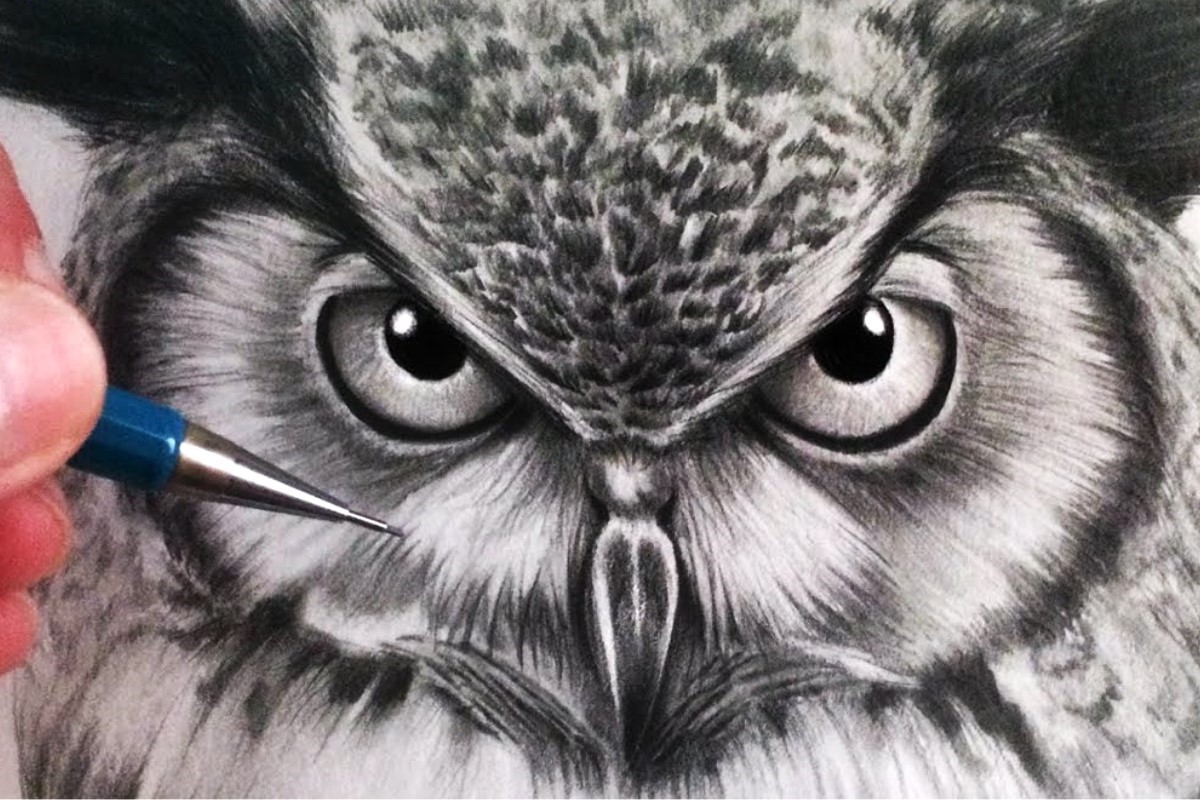
Step 3: Draw the Face
Drawing the face of the owl is a pivotal stage in capturing the bird's enigmatic and captivating essence. The owl's facial features, including its large, expressive eyes and distinctive beak, are central to its identity and allure. As you embark on this step, approach it with a sense of reverence for the owl's unique characteristics, aiming to infuse the illustration with depth and personality.
Begin by focusing on the placement of the owl's eyes, which serve as a focal point of its facial expression. Position the eyes towards the upper portion of the owl's face, taking into account their size and proportion in relation to the body. The eyes are typically large and round, reflecting the owl's acute vision and commanding presence. With a light pencil, delicately outline the circular shape of the eyes, ensuring that they convey a sense of depth and intensity.
Next, add intricate details to the eyes, such as the iris and pupil, to imbue them with a lifelike quality. Consider incorporating subtle shading around the eyes to create a sense of depth and dimension, enhancing the owl's gaze with a captivating allure. The eyes are a window to the owl's soul, exuding an air of wisdom and mystery that defines the bird's persona.
Moving on to the beak, carefully sketch the distinctive shape of the owl's beak, which varies in size and curvature based on the owl species. Whether it is short and robust or long and slender, the beak plays a crucial role in conveying the owl's predatory nature and distinctive facial profile. Pay attention to the beak's placement and proportion in relation to the eyes, ensuring a harmonious balance within the overall facial structure.
As you refine the facial features, take moments to step back and assess the owl's expression, aiming to capture the bird's enigmatic allure and commanding presence. Embrace the opportunity to infuse the owl's face with a sense of character and depth, allowing the illustration to resonate with the bird's inherent mystique.
By drawing the face of the owl with precision and reverence, you breathe life into the illustration, encapsulating the bird's captivating persona with each stroke of the pencil. With the facial features now taking shape, the artistic journey of drawing an owl continues to unfold, inviting you to delve into the next stage of bringing the bird's captivating features to life on paper.
Read more: How To Draw A Squirrel
Step 4: Add Details
As you progress through the artistic process of drawing an owl, the stage of adding intricate details serves as a pivotal opportunity to infuse the illustration with depth, texture, and visual richness. This step allows you to embellish the owl's form with nuanced elements that capture the bird's distinctive characteristics and natural allure.
Begin by focusing on the intricate texture of the owl's feathers, a defining feature that contributes to the bird's majestic presence. With a keen eye for detail, delicately sketch the intricate patterns and contours of the owl's plumage, paying attention to the natural flow and arrangement of the feathers. Consider the varying lengths and densities of the feathers, aiming to convey a sense of volume and dimension within the illustration. By incorporating subtle variations in shading and texture, you can evoke the tactile quality of the owl's feathers, infusing the artwork with a lifelike and captivating allure.
Moving on to the owl's talons, take the opportunity to depict the bird's powerful and formidable claws with precision and artistry. Sketch the curved and pointed shape of the talons, reflecting the owl's predatory nature and adept hunting abilities. Pay attention to the positioning of the talons in relation to the body, ensuring a sense of balance and poise within the overall composition. By infusing the talons with a sense of strength and dynamism, you further enhance the owl's portrayal, capturing the bird's innate prowess and commanding presence.
Additionally, consider incorporating subtle environmental elements to contextualize the owl within its natural habitat. Whether it's a hint of foliage, a textured tree branch, or a moonlit backdrop, these details can enrich the illustration, adding depth and narrative resonance to the artwork. By thoughtfully integrating these environmental nuances, you create a compelling visual narrative that transports the viewer into the captivating world of the owl's domain.
Throughout this stage, maintain a harmonious balance between intricate details and overall composition, ensuring that each element contributes to the cohesive and captivating portrayal of the owl. Embrace the creative freedom to infuse the illustration with your unique artistic flair, allowing the intricate details to resonate with the bird's inherent mystique and natural beauty.
With the addition of these intricate details, the artistic journey of drawing an owl reaches a crescendo, culminating in a visually captivating and evocative portrayal of this remarkable bird. As you immerse yourself in this stage of the creative process, savor the opportunity to bring the owl's captivating features to life on paper, infusing the illustration with depth, texture, and a sense of timeless allure.
Step 5: Final Touches
As you approach the culmination of the artistic journey of drawing an owl, the stage of final touches presents a pivotal opportunity to refine and elevate the illustration to its full potential. This phase allows you to meticulously assess the composition, make nuanced adjustments, and infuse the artwork with a sense of polished finesse.
Begin by conducting a comprehensive review of the entire illustration, taking note of any areas that may benefit from subtle refinements or enhancements. Pay close attention to the overall balance, proportion, and visual impact of the owl's portrayal, ensuring that each element harmonizes seamlessly to convey the bird's captivating presence.
Next, consider the application of shading and tonal variations to evoke a sense of depth and dimension within the illustration. Utilize a combination of light and dark pencil strokes to accentuate contours, create subtle gradients, and enhance the three-dimensional quality of the owl's form. By thoughtfully refining the shading, you can imbue the artwork with a captivating sense of realism and visual depth.
Furthermore, take the opportunity to refine the intricate details of the owl's feathers, facial features, and talons, aiming to achieve a delicate balance between meticulous precision and artistic expression. Embrace the subtle art of fine-tuning, allowing each stroke of the pencil to contribute to the overall refinement and visual richness of the illustration.
As you approach the final touches, consider the incorporation of subtle highlights to accentuate the owl's features and imbue the artwork with a luminous quality. Delicately apply highlights to areas where light would naturally strike, such as the eyes, feathers, and talons, enhancing the illustration with a sense of luminosity and vitality.
Lastly, step back and assess the illustration with a discerning eye, ensuring that it resonates with the captivating essence of the owl while showcasing your unique artistic sensibilities. Embrace the opportunity to infuse the artwork with a touch of your personal style, allowing the final touches to reflect your creative vision and reverence for the natural beauty of the owl.
With the meticulous application of final touches, the artistic journey of drawing an owl culminates in a visually captivating and evocative portrayal of this remarkable bird. As you immerse yourself in this stage of the creative process, savor the opportunity to bring the owl's captivating features to life on paper, infusing the illustration with depth, texture, and a sense of timeless allure.
Conclusion
In the realm of artistic expression, the process of drawing an owl transcends the mere act of sketching; it becomes a captivating journey of capturing the essence of a remarkable creature. As we conclude this artistic endeavor, it is essential to reflect on the profound experience of bringing the enigmatic owl to life on paper.
Drawing an owl is a testament to the fusion of technical skill and creative intuition, where each stroke of the pencil serves as a conduit for infusing the illustration with depth, character, and timeless allure. From the initial sketch of the owl's body to the meticulous detailing of its feathers and facial features, every stage of the artistic process unfolds as a harmonious symphony of artistry and reverence for the natural world.
As the final touches delicately refine the illustration, a sense of accomplishment and connection to the owl's captivating persona permeates the creative space. The portrayal of the owl transcends the confines of paper and graphite, resonating with the inherent mystique and wisdom that define these majestic birds. It is a testament to the artist's ability to evoke emotion and narrative through the medium of visual art, inviting viewers to immerse themselves in the captivating world of the owl's domain.
Moreover, drawing an owl serves as a poignant reminder of the profound beauty that surrounds us in the natural world. It fosters a deep appreciation for the intricate details and timeless elegance found in the feathers, eyes, and form of these remarkable creatures. Through the act of artistic interpretation, we pay homage to the owl's role as a symbol of wisdom, intuition, and enigmatic allure, transcending cultural and artistic boundaries.
In essence, the journey of drawing an owl extends beyond the confines of a creative exercise; it becomes a celebration of the inherent beauty and mystique found in nature. It is a testament to the artist's ability to encapsulate the essence of a living being through the delicate interplay of lines, shadows, and form. As the final strokes of the pencil bring the illustration to fruition, a sense of reverence and wonder permeates the artistic space, leaving an indelible impression of the owl's timeless allure.
In the end, drawing an owl is not merely an artistic endeavor; it is a profound homage to the captivating spirit of these enigmatic birds, inviting us to embrace the beauty and wisdom that permeate the natural world.