Home>Arts and Culture>How To Draw Mickey Mouse

Arts and Culture
How To Draw Mickey Mouse
Published: February 29, 2024
Learn how to draw Mickey Mouse with step-by-step instructions and tips. Explore the world of arts and culture with our fun and easy drawing tutorial.
(Many of the links in this article redirect to a specific reviewed product. Your purchase of these products through affiliate links helps to generate commission for Noodls.com, at no extra cost. Learn more)
Table of Contents
Introduction
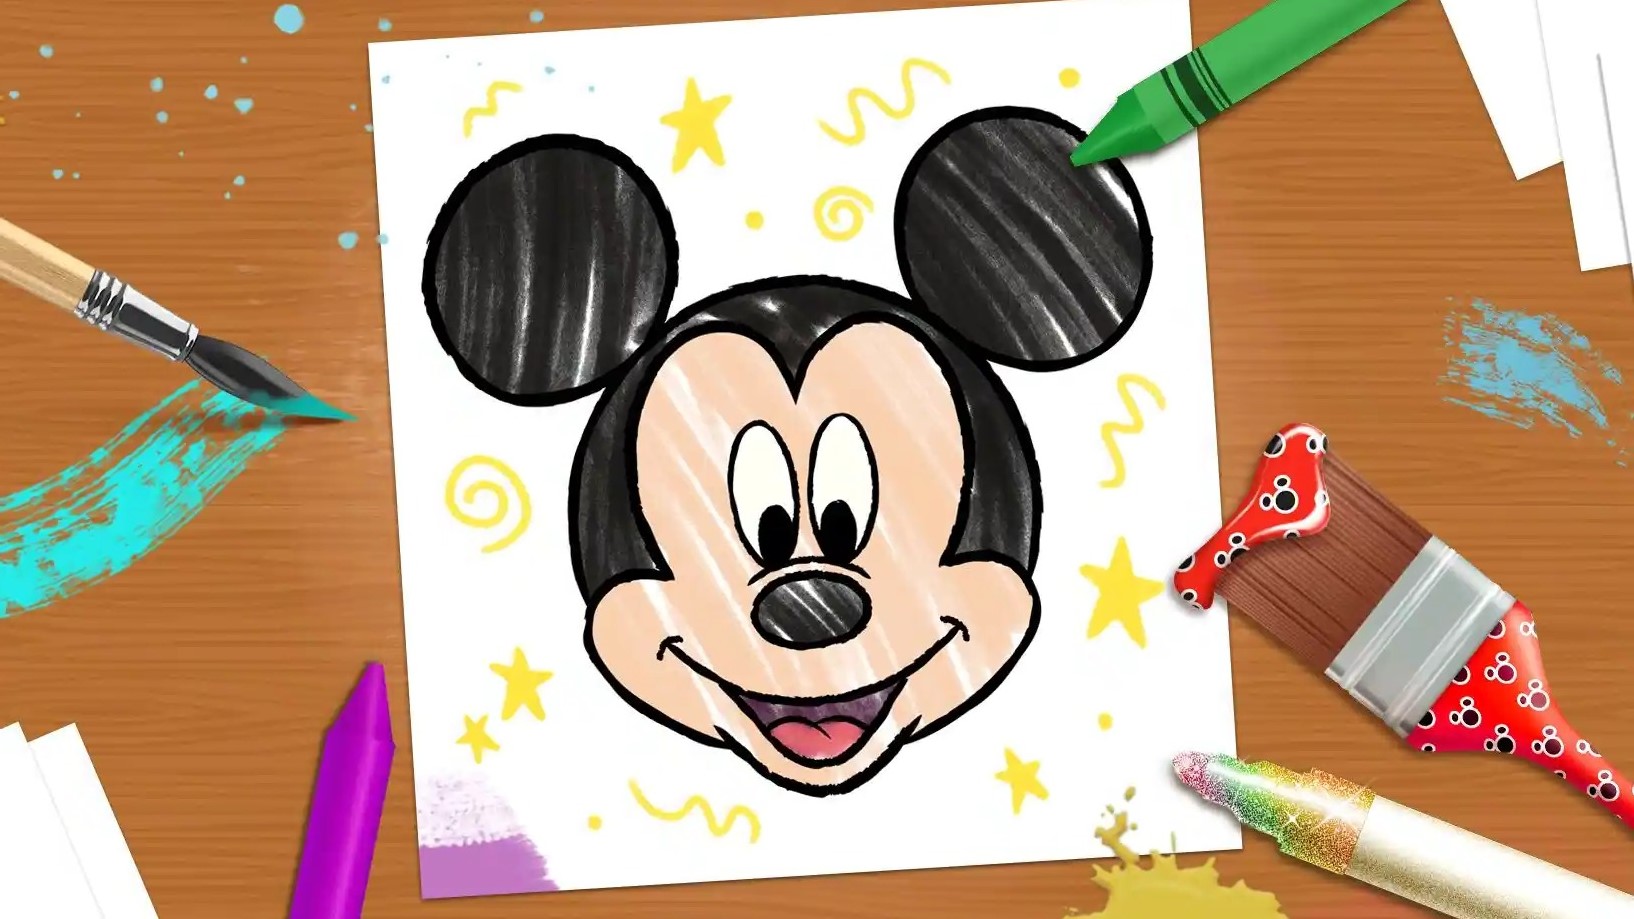
Mickey Mouse, the iconic and beloved character created by Walt Disney and Ub Iwerks, has captured the hearts of audiences worldwide since his debut in 1928. As a timeless symbol of joy, imagination, and creativity, Mickey Mouse continues to inspire people of all ages. Whether you're an aspiring artist, a Disney enthusiast, or simply looking to embark on a fun drawing project, learning how to draw Mickey Mouse can be a delightful and rewarding experience.
In this step-by-step guide, we will explore the process of drawing Mickey Mouse, from his distinctive circular head to his cheerful smile and iconic attire. By following these instructions and allowing your creativity to flow, you can bring this beloved character to life on paper. So, grab your drawing materials, unleash your imagination, and let's embark on a magical journey to learn how to draw the one and only Mickey Mouse!
Materials Needed
Before you begin your artistic endeavor to draw Mickey Mouse, it's essential to gather the necessary materials to ensure a smooth and enjoyable drawing experience. Here's a list of items you'll need to bring Mickey Mouse to life on paper:
-
Drawing Paper: Select a smooth, sturdy, and acid-free drawing paper to provide a suitable surface for your artwork. The paper should be thick enough to withstand erasing and shading without tearing.
-
Pencils: A set of high-quality pencils, including HB, 2B, and 4B, will allow you to create varying line weights and achieve different levels of shading in your drawing.
-
Eraser: A soft, kneaded eraser is ideal for gently lifting graphite and making precise corrections without damaging the paper.
-
Sharpener: Keep a reliable pencil sharpener on hand to ensure that your pencils are consistently sharp for precise lines and details.
-
Ruler: While Mickey Mouse's iconic circular head may not require precise measurements, a ruler can be helpful for maintaining proportion and symmetry in your drawing.
-
Reference Image: Having a reference image of Mickey Mouse, whether it's a printed picture or a digital reference on a screen, will guide you in capturing the character's distinctive features and expressions.
-
Coloring Materials (Optional): If you plan to add color to your Mickey Mouse drawing, consider including colored pencils, markers, or paints in your materials.
By gathering these essential materials, you'll be well-equipped to embark on the creative journey of drawing Mickey Mouse with confidence and enthusiasm. With your artistic tools at the ready, you're now prepared to dive into the step-by-step process of bringing this beloved Disney character to life on paper.
Step 1: Draw Mickey's Head
To begin drawing Mickey Mouse, start by creating a large, circular shape at the center of your paper. This circle will serve as the foundation for Mickey's iconic head. Using a light pencil, sketch the circle with smooth, rounded strokes, allowing the shape to gradually take form. Don't worry about achieving perfect symmetry at this stage; focus on capturing the general outline of the circle.
As you refine the circular shape, pay attention to the proportions and size, aiming to create a well-defined silhouette for Mickey's head. Take your time to adjust the shape as needed, ensuring that it reflects the characteristic roundness that defines Mickey Mouse's appearance.
Once you are satisfied with the overall shape of the circle, you can proceed to add a center guideline. This guideline will help you position Mickey's facial features accurately within the circular head. Lightly draw a vertical line intersecting the circle's center and a horizontal line across the middle, intersecting the vertical line. These guidelines will serve as reference points as you continue to develop Mickey's facial features in the subsequent steps.
Drawing Mickey Mouse's head is a foundational step that sets the stage for capturing his timeless charm and personality. By focusing on achieving a well-proportioned and symmetrical circular shape, you lay the groundwork for bringing this beloved Disney character to life on paper. With Mickey's head taking shape, you're now ready to move on to the next step and add his iconic ears, further enhancing the recognizable silhouette of this endearing character.
Step 2: Add Mickey's Ears
With Mickey Mouse's head taking form on the paper, it's time to infuse his unmistakable charm by adding his iconic ears. Mickey's ears are a defining feature that contributes to his timeless appeal and recognizable silhouette. To begin, position yourself to the left of the circular head and draw a curved line that extends outward, mirroring the contour of the head. This line should curve upward and then sharply bend to form the top of Mickey's left ear. Next, continue the line downward, curving it back in toward the head to create the lower edge of the ear. Ensure that the ear maintains a smooth and rounded appearance, capturing the classic shape that has made Mickey Mouse instantly identifiable for generations.
Once the left ear is sketched, repeat the process on the right side of Mickey's head to create his second ear. Begin by drawing a curved line that mirrors the shape and size of the left ear, extending it outward and then curving it back toward the head to form the lower edge. Pay close attention to symmetry, aiming to achieve a balanced and harmonious appearance between the two ears. As you refine the shape of the right ear, ensure that it complements the left ear, contributing to the overall symmetry and character of Mickey Mouse's endearing visage.
As Mickey's ears come to life on the page, take a moment to step back and admire the progress. The addition of his iconic ears not only enhances the visual appeal of the drawing but also solidifies the unmistakable identity of this beloved Disney character. With Mickey's head and ears now established, the next step will delve into capturing the essence of his cheerful and expressive face, further enriching the portrayal of this timeless icon.
Step 3: Draw Mickey's Face
With Mickey Mouse's characteristic circular head and iconic ears in place, it's time to focus on capturing the essence of his expressive face. Begin by locating the center of the circular head, where the vertical and horizontal guidelines intersect. This central point serves as a pivotal reference for positioning Mickey's facial features with precision and balance.
Starting from the center point, lightly sketch a small oval to represent Mickey's button-like nose. The oval should be positioned slightly below the horizontal guideline, maintaining a proportional distance from the top of the head. As you refine the shape of the nose, aim to achieve a gentle, rounded appearance that complements the overall charm of Mickey's visage.
Next, draw a wide, curved line that extends from the left side of the nose, arching upward and then curving back down to form Mickey's endearing smile. Pay close attention to the curvature and proportions of the smile, ensuring that it reflects Mickey's signature expression of joy and warmth. As the smile takes shape, allow it to gracefully extend beyond the circular outline of the head, capturing the exuberant spirit that defines this beloved character.
Moving upward from the nose, position yourself slightly above the horizontal guideline and sketch two large, circular eyes on either side of the vertical guideline. Mickey's eyes are a focal point of his animated personality, so take care to create well-defined, expressive circles that convey his cheerful and mischievous nature. Within each eye, add a smaller circle to represent the pupils, infusing them with a sense of liveliness and animation.
As Mickey's endearing face emerges on the paper, take a moment to observe the harmonious interplay of his nose, smile, and eyes. Pay attention to the positioning and proportions of each feature, ensuring that they collectively capture the timeless appeal and playful spirit of this beloved Disney character.
With Mickey's face now taking shape, the next step will delve into adding his iconic body, further enriching the portrayal of this timeless icon on paper.
Step 4: Add Mickey's Body
As Mickey Mouse's endearing face comes to life on the paper, it's time to extend the portrayal of this beloved character by adding his iconic body. Begin by positioning yourself below Mickey's circular head, allowing ample space to depict his cheerful and animated body. With a light pencil, sketch a large, rounded shape beneath Mickey's head to represent his torso. This shape should maintain a sense of proportion and balance with the head, contributing to the overall harmony of Mickey's portrayal.
Next, extend two slightly curved lines downward from the bottom of Mickey's torso, forming the basic framework for his legs. These lines should gradually converge, creating a gentle tapering effect to represent Mickey's legs as they extend downward. As you refine the shape of the legs, pay attention to symmetry and proportion, ensuring that they complement the character's joyful and dynamic demeanor.
Moving to the bottom of Mickey's legs, sketch two oval shapes to depict his distinctive, oversized shoes. Mickey's shoes are a defining element of his iconic appearance, characterized by their exaggerated proportions and playful charm. As you craft the shape of each shoe, aim to capture the whimsical essence that has made Mickey's footwear an enduring symbol of his endearing personality.
With Mickey's body and shoes taking form on the page, step back to appreciate the evolving portrayal of this beloved Disney character. The addition of his body not only enriches the visual narrative but also contributes to capturing the lively and spirited essence of Mickey Mouse. As the portrayal of Mickey's body unfolds, the next step will delve into adding his expressive hands and feet, further enhancing the dynamic and engaging depiction of this timeless icon on paper.
By following these step-by-step instructions and infusing your artistic interpretation, you can bring Mickey Mouse to life on paper, celebrating his enduring legacy and captivating spirit through the timeless art of drawing.
Step 5: Draw Mickey's Hands and Feet
As Mickey Mouse's endearing portrayal continues to unfold on the paper, it's time to infuse his lively and expressive persona by adding his distinctive hands and oversized feet. These iconic features are integral to capturing the dynamic and animated essence of this beloved Disney character.
Begin by focusing on Mickey's hands, which play a pivotal role in conveying his playful and endearing gestures. Position yourself near the lower part of Mickey's torso and sketch two curved lines extending outward to represent his arms. These lines should gracefully taper as they extend, creating a sense of fluidity and movement. As you refine the shape of the arms, pay attention to proportion and symmetry, ensuring that they complement Mickey's cheerful demeanor.
Moving to the end of each arm, sketch a series of overlapping, curved lines to form Mickey's distinctive gloved hands. The exaggerated proportions and whimsical charm of Mickey's gloves are central to his iconic appearance, so take care to capture their characteristic shape and appeal. Within each glove, add a circular shape to represent Mickey's fingers, infusing them with a sense of animation and vitality.
With Mickey's hands taking form on the page, shift your focus to his oversized feet, another defining feature that contributes to his timeless appeal. Position yourself at the bottom of Mickey's legs and sketch two large, rounded shapes to depict his iconic shoes. These shapes should maintain a sense of proportion and balance with the rest of Mickey's portrayal, reflecting the playful and dynamic nature of this beloved character.
As you refine the shape of each shoe, pay attention to the exaggerated proportions and whimsical details that define Mickey's footwear. The portrayal of Mickey's hands and feet not only enriches the visual narrative but also captures the lively and spirited essence of this timeless icon.
With Mickey's hands and feet now taking shape on the page, step back to admire the evolving portrayal of this beloved Disney character. By following these step-by-step instructions and infusing your artistic interpretation, you can bring Mickey Mouse to life on paper, celebrating his enduring legacy and captivating spirit through the timeless art of drawing.
Step 6: Add Mickey's Clothing and Features
As the portrayal of Mickey Mouse nears completion, the final step involves adding his iconic clothing and distinctive features, further enriching the vibrant and engaging depiction of this beloved Disney character.
Begin by focusing on Mickey's attire, which includes his signature red shorts and oversized yellow shoes. Position yourself near the lower part of Mickey's torso and carefully sketch a pair of large, rounded shorts that extend slightly below his torso. These shorts are a defining element of Mickey's classic ensemble, symbolizing his playful and carefree nature. As you refine the shape of the shorts, pay attention to their proportions and positioning, ensuring that they complement the overall portrayal of Mickey's dynamic and endearing persona.
Moving to the bottom of Mickey's legs, emphasize the exaggerated proportions and whimsical charm of his oversized yellow shoes. These iconic footwear pieces are integral to Mickey's timeless appearance, reflecting his animated and lighthearted character. Craft the shape of each shoe with attention to detail, capturing the playful essence that has made Mickey's footwear an enduring symbol of his endearing personality.
With Mickey's clothing taking form on the page, shift your focus to adding the finishing touches to his features. Enhance the portrayal of Mickey's face by refining the contours of his nose, smile, and eyes, ensuring that they exude warmth, joy, and animated charm. Pay attention to the subtle nuances of his expression, infusing his features with a sense of liveliness and personality.
As the portrayal of Mickey Mouse comes to fruition, take a moment to step back and admire the vibrant and dynamic depiction of this beloved Disney character. By following these step-by-step instructions and infusing your artistic interpretation, you have brought Mickey Mouse to life on paper, celebrating his enduring legacy and captivating spirit through the timeless art of drawing.
With Mickey's clothing and features now seamlessly integrated into the portrayal, you have successfully captured the essence of this beloved icon, honoring his timeless appeal and endearing charisma through the expressive medium of art.
Conclusion
In conclusion, the process of drawing Mickey Mouse is a delightful and rewarding artistic journey that allows enthusiasts to celebrate the enduring legacy of this beloved Disney character. From the distinctive circular shape of Mickey's head to the iconic features that define his cheerful and animated persona, each step in the drawing process offers an opportunity to capture the timeless charm and playful spirit of this endearing icon.
As aspiring artists and Disney enthusiasts embark on the creative endeavor of drawing Mickey Mouse, they are invited to infuse their unique artistic interpretation into each stroke of the pencil, allowing their creativity to harmonize with the timeless essence of this beloved character. By following the step-by-step instructions and embracing the playful nature of Mickey Mouse's portrayal, artists can experience the joy of bringing this iconic figure to life on paper, celebrating his enduring legacy and captivating spirit through the expressive medium of art.
Through the careful attention to detail in capturing Mickey's distinctive features, from his cheerful smile to his oversized shoes, artists can immerse themselves in the playful and dynamic world of this beloved character. The process of drawing Mickey Mouse not only hones artistic skills but also fosters a sense of connection to the imaginative and heartwarming narratives that have endeared Mickey to audiences worldwide for generations.
As the final lines and details come together to complete the portrayal of Mickey Mouse, artists are encouraged to step back and admire the vibrant and engaging depiction they have created. Whether it's a whimsical sketch or a meticulously detailed illustration, each rendition of Mickey Mouse pays homage to the enduring legacy of this beloved Disney character, perpetuating his timeless appeal and endearing charisma through the expressive language of art.
In the spirit of creativity and imagination, the journey of drawing Mickey Mouse transcends the act of replicating an iconic figure; it becomes a celebration of joy, inspiration, and the enduring magic of storytelling. As artists of all ages and backgrounds embrace the process of drawing Mickey Mouse, they contribute to the rich tapestry of artistic expressions that honor the beloved legacy of this timeless icon, ensuring that Mickey's endearing spirit continues to inspire and enchant for years to come.
