Home>Arts and Culture>How To Draw A Shark
Arts and Culture
How To Draw A Shark
Published: February 26, 2024
Learn how to draw a shark with easy step-by-step instructions. Perfect for arts and culture enthusiasts looking to improve their drawing skills.
(Many of the links in this article redirect to a specific reviewed product. Your purchase of these products through affiliate links helps to generate commission for Noodls.com, at no extra cost. Learn more)
Table of Contents
Introduction
Drawing a shark may seem like a daunting task, but with the right guidance and a bit of creativity, you can bring this majestic creature to life on paper. Sharks are fascinating creatures that have captured the imagination of people for generations. Their sleek bodies, powerful fins, and rows of razor-sharp teeth make them both fearsome and awe-inspiring. Whether you're an aspiring artist or simply looking for a fun and creative activity, learning how to draw a shark can be an exciting and rewarding experience.
In this step-by-step guide, we will explore the process of drawing a shark in a way that is both accessible and enjoyable. By breaking down the drawing into simple and manageable steps, you'll be able to follow along and create your own impressive shark illustration. All you need is a pencil, paper, and a willingness to unleash your artistic potential.
So, grab your drawing supplies and get ready to dive into the world of shark artistry. Whether you're aiming for a realistic depiction or a more whimsical interpretation, this guide will provide you with the foundational skills and techniques to bring your shark drawing to life. Let's embark on this creative journey together and discover the thrill of capturing the essence of one of the ocean's most captivating creatures on paper.
Read more: How To Draw A Shoe
Materials Needed
Before you begin your shark-drawing adventure, it's essential to gather the right materials to ensure a smooth and enjoyable creative process. Here's a list of the essential items you'll need to bring your shark illustration to life:
-
Drawing Paper: Start with a clean sheet of drawing paper that provides a smooth surface for your pencil strokes. Opt for a size that suits your preference, whether it's a standard letter size or a larger sketch pad for more intricate details.
-
Pencils: A set of high-quality pencils will be your best companions in this artistic endeavor. Consider using a range of pencils with different lead hardness, such as 2H, HB, and 2B, to achieve varying levels of shading and detailing.
-
Eraser: An eraser is a crucial tool for refining your shark drawing. Look for a soft, kneaded eraser that can easily lift graphite without damaging the paper, allowing you to make corrections and adjustments as needed.
-
Sharpener: Keep your pencils sharp and ready for precise lines by having a reliable pencil sharpener on hand. A sharp pencil will help you achieve clean and defined outlines as you bring your shark to life on paper.
-
Reference Images: While your imagination is a powerful tool, having reference images of sharks can provide valuable insights into their anatomy and features. Consider gathering a few reference photos of different shark species to inspire and inform your drawing.
-
Coloring Materials (Optional): If you plan to add color to your shark illustration, consider including colored pencils, markers, or watercolor paints in your materials. This will allow you to infuse your drawing with vibrant hues and bring an extra dimension to your artwork.
By ensuring that you have these materials at your disposal, you'll be well-equipped to embark on your shark-drawing journey with confidence and creativity. With your supplies gathered and your artistic spirit ignited, it's time to dive into the step-by-step process of bringing a shark to life on paper.
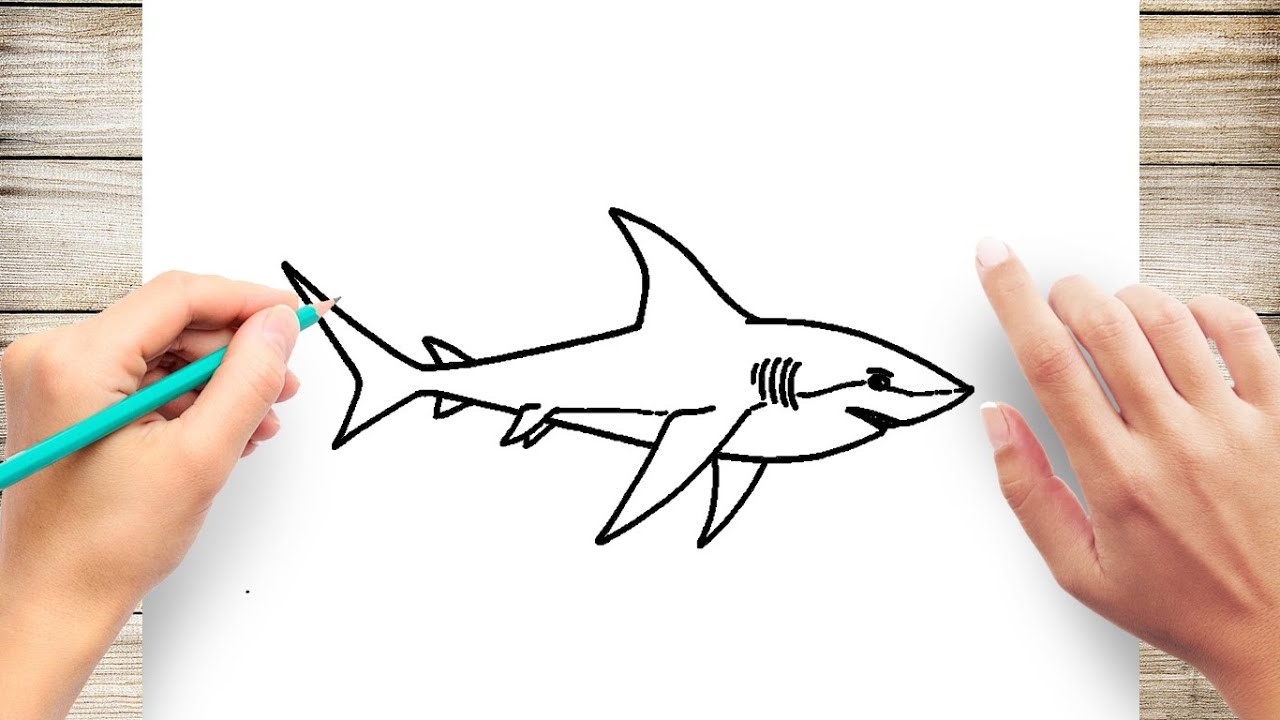
Step 1: Draw the Body
The first step in drawing a shark is to outline its body, capturing the distinctive shape that sets these creatures apart. Begin by sketching a large oval or egg-like shape to represent the main body of the shark. This initial outline will serve as the foundation upon which you'll build the shark's formidable form.
Next, extend the front of the oval to form a pointed snout, characteristic of many shark species. The snout should taper to a rounded tip, reflecting the sleek and hydrodynamic nature of the shark's head. As you refine the shape of the snout, pay attention to the proportions and angles, aiming to capture the essence of the shark's powerful profile.
Once the basic body and snout are in place, it's time to add the defining feature of the shark: its iconic dorsal fin. Position the dorsal fin atop the shark's back, extending it upward with a graceful curve. The dorsal fin serves as a visual anchor, instantly signaling the shark's presence and adding to its commanding presence on the page.
As you work on the body, keep in mind the overall posture and movement you want to convey. Sharks are known for their agility and speed in the water, so consider the positioning of the body to evoke a sense of dynamic motion. Whether you opt for a sleek and streamlined pose or a more robust and assertive stance, the body's shape and posture will set the tone for the entire composition.
With the body outline, snout, and dorsal fin taking shape, take a moment to assess the proportions and overall structure. Refine the lines and curves as needed, ensuring that the body conveys the distinctive silhouette of a shark. This foundational step lays the groundwork for the subsequent details and embellishments that will bring your shark drawing to life.
By focusing on the body in this initial stage, you'll establish a strong visual anchor for your shark illustration, setting the stage for the addition of fins, tail, and intricate details in the following steps. With the body sketched out, you're ready to move on to the next phase of capturing the essence of this remarkable ocean predator on paper.
Step 2: Add the Fins
With the foundational body structure in place, the next crucial step in bringing your shark drawing to life is adding the distinctive fins that define these remarkable creatures. Sharks are renowned for their array of fins, each serving a specific purpose in their aquatic domain. By incorporating these fins into your illustration, you'll infuse your shark with a sense of power, grace, and unmistakable identity.
The Pectoral Fins
Begin by focusing on the pectoral fins, which are located on either side of the shark's body. These fins are essential for steering and maintaining balance as the shark navigates through the water. To depict the pectoral fins, sketch two large, triangular shapes extending outward from the sides of the shark's body. Pay attention to the size and angle of the pectoral fins, as they contribute to the shark's overall sense of movement and dynamism.
Read more: How To Draw People
The Pelvic and Anal Fins
Moving on to the pelvic and anal fins, these smaller fins play a role in stabilizing the shark's movement and aiding in sudden turns. Position the pelvic fins slightly below the pectoral fins, closer to the shark's belly. These fins are generally smaller and more angular in shape compared to the pectoral fins. Similarly, sketch the anal fin near the tail region, adding a subtle yet impactful detail to the lower portion of the shark's body.
The Caudal (Tail) Fin
One of the most iconic features of a shark is its powerful caudal fin, which propels the creature through the water with remarkable speed and agility. When drawing the caudal fin, envision a large, crescent-shaped structure extending from the rear of the shark's body. The caudal fin is often characterized by a distinct upper lobe and a lower lobe, each contributing to the shark's ability to swiftly maneuver through its marine environment.
As you add the fins to your shark drawing, consider the interplay between these elements and the overall body posture. The positioning and size of the fins can convey a sense of motion, energy, and predatory prowess, enhancing the visual impact of your illustration. By meticulously crafting each fin with attention to detail, you'll capture the essence of the shark's formidable presence in its natural habitat.
With the fins artfully integrated into your shark drawing, you've taken a significant stride toward encapsulating the allure and majesty of these oceanic marvels. The addition of the fins infuses your illustration with a sense of authenticity and dynamism, setting the stage for the subsequent steps that will further refine and embellish your captivating shark artwork.
Step 3: Draw the Tail
The tail of a shark is a defining feature that embodies both elegance and power. As you delve into drawing the tail, you have the opportunity to infuse your shark illustration with a sense of dynamic movement and aquatic grace. The tail, also known as the caudal fin, serves as the primary propulsion mechanism for sharks, enabling them to swiftly navigate their marine realm with remarkable agility.
To begin capturing the essence of the shark's tail, envision a large, crescent-shaped structure extending from the rear of the shark's body. The tail fin is characterized by a distinct upper lobe and a lower lobe, each contributing to the shark's ability to propel itself through the water with precision and speed. As you sketch the tail, pay close attention to the curvature and proportions, aiming to convey the fluidity and strength inherent in the shark's movement.
The upper lobe of the tail fin is typically larger and more pronounced, curving gracefully to form a powerful surface for generating forward thrust. In contrast, the lower lobe complements the upper lobe, contributing to the shark's hydrodynamic efficiency and maneuverability. By carefully shaping and refining the contours of the tail fin, you can evoke a sense of kinetic energy and aquatic prowess within your shark illustration.
As you craft the tail, consider the interplay between the tail fin and the rest of the shark's body. The positioning and angle of the tail fin can convey a sense of propulsion and momentum, enhancing the overall dynamism of your artwork. Whether you opt for a sleek, streamlined tail or a more robust and assertive form, the tail's shape and posture will contribute to the visual narrative of your shark drawing.
With each stroke of your pencil, you have the opportunity to imbue the tail with a sense of grace and power, capturing the essence of the shark's aquatic prowess. By focusing on the intricate details of the tail fin, you'll further elevate the authenticity and impact of your shark illustration, bringing it one step closer to capturing the captivating spirit of these oceanic marvels.
As you complete the tail, take a moment to assess the overall composition, ensuring that the tail seamlessly integrates with the body and fins to form a cohesive and compelling portrayal of a shark in its natural habitat. With the tail skillfully rendered, you're poised to embark on the final stages of adding intricate details and, if desired, infusing your shark illustration with vibrant color to bring it to life on the page.
Step 4: Add the Details
As you progress to the pivotal stage of adding intricate details to your shark drawing, you have the opportunity to infuse your artwork with depth, character, and a heightened sense of realism. The details you incorporate will breathe life into your illustration, capturing the essence of the shark's anatomy and enhancing its visual impact.
Begin by focusing on the shark's distinctive features, such as its eyes and mouth. Sharks are renowned for their piercing gaze and rows of formidable teeth, which are emblematic of their predatory nature. Sketch the shark's eye with attention to its placement and expression, aiming to convey a sense of focus and intensity. The eye serves as a window into the shark's demeanor, adding a compelling dimension to your illustration.
Next, turn your attention to the shark's mouth, a defining aspect of its formidable visage. Depict the shark's mouth with precision, outlining the contours of its powerful jaws and the characteristic shape of its teeth. Whether you opt for a closed or open-mouthed portrayal, the mouth serves as a focal point, exuding the shark's commanding presence and predatory prowess.
Incorporate additional details such as the shark's gill slits, which play a vital role in its respiratory system. The gill slits are situated behind the shark's head and contribute to its streamlined appearance. By delicately rendering these subtle yet essential features, you'll further enrich the authenticity of your shark illustration.
As you add details, consider the texture and shading that will enhance the three-dimensional quality of your drawing. Use light and shadow to create depth, emphasizing the contours of the shark's body and fins. Pay attention to the play of light on the shark's sleek skin, infusing your illustration with a sense of luminosity and tactile realism.
Furthermore, you may choose to incorporate additional elements such as underwater surroundings, marine flora, or other aquatic creatures to contextualize your shark within its natural habitat. These details can enrich the narrative of your illustration, offering a glimpse into the captivating world in which the shark thrives.
By meticulously adding these intricate details, you'll elevate your shark drawing to a new level of artistry, capturing the essence of these magnificent creatures with precision and finesse. With the details skillfully integrated, your shark illustration will stand as a testament to your artistic prowess and your ability to convey the awe-inspiring allure of the ocean's apex predators on paper.
Read more: How To Draw A Squirrel
Step 5: Color the Shark
Adding color to your shark illustration presents an exciting opportunity to infuse your artwork with vibrancy, depth, and visual impact. Whether you opt for a realistic color palette or a more imaginative interpretation, the coloring stage allows you to bring your shark drawing to life with captivating hues and dynamic contrasts.
Begin by considering the natural coloring of the shark species you aim to depict. Researching reference images of different shark species can provide valuable insights into their distinct coloration and markings. From the classic gray tones of the great white shark to the striking patterns of the tiger shark, each species offers a unique color palette that contributes to its visual identity.
When selecting colors for your shark, consider the interplay of light and shadow to create a sense of dimension and realism. Use lighter tones to highlight areas where light would naturally strike the shark's body, such as the underbelly and the tops of fins. Conversely, employ darker shades to accentuate depth and form, particularly along the shark's back and in areas of shadow.
If you prefer a more creative approach, you can experiment with unconventional color schemes to imbue your shark with a sense of artistic flair. Explore the use of bold and unexpected colors to evoke a stylized or fantastical interpretation of this iconic marine creature. By embracing artistic freedom, you can unleash your creativity and infuse your shark illustration with a captivating and imaginative aesthetic.
Consider incorporating subtle textures and gradients to enhance the visual richness of your coloring. Utilize blending techniques to seamlessly transition between different shades, creating a smooth and cohesive appearance. By skillfully applying color gradients, you can evoke the iridescence of the shark's skin and the dynamic interplay of colors that define its captivating presence.
Furthermore, you may choose to depict the underwater environment surrounding the shark, introducing elements such as shimmering water, aquatic plants, or other marine life. This contextual coloring can transport your illustration into a vivid and immersive underwater realm, adding depth and narrative intrigue to your artwork.
Whether you opt for a faithful representation of natural hues or an imaginative exploration of color, the coloring stage offers a compelling opportunity to elevate your shark illustration to a new level of visual impact and artistic expression. With each stroke of color, you'll breathe vitality and character into your artwork, capturing the essence of these magnificent oceanic predators in a captivating and evocative portrayal.
Conclusion
In conclusion, mastering the art of drawing a shark opens a gateway to a world of creativity, exploration, and artistic expression. Throughout this step-by-step guide, we've embarked on a captivating journey to capture the essence of one of the ocean's most formidable and awe-inspiring creatures on paper. From outlining the shark's body to infusing it with intricate details and vibrant color, each stage of the drawing process has offered a wealth of opportunities to hone our artistic skills and unleash our imagination.
Drawing a shark transcends the mere act of replicating its physical form; it invites us to delve into the captivating realm of marine life, where grace, power, and mystery converge. By carefully crafting the shark's body, fins, tail, and details, we've not only honed our technical abilities but also cultivated a deeper appreciation for the natural world and its remarkable inhabitants.
As we reflect on the journey of bringing a shark to life on paper, it becomes evident that artistry is a powerful conduit for storytelling and connection. Each stroke of the pencil has allowed us to convey the dynamic energy of the shark, evoking its prowess as a master of the ocean. Through the interplay of light and shadow, the careful consideration of form and texture, and the infusion of vibrant color, we've breathed life into our illustration, capturing the spirit of the shark in all its captivating glory.
Moreover, the process of drawing a shark serves as a testament to the boundless potential of artistic expression. Whether aiming for a realistic portrayal or embracing a more imaginative interpretation, each artist brings a unique perspective and creative vision to their shark illustration. This diversity of artistic voices enriches the tapestry of shark art, offering a kaleidoscope of interpretations that celebrate the multifaceted nature of these extraordinary creatures.
Ultimately, the journey of drawing a shark transcends the confines of the page, inviting us to embrace curiosity, observation, and a profound reverence for the natural world. It encourages us to seek inspiration from the wonders of the ocean, to marvel at the diversity of marine life, and to channel our fascination into evocative and compelling artworks. As we conclude this artistic odyssey, we carry with us the enduring appreciation for the beauty and grandeur of sharks, and the boundless potential of artistic expression to illuminate the wonders of the natural world.