Home>Home and Garden>How To Put A Zipper Back On


Home and Garden
How To Put A Zipper Back On
Published: February 28, 2024
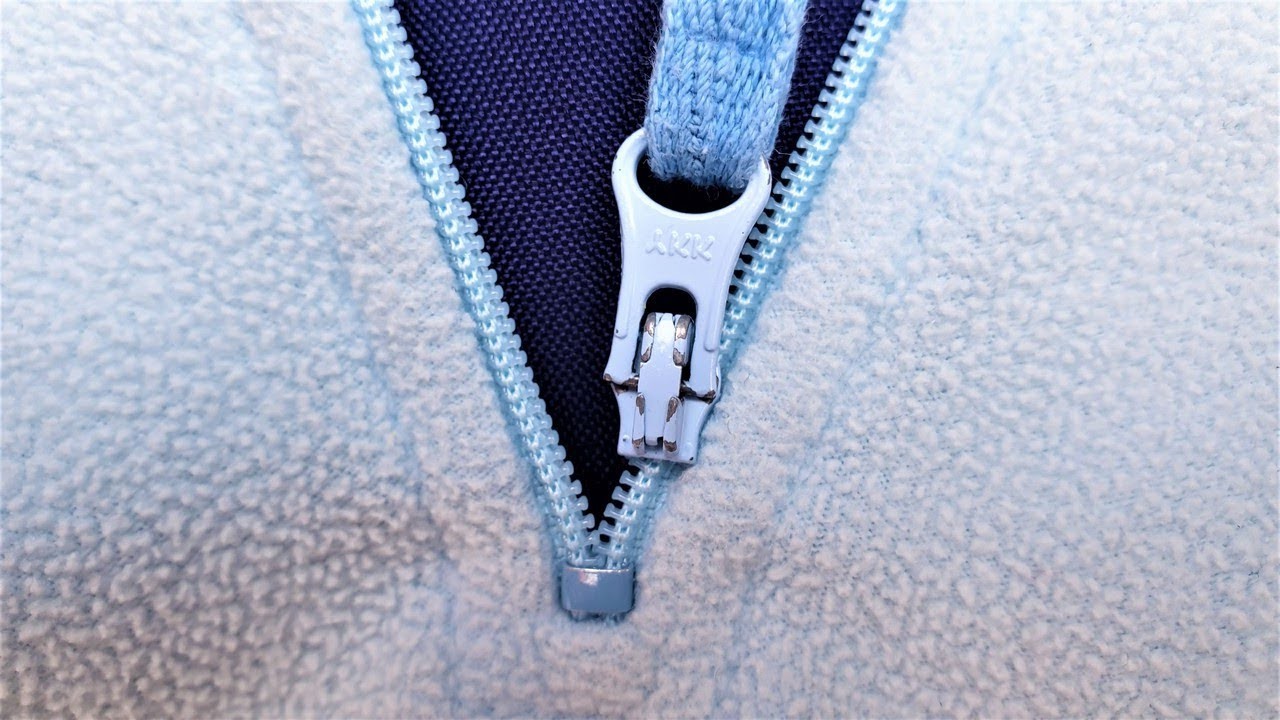
Learn how to put a zipper back on with our easy step-by-step guide. Get your favorite items in your home and garden back in working order in no time!
(Many of the links in this article redirect to a specific reviewed product. Your purchase of these products through affiliate links helps to generate commission for Noodls.com, at no extra cost. Learn more)
Table of Contents
Introduction
Have you ever found yourself in a frustrating situation where the zipper on your favorite jacket or pair of jeans suddenly breaks or comes off track? It's a common occurrence that can leave you feeling exasperated, especially if you're not sure how to fix it. The good news is that putting a zipper back on is a manageable task that you can easily tackle with the right guidance and a few simple tools. Whether it's a clothing item, a bag, or any other fabric with a zipper, knowing how to reattach a zipper can save you from the inconvenience of having to replace the entire item.
In this guide, we'll walk you through the step-by-step process of putting a zipper back on, empowering you to restore functionality to your beloved garments and accessories. With a bit of patience and the right approach, you'll soon be able to confidently repair zippers, extending the lifespan of your favorite items and saving money on replacements. So, gather your tools and let's dive into the process of reattaching a zipper, ensuring that you can enjoy your cherished items for years to come.
Read more: How To Put Hinges On A Door
Tools and materials needed
When it comes to putting a zipper back on, having the right tools and materials at your disposal is essential for a successful repair. Here's a comprehensive list of what you'll need to effectively reattach a zipper:
Tools:
- Needle-nose pliers: These are indispensable for manipulating the zipper slider and teeth, allowing you to realign and reattach the zipper components with precision.
- Seam ripper: This tool will help you carefully remove the old zipper without causing damage to the surrounding fabric.
- Thread clippers or small scissors: These will aid in trimming any loose threads and ensuring a neat finish once the new zipper is in place.
- Needle and thread: Opt for a sturdy thread that matches the color of the original stitching to seamlessly secure the new zipper in place.
- Straight pins: These will assist in holding the new zipper in position before you begin sewing, preventing any misalignment during the attachment process.
Materials:
- Replacement zipper: Ensure that you have a new zipper that matches the length and style of the original one. Whether it's a metal, plastic, or invisible zipper, selecting the right type is crucial for a seamless repair.
- Fabric marking pencil or chalk: This will allow you to make precise markings on the fabric, ensuring that the new zipper is aligned correctly before sewing.
- Optional: Fusible interfacing: If the fabric around the zipper area is worn or weakened, using fusible interfacing can reinforce the material, providing added stability for the new zipper attachment.
By gathering these essential tools and materials, you'll be well-equipped to tackle the task of putting a zipper back on with confidence and precision. With the right resources at your disposal, you can approach the repair process methodically, ensuring a professional-looking result that restores the functionality and aesthetic appeal of your cherished items.
Step 1: Remove the old zipper
Removing the old zipper is the crucial first step in the process of putting a zipper back on. This task requires precision and care to avoid damaging the surrounding fabric. To begin, use a seam ripper to gently cut the stitches holding the old zipper in place. Take your time and work methodically to prevent any accidental snags or tears in the fabric. As you carefully remove the stitches, be mindful of preserving the integrity of the surrounding material.
Once the stitches are undone, the next step is to detach the zipper from the fabric. This can be done by using needle-nose pliers to grip the bottom stop of the zipper and gently pull it apart. If the zipper is sewn into a lining, carefully detach it from the lining as well. Exercise caution to avoid pulling too forcefully, as this can cause damage to the fabric or the zipper tape.
After the zipper is separated from the fabric, inspect the area for any remaining bits of thread or debris. Use thread clippers or small scissors to trim any loose threads, ensuring that the fabric is clean and ready for the new zipper. Take a moment to assess the condition of the fabric around the zipper area. If there are signs of wear or weakness, consider reinforcing the material with fusible interfacing to provide added stability for the new zipper attachment.
By methodically removing the old zipper and preparing the fabric for the new one, you set the stage for a successful zipper repair. This careful approach ensures that the fabric remains intact and ready for the next phase of the process. With the old zipper removed and the fabric prepped, you're now ready to move on to the next step of putting a zipper back on.
This detailed process of removing the old zipper sets the foundation for a seamless repair, allowing you to proceed with confidence as you prepare to attach the new zipper. With the old zipper successfully removed and the fabric in optimal condition, you're well-positioned to move on to the subsequent steps, bringing you closer to restoring functionality to your cherished items.
Read more: How To Flex Your Back
Step 2: Prepare the new zipper
With the old zipper removed and the fabric prepped, the next crucial step is to prepare the new zipper for attachment. Before proceeding, ensure that the replacement zipper matches the length and style of the original one. Whether it's a metal, plastic, or invisible zipper, selecting the right type is essential for a seamless repair.
Begin by aligning the new zipper with the fabric opening to verify that it fits properly. If the new zipper is longer than needed, mark the appropriate length using a fabric marking pencil or chalk. This step is crucial for ensuring that the zipper aligns perfectly with the fabric edges, allowing for a neat and professional finish once it's attached.
Next, if the fabric around the zipper area is worn or weakened, consider reinforcing it with fusible interfacing. Cut a piece of interfacing to match the length of the zipper tape and iron it onto the wrong side of the fabric. This additional layer of support will strengthen the material, providing a stable foundation for the new zipper attachment.
Once the fabric is prepped and reinforced if necessary, position the new zipper onto the fabric, ensuring that the teeth align perfectly with the fabric edges. Use straight pins to secure the zipper in place, allowing you to make any necessary adjustments before moving on to the attachment phase.
By meticulously preparing the new zipper and ensuring that it fits snugly and securely within the fabric opening, you set the stage for a successful attachment process. This careful preparation minimizes the risk of misalignment and ensures that the new zipper integrates seamlessly with the fabric, restoring both functionality and aesthetic appeal to your cherished items.
With the new zipper meticulously prepared and positioned for attachment, you're now ready to move on to the next step of the process, bringing you closer to completing the zipper repair with confidence and precision.
Step 3: Attach the new zipper
Attaching the new zipper is a pivotal phase in the process of putting a zipper back on. This step requires precision and attention to detail to ensure that the zipper is securely and seamlessly integrated with the fabric. With the new zipper meticulously prepared and positioned for attachment, you're now poised to proceed with the following steps to complete the repair process.
Begin by threading a needle with a sturdy thread that matches the color of the original stitching. Double the thread and tie a secure knot at the end. Position the zipper tape against the fabric, ensuring that the teeth align perfectly with the fabric edges. Starting at one end of the zipper, carefully begin sewing through the fabric and the tape, using small and discreet stitches to secure the zipper in place. As you sew, maintain a consistent and even tension on the thread to ensure a neat and professional finish.
As you progress along the length of the zipper, continue sewing with precision, ensuring that the stitches are securely anchored to the fabric and the zipper tape. Take care to sew around the bottom stop of the zipper, ensuring that it is firmly secured to prevent the slider from coming off. If the zipper is sewn into a lining, sew through the lining as well, ensuring that the attachment is secure and seamless.
Once you reach the end of the zipper, secure the thread with a knot and carefully trim any excess thread. Test the zipper to ensure that it moves smoothly and functions properly. Gently open and close the zipper, verifying that it aligns perfectly and operates without any snags or resistance.
With the new zipper securely attached and functioning flawlessly, take a moment to admire your handiwork. The careful and meticulous approach to attaching the new zipper has resulted in a professional-looking repair that restores both functionality and aesthetic appeal to your cherished items.
By following these detailed steps to attach the new zipper, you've successfully completed a crucial phase of the repair process, bringing you closer to enjoying your favorite garments and accessories once again. With the new zipper seamlessly integrated, you're now ready to move on to the final step of testing the zipper, ensuring that the repair is a resounding success.
Step 4: Test the zipper
After securely attaching the new zipper, it's essential to conduct a thorough test to ensure that the repair is successful and the zipper functions flawlessly. Testing the zipper is a critical step that allows you to verify the integrity of the attachment and confirm that the zipper moves smoothly without any snags or resistance.
To begin the testing process, gently grasp the zipper slider and slowly open and close the zipper. Pay close attention to the movement of the slider along the teeth, ensuring that it glides effortlessly without catching on any fabric or encountering resistance. As you operate the zipper, listen for any unusual sounds or sensations that may indicate misalignment or issues with the attachment.
Next, test the zipper under varying degrees of tension. If the repaired item is a garment, such as a jacket or pair of pants, gently pull on the fabric surrounding the zipper while opening and closing it. This simulates the real-world conditions in which the zipper will be used and allows you to assess its performance under normal wear and movement.
As you test the zipper, observe the alignment of the teeth and the overall stability of the attachment. Ensure that the zipper remains securely in place and that the stitching holds firm without any signs of strain or weakness. Additionally, verify that the bottom stop of the zipper effectively prevents the slider from detaching, providing a reliable closure for the repaired item.
If the zipper operates smoothly and exhibits consistent functionality under various testing conditions, you can be confident that the repair is a resounding success. The meticulous approach to reattaching the zipper has resulted in a seamlessly integrated and fully functional closure, restoring both the practical utility and aesthetic appeal of your cherished items.
In the event that you encounter any issues during the testing phase, such as misalignment, resistance, or instability, carefully assess the problem areas and consider reevaluating the attachment. It may be necessary to reinforce the stitching or make minor adjustments to ensure that the zipper operates optimally.
By conducting a comprehensive test of the zipper, you can rest assured that the repair is complete and that your favorite garments and accessories are once again fully functional. The successful testing of the zipper signifies the culmination of a meticulous and skillfully executed repair process, allowing you to enjoy your beloved items with confidence and peace of mind.
Conclusion
In conclusion, mastering the art of putting a zipper back on is a valuable skill that empowers you to breathe new life into your favorite garments and accessories. By following the step-by-step process outlined in this guide, you've gained the knowledge and confidence to tackle zipper repairs with precision and finesse.
From carefully removing the old zipper to meticulously preparing and attaching the new one, each phase of the repair process plays a crucial role in restoring functionality and aesthetic appeal to your cherished items. The careful attention to detail and the use of the right tools and materials have been instrumental in achieving a professional-looking repair that ensures the longevity of your beloved possessions.
As you reflect on the journey of reattaching a zipper, it's important to recognize the sense of accomplishment that comes with mastering a practical and valuable skill. The ability to revive and rejuvenate items that hold sentimental or practical significance is a testament to your resourcefulness and ingenuity.
Furthermore, the knowledge gained from this experience extends beyond the realm of zipper repairs. It instills a sense of empowerment, encouraging you to approach other DIY projects with a newfound confidence and a willingness to tackle challenges head-on.
Ultimately, the process of putting a zipper back on transcends the mere act of repair; it embodies the spirit of preservation, resourcefulness, and the appreciation of craftsmanship. By embracing these principles, you not only extend the lifespan of your possessions but also contribute to a sustainable and mindful approach to consumption and waste reduction.
So, as you embark on future endeavors, may the skills and insights gained from this guide serve as a reminder of your ability to overcome obstacles, preserve cherished items, and embrace the satisfaction of a job well done. With each successful zipper repair, you reaffirm your capability to breathe new life into the things you hold dear, fostering a sense of connection and stewardship that transcends the act of repair itself.


