Home>Automotive>How To Put Air In Tires At Gas Station

Automotive
How To Put Air In Tires At Gas Station
Published: February 26, 2024
Learn how to properly inflate your tires at a gas station with our step-by-step guide. Keep your automotive maintenance on track with these easy tips.
(Many of the links in this article redirect to a specific reviewed product. Your purchase of these products through affiliate links helps to generate commission for Noodls.com, at no extra cost. Learn more)
Table of Contents
- Introduction
- Step 1: Park at the air pump
- Step 2: Check your tire pressure
- Step 3: Prepare your payment method
- Step 4: Insert coins or card into the air pump
- Step 5: Remove the valve cap
- Step 6: Attach the air hose to the valve stem
- Step 7: Add air to the tire
- Step 8: Check the tire pressure again
- Step 9: Replace the valve cap
- Step 10: Return the air hose and payment method
Introduction
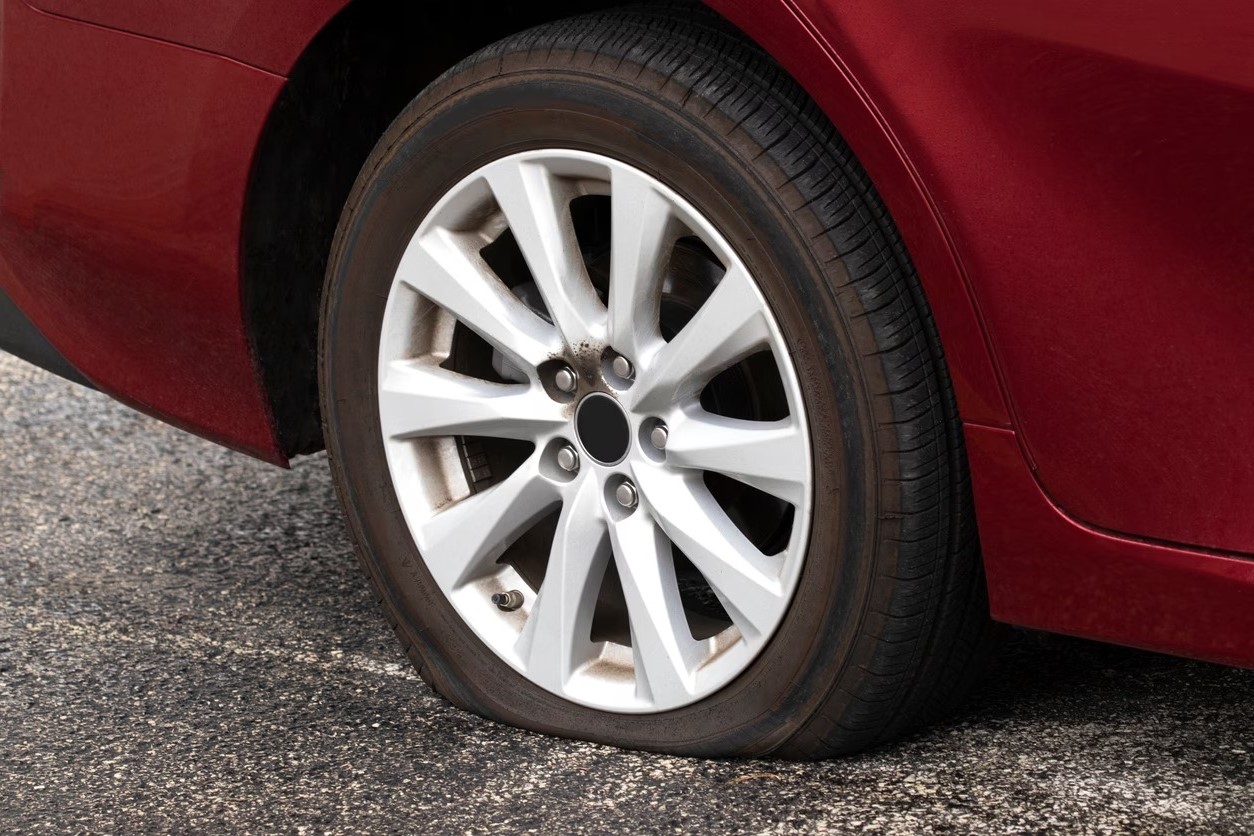
Ensuring that your vehicle's tires are properly inflated is a crucial aspect of vehicle maintenance that directly impacts safety, fuel efficiency, and overall performance. While it may seem like a mundane task, maintaining the correct tire pressure can significantly enhance your driving experience and extend the lifespan of your tires. One of the most convenient places to add air to your tires is at a gas station, where air pumps are readily available for public use.
In this comprehensive guide, we will walk you through the step-by-step process of putting air in your tires at a gas station. Whether you are a seasoned driver or a novice behind the wheel, understanding the correct procedure for inflating your tires can save you time, money, and potential headaches down the road. By following these simple yet essential steps, you can ensure that your vehicle's tires are optimally inflated, promoting a smoother and safer driving experience.
Proper tire maintenance is not only a matter of convenience but also a critical safety measure. Underinflated tires can compromise vehicle handling, increase the risk of blowouts, and reduce fuel efficiency. Conversely, overinflated tires can lead to uneven wear, reduced traction, and a harsher ride. By taking the time to check and adjust your tire pressure regularly, you can maintain optimal driving performance and contribute to a safer road environment for yourself and others.
Now, let's delve into the step-by-step process of adding air to your tires at a gas station, empowering you to take control of your vehicle's maintenance and ensure a smooth and worry-free driving experience.
Read more: How To Take Air Out Of Tire
Step 1: Park at the air pump
When it comes to adding air to your tires at a gas station, the first step is to park your vehicle in close proximity to the air pump. As you approach the gas station, keep an eye out for the designated area where the air pump is located. These areas are typically marked with clear signage and are strategically positioned for easy access.
Once you have located the air pump, maneuver your vehicle into a position that allows you to comfortably reach all four tires with the air hose. It's important to ensure that your vehicle is parked in a manner that allows for easy movement around the car, as you will need to access each tire individually to check and adjust the tire pressure.
When parking at the air pump, be mindful of other vehicles and pedestrians in the vicinity. Take note of any posted instructions or guidelines regarding the use of the air pump, and adhere to any specific parking regulations that may be in place at the gas station.
Additionally, it's a good practice to position your vehicle in a way that allows for a smooth and efficient transition from one tire to the next. This may involve parking in a manner that aligns the air pump with the first tire you intend to inflate, minimizing the need to reposition your vehicle between tire inflation.
By parking your vehicle strategically at the air pump, you can streamline the process of adding air to your tires and ensure that you have ample space and accessibility to carry out the subsequent steps with ease and efficiency. This initial step sets the stage for a seamless tire inflation process, allowing you to focus on the task at hand without unnecessary obstacles or disruptions.
With your vehicle parked at the air pump, you are now ready to proceed to the next step in the process of adding air to your tires at the gas station. This strategic positioning sets the foundation for a smooth and effective tire inflation process, setting the stage for a successful outcome and optimal tire performance.
Next, we will delve into the crucial task of checking your tire pressure, a fundamental step in maintaining the health and performance of your vehicle's tires.
Step 2: Check your tire pressure
Before adding air to your tires at the gas station, it's essential to assess the current tire pressure to determine the extent of inflation required. Checking your tire pressure is a fundamental aspect of tire maintenance that directly impacts your vehicle's safety, handling, and fuel efficiency.
To begin, you will need a reliable tire pressure gauge, which can be readily purchased at automotive supply stores or even at some gas stations. Once you have the gauge in hand, proceed to the first tire you intend to check. It's advisable to start with the front driver's side tire and work your way around the vehicle in a systematic manner.
Remove the valve cap from the tire's valve stem and set it aside in a safe place, ensuring that it doesn't roll away or get misplaced. With the valve stem exposed, firmly press the tire pressure gauge onto the valve stem to obtain an accurate reading. The gauge will display the current pressure in pounds per square inch (PSI), providing you with a clear indication of the tire's inflation status.
Compare the measured pressure with the recommended PSI specified by the vehicle manufacturer, which is typically found on a sticker inside the driver's side door jamb or in the owner's manual. It's important to note that the recommended tire pressure may vary between front and rear tires, so be sure to consult the appropriate source for accurate guidance.
If the measured pressure falls below the recommended level, the tire is considered underinflated and requires additional air. Conversely, if the pressure exceeds the recommended level, the tire is overinflated and may need to be slightly deflated. Repeat this process for each tire, taking note of the individual pressure readings and comparing them to the manufacturer's specifications.
By diligently checking your tire pressure before adding air, you can gain valuable insights into the current state of your tires and make informed decisions regarding the necessary adjustments. This proactive approach empowers you to address any deviations from the recommended pressure, ensuring that your tires are optimally inflated to support safe and efficient driving.
With the tire pressure accurately assessed, you are now equipped with the essential information needed to proceed to the next step of adding air to your tires at the gas station. This foundational task sets the stage for precise and effective tire inflation, laying the groundwork for enhanced vehicle performance and safety.
Step 3: Prepare your payment method
Before proceeding to add air to your tires at the gas station, it's essential to ensure that you have a suitable payment method readily available to cover the cost of using the air pump. While some gas stations offer complimentary air for customers, many stations require a nominal fee to access the air pump. By preparing your payment method in advance, you can streamline the tire inflation process and avoid any unnecessary delays or complications.
First and foremost, it's important to determine the specific payment options accepted at the gas station's air pump. In most cases, air pumps are equipped to accept coins, bills, credit cards, or debit cards. Take a moment to survey the payment interface of the air pump to identify the accepted forms of payment and ensure that you have the necessary means to proceed.
If the air pump operates on a coin-based system, it's advisable to gather the appropriate amount of coins needed to activate the air pump for the desired duration. Some air pumps may offer a preset inflation time for a specified fee, while others allow users to customize the duration based on their individual needs. Be sure to have a sufficient supply of coins on hand to facilitate a seamless transaction at the air pump.
Alternatively, if the air pump accepts bills or electronic payments, such as credit or debit cards, ensure that your chosen payment method is readily accessible. If using a credit or debit card, it's prudent to verify that the card is functional and has adequate funds or available credit to cover the anticipated charge for using the air pump. This proactive approach can prevent any potential payment complications and expedite the tire inflation process.
In the event that the gas station offers complimentary air for customers, it's still beneficial to confirm this policy and be prepared to present any required credentials, such as a loyalty card or proof of purchase, to access the complimentary air service. By familiarizing yourself with the station's air pump payment procedures and policies, you can navigate the process with confidence and efficiency.
By proactively preparing your payment method before adding air to your tires, you can minimize the risk of encountering payment-related obstacles or delays, allowing you to focus on the task at hand. This thoughtful preparation ensures that you are equipped with the necessary means to access the air pump and proceed with inflating your tires without unnecessary interruptions.
With your payment method prepared and readily available, you are now poised to move on to the next step of inserting coins or a card into the air pump, setting the stage for a smooth and hassle-free tire inflation experience.
Step 4: Insert coins or card into the air pump
Once you have parked your vehicle at the gas station's air pump and checked your tire pressure, the next crucial step is to initiate the inflation process by activating the air pump. Depending on the specific payment system in place at the gas station, you will need to insert coins or a card into the air pump to access the compressed air for your tires.
If the air pump operates on a coin-based system, gather the required amount of coins based on the indicated fee for the desired duration of air supply. Typically, the air pump will display the cost per unit of time, allowing you to calculate the necessary coins needed to meet your tire inflation requirements. Once you have the appropriate coins at hand, locate the coin slot on the air pump and insert the coins one by one, following any displayed instructions to ensure a successful transaction.
In the case of air pumps that accept bills or electronic payments, such as credit or debit cards, the process may involve inserting the bill or card into the designated payment interface on the air pump. If using a bill, carefully insert it into the bill acceptor slot, ensuring that it is properly oriented and free from any folds or damage that may impede the transaction. For electronic payments, follow the prompts on the payment interface to insert your credit or debit card, providing any required authorization or verification as indicated.
As you complete the payment transaction, the air pump will activate, providing you with access to the compressed air needed to inflate your tires. Some air pumps may offer a preset inflation duration based on the payment made, while others allow users to customize the inflation time within the paid duration. Be attentive to any instructions or prompts displayed on the air pump's interface, and adjust the inflation duration as needed to accommodate the tire pressure adjustments required for your vehicle.
By successfully inserting the necessary coins or card into the air pump, you gain access to the essential resource for inflating your tires, setting the stage for the subsequent steps in the tire inflation process. This seamless transaction ensures that you are equipped with the means to proceed with adding air to your tires, promoting a smooth and efficient tire maintenance experience.
With the air pump activated and ready for use, you are now prepared to move on to the next step of removing the valve cap from the tire's valve stem, initiating the hands-on process of adding air to your tires at the gas station.
Read more: How To Let Air Out Of Tire
Step 5: Remove the valve cap
As you embark on the process of adding air to your tires at the gas station, the next pivotal step involves removing the valve cap from the tire's valve stem. The valve cap serves as a protective cover for the valve stem, safeguarding it from dirt, debris, and moisture that could compromise the integrity of the valve. By removing the valve cap, you gain access to the valve stem, enabling you to connect the air hose and commence the tire inflation process.
To begin, locate the valve stem on the tire from which you intend to add air. The valve stem is typically a small, cylindrical protrusion located on the outer surface of the tire, often adorned with a valve cap to shield it from external elements. With the valve stem identified, inspect the valve cap to ensure that it is securely fastened and free from any visible damage or debris accumulation.
Once you have confirmed the condition of the valve cap, proceed to unscrew it in a counterclockwise direction, using your fingers to carefully loosen and remove the cap. It's important to exercise caution during this process to prevent misplacing or dropping the valve cap, as it is a small component that can easily be misplaced in a bustling gas station environment.
As you remove the valve cap, take note of its design and any distinguishing features that may aid in its reattachment later in the tire inflation process. Some valve caps may have built-in threads or unique patterns, while others may be equipped with a rubber gasket for enhanced sealing. By observing these details, you can ensure that the valve cap is reinstalled correctly after the tire inflation is completed.
With the valve cap safely removed and set aside in a secure location, the valve stem is now exposed and ready for the next phase of the tire inflation process. This simple yet crucial step sets the stage for seamlessly connecting the air hose to the valve stem, initiating the direct transfer of compressed air into the tire to address any underinflation and restore optimal tire pressure.
By methodically removing the valve cap from the tire's valve stem, you pave the way for a smooth and efficient tire inflation experience, positioning yourself to proceed with the subsequent steps with precision and confidence. This deliberate action underscores the meticulous approach to tire maintenance, ensuring that each element of the inflation process is carried out with care and attention to detail.
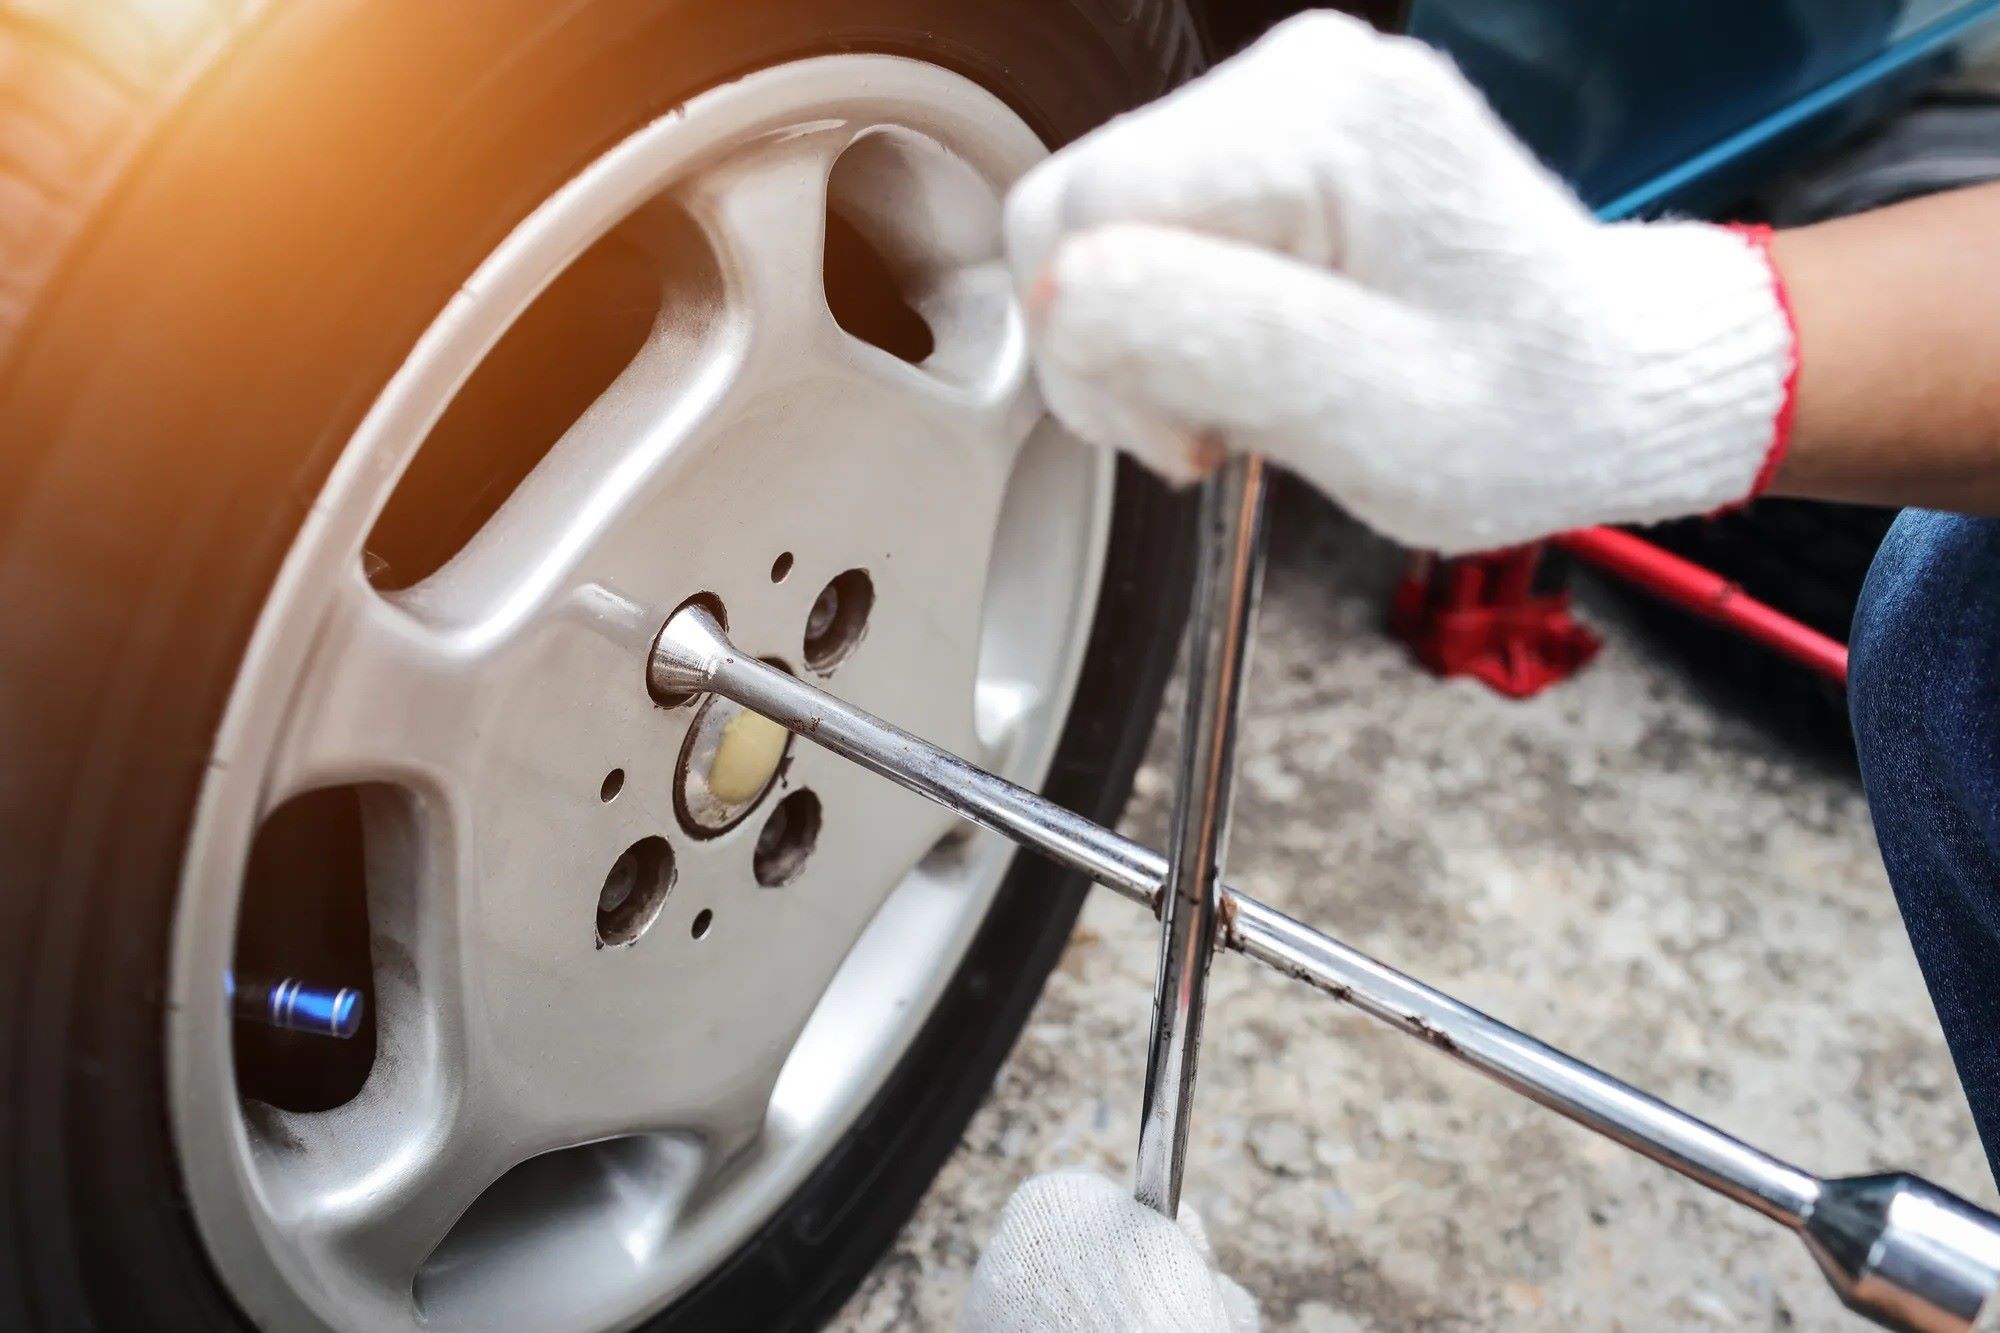
Step 6: Attach the air hose to the valve stem
With the valve cap removed and the valve stem exposed, the next critical step in adding air to your tires at the gas station involves attaching the air hose to the valve stem. The air hose serves as the conduit through which compressed air is transferred from the air pump into the tire, facilitating the inflation process to achieve the desired tire pressure.
To begin, retrieve the air hose from the air pump, ensuring that it is free from any kinks, twists, or visible damage that may impede the flow of air. Inspect the hose nozzle to confirm that it is clean and free from debris, as any foreign particles could compromise the integrity of the tire valve and affect the accuracy of the inflation process.
With the air hose in hand, position yourself in close proximity to the tire's valve stem, allowing for easy maneuverability and a direct line of sight to the valve. Align the nozzle of the air hose with the valve stem, ensuring a snug and secure fit for the upcoming air transfer. The nozzle should be positioned directly over the valve stem, with minimal clearance to prevent air leakage during the inflation process.
Once the nozzle is aligned with the valve stem, apply gentle downward pressure to the air hose, firmly pressing it onto the valve stem to create a tight seal. It's essential to maintain a steady and even application of pressure to ensure a secure connection between the air hose and the valve stem, minimizing the risk of air loss or disconnection during the inflation process.
As the air hose is securely attached to the valve stem, take a moment to verify the stability of the connection, ensuring that the nozzle remains firmly seated on the valve stem without any signs of slippage or detachment. This visual confirmation provides assurance that the air transfer will proceed smoothly and effectively, allowing for precise inflation of the tire to the targeted pressure level.
By methodically attaching the air hose to the valve stem, you establish a vital link between the air pump and the tire, setting the stage for the controlled and accurate transfer of compressed air. This deliberate action marks a pivotal moment in the tire inflation process, signifying the transition from preparation to hands-on execution, as you proceed to add air to the tire and address any underinflation with precision and confidence.
Step 7: Add air to the tire
With the air hose securely attached to the valve stem, you are now poised to initiate the crucial phase of adding air to the tire at the gas station. This hands-on step involves activating the air pump to commence the controlled transfer of compressed air into the tire, addressing any underinflation and gradually restoring the tire to the recommended pressure level.
To begin, locate the inflation control interface on the air pump, which may feature buttons, dials, or digital displays for adjusting the airflow and monitoring the inflation process. Familiarize yourself with the functionality of the air pump's controls, taking note of any specific indicators or settings that allow for precise pressure adjustments.
Once you have identified the inflation control interface, activate the air pump to initiate the airflow into the tire. Depending on the design of the air pump, you may have the option to set a specific target pressure level for the tire, allowing the pump to automatically cease operation once the desired pressure is reached. Alternatively, some air pumps may require manual monitoring and adjustment to ensure that the tire is inflated to the appropriate pressure.
As the air flows into the tire, monitor the pressure gauge on the air pump or utilize a separate tire pressure gauge to periodically check the tire's pressure level. It's essential to proceed with caution and attentiveness, avoiding overinflation by regularly assessing the tire pressure and making incremental adjustments as needed.
Throughout the inflation process, maintain a firm grip on the air hose to prevent any accidental disconnection or air leakage. Be mindful of the duration of the air supply, ensuring that the tire receives an adequate amount of compressed air to reach the recommended pressure while avoiding excessive inflation that could lead to potential tire damage.
As the tire approaches the target pressure level, be prepared to halt the air supply promptly to prevent overinflation. Some air pumps may emit a distinct sound or visual cue to indicate the completion of the inflation process, while others may require manual intervention to cease the airflow at the appropriate pressure.
By methodically adding air to the tire with precision and attentiveness, you ensure that the tire reaches the optimal pressure level, promoting safe and efficient driving performance. This hands-on phase of the tire inflation process underscores the meticulous approach to vehicle maintenance, culminating in the successful restoration of the tire's proper inflation.
With the tire effectively inflated to the recommended pressure, you are now ready to proceed to the next step of checking the tire pressure again, validating the successful completion of the inflation process and confirming the tire's readiness for the road ahead.
Step 8: Check the tire pressure again
After adding air to your tire at the gas station, it is crucial to perform a final check of the tire pressure to ensure that it aligns with the recommended PSI specified by the vehicle manufacturer. This step serves as a critical validation of the tire inflation process, allowing you to confirm that the tire has been effectively restored to the optimal pressure level for safe and efficient driving.
To begin the reevaluation of the tire pressure, retrieve your reliable tire pressure gauge and proceed to the first tire that was inflated. Remove the air hose from the valve stem, taking care to prevent any rapid air loss that may occur during disconnection. With the valve stem exposed, firmly press the tire pressure gauge onto the valve stem to obtain an accurate reading of the current pressure in pounds per square inch (PSI).
Compare the measured pressure with the recommended PSI specified by the vehicle manufacturer, cross-referencing the obtained reading with the ideal pressure range for the specific tire. It is essential to ensure that the tire pressure falls within the acceptable tolerance of the recommended PSI, as both underinflation and overinflation can have adverse effects on vehicle handling, fuel efficiency, and tire longevity.
If the measured pressure aligns with the recommended PSI and falls within the acceptable range, the tire is deemed to be optimally inflated, signifying the successful completion of the tire inflation process. However, if the pressure deviates from the recommended range, further adjustments may be necessary to achieve the desired inflation level.
In the event of underinflation, reattach the air hose to the valve stem and add incremental bursts of air to the tire, carefully monitoring the pressure gauge to achieve the targeted PSI. Conversely, if the tire is overinflated, utilize a suitable tool to release small amounts of air from the tire, gradually reducing the pressure to the recommended level.
By meticulously checking the tire pressure again and making any required adjustments, you can ensure that each tire is optimally inflated, promoting balanced vehicle performance and safety. This diligent validation process underscores the commitment to meticulous tire maintenance, empowering you to address any deviations from the recommended pressure and uphold the integrity of your vehicle's tires.
With the tire pressure accurately reassessed and fine-tuned as needed, you have completed the comprehensive process of adding air to your tires at the gas station, culminating in the successful restoration of optimal tire inflation. This meticulous attention to tire maintenance contributes to a safer and more efficient driving experience, underscoring the significance of proactive vehicle care and attention to detail.
Read more: How To Operate A Gas Fireplace
Step 9: Replace the valve cap
After confirming that each tire has been effectively inflated to the recommended pressure level, the next crucial step in the tire maintenance process involves replacing the valve cap on the tire's valve stem. The valve cap serves as a protective barrier, shielding the valve stem from dirt, moisture, and debris that could compromise its functionality and lead to potential air leakage.
To initiate the replacement of the valve cap, retrieve the cap from its secure location and inspect it for any signs of damage or wear. Ensure that the cap is clean and free from any foreign particles that could impede its proper seating on the valve stem. Additionally, take note of any unique features or design elements on the valve cap that may aid in its correct reattachment.
With the valve cap in hand, position yourself in close proximity to the tire's valve stem, aligning the cap with the exposed valve. Carefully thread the cap onto the valve stem in a clockwise direction, applying gentle pressure to ensure a snug and secure fit. It's essential to avoid cross-threading or overtightening the cap, as this could lead to potential damage to the valve stem threads.
As you secure the valve cap onto the valve stem, take a moment to verify that it is properly seated and tightened to provide effective protection. The cap should form a secure seal with the valve stem, preventing the intrusion of dirt, moisture, or debris that could compromise the integrity of the valve. Additionally, ensure that the cap is aligned evenly with the valve stem, providing a uniform and secure closure.
By methodically replacing the valve cap on the tire's valve stem, you safeguard the integrity of the valve and mitigate the risk of potential air loss due to external contaminants. This simple yet essential step contributes to the overall maintenance of your vehicle's tires, promoting longevity and optimal performance.
With the valve cap securely reattached to the tire's valve stem, you have completed the comprehensive process of adding air to your tires at the gas station. This meticulous attention to detail underscores the commitment to proactive vehicle care, ensuring that each tire is equipped to support safe and efficient driving.
Step 10: Return the air hose and payment method
As you conclude the tire inflation process at the gas station, it is essential to finalize the procedure by returning the air hose to its designated storage location and addressing any remaining payment-related tasks. This concluding step ensures that the tire inflation process is seamlessly completed, allowing you to transition back to the road with confidence and peace of mind.
To begin, carefully detach the air hose from the tire's valve stem, taking care to prevent any sudden release of air that may occur during disconnection. As you remove the air hose, inspect the nozzle to ensure that it is free from any debris or obstructions, maintaining the cleanliness and functionality of the equipment for the next user. Once the air hose is safely disconnected, return it to the designated storage hook or compartment on the air pump, ensuring that it is neatly coiled and secured for future use.
With the air hose properly stowed, shift your attention to the resolution of any remaining payment-related tasks. If you utilized a coin-based payment system, ensure that any unused coins are safely returned to your possession, minimizing the risk of loss or misplacement. Similarly, if you made payment using a credit or debit card, securely stow the card in your wallet or purse, confirming that it is safely returned to its designated location.
If the gas station offers a receipt for the air pump transaction, be sure to collect and retain the receipt for your records, providing a tangible record of the tire inflation process and any associated expenses. This receipt may serve as a valuable reference for future maintenance activities or as documentation for any potential inquiries or warranty claims related to the tire inflation service.
As you complete the process of returning the air hose and addressing any remaining payment-related tasks, take a moment to survey the immediate area to ensure that no personal belongings or equipment have been inadvertently left behind. By conducting a brief visual inspection of the surroundings, you can confirm that all items are accounted for and that the tire inflation process has been concluded in a thorough and organized manner.
By meticulously returning the air hose to its storage location and addressing any remaining payment-related tasks, you finalize the comprehensive process of adding air to your tires at the gas station. This attentive approach underscores the commitment to proactive vehicle maintenance, ensuring that each element of the tire inflation process is carried out with care and attention to detail. With the tire inflation process successfully completed, you are now prepared to resume your journey with confidence, knowing that your vehicle's tires are optimally inflated and ready to support safe and efficient driving.