Home>Automotive>How To Let Air Out Of Tire
Automotive
How To Let Air Out Of Tire
Published: February 25, 2024
Learn the proper technique for letting air out of a tire with our step-by-step guide. Keep your automotive maintenance on track with our expert tips.
(Many of the links in this article redirect to a specific reviewed product. Your purchase of these products through affiliate links helps to generate commission for Noodls.com, at no extra cost. Learn more)
Table of Contents
Introduction
When it comes to maintaining your vehicle, knowing how to let air out of a tire is a fundamental skill that can come in handy in various situations. Whether you need to adjust the tire pressure for optimal performance, address overinflation, or simply deflate the tire for storage, understanding the proper procedure is essential. By following the correct steps, you can ensure the safety and longevity of your tires while promoting a smoother driving experience.
In this comprehensive guide, we will walk you through the step-by-step process of safely releasing air from a tire. From preparing the necessary tools and equipment to executing the deflation procedure with precision, you will gain valuable insights that empower you to take control of your vehicle's tire pressure. By mastering this essential skill, you can enhance your overall driving experience and contribute to the longevity of your tires.
So, whether you're a seasoned car enthusiast looking to expand your knowledge or a new driver eager to learn the ropes of tire maintenance, this guide is designed to equip you with the knowledge and confidence to tackle tire deflation with ease. With a clear understanding of the process and the right tools at your disposal, you can navigate this aspect of vehicle maintenance with efficiency and precision.
Now, let's delve into the essential tools and equipment you'll need to get started on this practical journey of tire deflation.
Read more: How To Take Air Out Of Tire
Tools and Equipment Needed
Before embarking on the task of letting air out of a tire, it's crucial to gather the necessary tools and equipment to ensure a smooth and efficient process. Here's a comprehensive list of items you'll need:
-
Tire Pressure Gauge: This essential tool allows you to measure the air pressure within the tire accurately. Opt for a reliable and easy-to-read gauge that suits your specific tire pressure requirements.
-
Valve Stem Cap Remover: A small yet indispensable tool, the valve stem cap remover enables you to swiftly remove the valve stem cap, providing access to the valve stem for the deflation process.
-
Tire Deflation Tool: While not always necessary, a tire deflation tool can expedite the process by allowing you to release air from the tire with precision and control. This tool can be particularly useful for adjusting tire pressure to a specific level.
-
Safety Gloves: Protect your hands with a pair of durable safety gloves to shield them from dirt, debris, and potential sharp edges around the valve stem area.
-
Flashlight: In case you're working in low-light conditions or need to inspect the valve stem area more closely, a reliable flashlight can be immensely helpful.
-
Tire Inflator/Deflator: If you anticipate the need to adjust tire pressure frequently, investing in a quality tire inflator/deflator can be advantageous. This versatile tool allows you to inflate or deflate tires with ease, offering convenience and efficiency.
-
Owner's Manual: While not a physical tool, having the vehicle's owner's manual on hand can provide valuable insights into the recommended tire pressure levels and deflation procedures specific to your vehicle make and model.
By ensuring that you have these tools and equipment readily available, you can approach the task of letting air out of a tire with confidence and preparedness. With the right resources at your disposal, you'll be well-equipped to execute the deflation process effectively, promoting optimal tire performance and safety.
Now that you're equipped with the necessary tools and equipment, let's proceed to the next step: preparing the tire for the deflation process.
Step 1: Prepare the Tire
Before initiating the process of letting air out of a tire, it's essential to prepare the tire and its immediate surroundings to ensure a safe and efficient deflation procedure. This step sets the foundation for a smooth deflation process and minimizes the risk of potential complications. Here's a detailed breakdown of the key aspects involved in preparing the tire:
Inspect the Surrounding Area
Begin by conducting a visual inspection of the area surrounding the tire. Look for any sharp objects, debris, or potential hazards that could pose a risk during the deflation process. Clearing the immediate vicinity of the tire helps create a safe working environment and reduces the likelihood of accidents or damage to the tire.
Park the Vehicle on a Level Surface
To facilitate an accurate deflation process, ensure that the vehicle is parked on a level surface. This helps maintain stability and allows for precise measurement of the tire pressure. Parking on a level surface also minimizes the risk of the vehicle rolling or shifting during the deflation procedure, enhancing safety and control.
Read more: How To Put Air In Tires At Gas Station
Engage the Parking Brake
Before proceeding, engage the parking brake to secure the vehicle in place. This additional safety measure prevents the vehicle from moving unexpectedly and provides stability during the tire deflation process. By activating the parking brake, you create a secure working environment, reducing the risk of accidents or mishaps.
Position the Vehicle for Access
Position the vehicle in a manner that allows convenient access to the tire you intend to deflate. Ensure that there is ample space around the tire to maneuver and access the valve stem easily. This strategic positioning streamlines the deflation process, making it more efficient and manageable.
By meticulously preparing the tire and its surroundings, you establish a solid foundation for the subsequent steps of the tire deflation process. This proactive approach sets the stage for a safe, controlled, and effective deflation procedure, ensuring that you can proceed with confidence and precision. With the tire adequately prepared, you are now ready to move on to the next step: locating the valve stem.
Step 2: Locate the Valve Stem
The next crucial step in the tire deflation process is locating the valve stem, the key access point for adjusting tire pressure. The valve stem serves as the gateway for adding or releasing air from the tire, making its precise identification essential for a successful deflation procedure. Here's a detailed exploration of the process of locating the valve stem:
Understanding the Valve Stem's Appearance
The valve stem is a small, cylindrical protrusion typically located on the outer surface of the tire. It is often capped with a protective valve stem cap, which helps shield the valve from dirt, debris, and moisture. The valve stem cap is usually made of plastic or metal and can be unscrewed to reveal the valve stem underneath.
Identifying the Valve Stem's Position
To locate the valve stem, visually inspect the outer surface of the tire, focusing on the area where the tire meets the wheel rim. The valve stem is commonly positioned near the edge of the rim, extending outward from the tire's sidewall. In some cases, it may be slightly recessed within the wheel rim, requiring a closer examination to pinpoint its exact location.
Utilizing Additional Light Sources
In instances where the valve stem is not immediately visible, employing a flashlight can aid in illuminating the area and facilitating the identification process. By directing the light around the perimeter of the wheel rim, you can effectively locate the valve stem and prepare for the subsequent steps of the deflation procedure.
Confirming the Valve Stem's Presence
Once the valve stem is located, verify its presence by observing the small metal valve at the tip of the stem. This valve is the access point for releasing air from the tire and is essential for accurate pressure adjustments. Ensuring that the valve stem is free from obstructions and damage is crucial for a smooth and efficient deflation process.
By meticulously locating the valve stem, you establish the groundwork for the precise execution of the tire deflation procedure. This foundational step sets the stage for accessing the tire's air supply and initiating the controlled release of air. With the valve stem identified, you are now prepared to proceed to the subsequent steps of the deflation process, equipped with the knowledge and confidence to navigate this essential aspect of tire maintenance.
Step 3: Remove the Valve Stem Cap
With the valve stem located, the next pivotal step in the tire deflation process is to remove the valve stem cap. The valve stem cap serves as a protective covering for the valve stem, safeguarding it from dirt, moisture, and debris. By removing the cap, you gain unhindered access to the valve stem, preparing it for the subsequent stages of the deflation procedure.
To remove the valve stem cap, grasp it firmly between your thumb and forefinger, applying gentle pressure to unscrew it in a counterclockwise direction. In some cases, the cap may be secured more tightly, requiring a bit of additional force to loosen it. Exercise caution to avoid applying excessive force, as this can lead to damage or loss of the cap.
As you unscrew the valve stem cap, be mindful of its small size and the potential for it to fall or roll away. To prevent misplacement, consider placing the cap in a secure location, such as a designated tray or your pocket, ensuring that it remains easily accessible for reinstallation after the deflation process is complete.
Upon successfully removing the valve stem cap, take a moment to inspect it for any signs of damage, corrosion, or debris accumulation. Cleaning the cap with a cloth or gentle brush can help maintain its functionality and prevent contaminants from entering the valve stem during the deflation process.
By removing the valve stem cap with care and attention to detail, you pave the way for seamless access to the valve stem, setting the stage for the precise release of air from the tire. With the cap removed and the valve stem exposed, you are now poised to proceed to the subsequent steps of the deflation process, equipped with the foundational knowledge and readiness to execute the procedure with precision.
This step marks a pivotal milestone in the tire deflation process, signifying the transition from preparation to active engagement with the tire's air supply. With the valve stem cap removed, you are now primed to progress to the next stage of the deflation procedure, ready to navigate the process with confidence and proficiency.
Step 4: Use the Tire Pressure Gauge
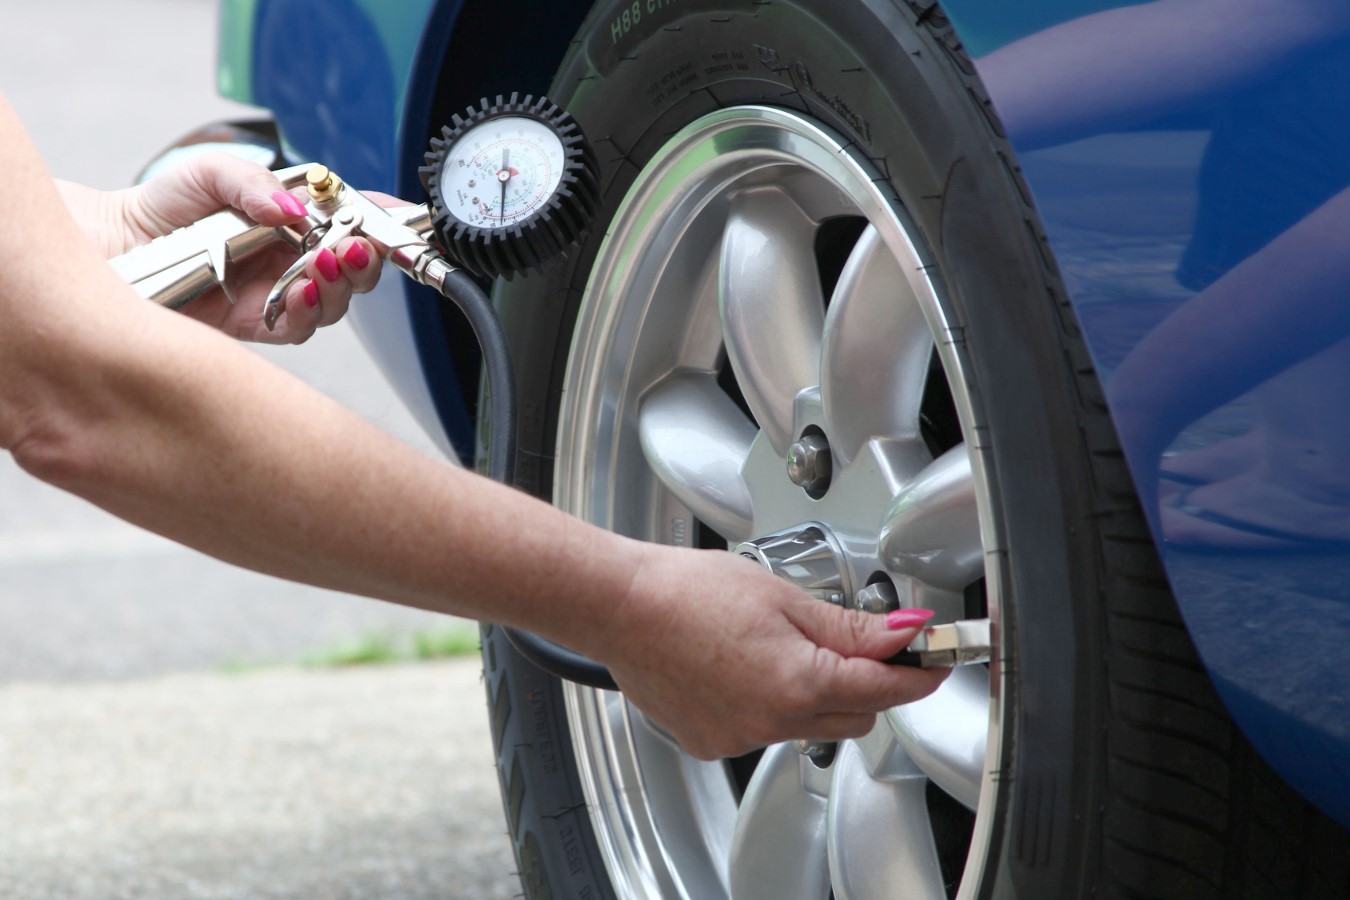
With the valve stem cap successfully removed, the next critical step in the tire deflation process involves utilizing the tire pressure gauge to measure the current air pressure within the tire accurately. This pivotal tool serves as the primary means of assessing the tire's pressure levels, providing essential data that guides the controlled release of air to achieve the desired pressure.
To begin, firmly press the nozzle of the tire pressure gauge onto the exposed valve stem, ensuring a secure and airtight connection. Hold the gauge in place for a few seconds to allow the pressure reading to stabilize, enabling the gauge to capture an accurate measurement of the tire's air pressure. During this process, it's important to maintain a steady and consistent connection between the gauge and the valve stem to prevent air from escaping and ensure precise readings.
Once the pressure reading is displayed on the gauge's dial or digital screen, take note of the value indicated. This numerical representation signifies the current air pressure within the tire and serves as the basis for determining the extent of deflation required to achieve the desired pressure level. If the tire pressure gauge features a digital display, the reading may appear as a numerical value accompanied by units such as PSI (pounds per square inch) or kPa (kilopascals), providing a clear indication of the tire's pressure status.
In the event that the tire pressure gauge indicates a pressure level higher than the desired target, the subsequent steps of the deflation process will involve releasing air from the tire in controlled increments. Conversely, if the initial pressure reading falls below the recommended threshold, additional steps may be necessary to address potential underinflation, such as inflating the tire to the optimal pressure level.
By utilizing the tire pressure gauge to obtain an accurate measurement of the tire's air pressure, you gain valuable insights that inform the precise adjustment of pressure levels. This data-driven approach empowers you to make informed decisions regarding the deflation process, ensuring that the tire's pressure aligns with the recommended specifications for optimal performance and safety.
With the tire pressure gauge serving as a reliable source of pressure data, you are now equipped with the essential information needed to proceed to the subsequent steps of the deflation process. This foundational step sets the stage for the controlled release of air from the tire, guided by accurate pressure measurements obtained through the tire pressure gauge.
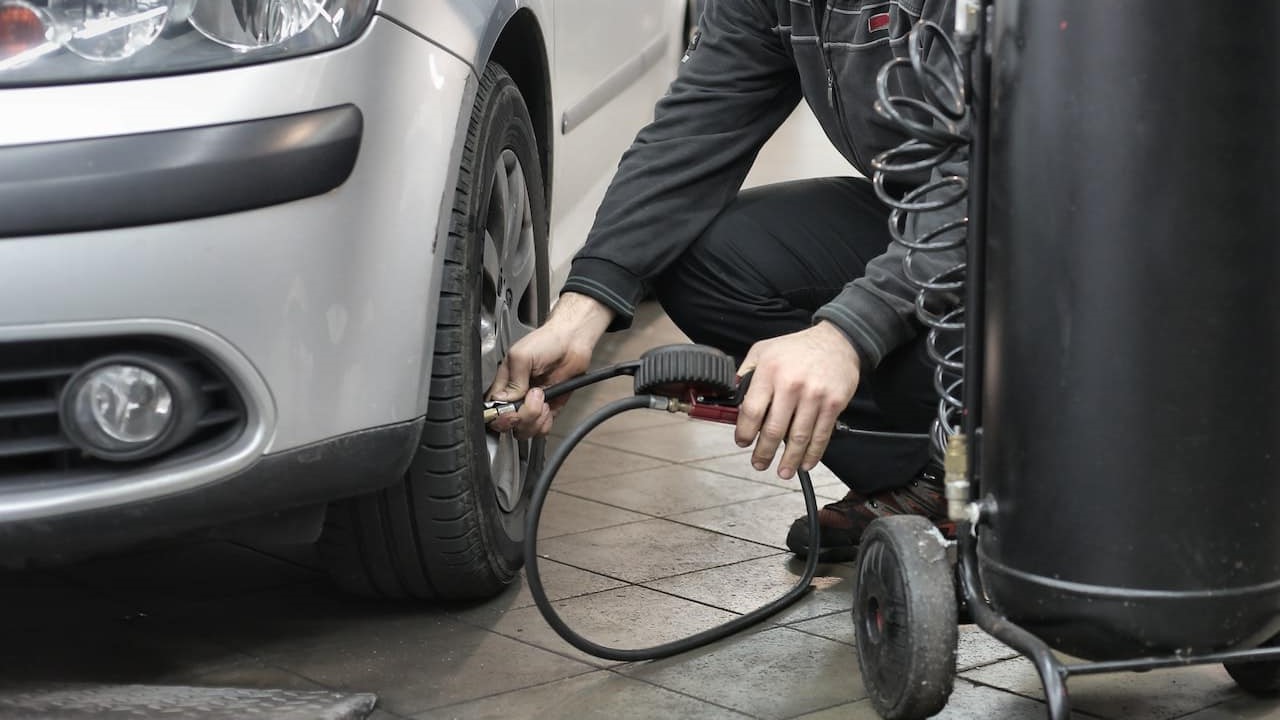
Step 5: Depress the Valve Stem
With the accurate measurement of the tire's air pressure obtained using the tire pressure gauge, the next crucial step in the tire deflation process involves depressurizing the tire by releasing air through the valve stem. This step requires precision and control to ensure that the tire's pressure is adjusted to the desired level, promoting optimal performance and safety.
To initiate the deflation process, firmly press the tire deflation tool onto the valve stem, creating a secure connection that facilitates the controlled release of air. The tire deflation tool serves as a specialized implement designed to depress the valve stem's core, allowing air to escape from the tire in a measured manner. By utilizing this tool, you can execute the deflation process with accuracy and efficiency, ensuring that the tire's pressure aligns with the recommended specifications.
As you engage the tire deflation tool with the valve stem, apply gradual pressure to depress the valve core, initiating the release of air from the tire. It's essential to exercise caution and attentiveness during this step, as precise control over the deflation process is paramount. By monitoring the tire pressure gauge concurrently, you can gauge the rate of air release and adjust the deflation tool's pressure as needed to achieve the desired pressure level.
Throughout the depressurization process, maintain a steady and deliberate approach, periodically checking the tire pressure gauge to track the decreasing pressure levels. This meticulous monitoring allows you to fine-tune the deflation process, ensuring that the tire's pressure aligns with the optimal range recommended for your specific vehicle and driving conditions.
As the tire's pressure approaches the target level, exercise heightened vigilance to prevent overdeflation. By maintaining a keen awareness of the pressure readings and adjusting the deflation tool's pressure application accordingly, you can achieve the precise pressure level required for optimal tire performance.
By depressurizing the tire with precision and control, you ensure that the deflation process aligns with the recommended pressure specifications, promoting enhanced safety, stability, and efficiency. With the valve stem depressurized and the tire's pressure adjusted to the desired level, you are now prepared to proceed to the subsequent steps of the deflation process, equipped with the foundational knowledge and readiness to execute the procedure with precision.
Step 6: Monitor the Air Pressure
As you progress through the tire deflation process, monitoring the air pressure becomes a pivotal task to ensure that the tire's pressure aligns with the desired level. This step involves vigilant observation of the tire pressure gauge readings and the ongoing deflation process, allowing for real-time adjustments to achieve the optimal pressure for the tire.
Continuously referencing the tire pressure gauge, observe the decreasing pressure levels as air is released from the tire through the valve stem. The gauge serves as a reliable indicator of the tire's pressure status, providing essential feedback that guides the deflation process. By maintaining a close watch on the gauge readings, you can gauge the rate of pressure reduction and make informed decisions regarding the duration and intensity of the deflation.
As the tire's pressure approaches the target level, exercise heightened vigilance to prevent overdeflation. It's crucial to strike a balance between achieving the desired pressure and avoiding excessive air loss, which can compromise the tire's performance and safety. By carefully monitoring the gauge readings and the deflation process, you can fine-tune the adjustments to ensure that the tire's pressure aligns with the recommended specifications.
Incorporate periodic pauses during the deflation process to assess the tire's pressure status and make necessary adjustments. This proactive approach allows for precise control over the pressure reduction, preventing abrupt or excessive deflation that can impact the tire's stability and performance. By maintaining a methodical and attentive stance, you can navigate the deflation process with confidence and precision, ensuring that the tire's pressure aligns with the optimal range for safe and efficient operation.
By diligently monitoring the air pressure and making calculated adjustments, you can achieve the desired pressure level with accuracy and control. This data-driven approach empowers you to maintain the tire's optimal performance and safety, setting the stage for a smooth and controlled deflation process. With the tire's pressure meticulously monitored and adjusted, you are now prepared to proceed to the subsequent steps of the deflation process, equipped with the foundational knowledge and readiness to execute the procedure with precision.
Step 7: Reinstall the Valve Stem Cap
Once the tire's pressure has been adjusted to the desired level, the final step in the tire deflation process involves reinstalling the valve stem cap. This seemingly simple yet crucial task serves as a protective measure to safeguard the valve stem from external elements and maintain the integrity of the tire's air supply.
To begin, retrieve the valve stem cap from its designated location, ensuring that it remains free from dirt, debris, or damage. Inspect the cap to verify its condition, checking for any signs of wear, corrosion, or foreign particles that could compromise its functionality. Cleaning the cap with a cloth or gentle brush can help remove any accumulated contaminants, ensuring that it remains in optimal condition for reinstallation.
Align the valve stem cap with the exposed valve stem, positioning it directly over the valve to facilitate a secure and snug fit. With gentle pressure, begin screwing the cap onto the valve stem in a clockwise direction, ensuring that it engages smoothly and securely. As the cap threads onto the valve stem, maintain a steady and controlled approach to prevent cross-threading or overtightening, which can lead to potential damage.
Once the valve stem cap is firmly in place, perform a visual inspection to confirm that it sits flush with the valve stem, forming a protective barrier against dust, moisture, and debris. This proactive measure helps preserve the integrity of the valve stem and prevents contaminants from infiltrating the tire's air supply, promoting long-term stability and performance.
By reinstalling the valve stem cap with care and attention to detail, you complete the tire deflation process with a final touch of protection and maintenance. This step signifies the culmination of the deflation procedure, marking the successful adjustment of the tire's pressure and the restoration of its protective measures.
With the valve stem cap securely reinstalled, the tire is now primed for optimal performance and safety, reflecting the meticulous attention to detail and precision applied throughout the deflation process. By executing this final step with diligence and care, you ensure that the tire's integrity is upheld, setting the stage for a smooth and controlled driving experience.
Now that the valve stem cap has been successfully reinstalled, the tire deflation process is complete, and you can proceed with confidence, knowing that the tire's pressure has been adjusted to the recommended level, and its essential components are safeguarded against external elements.
Read more: How To Remove Tire From Rim
Conclusion
In conclusion, mastering the art of letting air out of a tire is a valuable skill that empowers vehicle owners to maintain optimal tire performance, safety, and longevity. By following the comprehensive steps outlined in this guide, individuals can approach the tire deflation process with confidence and precision, ensuring that their vehicle's tires are equipped to deliver a smooth and controlled driving experience.
From the initial preparation of the tire and its surroundings to the precise utilization of tools such as the tire pressure gauge and deflation tool, each step plays a crucial role in achieving the desired tire pressure. By meticulously locating the valve stem, removing the valve stem cap, and monitoring the air pressure, individuals can navigate the deflation process with attentiveness and accuracy, ensuring that the tire's pressure aligns with the recommended specifications.
The significance of reinstalling the valve stem cap as the final step cannot be overstated, as it serves as a protective barrier that safeguards the valve stem and the tire's air supply from external contaminants. This proactive measure contributes to the long-term stability and performance of the tire, reflecting the commitment to meticulous maintenance and care.
By embracing the knowledge and skills presented in this guide, individuals can take control of their vehicle's tire maintenance, promoting enhanced safety, stability, and efficiency on the road. Whether it's adjusting tire pressure for specific driving conditions, addressing overinflation, or preparing tires for storage, the ability to let air out of a tire with precision and confidence is a valuable asset for every vehicle owner.
As individuals apply the insights gained from this guide to their tire maintenance routines, they contribute to the overall longevity and performance of their vehicle's tires, ultimately enhancing the driving experience and promoting safety on the road. With a solid understanding of the tire deflation process and the essential tools at their disposal, individuals are well-equipped to navigate this aspect of vehicle maintenance with efficiency and expertise.
In essence, mastering the art of letting air out of a tire empowers individuals to take proactive measures in maintaining their vehicle's tires, ensuring optimal performance and safety with each journey. This knowledge not only enhances the driving experience but also reflects a commitment to responsible vehicle ownership and maintenance, setting the stage for a smooth and controlled ride on the open road.