Home>Automotive>How To Fix A Slow Leak In Your Tire
Automotive
How To Fix A Slow Leak In Your Tire
Published: February 26, 2024
Learn how to quickly and effectively fix a slow leak in your tire with our expert automotive tips. Keep your vehicle safe and road-ready!
(Many of the links in this article redirect to a specific reviewed product. Your purchase of these products through affiliate links helps to generate commission for Noodls.com, at no extra cost. Learn more)
Table of Contents
Introduction
Dealing with a slow leak in your tire can be a frustrating experience, especially when it seems to disrupt your plans at the most inconvenient times. Whether you've noticed a gradual loss of tire pressure or have been alerted by the tire pressure monitoring system in your vehicle, addressing a slow leak is crucial for maintaining optimal safety and performance on the road.
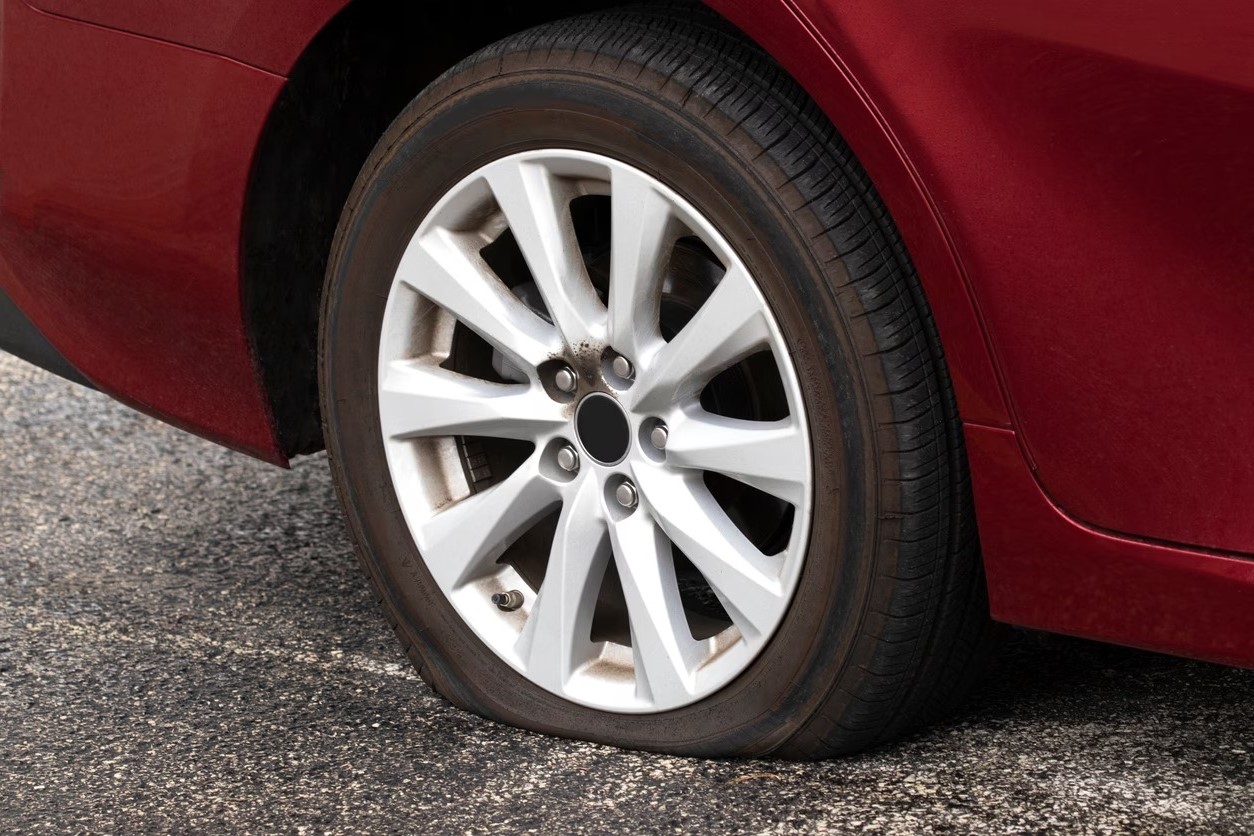
A slow leak in a tire can stem from various factors, such as a puncture from a sharp object, a damaged valve stem, or a corroded wheel rim. While it may seem like a minor inconvenience at first, neglecting a slow leak can lead to more severe issues, including compromised handling, reduced fuel efficiency, and even the risk of a blowout. Therefore, it's essential to promptly address any signs of a slow leak to ensure the continued reliability of your vehicle.
In this comprehensive guide, we will walk you through the step-by-step process of identifying, addressing, and resolving a slow leak in your tire. By following these instructions and utilizing the necessary tools, you can effectively restore your tire's integrity and get back on the road with confidence. Whether you're a seasoned automotive enthusiast or a novice DIYer, this guide will equip you with the knowledge and skills to tackle a slow leak and prevent it from dampening your driving experience.
So, let's roll up our sleeves and delve into the essential steps for fixing a slow leak in your tire. With the right approach and a bit of determination, you'll soon be able to conquer this common automotive challenge and enjoy smooth, worry-free travels.
Step 1: Identify the source of the leak
The first and most crucial step in addressing a slow leak in your tire is to pinpoint the exact source of the issue. While it may seem straightforward, identifying the source of a slow leak can sometimes be challenging, as the puncture or damage may not always be readily visible. Here's how you can effectively identify the source of the leak:
-
Visual Inspection: Begin by visually examining the tire for any visible signs of damage or foreign objects embedded in the tread. Look for nails, screws, glass shards, or any other sharp debris that may have caused the slow leak. Additionally, inspect the sidewalls for bulges, cuts, or cracks, as these can also lead to air loss.
-
Check Valve Stem and Wheel Rim: Inspect the valve stem for signs of wear, corrosion, or damage. A faulty valve stem can result in air leakage. Similarly, closely examine the wheel rim for any dents, corrosion, or imperfections that could be causing the slow leak.
-
Submerge the Tire: If the leak is not immediately apparent, you can submerge the tire in water and look for air bubbles. This method can help pinpoint the exact location of the leak, especially if it's a small puncture that's difficult to detect visually.
-
Use Soapy Water: Another effective technique is to apply a soapy water solution to the tire's surface and valve stem. As air escapes from the leak, it will create bubbles in the soapy water, indicating the precise location of the air loss.
-
Tire Pressure Monitoring System (TPMS): If your vehicle is equipped with a TPMS, pay attention to any alerts or notifications indicating low tire pressure. The TPMS can provide valuable insights into which tire is experiencing the slow leak, helping you narrow down the search for the source of the issue.
By carefully examining the tire, valve stem, and wheel rim, and utilizing techniques such as submersion and soapy water application, you can effectively identify the source of the slow leak. Once you have located the puncture or damaged area, you can proceed to the next steps to address and resolve the issue, ensuring that your tire is restored to its optimal condition.
Step 2: Remove the tire from the vehicle
Once you have identified the source of the slow leak in your tire, the next step is to safely remove the affected tire from your vehicle. This process is essential for gaining unrestricted access to the tire, allowing you to effectively address the leak and perform the necessary repairs. Here's a detailed guide on how to remove the tire from your vehicle:
Gather the Necessary Tools
Before beginning the tire removal process, gather the required tools and equipment. You will need a lug wrench or a suitable tire iron to loosen the lug nuts, a jack to elevate the vehicle, and a set of jack stands to support the vehicle securely once the tire is lifted off the ground. Additionally, it's advisable to have a pair of gloves to protect your hands during the tire removal process.
Loosen the Lug Nuts
Park your vehicle on a flat, stable surface and engage the parking brake to prevent any unintended movement. Using the lug wrench or tire iron, carefully loosen the lug nuts on the affected tire. It's important to loosen the lug nuts before lifting the vehicle with the jack to ensure that they can be easily removed once the tire is off the ground.
Elevate the Vehicle
Position the jack at the designated lifting point specified in your vehicle's owner's manual. Carefully raise the vehicle using the jack until the affected tire is completely off the ground. Once the vehicle is elevated, place the jack stands beneath the vehicle's frame or designated support points to provide additional stability and safety.
Remove the Lug Nuts and Tire
With the vehicle securely supported by the jack stands, proceed to remove the loosened lug nuts from the wheel studs. Once the lug nuts are removed, carefully take hold of the tire and gently pull it away from the wheel hub. Be mindful of the tire's weight and ensure a firm grip to prevent any mishaps during the removal process.
Secure the Tire and Inspect the Wheel Hub
After removing the tire, place it in a safe and stable location, away from the work area. Take this opportunity to inspect the wheel hub for any signs of corrosion, debris, or damage that may have contributed to the slow leak. Cleaning the wheel hub surface can help ensure a proper seal when reinstalling the tire.
By following these steps to remove the tire from your vehicle, you can effectively prepare for the subsequent actions required to address the slow leak and restore the tire to its optimal condition. With the tire safely removed, you can proceed with confidence, knowing that you have set the stage for successful repairs and maintenance.
Step 3: Locate and mark the puncture or leak
After successfully removing the affected tire from the vehicle, the next critical step is to precisely locate and mark the puncture or leak. This meticulous process is essential for ensuring that the repair efforts are targeted and effective, ultimately restoring the tire's integrity and functionality. Here's a detailed guide on how to locate and mark the puncture or leak with precision and accuracy:
Clean the Tire Surface
Begin by thoroughly cleaning the tire's tread and sidewall using a mild detergent or automotive cleaning solution. This step is crucial for removing any dirt, debris, or grime that may obscure the puncture or leak. Use a soft-bristled brush or cloth to gently scrub the tire's surface, paying close attention to the area surrounding the suspected leak.
Inspect the Tire Carefully
Once the tire surface is clean, carefully inspect the entire tread and sidewall for any signs of punctures, cuts, or embedded objects. Run your fingers lightly over the tire's surface, feeling for any abnormalities or protrusions that may indicate the location of the leak. Additionally, visually examine the tire from different angles and lighting conditions to enhance the visibility of any potential punctures.
Use a Puncture Detection Solution
To aid in the detection process, consider using a puncture detection solution or a commercially available leak detection spray. These solutions are formulated to create visible marks or bubbles when applied to the tire's surface, pinpointing the exact location of the leak. Apply the solution methodically, starting from the valve stem area and working your way around the tire in a systematic manner.
Mark the Leak Site
Upon identifying the precise location of the leak, use a non-permanent marker or a piece of chalk to mark the spot clearly. Make a prominent and easily visible indication on the tire's sidewall or tread, ensuring that it can be readily identified during the subsequent repair process. If the leak is located near the tread, mark the area with a small "X" or circle to delineate the exact point of the puncture.
Read more: How To Remove Tire From Rim
Document the Location
For added assurance, consider taking a photograph of the marked leak site using a smartphone or camera. This visual documentation can serve as a reference during the repair phase, providing a clear record of the puncture's location and aiding in the precise application of the repair materials.
By meticulously following these steps to locate and mark the puncture or leak, you can effectively prepare for the subsequent repair process with confidence and precision. With the leak site clearly identified and marked, you are now ready to proceed with the necessary repairs to restore the tire to its optimal condition and ensure reliable performance on the road.
Step 4: Repair the leak with a tire repair kit
Repairing a tire leak with a tire repair kit is a practical and cost-effective solution that can restore the integrity of your tire and prevent the need for a complete replacement. By following the steps outlined below, you can effectively utilize a tire repair kit to address the identified leak and ensure the continued reliability of your tire.
Gather the Necessary Tools and Materials
Before commencing the repair process, gather the essential tools and materials required for using a tire repair kit. Typically, a standard tire repair kit includes a T-handle insertion tool, a spiral rasp or reaming tool, rubber cement, and a set of tire plugs. Additionally, ensure that you have a pair of gloves, eye protection, and a portable air compressor or tire inflator on hand to reinflate the tire after the repair.
Prepare the Puncture Site
Begin by revisiting the marked puncture or leak site on the tire. Use the reaming tool from the tire repair kit to carefully ream out the puncture, creating a clean and uniform opening for the tire plug. This step is crucial for preparing the puncture site and ensuring proper adhesion and sealing of the repair materials.
Insert the Tire Plug
Select a suitable tire plug from the repair kit and insert it into the insertion tool, ensuring that it is centered and securely held in place. With the tire plug ready, carefully insert it into the puncture site, applying steady and even pressure to ensure that the plug is fully seated within the tire. The plug should extend slightly beyond the tire surface, providing a secure seal against air leakage.
Apply Rubber Cement
Once the tire plug is in place, apply a liberal amount of rubber cement to the repaired area. The rubber cement serves as an adhesive, enhancing the bond between the tire plug and the tire's inner lining. Ensure that the entire puncture site is coated with the rubber cement, creating a durable and airtight seal.
Trim Excess Plug Material
After allowing the rubber cement to set for a brief period, carefully trim any excess tire plug material protruding from the tire's surface. Use a sharp utility knife or scissors to trim the plug flush with the tire, ensuring a smooth and uniform appearance. This step also prevents the excess plug material from catching on road debris or causing potential issues with tire balance.
Reinflate the Tire and Verify the Repair
Using a portable air compressor or tire inflator, reinflate the tire to the recommended pressure specified by the vehicle manufacturer. Once the tire is properly inflated, visually inspect the repaired area, ensuring that the tire plug is securely in place and that no air leakage is occurring. You can also use a soapy water solution to check for any signs of bubbles, confirming the effectiveness of the repair.
By diligently following these steps to repair the leak with a tire repair kit, you can effectively restore the integrity of your tire and mitigate the effects of a slow leak. This proactive approach not only promotes safety and reliability but also extends the lifespan of your tire, allowing you to continue your travels with confidence and peace of mind.
Read more: How To Repair An Oil Leak
Step 5: Reinflate the tire and check for leaks
After successfully repairing the tire using a tire repair kit, the next crucial step is to reinflate the tire to the recommended pressure and thoroughly check for any signs of air leaks. This meticulous process is essential for ensuring that the repair has been effective and that the tire is ready to resume its role as a reliable component of your vehicle's performance and safety.
Reinflate the Tire to Recommended Pressure
Using a portable air compressor or a tire inflator, carefully reinflate the tire to the specific pressure level recommended by the vehicle manufacturer. Refer to the vehicle's owner's manual or the placard located on the driver's side door jamb for the correct tire pressure information. It's important to ensure that the tire is inflated to the appropriate pressure to maintain optimal handling, stability, and fuel efficiency.
Verify the Stability of Tire Pressure
Once the tire has been reinflated, use a reliable tire pressure gauge to measure the pressure and verify that it aligns with the manufacturer's specifications. Check the pressure multiple times to ensure accuracy and consistency. Additionally, compare the pressure readings with those of the other tires on the vehicle to confirm uniformity and balance.
Inspect the Repaired Area for Leaks
With the tire fully inflated, conduct a thorough visual inspection of the repaired area. Look for any signs of air leakage, such as hissing sounds, visible air bubbles, or a noticeable decrease in tire pressure. Pay close attention to the puncture site and the surrounding area, ensuring that the tire plug and the applied rubber cement have effectively sealed the leak.
Read more: How To Take Air Out Of Tire
Utilize a Soapy Water Solution
To further verify the integrity of the repair, apply a soapy water solution to the repaired area. The soapy water will react to any escaping air, producing visible bubbles that indicate a leak. Carefully observe the entire repaired section, including the edges of the tire plug and the surrounding tread, to confirm that no air leakage is present.
Confirm the Effectiveness of the Repair
After reinflating the tire and conducting a comprehensive leak check, take a brief test drive to assess the tire's performance and stability. Pay attention to any irregularities in handling, vibrations, or changes in tire pressure. If the tire maintains its pressure and exhibits no signs of air leakage during the test drive, it indicates that the repair has been successful and the tire is ready for regular use.
By meticulously following these steps to reinflate the tire and thoroughly check for leaks, you can ensure that the repair has been effective and that the tire is prepared to deliver reliable performance on the road. This proactive approach promotes safety, stability, and peace of mind, allowing you to confidently resume your travels without the lingering concerns of a slow leak compromising your driving experience.
Step 6: Reinstall the tire on the vehicle
Reinstalling the tire on the vehicle is the final crucial step in addressing a slow leak and restoring the optimal functionality of the tire. This process involves securely mounting the repaired tire back onto the vehicle, ensuring proper alignment, stability, and safety for continued use. Here's a detailed guide on how to effectively reinstall the tire on the vehicle:
Inspect the Wheel Hub and Lug Nuts
Before reinstalling the tire, carefully inspect the wheel hub for any signs of corrosion, debris, or damage. Clean the mounting surface using a wire brush or a cloth to ensure a smooth and secure fit for the tire. Additionally, examine the lug nuts to ensure they are clean, undamaged, and properly threaded.
Read more: How To Let Air Out Of Tire
Align the Wheel and Install the Lug Nuts
Lift the repaired tire and align it with the wheel hub, ensuring that it sits flush against the mounting surface. Proceed to hand-tighten the lug nuts in a crisscross pattern to promote even and secure fastening. Avoid fully tightening the lug nuts at this stage, as the final tightening will occur when the vehicle is lowered.
Lower the Vehicle and Tighten the Lug Nuts
Carefully lower the vehicle using the jack, allowing the tire to make full contact with the ground. Once the vehicle is lowered, use a torque wrench to securely tighten the lug nuts to the manufacturer's specified torque settings. This step is crucial for ensuring proper wheel attachment and preventing potential issues related to loose lug nuts.
Perform a Final Inspection
After tightening the lug nuts to the recommended torque, conduct a final visual inspection of the tire and wheel assembly. Verify that the tire is seated evenly and securely against the wheel hub. Additionally, check for any signs of misalignment or irregularities that may affect the tire's stability and performance.
Recheck the Tire Pressure
Using a reliable tire pressure gauge, recheck the inflation pressure of the reinstalled tire to ensure it aligns with the manufacturer's specifications. Adjust the pressure as needed to achieve the recommended level, promoting optimal handling, stability, and safety.
Test Drive and Monitor Performance
Before resuming regular driving, take a brief test drive to assess the tire's performance and stability. Pay attention to the vehicle's handling, ride comfort, and any indications of irregular tire behavior. Monitor the tire pressure using the vehicle's tire pressure monitoring system or a manual gauge to ensure stability and reliability.
By meticulously following these steps to reinstall the tire on the vehicle, you can effectively complete the comprehensive process of addressing a slow leak and restoring the tire to its optimal condition. This proactive approach promotes safety, stability, and peace of mind, allowing you to confidently resume your travels with the assurance of a well-maintained and reliable tire.
Conclusion
Addressing a slow leak in your tire is a task that demands attention to detail, patience, and a methodical approach. By following the comprehensive steps outlined in this guide, you have equipped yourself with the knowledge and skills to effectively identify, repair, and restore a tire affected by a slow leak. From the initial identification of the leak source to the meticulous repair process and the final reinstallation of the tire on your vehicle, each step plays a crucial role in ensuring the continued reliability and safety of your tire.
It's important to recognize that addressing a slow leak in a timely manner not only safeguards your driving experience but also contributes to the overall longevity and performance of your vehicle. Neglecting a slow leak can lead to compromised handling, reduced fuel efficiency, and potential safety hazards, underscoring the significance of proactive maintenance and repair.
By taking a proactive stance and addressing a slow leak promptly, you have not only preserved the integrity of your tire but also demonstrated a commitment to safety and responsible vehicle ownership. The utilization of a tire repair kit, coupled with thorough leak checks and meticulous reinstallation, reflects a dedication to maintaining your vehicle in optimal condition.
As you embark on your future travels, the knowledge and experience gained from addressing a slow leak in your tire will serve as a valuable asset. Whether navigating urban streets, embarking on road trips, or venturing off the beaten path, the confidence in your vehicle's reliability and safety is a testament to your proactive approach to maintenance and repair.
Remember, the steps outlined in this guide are not only applicable to addressing slow leaks but also serve as a foundation for proactive tire maintenance. Regular inspections, prompt repairs, and adherence to recommended tire pressure levels are essential practices that contribute to the overall safety, performance, and longevity of your vehicle's tires.
As you conclude this journey of addressing a slow leak in your tire, carry forward the knowledge and skills gained, and apply them to your ongoing vehicle maintenance endeavors. By doing so, you will continue to enjoy the peace of mind and confidence that come with a well-maintained and reliable vehicle, ensuring that a slow leak will never hinder your driving experience again.