Home>Home and Garden>Pruning Tulips After Blooming: A Step-by-Step Guide
Home and Garden
Pruning Tulips After Blooming: A Step-by-Step Guide
Published: February 17, 2024
Learn how to properly prune tulips after blooming with our step-by-step guide. Keep your home and garden looking beautiful with these expert tips.
(Many of the links in this article redirect to a specific reviewed product. Your purchase of these products through affiliate links helps to generate commission for Noodls.com, at no extra cost. Learn more)
Table of Contents
Introduction
Pruning tulips after blooming is an essential task for maintaining the health and vitality of these beloved spring flowers. While the vibrant blooms of tulips bring joy and beauty to gardens, proper post-blooming care is crucial for ensuring their longevity and promoting future growth. By following a few simple steps, you can help your tulips thrive and prepare them for a stunning display in the next growing season.
After the tulip blooms have faded and the petals have fallen, it's time to shift your focus to the next phase of care. Pruning tulips involves more than just snipping away at the stems; it's a process that involves thoughtful consideration and attention to detail. By understanding the significance of post-blooming maintenance, you can contribute to the overall well-being of your tulips and set the stage for their continued success.
As you embark on the journey of pruning tulips after blooming, it's important to approach the task with a sense of purpose and dedication. This process is not only about tidying up the garden but also about nurturing the plants and preparing them for the future. With the right approach and a willingness to invest time and effort, you can make a meaningful impact on the health and vitality of your tulips.
In the following steps, we will delve into the intricacies of post-blooming tulip care, providing you with a comprehensive guide to help you navigate this important phase of gardening. From waiting for the right time to gathering the necessary tools and executing the pruning process, each step plays a crucial role in the overall care and maintenance of your tulips. By following these steps, you can ensure that your tulips receive the attention they need to flourish and delight you with their resplendent blooms year after year.
Step 1: Wait for the Right Time
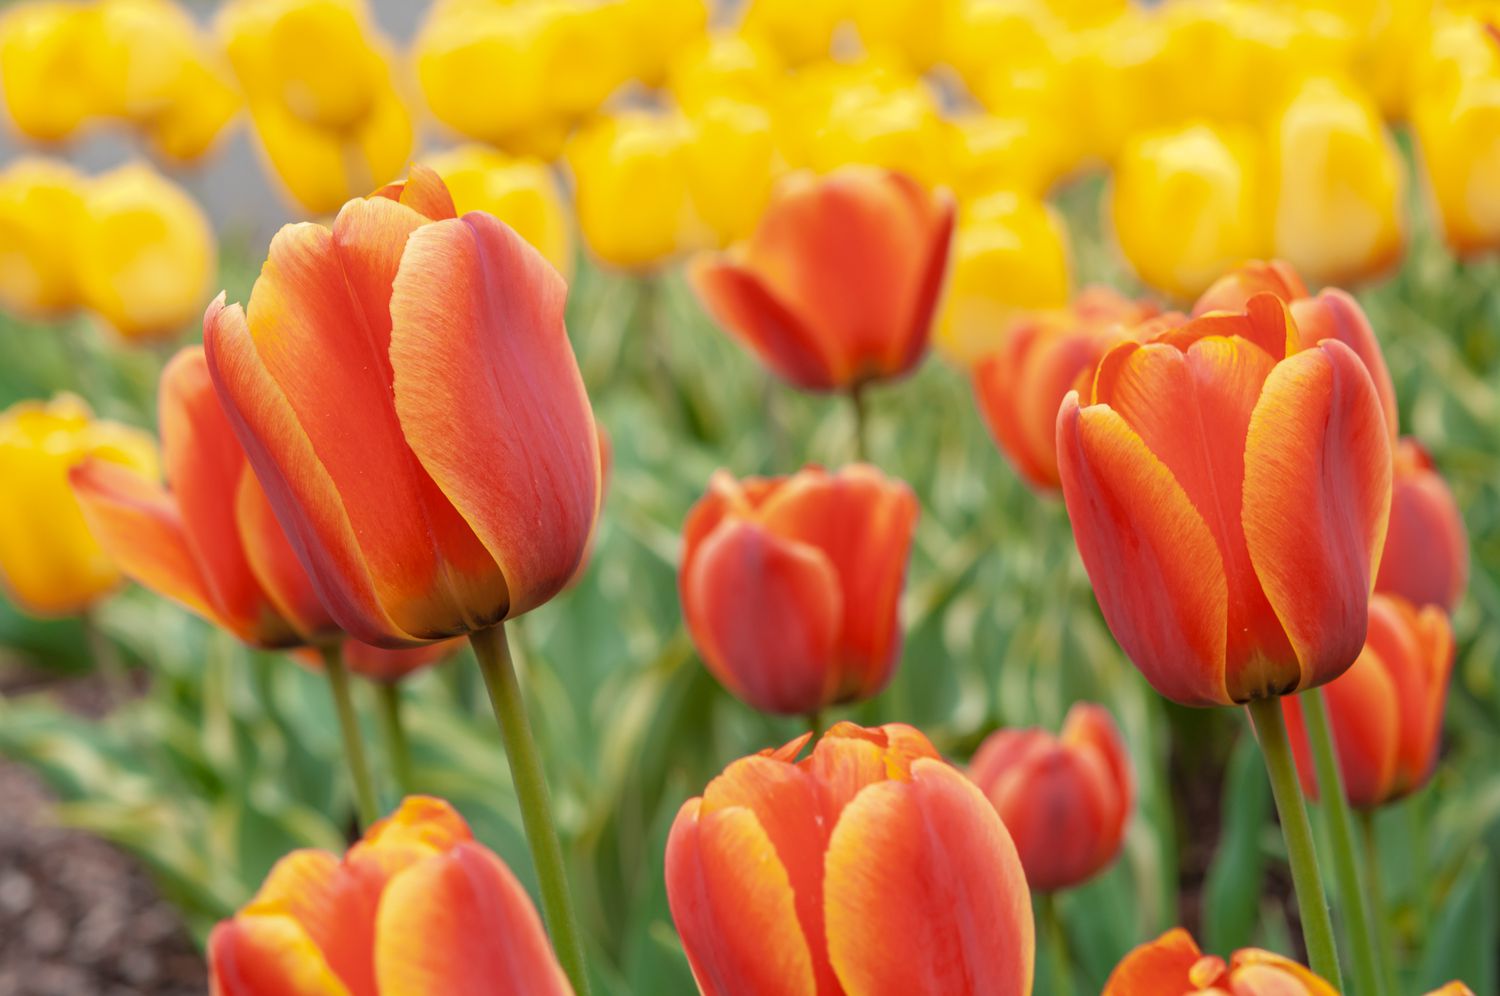
After the dazzling display of tulip blooms has faded, it's natural to feel eager to begin the post-blooming process. However, exercising patience and waiting for the right time is crucial for the overall health and vitality of your tulips. The ideal timing for pruning tulips after blooming is when the petals have withered and fallen, and the stems have started to turn yellow or brown. This indicates that the tulips have completed their flowering cycle and are ready for the next phase of care.
By waiting for the right time to prune your tulips, you allow the plants to channel their energy into the bulbs, enabling them to store essential nutrients for the next growing season. This period of post-blooming nourishment is integral to the tulips' ability to thrive and produce robust blooms in the future. Rushing into pruning before the tulips have completed this natural process can disrupt their growth cycle and diminish their potential for the following year.
Observing the gradual transition of the tulip stems from green to yellow or brown serves as a visual cue, signaling that the plants are ready for post-blooming care. It's a testament to the resilience and cyclical nature of these remarkable flowers, and by respecting this natural progression, you contribute to their long-term well-being.
As you patiently await the right time to prune your tulips, take the opportunity to appreciate the beauty of the fading blooms and reflect on the cycle of growth and renewal that characterizes the life of these flowers. Embracing this mindful approach to gardening fosters a deeper connection with nature and allows you to savor the fleeting yet profound moments that unfold in the garden.
By waiting for the opportune moment to begin the pruning process, you demonstrate a thoughtful and considerate approach to caring for your tulips. This simple act of patience sets the stage for the subsequent steps in the post-blooming care routine, laying a foundation for the continued health and vibrancy of your beloved tulips.
Step 2: Gather Your Tools
Gathering the necessary tools for pruning tulips after blooming is a pivotal step in ensuring a smooth and effective post-blooming care routine. Equipping yourself with the right tools not only streamlines the process but also contributes to the overall well-being of the tulips. As you prepare to embark on this essential task, assembling the following tools will set the stage for a successful pruning experience:
1. Pruning Shears:
Invest in a high-quality pair of pruning shears specifically designed for delicate tasks in the garden. Look for shears with sharp, precision blades that facilitate clean cuts without causing unnecessary damage to the plant. The sharpness of the blades is crucial for promoting quick healing of the cut stems and minimizing stress on the tulips.
2. Gloves:
Protect your hands with a sturdy pair of gardening gloves. Opt for gloves that offer a balance of dexterity and protection, allowing you to handle the tulips and maneuver the pruning shears with ease. Additionally, gloves provide a barrier against thorns and potential irritants, ensuring a comfortable and safe pruning experience.
Read more: Removing A Door Knob: Step-by-Step Guide
3. Container or Basket:
Prepare a container or basket to collect the trimmed stems and spent flowers. This simple yet essential tool helps maintain tidiness in the garden and facilitates efficient disposal of the pruned material. By keeping the work area organized, you can focus on the task at hand without the distraction of scattered debris.
4. Fertilizer:
Have a suitable fertilizer on hand to nourish the soil after pruning. Choose a balanced, slow-release fertilizer formulated for flowering bulbs to replenish essential nutrients and support the tulips' post-blooming recovery. Applying fertilizer at the appropriate time contributes to the overall health and vigor of the tulips as they prepare for the next growing season.
5. Marker or Label:
Keep a marker or label nearby to identify specific tulip varieties or special cultivars in your garden. This simple tool allows you to track the performance of different tulip types and make informed decisions for future care and maintenance. By labeling the pruned areas or noting specific details, you can enhance your gardening records and gain valuable insights for subsequent seasons.
By gathering these essential tools, you set the stage for a purposeful and efficient pruning experience. Each tool plays a crucial role in facilitating the post-blooming care process, contributing to the health and vitality of your tulips, and preparing them for continued growth and beauty in the seasons to come.
Step 3: Cut the Stems
As you embark on the pivotal task of pruning tulips after blooming, the precise and careful cutting of the stems is a crucial step in the post-blooming care routine. This process not only contributes to the tidiness of the garden but also plays a significant role in promoting the overall health and vitality of the tulips. With a mindful approach and the right technique, you can ensure that the tulips receive the care they need to thrive in the seasons to come.
Begin by carefully inspecting the tulip stems, identifying the point at which the stem transitions from green to yellow or brown. This visual cue indicates the natural progression of the tulips' growth cycle and signals that they are ready for pruning. Using sharp pruning shears, make clean cuts at the base of the stems, ensuring that each cut is made at a slight angle. This angled cut helps prevent water from pooling on the surface, reducing the risk of rot and fungal diseases.
As you proceed with cutting the stems, exercise caution to avoid damaging the surrounding foliage or neighboring plants. Approach each stem with precision and gentleness, allowing the pruning shears to glide smoothly and effortlessly. By maintaining a steady hand and a focused mindset, you can execute the cuts with finesse, minimizing stress on the tulips and promoting swift healing of the pruned areas.
While cutting the stems, take a moment to appreciate the resilience and beauty of the tulips, acknowledging the role they play in bringing joy and vibrancy to the garden. As each stem is carefully trimmed, visualize the potential for renewed growth and future blooms, knowing that your attentive care contributes to the tulips' continued well-being.
As the trimmed stems are collected in the designated container or basket, take a brief pause to survey the garden, observing the transformation taking place. The act of cutting the stems symbolizes a transition from the peak of blooming to a phase of renewal and preparation for the future. Embrace this moment as an integral part of the tulips' life cycle, recognizing the significance of your role in nurturing these remarkable flowers.
By approaching the task of cutting the stems with mindfulness and precision, you honor the resilience and beauty of the tulips while contributing to their long-term health and vitality. This simple yet impactful act sets the stage for the subsequent steps in the post-blooming care routine, laying the groundwork for the tulips' continued growth and splendor in the seasons to come.
Step 4: Remove the Dead Flowers
After the stems have been carefully pruned, the next vital step in post-blooming tulip care is the removal of the dead flowers. This process not only contributes to the aesthetic appeal of the garden but also plays a significant role in redirecting the tulips' energy towards bulb development and future growth. By diligently removing the spent flowers, you facilitate the plants' transition from the blooming phase to the crucial stage of nourishing the bulbs for the upcoming season.
Begin by gently inspecting the remaining flowers, identifying those that have completed their blooming cycle and begun to wilt or fade. With a delicate touch, pluck these spent flowers from the stems, taking care not to disturb the surrounding foliage or emerging buds. As you remove each dead flower, envision the renewal and vitality that this act fosters within the tulips, allowing them to channel their resources towards bulb development and strengthening their reserves for the future.
The process of removing the dead flowers serves as a symbolic gesture of nurturing and renewal, signifying the transition from the peak of blooming to a phase of regeneration and preparation for the next cycle. Embrace this task as an opportunity to connect with the resilience and cyclical nature of the tulips, recognizing the significance of your role in guiding them through this essential phase of post-blooming care.
As the garden undergoes this transformation, take a moment to appreciate the beauty and grace of the tulips, acknowledging the profound impact they have on the landscape. Each removed dead flower represents a step towards rejuvenation and future vitality, underscoring the cyclical rhythm of nature and the role of attentive care in nurturing the garden's splendor.
By meticulously removing the dead flowers, you contribute to the overall well-being of the tulips, setting the stage for their continued growth and resplendent blooms in the seasons to come. This simple yet meaningful act of post-blooming care underscores your dedication to fostering a thriving and vibrant garden, ensuring that the tulips receive the attention they need to flourish year after year.
Step 5: Fertilize the Soil
Fertilizing the soil after pruning tulips marks a pivotal stage in the post-blooming care routine, playing a crucial role in replenishing essential nutrients and supporting the tulips' recovery and future growth. This step is instrumental in nurturing the soil, providing the tulips with the resources they need to thrive and produce robust blooms in the upcoming seasons.
Select a balanced, slow-release fertilizer specifically formulated for flowering bulbs, ensuring that it contains the necessary nutrients to support the tulips' post-blooming recovery. With a mindful approach, apply the fertilizer to the soil around the pruned tulips, following the manufacturer's instructions regarding the appropriate dosage and application method. Gently work the fertilizer into the soil, taking care not to disturb the bulbs or emerging foliage.
As the fertilizer is applied, envision the vital nourishment it provides to the soil, fostering a nutrient-rich environment that supports the tulips' root development and overall health. This act of replenishing the soil serves as a testament to your commitment to the well-being of the garden, ensuring that the tulips receive the care and resources they need to flourish in the seasons to come.
The process of fertilizing the soil symbolizes a continuation of the nurturing cycle, reinforcing the garden's potential for renewal and growth. Embrace this task as an opportunity to connect with the interconnectedness of the garden ecosystem, recognizing the profound impact of providing essential nutrients to the soil and its role in sustaining the tulips' vitality.
As the fertilizer integrates into the soil, take a moment to appreciate the transformative power of this simple act, knowing that it sets the stage for the tulips' continued health and vibrancy. By nourishing the soil with the appropriate fertilizer, you contribute to the overall well-being of the garden, ensuring that the tulips have the support they need to thrive and delight you with their resplendent blooms in the future.
Step 6: Store the Bulbs for Next Year
Storing the bulbs for the next year is a crucial step in ensuring the continued success and vitality of your tulips. Proper storage not only preserves the bulbs during their dormant phase but also sets the stage for robust growth and blooming in the subsequent seasons. By carefully preparing and storing the bulbs, you pave the way for a stunning display of tulips in the future, perpetuating the cycle of beauty and renewal in your garden.
Begin by gently lifting the bulbs from the soil, taking care to avoid damaging them during the extraction process. Use a small garden spade or trowel to carefully loosen the soil around the bulbs, allowing you to lift them with minimal disturbance. As you unearth the bulbs, marvel at the intricate structures that hold the potential for future blooms, recognizing the significance of these humble yet remarkable components of the tulip life cycle.
Once the bulbs have been lifted, gently brush off excess soil, taking care not to remove the protective outer layer. Inspect the bulbs for any signs of damage or disease, discarding any that appear compromised. Select only the healthiest and most robust bulbs for storage, ensuring that they are free from blemishes and have the potential to thrive in the seasons to come.
Next, prepare a suitable storage location for the bulbs, ensuring that it provides the necessary conditions for their dormancy. Choose a cool, dry, and well-ventilated area, such as a garage or basement, where the bulbs can remain undisturbed until the next planting season. Avoid areas prone to excessive moisture or temperature fluctuations, as these conditions can compromise the bulbs' viability.
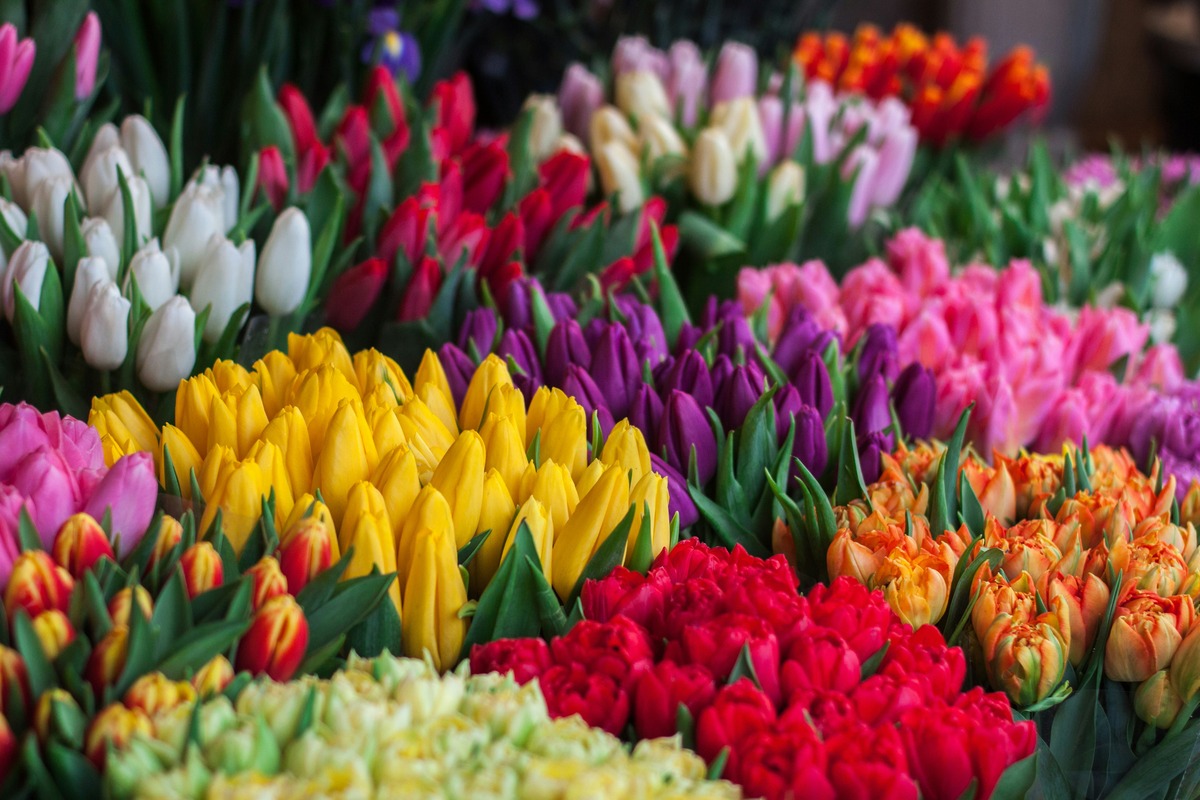
Before storing the bulbs, consider labeling or organizing them according to their varieties or colors, facilitating easy identification when it's time to plant them again. This simple yet thoughtful step enhances your gardening records and allows you to make informed decisions when planning the layout and design of your future tulip displays.
As you carefully place the bulbs in the designated storage area, envision the potential they hold for the next growing season, knowing that your attentive care during the storage process contributes to their continued vitality. Embrace this task as a continuation of your commitment to nurturing the tulips, recognizing the profound impact of proper storage on their future growth and blooming.
By storing the bulbs with care and consideration, you honor the resilience and beauty of the tulips, ensuring that they have the best possible conditions to thrive and delight you with their resplendent blooms in the seasons to come. This final step in the post-blooming care routine underscores your dedication to fostering a thriving and vibrant garden, ensuring that the tulips receive the attention they need to flourish year after year.
Conclusion
As the post-blooming care routine for your tulips draws to a close, it's essential to reflect on the significance of these nurturing efforts and the profound impact they have on the overall health and vitality of your garden. The journey of pruning tulips after blooming is not merely a series of tasks; it's a testament to your commitment to fostering a thriving and vibrant garden, ensuring that the tulips receive the attention they need to flourish year after year.
Throughout the process, from patiently waiting for the right time to gather the necessary tools, delicately cutting the stems, removing the spent flowers, fertilizing the soil, and carefully storing the bulbs for the next year, each step plays a pivotal role in nurturing the tulips and preparing them for continued growth and beauty in the seasons to come.
By embracing the cyclical nature of gardening and recognizing the interconnectedness of the garden ecosystem, you have demonstrated a mindful and purposeful approach to caring for your tulips. The act of pruning and nurturing these remarkable flowers is a celebration of resilience, renewal, and the enduring beauty of nature.
As you conclude the post-blooming care routine, take a moment to appreciate the transformative power of your efforts. Envision the potential for renewed growth and future blooms, knowing that your attentive care has set the stage for the tulips' continued health and vibrancy. Embrace the satisfaction of knowing that your dedication to nurturing the garden has contributed to the enduring beauty and splendor of the tulips.
Looking ahead, as the seasons transition and the tulips prepare for their next cycle of growth, carry with you the knowledge that your thoughtful care has played a significant role in shaping the garden's beauty. The post-blooming care routine is not merely a conclusion but a prelude to the next chapter in the life of your tulips, a testament to the enduring cycle of growth, renewal, and the timeless allure of nature's wonders.
As you step back and admire the garden, take pride in the knowledge that your efforts have contributed to the continued vitality and resplendence of the tulips. Your dedication to nurturing these remarkable flowers ensures that they will continue to grace your garden with their vibrant blooms, enriching your life and the lives of those who encounter their timeless beauty.