Home>Home and Garden>The Ultimate Guide To Cleaning Your Wall Air Conditioner
Home and Garden
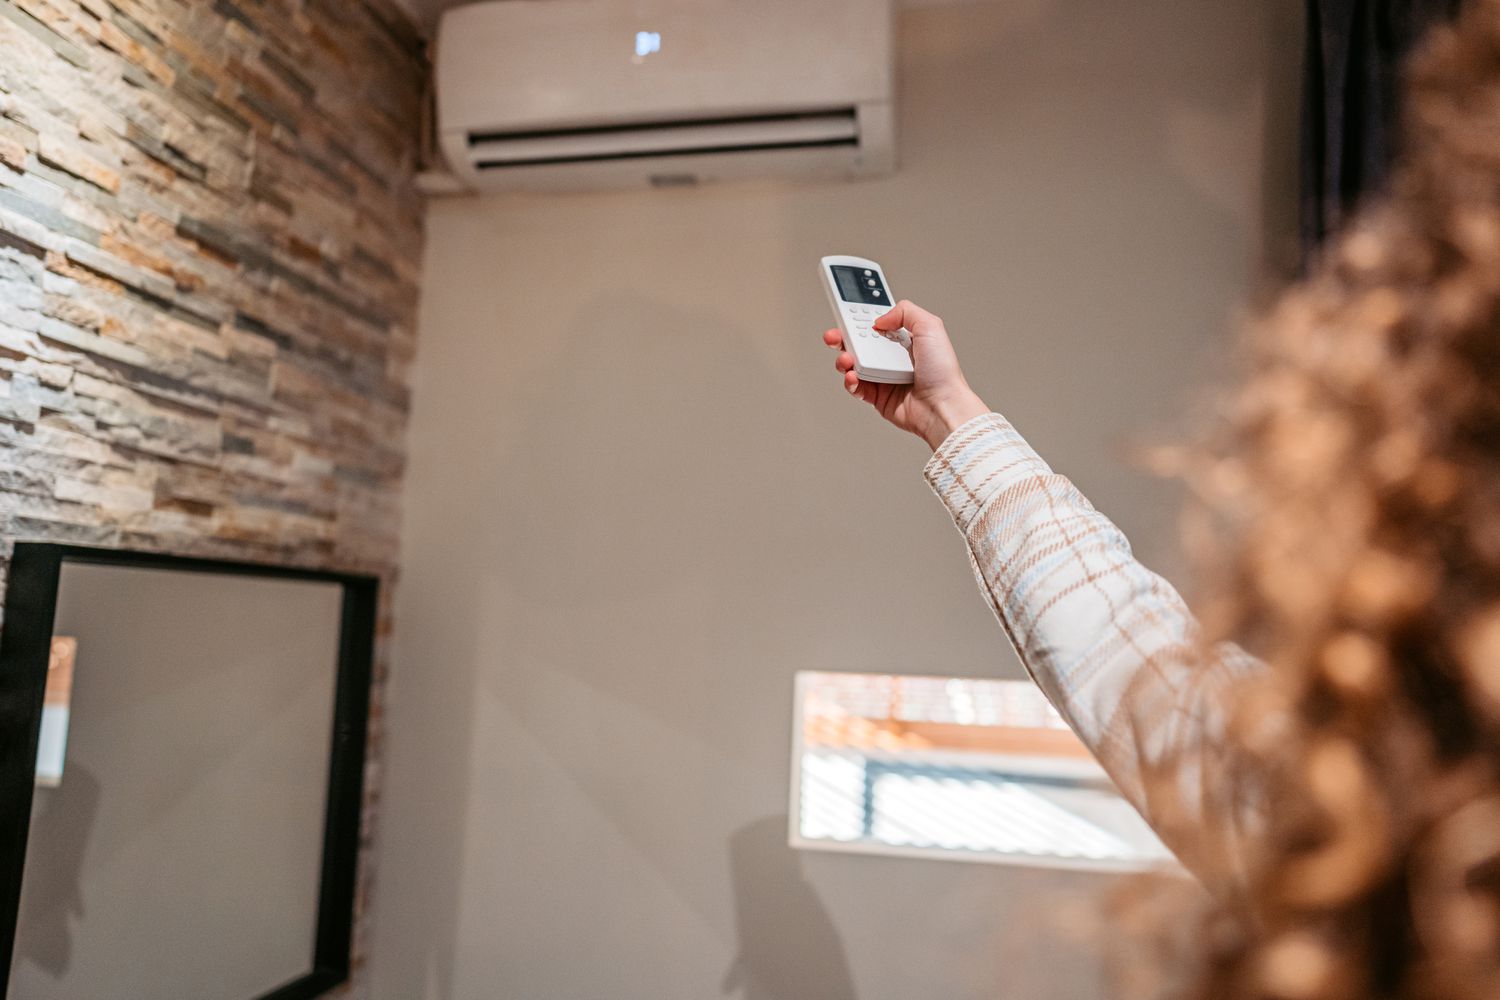
The Ultimate Guide To Cleaning Your Wall Air Conditioner
Published: January 20, 2024
Discover the best tips for cleaning your wall air conditioner in this comprehensive guide. Keep your home and garden cool and fresh with these expert cleaning techniques.
(Many of the links in this article redirect to a specific reviewed product. Your purchase of these products through affiliate links helps to generate commission for Noodls.com, at no extra cost. Learn more)
Table of Contents
Introduction
Cleaning your wall air conditioner is an essential maintenance task that is often overlooked but can significantly impact the performance and longevity of your unit. Over time, dust, dirt, and debris can accumulate within the air conditioner, leading to reduced efficiency, poor air quality, and potential malfunctions. By regularly cleaning your wall air conditioner, you can ensure that it operates at its best, providing optimal cooling and maintaining a healthy indoor environment for you and your family.
In this comprehensive guide, we will walk you through the step-by-step process of cleaning your wall air conditioner, equipping you with the knowledge and skills to tackle this essential maintenance task with confidence. Whether you are a seasoned homeowner or a first-time cleaner, this guide will provide you with valuable insights and practical tips to achieve a clean and well-maintained wall air conditioner.
By following the instructions outlined in this guide, you can not only enhance the performance and efficiency of your wall air conditioner but also extend its lifespan, potentially saving you from costly repairs or replacements down the line. Moreover, keeping your air conditioner clean can contribute to a healthier indoor environment by reducing the circulation of allergens and pollutants, which is especially crucial for individuals with respiratory conditions or allergies.
As we delve into the cleaning process, we will highlight the importance of safety precautions and provide a list of tools and materials you will need to effectively clean your wall air conditioner. From turning off the power to removing the front cover, cleaning the filter, and addressing the drainage system, each step is crucial in ensuring a thorough and effective cleaning process.
By the end of this guide, you will be equipped with the knowledge and confidence to maintain a clean and efficient wall air conditioner, allowing you to enjoy the benefits of a well-functioning cooling system and a healthier indoor environment for you and your loved ones. So, let's embark on this cleaning journey and take the first step towards a cleaner, more efficient wall air conditioner!
Why Clean Your Wall Air Conditioner?
Cleaning your wall air conditioner is a crucial maintenance task that directly impacts its performance, energy efficiency, and the quality of air it circulates within your living space. Over time, dust, dirt, pollen, and other airborne particles can accumulate within the unit, clogging the filters and coating the evaporator coils. This buildup not only restricts airflow but also hinders the air conditioner's ability to effectively cool the room, leading to reduced efficiency and increased energy consumption.
Furthermore, a neglected wall air conditioner can become a breeding ground for mold, mildew, and bacteria, posing potential health risks to you and your family. The accumulation of moisture within the unit, combined with organic matter, creates an ideal environment for microbial growth, which can compromise the air quality and trigger respiratory issues, particularly for individuals with allergies or asthma.
Regular cleaning of your wall air conditioner is essential for maintaining a healthy indoor environment. By removing accumulated dirt, dust, and biological contaminants, you can significantly reduce the circulation of allergens and pollutants, promoting cleaner and fresher air within your home. This is especially important during the summer months when the air conditioner operates at its peak, as a clean unit ensures that the cooled air is free from harmful particles and odors.
In addition to the health and comfort benefits, cleaning your wall air conditioner also contributes to its longevity and reliability. A well-maintained unit is less prone to malfunctions and breakdowns, ultimately saving you from costly repairs and premature replacements. By addressing dirt and debris before they cause damage to internal components, you can extend the lifespan of your air conditioner and maximize its cooling performance for years to come.
Ultimately, the decision to clean your wall air conditioner is an investment in both your comfort and your finances. By dedicating time to regular maintenance, you can enjoy a cooler, cleaner, and more efficient indoor environment while ensuring that your air conditioner operates at its best, providing reliable cooling when you need it most.
So, take the proactive step of cleaning your wall air conditioner, and reap the rewards of improved performance, energy savings, and a healthier home for you and your loved ones.
Tools and Materials Needed
When embarking on the task of cleaning your wall air conditioner, having the right tools and materials at your disposal is essential to ensure a thorough and effective cleaning process. Here's a comprehensive list of items you will need to successfully clean your wall air conditioner:
Tools:
- Screwdriver: You will need a screwdriver to remove the screws securing the front cover of the air conditioner. Ensure that the screwdriver matches the type of screws used in your specific unit.
- Vacuum Cleaner with Attachments: A vacuum cleaner equipped with a brush attachment and crevice tool is indispensable for removing dust, dirt, and debris from the air conditioner's interior, coils, and drainage system.
- Soft-Bristled Brush: A soft-bristled brush or a coil cleaning brush will aid in gently dislodging dirt and debris from the evaporator and condenser coils without causing damage.
- Spray Bottle: Fill a spray bottle with a mixture of mild detergent and water to clean the filter and other accessible components.
- Gloves: It's advisable to wear gloves to protect your hands from dirt, dust, and any cleaning solutions used during the process.
Materials:
- Mild Detergent: Opt for a gentle, non-abrasive detergent to clean the filter and other washable components of the air conditioner.
- Water: Have access to water for rinsing and diluting cleaning solutions.
- Fin Comb: If the aluminum fins on the air conditioner's coils are bent, a fin comb can be used to carefully straighten them, ensuring optimal airflow.
- Microfiber Cloth: Use a microfiber cloth for wiping down the interior surfaces of the air conditioner, removing any remaining dirt or moisture.
- Algaecide Tablets (Optional): If microbial growth is a concern, algaecide tablets can be used to prevent the formation of algae and mold within the drainage system.
By ensuring that you have these tools and materials on hand before starting the cleaning process, you can approach the task with confidence and efficiency, setting the stage for a successful maintenance endeavor. With these essential items at your disposal, you are well-prepared to tackle each step of the cleaning process, promoting the optimal performance and longevity of your wall air conditioner.
Safety Precautions
Prior to initiating the cleaning process for your wall air conditioner, it is imperative to prioritize safety precautions to safeguard yourself and the integrity of the unit. By adhering to the following safety guidelines, you can mitigate potential risks and ensure a secure and effective cleaning procedure.
-
Power Disconnection: Begin by switching off the power supply to the air conditioner at the main electrical panel. This precautionary measure eliminates the risk of electric shock and protects you from accidental contact with live electrical components within the unit.
-
Protective Gear: Equip yourself with protective gear, including gloves and safety goggles, to shield your hands and eyes from dirt, dust, and any cleaning solutions used during the process. Additionally, wearing a mask can prevent inhalation of airborne particles and microbial contaminants, further enhancing your safety.
-
Stable Working Platform: Ensure that you have a stable and secure platform for accessing the air conditioner. If using a ladder or step stool, verify its stability before climbing to prevent falls or accidents while working at elevated heights.
-
Proper Ventilation: Adequate ventilation is essential when cleaning your wall air conditioner. Open windows or doors to facilitate air circulation, especially when using cleaning agents, to prevent the accumulation of fumes and ensure a well-ventilated workspace.
-
Careful Handling of Components: Exercise caution when handling the various components of the air conditioner. The front cover, filter, and coils should be handled gently to avoid damage or bending, which can compromise the unit's performance.
-
Cautious Coil Cleaning: When cleaning the coils, use a soft-bristled brush and gentle, sweeping motions to dislodge dirt and debris. Avoid aggressive scrubbing or using sharp objects that could damage the delicate coil fins.
-
Avoid Water Contact with Electrical Parts: While cleaning the interior of the air conditioner, be mindful of electrical components and wiring. Prevent water from coming into contact with these parts to prevent electrical hazards and potential damage to the unit.
-
Safety in Drainage System Cleaning: When addressing the drainage system, exercise care to avoid spillage and ensure that the drainage pan and pipes are handled with caution. If using algaecide tablets, follow the manufacturer's instructions and take necessary precautions to prevent skin or eye contact with the chemical.
By adhering to these safety precautions, you can approach the cleaning process with confidence, knowing that you have taken the necessary measures to protect yourself and maintain the integrity of your wall air conditioner. Prioritizing safety not only minimizes potential risks but also sets the stage for a successful and efficient cleaning endeavor, allowing you to achieve a clean and well-maintained air conditioner without compromising your well-being.
Step 1: Turn Off the Power
Before embarking on the cleaning process for your wall air conditioner, it is crucial to prioritize safety by turning off the power supply to the unit. This precautionary measure is essential to eliminate the risk of electric shock and ensure a secure working environment as you proceed with the maintenance task.
To begin, locate the main electrical panel in your home where the circuit breaker or fuse box is situated. Identify the circuit that supplies power to the wall air conditioner and switch it off to cut off the electrical supply to the unit. If your air conditioner is connected to a dedicated electrical circuit, it may have its own circuit breaker within the main panel, allowing for independent power disconnection.
Once you have identified the appropriate circuit, switch off the corresponding breaker or remove the fuse to deactivate the power supply to the air conditioner. It is advisable to verify that the power has been successfully turned off by attempting to operate the air conditioner from the control panel. If the unit does not respond to the input, the power has been effectively disconnected, and you can proceed with confidence.
By ensuring that the power is switched off before initiating the cleaning process, you mitigate the risk of accidental electrical contact and create a safe environment for working on the air conditioner. This precautionary step sets the foundation for a secure and effective cleaning endeavor, allowing you to focus on maintaining and optimizing the performance of your wall air conditioner without compromising your safety.
With the power supply successfully turned off, you are now ready to proceed to the next steps of dismantling the unit and addressing the various components that require cleaning and maintenance. By prioritizing safety from the outset, you can approach the cleaning process with confidence, knowing that you have taken the necessary precautions to create a secure working environment for yourself and the maintenance task at hand.
Step 2: Remove the Front Cover
With the power supply to the wall air conditioner safely turned off, you can proceed to the next crucial step of the cleaning process: removing the front cover. The front cover of the air conditioner encases the filter and provides access to the unit's interior, allowing you to perform a thorough cleaning of the components housed within.
To begin, locate the fastening screws or clips that secure the front cover in place. Depending on the model of your wall air conditioner, these fasteners are typically positioned along the perimeter of the front cover. Using a suitable screwdriver, carefully remove the screws or disengage the clips to detach the front cover from the main body of the unit.
As you remove the fasteners, it is important to support the front cover to prevent it from falling and causing damage. Once the fasteners are released, gently lower the front cover and set it aside in a safe and stable location. Take care to note the orientation and arrangement of the fasteners for ease of reassembly later in the process.
With the front cover successfully removed, you now have unobstructed access to the internal components of the air conditioner, including the filter, evaporator coils, and other essential elements that require cleaning and maintenance. This pivotal step sets the stage for a comprehensive cleaning process, allowing you to address each component with precision and thoroughness.
By methodically removing the front cover, you have taken a significant stride towards maintaining a clean and efficient wall air conditioner. With the interior components exposed, you are now prepared to proceed with the subsequent steps of the cleaning process, ensuring that each element is meticulously cleaned and restored to optimal condition.
With the front cover safely detached and the interior of the air conditioner accessible, you are now ready to progress to the subsequent steps, poised to address the filter, coils, drainage system, and other vital components that contribute to the unit's performance and efficiency. This seamless transition sets the stage for a thorough and effective cleaning endeavor, allowing you to uphold the pristine condition of your wall air conditioner with confidence and precision.
Step 3: Clean the Filter
Cleaning the filter of your wall air conditioner is a critical maintenance task that directly impacts the unit's performance and the quality of air it circulates within your living space. Over time, the filter becomes laden with dust, dirt, and airborne particles, hindering airflow and compromising the air conditioner's ability to effectively remove impurities from the air. Therefore, regular cleaning of the filter is essential to ensure optimal air quality and efficient operation of the unit.
To clean the filter, begin by gently removing it from its housing, taking care to note its orientation for proper reinstallation. Once the filter is removed, inspect it for visible dirt, debris, and signs of clogging. If the filter is heavily soiled, it is advisable to proceed with a thorough cleaning to restore its functionality.
Using a vacuum cleaner equipped with a brush attachment, carefully vacuum both sides of the filter to remove loose dirt and debris. Ensure that the vacuum is set to a low or moderate suction level to prevent damage to the filter material. For stubborn dirt and buildup, a soft-bristled brush can be used to gently dislodge the particles, working from the clean side of the filter towards the dirty side.
Next, prepare a solution of mild detergent and water in a spray bottle. Lightly mist the solution onto both sides of the filter, ensuring even coverage. Allow the detergent solution to penetrate the filter material for a few minutes to loosen and dissolve any remaining dirt and grime. Avoid saturating the filter excessively, as this can prolong the drying process and potentially lead to mold or mildew growth.
After allowing the detergent solution to act, rinse the filter thoroughly with clean water to remove the loosened dirt and soap residue. It is essential to rinse the filter from the clean side to the dirty side, ensuring that all contaminants are effectively flushed out. Once rinsed, gently shake the filter to remove excess water and allow it to air-dry completely before reinstalling it in the air conditioner.
By diligently cleaning the filter of your wall air conditioner, you can ensure that it effectively captures airborne particles and maintains optimal airflow, contributing to improved air quality and efficient operation of the unit. Regular cleaning of the filter is vital for preserving the air conditioner's performance and preventing the circulation of allergens and pollutants within your home, promoting a healthier and more comfortable indoor environment for you and your family.
Read more: Ultimate Guide To Cleaning Your Suede Purse
Step 4: Clean the Coils
Cleaning the coils of your wall air conditioner is a crucial step in maintaining its optimal performance and energy efficiency. Over time, the evaporator and condenser coils can become coated with dirt, dust, and debris, hindering the transfer of heat and impeding the unit's cooling capacity. Therefore, a thorough cleaning of the coils is essential to ensure that the air conditioner operates at its best, delivering efficient cooling and prolonging its lifespan.
To commence the coil cleaning process, begin by visually inspecting the coils for any visible buildup of dirt and debris. If the coils appear heavily soiled or obstructed, it is imperative to proceed with a comprehensive cleaning to restore their functionality and efficiency.
Using a soft-bristled brush or a specialized coil cleaning brush, gently dislodge the accumulated dirt and debris from the coils. It is crucial to exercise care and avoid applying excessive pressure to prevent damage to the delicate coil fins. Begin by brushing the coils in a sweeping motion, working from the top to the bottom and ensuring thorough coverage of the entire surface area.
Subsequently, utilize a vacuum cleaner equipped with a brush attachment to remove the dislodged dirt and debris from the coils. Carefully vacuum both the evaporator and condenser coils, ensuring that all loose particles are effectively suctioned away. This step aids in eliminating residual contaminants and preparing the coils for a more meticulous cleaning process.
For stubborn dirt and grime that may be embedded within the coils, a commercially available coil cleaning solution can be utilized. Follow the manufacturer's instructions to apply the cleaning solution to the coils, allowing it to penetrate and dissolve any persistent buildup. After the designated dwell time, rinse the coils thoroughly with water to remove the cleaning solution and dislodged contaminants.
It is essential to exercise caution during the rinsing process, ensuring that the water pressure is gentle and directed in the same direction as the coil fins to prevent bending or damage. Following the rinsing, allow the coils to air-dry completely before proceeding with the reassembly of the air conditioner.
By meticulously cleaning the coils of your wall air conditioner, you can optimize its heat transfer efficiency, enhance its cooling performance, and contribute to energy savings. A clean set of coils facilitates the proper removal of heat from the indoor air, allowing the unit to operate more effectively and consume less energy, ultimately reducing your utility costs.
With the coils effectively cleaned and restored to optimal condition, your wall air conditioner is poised to deliver efficient and reliable cooling, ensuring a comfortable and refreshing indoor environment for you and your family.
Step 5: Clean the Drainage System
The drainage system of your wall air conditioner plays a crucial role in channeling excess moisture away from the unit, preventing water buildup and potential damage. Over time, the drainage system can become clogged with algae, mold, and debris, impeding proper water flow and leading to potential leaks or overflow. Therefore, it is essential to include the cleaning of the drainage system as part of your maintenance routine to ensure the efficient operation of your air conditioner.
To initiate the cleaning process, locate the drainage pan and the associated drainage pipes connected to the air conditioner. Begin by inspecting the drainage pan for any standing water, debris, or signs of microbial growth. If the pan is soiled or contains stagnant water, carefully remove the accumulated debris and dispose of any standing water before proceeding with the cleaning.
Next, utilize a vacuum cleaner with a crevice tool to effectively remove dirt, debris, and any residual water from the drainage pan and surrounding areas. Ensure thorough suctioning to eliminate any blockages or contaminants that may impede the proper drainage of water from the unit.
Following the cleaning of the drainage pan, proceed to inspect and clean the drainage pipes connected to the air conditioner. Using a gentle stream of water or a pipe cleaning brush, flush the drainage pipes to dislodge any accumulated debris and ensure unobstructed water flow. It is essential to verify that the pipes are free from clogs and that water can flow smoothly through the system.
As an additional preventive measure, consider the use of algaecide tablets designed for air conditioner drainage systems. These tablets can help inhibit the growth of algae and mold within the drainage system, minimizing the risk of blockages and microbial contamination. Follow the manufacturer's instructions for the proper placement and usage of algaecide tablets to maintain a clean and functional drainage system.
By thoroughly cleaning the drainage system of your wall air conditioner, you can mitigate the risk of water-related issues and ensure the efficient removal of condensate from the unit. A well-maintained drainage system promotes the proper functioning of the air conditioner, preventing water damage and contributing to its longevity and reliability.
With the drainage system effectively cleaned and inspected, your wall air conditioner is poised to operate at its best, efficiently removing excess moisture and maintaining a comfortable and dry indoor environment. This proactive maintenance step ensures that your air conditioner remains in optimal condition, ready to provide reliable cooling and comfort for years to come.
Step 6: Reassemble the Unit
After completing the comprehensive cleaning process for your wall air conditioner, the final step involves reassembling the unit to restore it to its operational state. This pivotal phase ensures that all components are securely reinstated, allowing the air conditioner to function at its best and provide optimal cooling and air quality within your living space.
Begin by carefully repositioning the cleaned filter back into its housing, ensuring that it is correctly oriented and securely seated. The filter plays a critical role in capturing airborne particles and maintaining optimal airflow, making its proper installation essential for the unit's performance. Once the filter is in place, proceed to reattach the front cover by aligning it with the main body of the air conditioner and securing it with the appropriate fasteners. Take care to verify that the cover is firmly affixed, preventing any potential rattling or displacement during operation.
Following the reinstallation of the front cover, take a moment to inspect the exterior of the air conditioner for any residual dirt or moisture. Use a microfiber cloth to wipe down the surfaces, ensuring that the unit is clean and free from any lingering contaminants. This step not only enhances the aesthetic appeal of the air conditioner but also contributes to maintaining a hygienic and well-maintained appearance.
Once the exterior is thoroughly cleaned, proceed to verify that the power supply to the air conditioner is still switched off before restoring it. Return to the main electrical panel and reinstate the power by flipping the corresponding breaker or replacing the fuse, effectively reactivating the unit. After the power is restored, use the air conditioner's control panel to initiate a test run, ensuring that it operates smoothly and efficiently.
Finally, monitor the air conditioner for any unusual sounds, odors, or performance issues, ensuring that it functions as expected following the cleaning and reassembly. Pay attention to the air quality and cooling performance, verifying that the unit delivers clean, refreshing air and maintains the desired temperature within your living space.
By meticulously reassembling the unit and conducting a thorough post-cleaning inspection, you can rest assured that your wall air conditioner is ready to provide reliable and efficient cooling, contributing to a comfortable and healthy indoor environment. This final step marks the culmination of your cleaning endeavor, setting the stage for a well-maintained and high-performing air conditioner that enhances your overall comfort and well-being.
Conclusion
In conclusion, the comprehensive cleaning process for your wall air conditioner is a vital undertaking that not only ensures the optimal performance and longevity of the unit but also contributes to a healthier and more comfortable indoor environment for you and your loved ones. By following the step-by-step guide outlined in this comprehensive cleaning manual, you have equipped yourself with the knowledge and skills to maintain a clean and efficient wall air conditioner, promoting enhanced cooling performance and improved air quality within your home.
Regular maintenance, including the cleaning of essential components such as the filter, coils, and drainage system, is instrumental in preserving the functionality of your air conditioner and preventing potential issues. By incorporating these maintenance tasks into your routine, you can mitigate the accumulation of dirt, debris, and microbial contaminants, ensuring that your air conditioner operates at its best when you need it most.
Furthermore, the emphasis on safety precautions throughout the cleaning process underscores the importance of creating a secure and well-protected environment for undertaking maintenance tasks. Prioritizing safety not only safeguards you from potential hazards but also fosters a sense of confidence and assurance as you engage in the upkeep of your wall air conditioner.
By investing the time and effort to clean your wall air conditioner, you are making a proactive commitment to the well-being of your home environment. The benefits of a clean and well-maintained air conditioner extend beyond efficient cooling, encompassing improved air quality, reduced energy consumption, and potential cost savings through enhanced longevity and reliability.
As you conclude the cleaning process and reassemble the unit, take a moment to appreciate the impact of your efforts on the performance and condition of your wall air conditioner. With a clean and well-maintained unit, you can enjoy the comfort of a cooler and healthier indoor environment, knowing that your air conditioner is operating at its best, providing reliable cooling and contributing to a refreshing and enjoyable living space.
In essence, the commitment to regular cleaning and maintenance of your wall air conditioner is a testament to your dedication to a comfortable and healthy home. By adhering to the guidance provided in this manual and integrating the cleaning process into your home maintenance routine, you are poised to reap the rewards of a well-functioning and efficient air conditioner, enriching your daily life with cool, clean, and refreshing air.
With the conclusion of this comprehensive cleaning guide, you are now equipped to maintain a clean and efficient wall air conditioner, ensuring that it continues to deliver optimal performance and comfort for years to come.