
Lifestyle
How To Use A Curling Iron
Published: February 26, 2024
Learn how to use a curling iron to achieve beautiful, effortless curls and waves. Discover tips and techniques for styling your hair with ease. Elevate your lifestyle with stunning hair looks.
(Many of the links in this article redirect to a specific reviewed product. Your purchase of these products through affiliate links helps to generate commission for Noodls.com, at no extra cost. Learn more)
Table of Contents
Introduction
Curling irons are versatile styling tools that can transform your hair from sleek and straight to voluminous and curly. Whether you're aiming for beachy waves, tight ringlets, or glamorous curls, a curling iron can help you achieve the desired look with ease. Understanding how to use a curling iron effectively is essential for creating stunning hairstyles while keeping your hair healthy and undamaged.
In this comprehensive guide, we will explore the art of using a curling iron to achieve various styles, from casual to formal. You'll learn about selecting the right curling iron for your hair type, preparing your hair for the curling process, and mastering the techniques to create different types of curls. Additionally, we'll delve into valuable tips for ensuring that your curls last longer and discuss essential safety precautions and aftercare practices to protect both your hair and the curling iron.
By the end of this guide, you'll be equipped with the knowledge and skills to wield a curling iron like a pro, allowing you to unleash your creativity and express your unique style through beautifully crafted curls. So, let's embark on this exciting journey into the world of curling irons and discover the secrets to achieving stunning, long-lasting curls that will leave you feeling confident and fabulous.
Read more: How To Iron On Patches
Choosing the Right Curling Iron for Your Hair Type
Selecting the appropriate curling iron for your hair type is crucial for achieving the best results while minimizing the risk of damage. With a wide array of curling irons available in the market, each designed with specific features and barrel sizes, it's essential to consider your hair texture, length, and desired curl style before making a purchase.
Consider Your Hair Texture
- For fine or thin hair: Opt for a curling iron with a smaller barrel diameter, typically around 3/4 inch to 1 inch. This size helps create defined curls without weighing down the hair.
- For thick or coarse hair: Choose a curling iron with a larger barrel diameter, ranging from 1 1/4 inches to 2 inches. The larger barrel allows for the creation of voluminous curls and helps the heat penetrate through the thicker hair strands more effectively.
Evaluate Your Hair Length
- Short hair: A curling iron with a smaller barrel size, such as 3/4 inch, is ideal for styling short hair, as it enables you to maneuver the iron more easily and create precise curls.
- Medium to long hair: Consider a curling iron with a barrel size between 1 inch to 1 1/2 inches. This size provides versatility for styling various lengths and allows you to achieve a range of curl sizes.
Determine Your Desired Curl Style
- For tight curls: A curling iron with a smaller barrel diameter is suitable for achieving tight, bouncy curls. This size is ideal for creating a retro-inspired look or adding texture to your hair.
- For loose waves: Opt for a curling iron with a larger barrel diameter to achieve effortless, beachy waves. This size is perfect for imparting a relaxed, tousled appearance to your hair.
Read more: How To Preserve Curls Overnight
Additional Features to Consider
- Adjustable heat settings: Look for a curling iron with adjustable heat settings to accommodate different hair types and minimize heat damage.
- Ceramic or tourmaline barrels: These materials help distribute heat evenly, reducing the risk of hot spots and ensuring consistent curls with minimal frizz.
By carefully considering your hair texture, length, and desired curl style, along with the additional features of the curling iron, you can confidently select the perfect tool to achieve stunning curls while maintaining the health and integrity of your hair.
Preparing Your Hair for Curling
Before embarking on the curling process, it's essential to prepare your hair adequately to ensure optimal results and minimize potential damage. Proper preparation sets the foundation for long-lasting and beautifully defined curls. Here's a step-by-step guide to preparing your hair for curling:
Step 1: Cleanse and Condition
Begin by washing your hair with a high-quality shampoo and conditioner suitable for your hair type. Choose a lightweight conditioner if you have fine hair, and opt for a more nourishing formula for thick or coarse hair. Thoroughly rinse out the products to prevent any residue that could interfere with the curling process.
Step 2: Apply Heat Protectant
Prior to using any heat styling tools, it's crucial to shield your hair from potential heat damage. Apply a heat protectant spray or serum evenly throughout your hair, focusing on the mid-lengths and ends. The heat protectant forms a protective barrier, minimizing the impact of heat exposure and helping to maintain the hair's moisture and integrity.
Read more: How To Get My Curls Back
Step 3: Dry Your Hair
Ensure that your hair is completely dry before using a curling iron. If you're in a rush, you can use a blow dryer to speed up the drying process. It's important to avoid curling damp or wet hair, as this can lead to uneven curls and potential damage due to the excessive heat required to style damp strands.
Step 4: Detangle and Section Your Hair
Use a wide-tooth comb or a detangling brush to gently remove any knots or tangles from your hair. Next, divide your hair into sections, securing the rest of the hair with clips or hair ties. Working with smaller sections makes the curling process more manageable and allows for more precise styling.
Step 5: Set the Temperature
Depending on your hair type, adjust the curling iron's temperature to an appropriate setting. Lower heat settings are suitable for fine or damaged hair, while higher heat settings can be used for thicker or coarser hair. Always start with a lower temperature and gradually increase if needed to avoid excessive heat exposure.
By following these preparatory steps, you can ensure that your hair is primed for the curling process, setting the stage for creating stunning curls while safeguarding the health and vitality of your hair. With your hair properly prepared, you're ready to move on to the exciting phase of using the curling iron to craft your desired curls.
Using the Curling Iron to Create Different Types of Curls
Mastering the art of using a curling iron to create diverse types of curls opens up a world of hairstyling possibilities. Whether you prefer soft waves, tight ringlets, or glamorous Hollywood curls, understanding the techniques for achieving different curl styles empowers you to express your unique personality through your hair. Here's a detailed exploration of using a curling iron to craft various types of curls:
Read more: How To Remove Iron On Vinyl
Beachy Waves
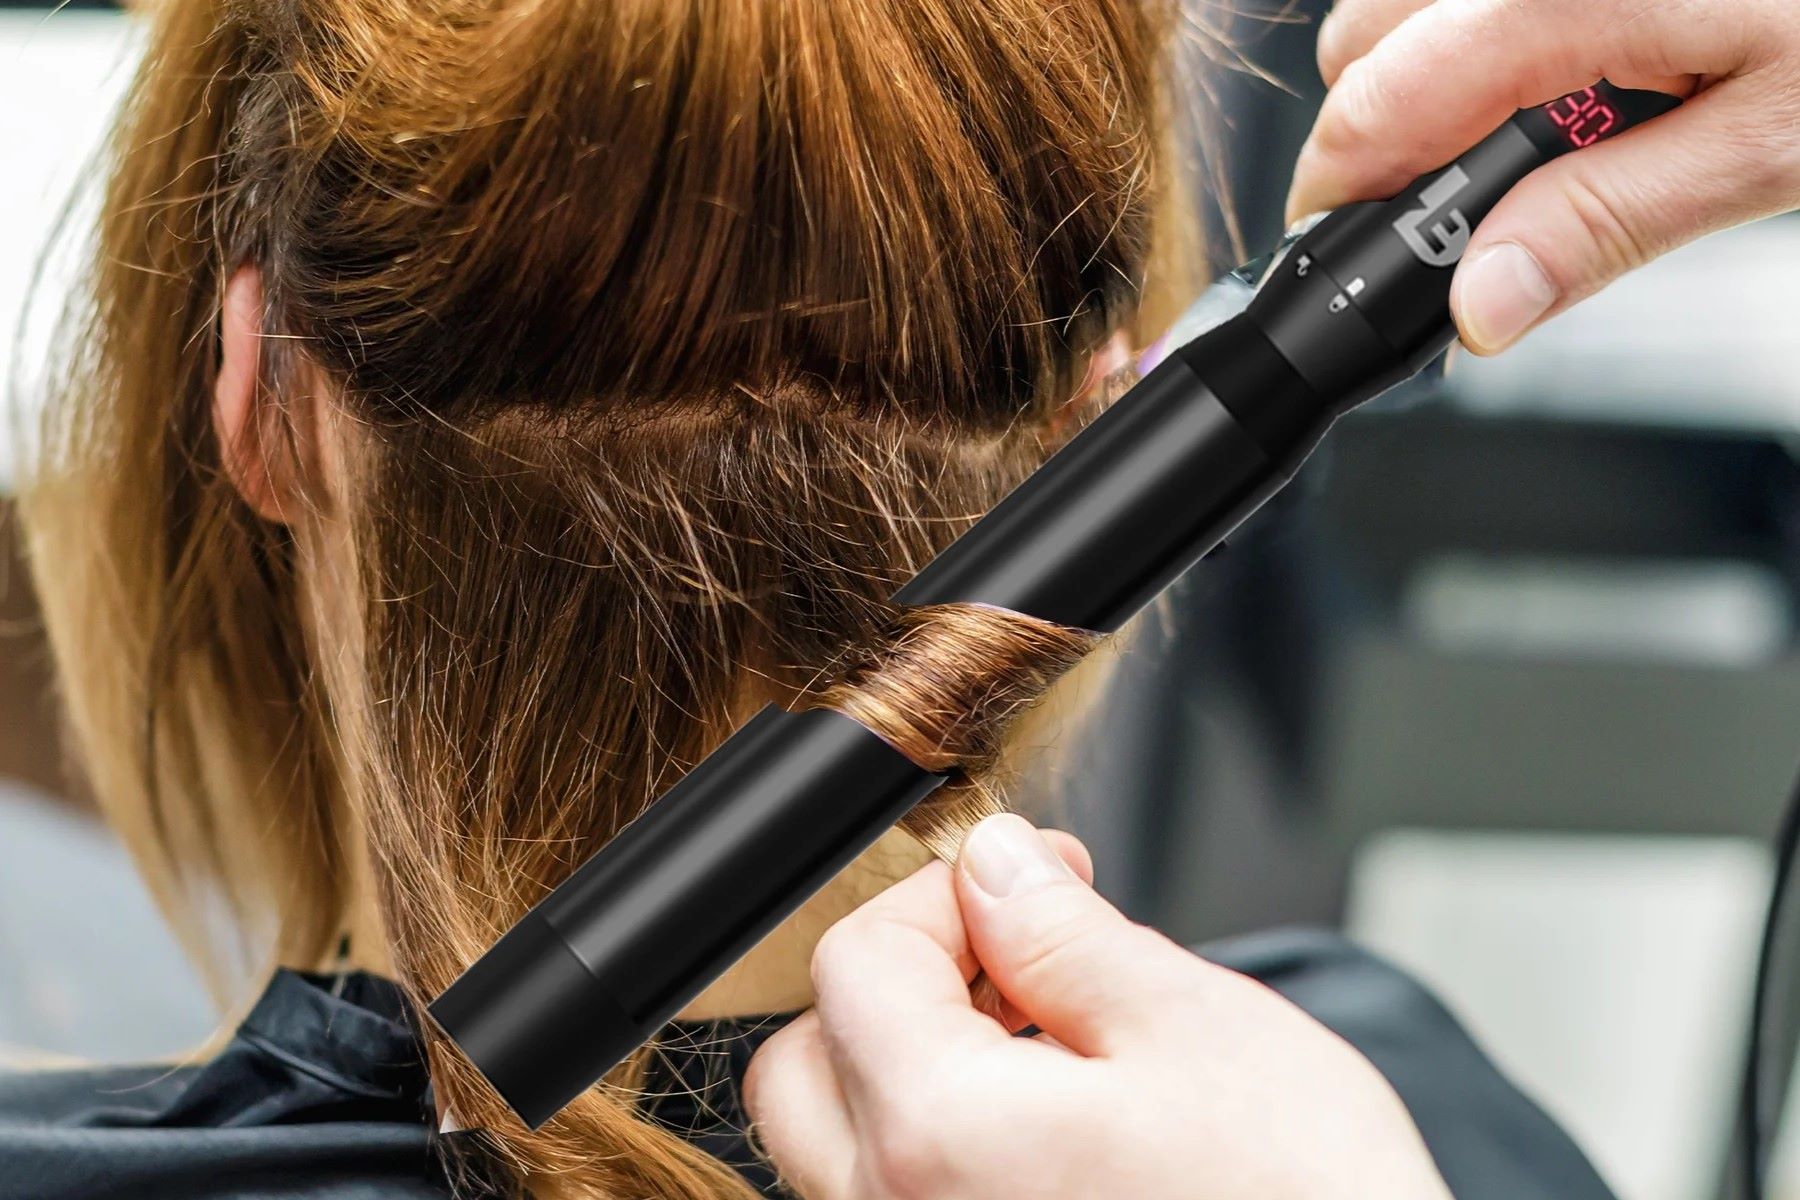
To achieve effortless beachy waves, begin by selecting a curling iron with a larger barrel diameter, typically around 1 1/4 inches to 2 inches. After preparing your hair as outlined earlier, take a small section of hair and wrap it around the barrel, leaving the ends uncurled for a relaxed finish. Hold the hair in place for a few seconds before releasing it. Repeat this process throughout your hair, alternating the direction of the curls for a natural, tousled look.
Tight Ringlets
For tight, defined ringlets, opt for a curling iron with a smaller barrel diameter, typically around 3/4 inch to 1 inch. After preparing your hair, take small sections and wrap them tightly around the barrel, holding for a slightly longer duration to set the curls. Gently release the curls and allow them to cool before styling. For added longevity, consider spritzing each curled section with a light-hold hairspray to help the curls maintain their shape.
Hollywood Glamour Curls
To achieve classic, voluminous curls reminiscent of old Hollywood glamour, select a curling iron with a medium barrel size, approximately 1 inch to 1 1/2 inches. After preparing your hair, curl small to medium sections of hair, focusing on creating uniform curls throughout. Once all the curls are set, gently brush through them with a wide-tooth comb or a soft bristle brush to blend the curls together, resulting in luxurious, cascading waves.
Soft, Romantic Curls
For soft, romantic curls that exude elegance, consider using a curling wand instead of a traditional curling iron. A curling wand lacks a clamp, allowing for more natural-looking curls. After preparing your hair, wrap small sections around the wand, holding the ends in place with your fingers to create loose, flowing curls. Once all the curls are set, run your fingers through them to separate and soften the curls, imparting a dreamy, ethereal quality to your hairstyle.
Versatile Curling Techniques
Experimenting with different curling techniques, such as varying the direction of the curls, adjusting the wrapping technique, or altering the curling iron's angle, can yield a myriad of unique curl styles. By exploring these techniques, you can customize your curls to suit any occasion, from casual outings to formal events, allowing you to express your creativity and individuality through your hair.
By mastering the art of using a curling iron to create diverse types of curls, you can unleash your hairstyling prowess and effortlessly transform your look to complement any mood or outfit. With the right techniques and a touch of creativity, you'll be able to craft stunning curls that showcase your personal style with elegance and flair.
Tips for Achieving Long-Lasting Curls
Creating beautiful curls is an art, and ensuring that they last throughout the day or evening is equally important. Here are some valuable tips to help you achieve long-lasting curls that maintain their shape and vitality:
1. Use the Right Products
Selecting the appropriate styling products can significantly impact the longevity of your curls. Consider using a lightweight mousse or a curl-enhancing cream before curling your hair to provide hold and structure. Additionally, a high-quality hairspray with flexible hold can help set the curls without weighing down your hair.
2. Allow the Curls to Cool
After curling each section of hair, allow the curls to cool completely before handling them. This helps the hair fibers set in the curled shape, enhancing the longevity of the curls. Avoid running your fingers through the curls or brushing them immediately after curling, as this can cause the curls to lose their form.
Read more: How To Use Thinning Shears
3. Opt for a Lower Heat Setting
Using excessive heat can lead to rapid curl droopage. To promote long-lasting curls, consider using a lower heat setting on your curling iron. This gentler approach minimizes the risk of damaging the hair while allowing the curls to hold their shape for an extended period.
4. Curl in Sections
Dividing your hair into smaller, manageable sections and curling each section individually ensures that every strand receives adequate heat and attention. This method promotes uniform curls and prevents any sections from being overlooked, resulting in a more consistent and enduring curl pattern.
5. Embrace Overnight Styling Techniques
For those seeking curls that last well into the next day, consider utilizing overnight styling methods. After curling your hair, twist the curls into small buns and secure them with bobby pins before going to bed. In the morning, release the buns to reveal beautifully preserved curls with enhanced longevity.
6. Refresh with Dry Shampoo
To revitalize your curls and extend their lifespan, lightly spritz dry shampoo at the roots and gently massage it into your scalp. This technique helps absorb excess oil and adds volume, effectively rejuvenating your curls and prolonging their freshness.
By incorporating these tips into your curling routine, you can elevate the longevity of your curls, ensuring that your meticulously styled hair remains vibrant and captivating throughout the day or night. With the right approach and a touch of strategic care, you can revel in long-lasting curls that exude beauty and confidence, enhancing your overall look with effortless charm.
Read more: How To Use Hinge
Safety Precautions and Aftercare for Your Hair and Curling Iron
Ensuring the safety of both your hair and the curling iron is paramount when engaging in heat styling practices. By implementing essential safety precautions and adopting proper aftercare measures, you can safeguard your hair from damage and prolong the longevity of your curling iron.
Safety Precautions
-
Heat Protection: Before using a curling iron, apply a heat protectant product to shield your hair from the potentially damaging effects of heat styling. This crucial step forms a protective barrier, minimizing heat-related harm and preserving the health of your hair.
-
Proper Handling: Always handle the curling iron with care, especially when it's hot. Use the provided heat-resistant glove or mat to prevent accidental burns. Additionally, ensure that the cord and plug are in good condition to avoid any electrical hazards.
-
Temperature Regulation: Be mindful of the temperature settings on your curling iron. Avoid using excessively high heat, especially on fine or damaged hair, as this can lead to heat-induced damage and dryness. Adjust the temperature according to your hair type and the desired curl style.
-
Unplugging After Use: Once you've finished styling your hair, unplug the curling iron and allow it to cool down on a heat-resistant surface. This practice prevents the risk of accidental burns and minimizes the potential for fire hazards.
Aftercare for Your Hair and Curling Iron
-
Cooling Down Safely: After each use, allow the curling iron to cool down completely before storing it. Placing a hot curling iron on a heat-resistant mat or surface prevents damage to countertops and other surfaces, ensuring the longevity of both the iron and the surrounding area.
-
Cleaning and Maintenance: Regularly clean the curling iron to remove any product buildup or residue. Use a soft, damp cloth to gently wipe the barrel and ensure that the curling iron is unplugged and cool before cleaning. This practice helps maintain the performance and appearance of the curling iron.
-
Storage Considerations: Store the curling iron in a safe and secure location, away from water sources and out of reach of children or pets. Proper storage minimizes the risk of accidents and prolongs the lifespan of the curling iron.
-
Hair Nourishment: After heat styling, provide your hair with nourishing care. Use a hydrating hair mask or conditioner to replenish moisture and restore vitality to your hair, counteracting the potential drying effects of heat styling.
By adhering to these safety precautions and aftercare practices, you can prioritize the well-being of your hair and the longevity of your curling iron. These measures not only protect your hair from heat-related damage but also contribute to the safe and effective use of your styling tools, ensuring that you can continue to create stunning, healthy curls with confidence and peace of mind.
