Home>Automotive>How To Test Coil Pack
Automotive
How To Test Coil Pack
Published: February 25, 2024
Learn how to test a coil pack in your automotive vehicle with our step-by-step guide. Ensure your car's ignition system is functioning optimally.
(Many of the links in this article redirect to a specific reviewed product. Your purchase of these products through affiliate links helps to generate commission for Noodls.com, at no extra cost. Learn more)
Table of Contents
Introduction
When it comes to diagnosing issues with your vehicle's ignition system, the coil pack is a critical component that often comes under scrutiny. A faulty coil pack can lead to a myriad of problems, including engine misfires, rough idling, and decreased fuel efficiency. Understanding how to effectively test a coil pack is essential for maintaining the optimal performance of your vehicle.
In this comprehensive guide, we will delve into the intricacies of testing a coil pack, providing you with the knowledge and confidence to identify potential issues and take the necessary steps to rectify them. By following the step-by-step instructions and utilizing the right tools, you can gain valuable insights into the condition of your coil pack and make informed decisions regarding any required maintenance or replacements.
Whether you're a seasoned automotive enthusiast or a DIY enthusiast looking to expand your knowledge, mastering the art of testing a coil pack is a valuable skill that can save you time and money in the long run. So, let's embark on this journey together, unraveling the mysteries of the coil pack and empowering ourselves with the expertise to ensure our vehicles run smoothly and efficiently.
Read more: How To Test Ignition Coil
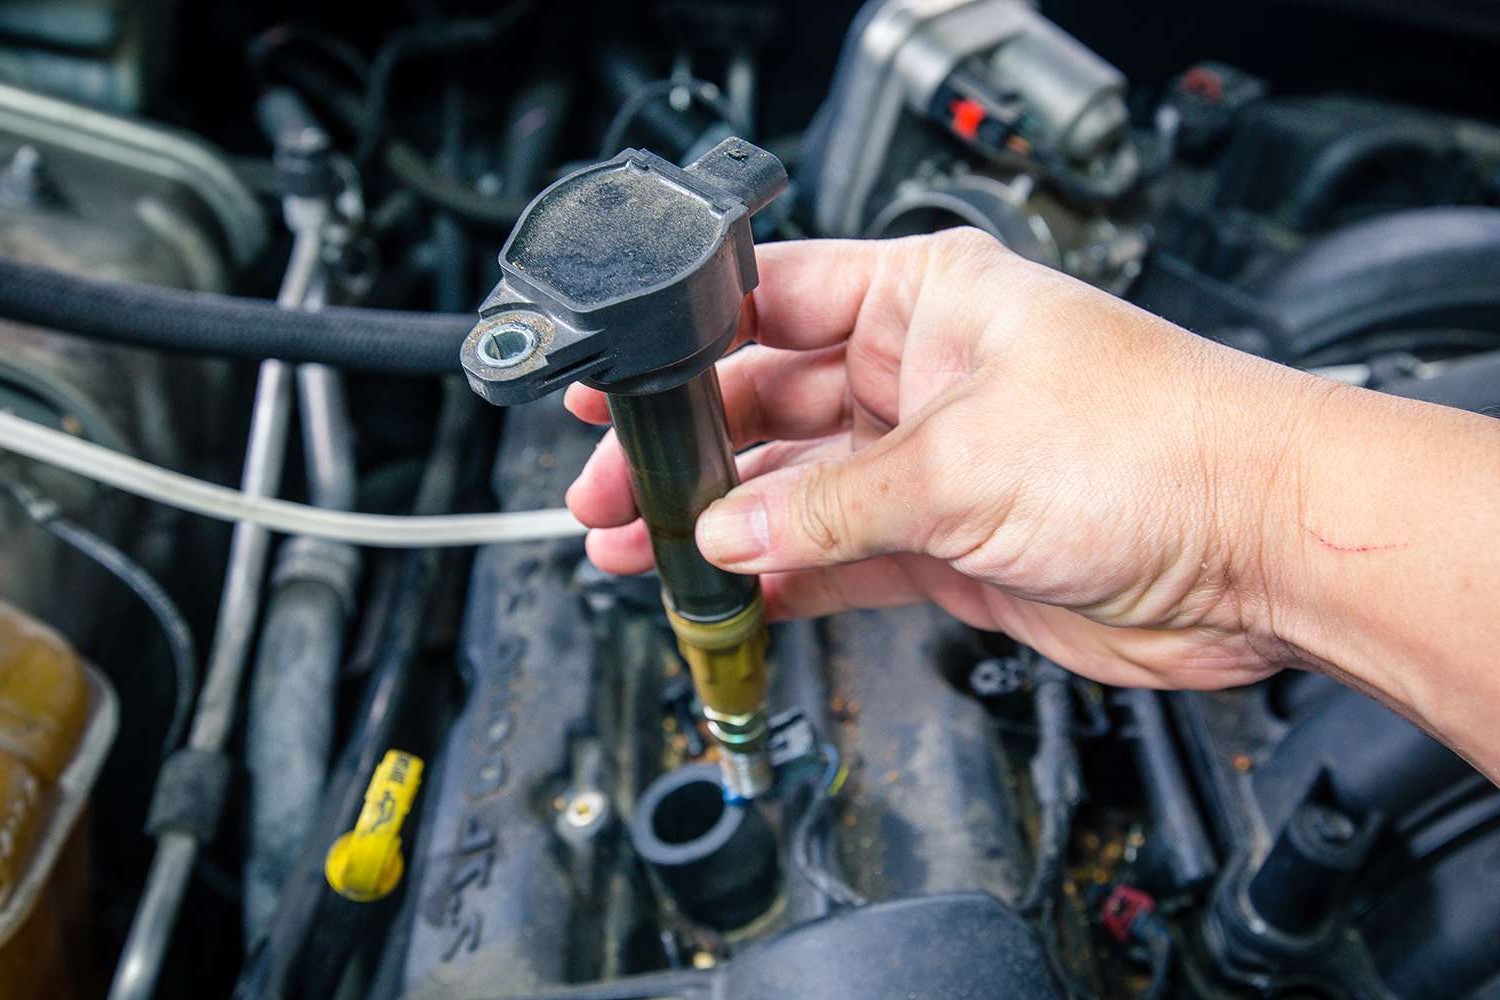
Understanding Coil Packs
Coil packs, also known as ignition coil packs, play a pivotal role in the ignition system of modern vehicles. These compact yet powerful components are responsible for converting the low voltage from the battery into the high voltage needed to ignite the fuel and air mixture within the engine's cylinders. This process is crucial for the combustion that powers the vehicle.
A typical coil pack consists of several individual coils, each dedicated to a specific engine cylinder. This design, known as a "waste spark" system, allows for more efficient combustion and better fuel economy. The coil pack is usually mounted directly on the engine and is connected to the spark plugs via high-tension leads or spark plug wires.
Each coil within the pack operates independently, triggered by the engine's electronic control module (ECM) or ignition control module (ICM). When the ECM or ICM signals the coil to fire, it generates a high-voltage pulse that travels through the spark plug wire to the corresponding spark plug, initiating the combustion process.
Understanding the basic functioning of a coil pack is essential for diagnosing potential issues. A malfunctioning coil pack can disrupt the ignition process, leading to engine misfires, rough idling, and a decrease in overall performance. Therefore, being able to recognize the signs of a faulty coil pack and knowing how to test it is crucial for maintaining the health and efficiency of your vehicle's ignition system.
By gaining a deeper understanding of the role and operation of coil packs, you can approach the testing process with confidence and a clear understanding of the significance of this component within your vehicle's ignition system. This knowledge will empower you to make informed decisions when it comes to troubleshooting and maintaining your vehicle's performance, ultimately ensuring a smoother and more reliable driving experience.
Signs of a Faulty Coil Pack
Recognizing the signs of a faulty coil pack is crucial for maintaining the optimal performance of your vehicle. Here are some common indicators that may point to a malfunctioning coil pack:
-
Engine Misfires: One of the most prevalent signs of a faulty coil pack is engine misfires. When a coil pack fails to deliver a strong and consistent spark to the spark plugs, it can result in incomplete combustion within the engine cylinders. This leads to noticeable engine misfires, often accompanied by a rough or uneven idle.
-
Decreased Fuel Efficiency: A malfunctioning coil pack can also contribute to decreased fuel efficiency. When the combustion process is compromised due to weak or inconsistent sparks, the engine may not operate at its optimal efficiency, leading to increased fuel consumption.
-
Rough Idling and Vibrations: A faulty coil pack can cause the engine to idle roughly or produce noticeable vibrations. This is a result of irregular combustion patterns caused by inadequate spark delivery, leading to an imbalance in the engine's operation.
-
Difficulty Starting the Engine: If you experience difficulty starting your vehicle, especially in conjunction with the aforementioned symptoms, it could be indicative of a faulty coil pack. A weakened spark can hinder the ignition process, resulting in prolonged cranking or failure to start the engine altogether.
-
Illuminated Check Engine Light: A malfunctioning coil pack can trigger the vehicle's onboard diagnostics system to illuminate the check engine light. This serves as an early warning indicator, prompting you to investigate and address potential issues within the ignition system, including the coil pack.
-
Visible Damage to the Coil Pack: Physical damage to the coil pack, such as cracks, corrosion, or other forms of wear, can also indicate a potential issue. Inspecting the coil pack for any visible damage should be part of your regular maintenance routine.
By being attentive to these signs, you can proactively identify potential issues with the coil pack and take the necessary steps to address them. Understanding these indicators empowers you to maintain the health and efficiency of your vehicle's ignition system, ensuring a smoother and more reliable driving experience.
Tools Needed for Testing
Before embarking on the process of testing a coil pack, it is essential to ensure that you have the necessary tools at your disposal. These tools will enable you to conduct a thorough and accurate assessment of the coil pack's condition, allowing you to make informed decisions regarding any required maintenance or replacements. Here are the essential tools needed for testing a coil pack:
-
Multimeter: A multimeter is a versatile and indispensable tool for testing the electrical properties of the coil pack. It allows you to measure resistance, voltage, and continuity, providing valuable insights into the coil pack's performance. When selecting a multimeter, opt for one with a resistance measurement setting capable of reading in the range of the coil pack's primary and secondary resistance values.
-
Spark Tester: A spark tester is a specialized tool designed to simulate the presence of a spark in the ignition system. It is used to verify the coil pack's ability to generate a strong and consistent spark, essential for igniting the fuel and air mixture within the engine cylinders. A spark tester typically features a transparent housing that allows you to visually inspect the strength and consistency of the spark.
-
Safety Gloves and Goggles: Safety should always be a priority when working on automotive components. Insulating safety gloves and protective goggles are essential for safeguarding yourself against potential electrical hazards during the testing process. These safety measures minimize the risk of electrical shock or injury, ensuring a safe and secure testing environment.
-
Inspection Light: An inspection light, preferably with a flexible and adjustable neck, is invaluable for illuminating the work area and providing clear visibility when inspecting the coil pack. It allows you to closely examine the coil pack for any signs of physical damage, such as cracks, corrosion, or other forms of wear that may indicate a potential issue.
-
Service Manual or Wiring Diagram: A service manual specific to your vehicle or a comprehensive wiring diagram is indispensable for understanding the intricacies of the ignition system and locating the coil pack within the engine compartment. It provides essential guidance on the proper procedures for disconnecting, testing, and inspecting the coil pack, ensuring that you approach the testing process with accuracy and confidence.
By ensuring that you have these essential tools at your disposal, you can proceed with confidence and precision when testing the coil pack. These tools empower you to conduct a thorough assessment of the coil pack's electrical and physical condition, enabling you to identify any potential issues and take the necessary steps to maintain the optimal performance of your vehicle's ignition system.
Step 1: Disconnecting the Coil Pack
Before initiating the testing process, it is crucial to disconnect the coil pack from the vehicle's electrical system to ensure a safe and accurate assessment. This step involves isolating the coil pack from the ignition system and other electrical components, allowing for precise testing without the risk of electrical interference or injury.
-
Locate the Coil Pack: Depending on your vehicle's make and model, the coil pack is typically situated near the engine's cylinder head or intake manifold. Refer to your vehicle's service manual or wiring diagram to pinpoint the exact location of the coil pack within the engine compartment.
-
Ensure Safety Precautions: Prior to disconnecting the coil pack, it is essential to prioritize safety. To safeguard against potential electrical hazards, wear insulating safety gloves and protective goggles. These safety measures minimize the risk of electrical shock or injury during the disconnection process.
-
Disconnect the Electrical Connectors: Identify the electrical connectors attached to the coil pack. These connectors are responsible for transmitting the electrical signals from the vehicle's electronic control module (ECM) or ignition control module (ICM) to the coil pack. Carefully detach the electrical connectors by firmly grasping the connector housing and gently pulling it away from the coil pack. Exercise caution to avoid damaging the connectors or the wiring harness.
-
Remove the Mounting Bolts or Nuts: The coil pack is secured to the engine or mounting bracket by bolts or nuts. Using the appropriate socket or wrench, carefully remove the mounting bolts or nuts that secure the coil pack in place. Keep track of the fasteners to ensure they are not misplaced during the testing process.
-
Lift and Remove the Coil Pack: With the electrical connectors and mounting fasteners detached, carefully lift the coil pack away from its mounting location. Exercise caution to avoid damaging the surrounding components or wiring harnesses. Once the coil pack is removed, place it on a clean and stable surface for further testing and inspection.
By meticulously following these steps to disconnect the coil pack, you create a safe and controlled environment for testing. This isolation ensures that the subsequent testing procedures are conducted accurately and without the risk of electrical interference. With the coil pack disconnected, you are now prepared to proceed to the next crucial steps in the testing process, armed with the confidence and knowledge necessary to assess the coil pack's condition thoroughly.
Read more: How To Set Up A Graco Pack And Play
Step 2: Using a Multimeter to Test Resistance
Once the coil pack is safely disconnected, the next step involves utilizing a multimeter to test the resistance of the individual coils within the pack. This crucial procedure provides valuable insights into the electrical properties of the coil pack, allowing you to assess its performance and identify any potential issues. Here's a detailed guide on using a multimeter to test resistance:
-
Select the Resistance Measurement Setting: Begin by setting your multimeter to the resistance measurement mode. Most multimeters have a dedicated setting for measuring resistance, often denoted by the Greek letter omega (Ω). Ensure that the multimeter is set to an appropriate resistance range capable of reading the primary and secondary resistance values of the coil pack.
-
Identify the Primary and Secondary Terminals: Each coil within the pack has primary and secondary terminals. The primary terminals receive the low-voltage electrical signal from the vehicle's electronic control module, while the secondary terminals deliver the high-voltage output to the spark plugs. Refer to the coil pack's documentation or service manual to identify the specific terminals for each coil.
-
Testing the Primary Resistance: To test the primary resistance, place the multimeter's probes on the primary terminals of the coil. Record the resistance reading displayed on the multimeter. Compare the measured resistance to the manufacturer's specifications for your vehicle's specific coil pack. A significantly higher or lower resistance value may indicate a potential issue with the coil's primary winding.
-
Testing the Secondary Resistance: Similarly, test the secondary resistance by placing the multimeter's probes on the secondary terminals of the coil. Note the resistance reading displayed on the multimeter and compare it to the manufacturer's specified range. Deviations from the expected secondary resistance values can signify problems with the coil's secondary winding.
-
Interpreting the Resistance Readings: Understanding the significance of the resistance readings is crucial. Deviations from the specified resistance values, such as excessively high or low resistance, can indicate potential issues within the coil pack. It is essential to compare the measured resistance values with the manufacturer's specifications to determine the overall health of the coil pack.
By meticulously following these steps and accurately measuring the resistance of the coil pack's individual coils, you gain valuable insights into its electrical properties. These resistance readings serve as a critical diagnostic tool, enabling you to assess the performance of the coil pack and make informed decisions regarding any necessary maintenance or replacements. With the resistance testing completed, you are now prepared to proceed to the next steps in the comprehensive process of testing a coil pack.
Step 3: Testing for Spark
After conducting the resistance testing with a multimeter, the next crucial step in the comprehensive process of testing a coil pack involves verifying its ability to generate a strong and consistent spark. This step is essential for ensuring that the coil pack is capable of igniting the fuel and air mixture within the engine cylinders, a fundamental aspect of the combustion process. Here's a detailed guide on testing for spark:
-
Prepare the Spark Tester: Begin by preparing the spark tester for use. A spark tester is a specialized tool designed to simulate the presence of a spark in the ignition system. It typically features a transparent housing that allows for a visual inspection of the strength and consistency of the spark. Ensure that the spark tester is securely connected to a reliable ground source, such as the engine block or a designated grounding point.
-
Connect the Spark Tester to the Coil Pack: Identify the high-tension leads or spark plug wires connected to the coil pack. Carefully disconnect one of the leads from the spark plug and connect it to the spark tester. The spark tester serves as an intermediary between the coil pack and the spark plug, allowing you to observe the presence and quality of the spark generated by the coil pack.
-
Observe the Spark Tester: With the spark tester connected, initiate the engine's cranking or starting process. Observe the spark tester closely to determine if the coil pack is generating a strong and consistent spark. A healthy coil pack should produce a visible and consistent spark within the spark tester's transparent housing, indicating its ability to deliver the necessary ignition spark to the engine cylinders.
-
Assess the Spark Quality: Pay close attention to the quality and consistency of the spark observed within the spark tester. A strong and consistent spark is indicative of a properly functioning coil pack, capable of reliably igniting the fuel and air mixture within the engine cylinders. Conversely, a weak or intermittent spark may signify potential issues with the coil pack's performance, necessitating further investigation and potential maintenance.
By meticulously following these steps and observing the spark tester's indications, you can effectively assess the coil pack's ability to generate a strong and consistent spark. This critical testing procedure provides valuable insights into the coil pack's functionality, enabling you to make informed decisions regarding any required maintenance or replacements. With the spark testing completed, you are now prepared to proceed to the subsequent steps in the comprehensive process of testing a coil pack.
Step 4: Inspecting for Physical Damage
After conducting electrical tests, it's crucial to visually inspect the coil pack for any physical damage that may compromise its functionality. Physical damage can manifest in various forms, including cracks, corrosion, or other signs of wear. A meticulous inspection can reveal potential issues that may not be evident through electrical testing alone.
Here's a detailed guide on inspecting the coil pack for physical damage:
-
External Examination: Begin by carefully examining the exterior of the coil pack. Look for any visible cracks, especially along the housing or mounting points. Cracks can compromise the structural integrity of the coil pack, potentially leading to electrical malfunctions or insulation breakdown.
-
Corrosion and Rust: Check for any signs of corrosion or rust on the surface of the coil pack. Corrosion can develop due to exposure to moisture or environmental contaminants, potentially causing electrical conductivity issues or component degradation. Pay particular attention to the electrical terminals and connections for signs of corrosion.
-
Insulation Integrity: Inspect the insulation material surrounding the coil pack's windings. Any signs of fraying, deterioration, or exposed wires can indicate insulation breakdown, posing a risk of electrical short circuits or malfunctions. Ensure that the insulation is intact and free from damage.
-
Mounting and Fasteners: Examine the mounting points and fasteners used to secure the coil pack to the engine or mounting bracket. Loose or damaged fasteners can lead to excessive vibration, potentially compromising the coil pack's electrical connections and overall stability.
-
Connector Examination: Carefully inspect the electrical connectors and wiring harness associated with the coil pack. Look for any signs of pinched wires, loose connections, or damage to the connector housing. Proper electrical connections are essential for the reliable operation of the coil pack.
-
Comparison to Manufacturer's Specifications: Refer to the manufacturer's specifications or service manual to ensure that the physical condition of the coil pack aligns with the recommended guidelines. Any deviations from the specified condition should be thoroughly evaluated and addressed.
By meticulously inspecting the coil pack for physical damage, you can identify potential issues that may impact its performance and longevity. This comprehensive assessment, combined with the earlier electrical testing, provides a holistic view of the coil pack's condition, empowering you to make informed decisions regarding any necessary maintenance or replacements. With the inspection for physical damage completed, you have gained valuable insights into the overall health and integrity of the coil pack, ensuring the optimal performance of your vehicle's ignition system.
Conclusion
In conclusion, mastering the art of testing a coil pack is a valuable skill that empowers vehicle owners and enthusiasts to maintain the optimal performance of their vehicles' ignition systems. By understanding the fundamental role of coil packs in the ignition process and recognizing the signs of a faulty coil pack, individuals can proactively identify and address potential issues, ensuring a smoother and more reliable driving experience.
The comprehensive testing process outlined in this guide equips individuals with the knowledge and confidence to assess the electrical and physical condition of the coil pack. From disconnecting the coil pack and utilizing a multimeter to test resistance to verifying its ability to generate a strong and consistent spark, each step provides valuable insights into the coil pack's functionality.
Furthermore, the meticulous inspection for physical damage ensures that potential issues such as cracks, corrosion, or insulation breakdown are identified and addressed. This holistic approach to testing a coil pack enables individuals to make informed decisions regarding any required maintenance or replacements, ultimately contributing to the longevity and efficiency of their vehicles' ignition systems.
By recognizing the importance of safety precautions, utilizing essential tools, and following the step-by-step testing procedures, individuals can take proactive measures to maintain the health and integrity of their vehicles' coil packs. Whether it's diagnosing engine misfires, addressing rough idling, or optimizing fuel efficiency, the ability to test a coil pack effectively is a valuable asset for vehicle owners and enthusiasts alike.
In essence, the knowledge and expertise gained from mastering the testing process for a coil pack empower individuals to take control of their vehicle's maintenance and performance. By embracing this essential skill, individuals can ensure that their vehicles operate at their best, delivering a reliable and enjoyable driving experience for years to come.