Home>Home and Garden>How To Take Oven Door Off
Home and Garden
How To Take Oven Door Off
Published: March 4, 2024
Learn how to safely remove your oven door with our step-by-step guide. Get expert tips for easy maintenance and repairs at home. Perfect for home and garden enthusiasts!
(Many of the links in this article redirect to a specific reviewed product. Your purchase of these products through affiliate links helps to generate commission for Noodls.com, at no extra cost. Learn more)
Table of Contents
Introduction
Taking off the oven door might seem like a daunting task, but it's actually a straightforward process that can be easily accomplished with the right guidance. Whether you're cleaning hard-to-reach areas, replacing a damaged part, or simply need to remove the door for better access, understanding the steps involved can make the task much more manageable. By following a few simple steps and using the appropriate tools, you can safely remove the oven door without any hassle.
Understanding the anatomy of your oven door is the first step in this process. Most oven doors are designed to be easily removed for cleaning and maintenance purposes. They are typically attached to the oven body by a pair of hinges that allow for smooth opening and closing. Additionally, some oven models may feature a locking mechanism that secures the door in place. Familiarizing yourself with these components will give you a clearer understanding of how to approach the removal process.
In this guide, we will walk you through the step-by-step process of taking off the oven door, providing clear instructions and valuable tips to ensure a smooth experience. From preparing the oven for door removal to safely lifting and reinstalling the door, each stage will be thoroughly explained to help you navigate the process with confidence. Additionally, we will highlight the tools and materials you'll need, ensuring that you have everything at your disposal before getting started.
By the end of this guide, you'll have the knowledge and skills to safely remove your oven door whenever the need arises. Whether you're a seasoned DIY enthusiast or a novice looking to tackle household maintenance tasks, this guide will equip you with the essential know-how to successfully take off your oven door and carry out any necessary maintenance or cleaning. So, let's dive in and explore the simple yet essential steps to remove your oven door effectively.
Read more: How To Take Off Earrings With Flat Back
Tools and Materials Needed
Before embarking on the process of removing your oven door, it's essential to gather the necessary tools and materials to ensure a smooth and efficient experience. Here's a comprehensive list of items you'll need:
Tools:
- Screwdriver: A screwdriver, typically a Phillips or flathead, will be required to loosen and remove any screws holding the door in place.
- Towel or Blanket: Having a towel or blanket on hand can provide a soft surface to place the oven door on once it's removed, preventing any damage or scratches.
- Gloves: Wearing gloves can offer protection and a better grip when handling the door, especially if it's heavy or has sharp edges.
- Safety Goggles: While not always necessary, safety goggles can be beneficial when working with cleaning agents or in dusty environments, ensuring eye protection throughout the process.
Materials:
- Cleaning Solution: If your intention is to clean the door or its components, a suitable cleaning solution or mild detergent will be necessary.
- Water: Having access to water for rinsing or diluting cleaning solutions is essential for maintaining a clean and safe working environment.
- Soft Cloth or Sponge: A soft cloth or sponge will aid in cleaning the door and its components without causing scratches or damage.
- Replacement Parts (if applicable): If you're removing the door for maintenance or repair purposes, ensure that any replacement parts, such as hinges or seals, are readily available.
By ensuring that you have these tools and materials at your disposal, you'll be well-prepared to tackle the task of removing your oven door with confidence and ease. Having everything organized and within reach before you begin will streamline the process and minimize any potential disruptions. With the necessary tools and materials in hand, you're ready to proceed to the next steps of preparing the oven for door removal.
Step 1: Prepare the Oven
Before initiating the process of removing the oven door, it's crucial to prepare the oven and its surrounding environment to ensure a safe and efficient experience. By following these preparatory steps, you can create an optimal workspace and minimize any potential risks or complications.
Safety First
Prior to any maintenance or cleaning task, it's essential to prioritize safety. Start by turning off the power to the oven at the circuit breaker to prevent any electrical mishaps. Additionally, ensure that the oven has completely cooled down if it was recently in use. This precautionary measure will prevent accidental burns and ensure a safe working environment.
Clear the Surrounding Area
Clearing the space around the oven is equally important. Remove any nearby objects or obstacles that may obstruct the door removal process or pose a tripping hazard. Creating a clear and unobstructed workspace will allow for better maneuverability and minimize the risk of accidents during the door removal.
Protect the Floor and Door
To safeguard the floor and the oven door itself, consider placing a towel or blanket on the floor in front of the oven. This protective layer will cushion the door when it's removed and prevent any potential damage to the floor surface. Additionally, it's advisable to have a soft, clean surface to place the door on once it's removed, ensuring that it remains unscathed during the process.
Gather the Necessary Tools and Materials
Ensure that all the required tools and materials, as outlined in the previous section, are within reach. Having these items organized and readily available will streamline the process and prevent any unnecessary delays or interruptions. Double-check that the screwdriver, gloves, safety goggles, and any cleaning solutions are easily accessible before proceeding with the door removal.
By diligently preparing the oven and its surroundings, you set the stage for a smooth and safe door removal process. These preparatory steps not only minimize potential hazards but also contribute to a more organized and efficient workflow. With the oven properly prepared, you're now ready to move on to the next step of removing the hinges and lifting the door from its position.
Read more: How To Toast Bagel In Oven
Step 2: Remove the Hinges
Removing the hinges is a critical step in the process of taking off the oven door. The hinges are the components that secure the door to the oven and allow for smooth opening and closing. Before proceeding with this step, ensure that the oven is adequately prepared, as outlined in the previous section, to create a safe and organized workspace.
-
Locate the Hinge Latches: Depending on the oven model, the hinges may have latches that secure them in place. These latches are typically located on the hinge itself or on the oven frame. Identify these latches and determine the type of mechanism used to secure them.
-
Release the Latches: Once the latches are located, carefully release them to unlock the hinges. This may involve lifting or flipping the latches, depending on the specific design of the oven. Take caution to avoid applying excessive force or causing damage to the latches during this process.
-
Open the Door Slightly: With the latches released, gently open the oven door to a partially open position. This step is crucial as it allows for easier access to the hinges and facilitates the removal process.
-
Support the Door: While holding the door in its partially open position, ensure that it is adequately supported to prevent it from swinging or falling. If necessary, enlist the help of a second person to hold the door steady while you work on removing the hinges.
-
Remove the Hinge Pins: The hinges are typically secured to the oven door and frame by hinge pins. Using a screwdriver, carefully remove the hinge pins by unscrewing them from their respective positions. Take note of the orientation of the hinge pins as they are removed, as this will be essential when reinstalling the door.
-
Detach the Hinges: Once the hinge pins are removed, the hinges can be detached from the oven door and frame. Depending on the design, this may involve lifting the door to disengage the hinges or simply sliding them out of their mounting slots.
By following these steps, you can effectively remove the hinges and detach the oven door, allowing for thorough cleaning, maintenance, or any necessary repairs. With the door successfully removed, you can proceed to the next step of lifting and safely handling the door.
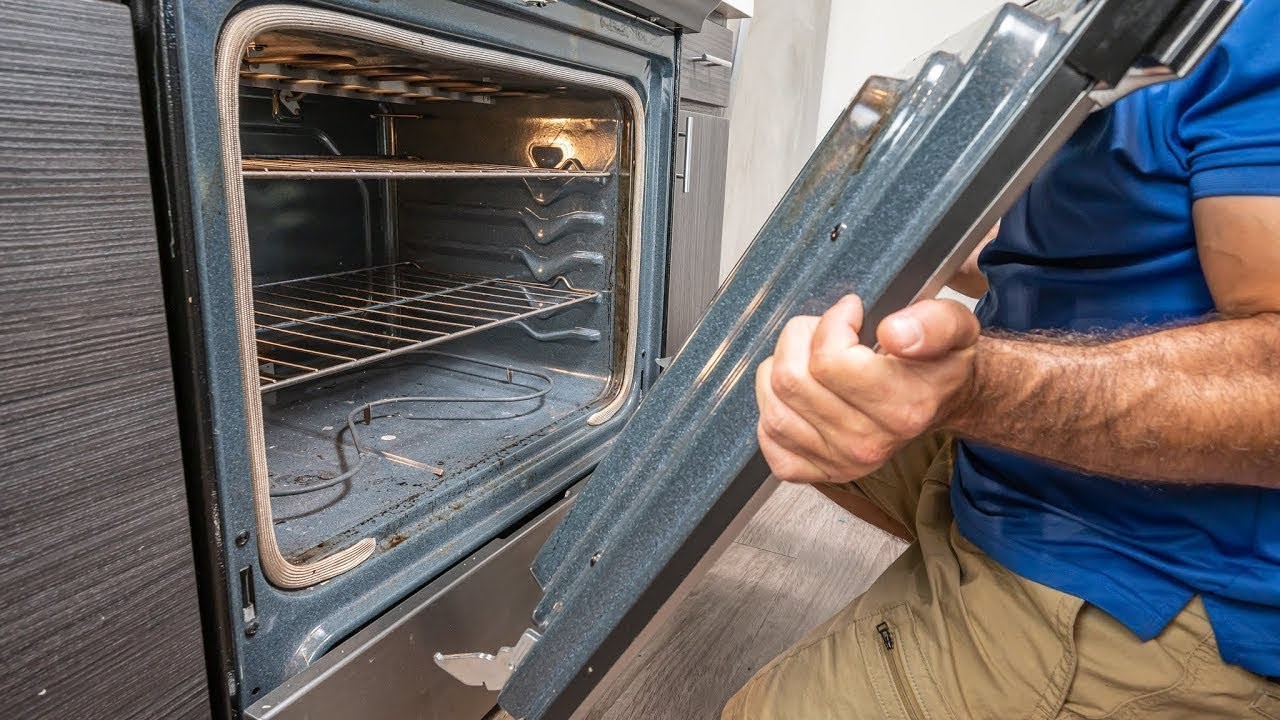
Step 3: Lift and Remove the Door
With the hinges detached, the next crucial step is to lift and remove the oven door from its position. This process requires careful handling to ensure the door is safely maneuvered and does not sustain any damage during removal.
-
Lift the Door: Begin by gripping the sides of the oven door firmly. Lift the door upwards, using slow and steady movements to prevent any sudden shifts or jolts. It's important to maintain a balanced grip on the door to ensure stability and control throughout the lifting process.
-
Check for Resistance: As you lift the door, be attentive to any resistance or obstruction. If the door seems to be catching on any part of the oven or if it feels unusually heavy, pause and reassess the lifting process. It's essential to avoid forcing the door, as this can lead to potential damage or accidents.
-
Enlist Assistance if Needed: Depending on the size and weight of the oven door, it may be beneficial to have a second person assist with the lifting process. This additional support can ensure that the door is handled safely and that any potential strain or difficulty is minimized.
-
Place the Door Securely: Once the door has been lifted from its position, carefully place it on the previously prepared surface, such as a towel or blanket. Ensure that the door is positioned flat and stable to prevent any tipping or instability. This step is crucial in safeguarding the door from damage and maintaining a safe working environment.
-
Handle with Care: Throughout the lifting and removal process, it's important to handle the door with care and attention. Avoid placing excessive pressure on any specific areas of the door, especially the glass panels, to prevent breakage or damage. By maintaining a gentle and controlled approach, you can ensure that the door is safely removed and ready for any necessary maintenance or cleaning.
By following these steps, you can effectively lift and remove the oven door, setting the stage for any required maintenance, cleaning, or repairs. With the door successfully removed, you have the freedom to access and address specific components of the oven with ease. This marks a significant milestone in the maintenance process, allowing you to proceed with the necessary tasks while ensuring the door remains in optimal condition for reinstallation.
Step 4: Reinstall the Door (Optional)
Reinstalling the oven door is an optional yet essential step, especially if the door was removed for cleaning, maintenance, or repair purposes. Proper reinstallation ensures that the door functions seamlessly and securely, maintaining the safety and efficiency of the oven. If you've completed the necessary tasks and are ready to return the door to its original position, follow these steps to reinstall it with precision and care.
-
Position the Door: Begin by carefully lifting the door and positioning it in front of the oven opening. Align the hinges with their respective slots on the oven frame, ensuring that the orientation matches the original configuration. It's crucial to approach this step with patience and precision to avoid any misalignment or potential damage to the hinges.
-
Insert the Hinge Pins: Once the door is aligned with the hinges, insert the hinge pins back into their designated positions. This may require some gentle maneuvering to ensure that the pins slide smoothly into place. Pay close attention to the alignment of the pins, as they should fit securely and evenly to maintain the stability of the door.
-
Secure the Hinge Latches: If your oven door features hinge latches, engage them to secure the hinges in place. Depending on the design, this may involve flipping or pressing the latches to lock them into position. Confirm that the latches are fully engaged and that the hinges are securely fastened to the oven frame.
-
Test the Door: With the door reinstalled, perform a brief test to ensure that it opens and closes smoothly. Check for any unusual resistance or misalignment, as these issues may indicate that the door requires further adjustment. By testing the door immediately after reinstallation, you can address any potential issues promptly.
-
Reconnect the Power: If the power to the oven was turned off during the removal process, remember to reconnect it at the circuit breaker. This step is essential to restore the functionality of the oven and ensure that the door operates as intended.
By following these steps, you can successfully reinstall the oven door, completing the maintenance or repair process with precision and attention to detail. Proper reinstallation not only ensures the seamless operation of the oven but also contributes to a safe and functional kitchen environment. Whether you're a seasoned DIY enthusiast or a homeowner looking to maintain your appliances, mastering the process of reinstalling the oven door is a valuable skill that enhances the overall efficiency and longevity of your kitchen equipment.