Home>Home and Garden>How To Remove Door Knob
Home and Garden
How To Remove Door Knob
Published: March 4, 2024
Learn how to remove a door knob easily with our step-by-step guide. Upgrade your home and garden with our simple DIY tips and tricks.
(Many of the links in this article redirect to a specific reviewed product. Your purchase of these products through affiliate links helps to generate commission for Noodls.com, at no extra cost. Learn more)
Table of Contents
Introduction
Removing a door knob may seem like a daunting task, but with the right tools and a clear understanding of the process, it can be a straightforward and rewarding home maintenance project. Whether you're looking to update the style of your door hardware or need to replace a faulty knob, knowing how to remove a door knob is a valuable skill for any homeowner or DIY enthusiast.
In this comprehensive guide, we will walk you through the step-by-step process of removing a door knob, from gathering the necessary tools and materials to preparing the door for a new knob installation. By following these instructions, you can confidently tackle this task and achieve a professional-looking result.
Understanding the anatomy of a door knob and latch assembly is essential for a successful removal and replacement process. By familiarizing yourself with the components and their functions, you'll gain the knowledge needed to navigate the removal process with ease. Additionally, learning how to remove a door knob can save you time and money by eliminating the need for professional assistance.
So, roll up your sleeves, gather your tools, and let's dive into the process of removing a door knob. With a bit of patience and attention to detail, you'll soon master this essential home maintenance skill.
Read more: Removing A Door Knob: Step-by-Step Guide
Tools and Materials Needed
Before embarking on the task of removing a door knob, it's essential to gather the necessary tools and materials to ensure a smooth and efficient process. Here's a comprehensive list of items you'll need:
Tools:
-
Phillips Head Screwdriver: This tool is essential for removing the screws that secure the door knob in place. Ensure that the screwdriver is the appropriate size for the screws on your specific door knob.
-
Flathead Screwdriver: In some cases, a flathead screwdriver may be needed to assist in detaching the knob from the door.
-
Needle-Nose Pliers: These pliers can be useful for gripping and manipulating small components within the door knob assembly.
-
Hammer: A hammer may be required to gently tap the base of the door knob to release it from the door.
-
Allen Wrench (Hex Key): Certain door knobs, particularly those with a modern or minimalist design, may be secured with set screws that require an Allen wrench for removal.
-
Latch Plate Template (Optional): If you plan to install a new door knob after removal, a latch plate template can be helpful for marking the correct placement of the new hardware.
Materials:
-
Replacement Door Knob: If you intend to install a new door knob after removal, ensure that you have the replacement hardware on hand.
-
Painter's Tape: This can be used to protect the door's finish from accidental scratches or marks during the removal process.
-
Cleaning Solution and Cloth: Having a cleaning solution and cloth available will allow you to clean the door and door knob components as needed.
-
Safety Glasses and Gloves (Optional): While not always necessary, safety glasses and gloves can provide added protection, especially if you encounter any sharp edges or debris during the removal process.
By gathering these tools and materials before you begin, you'll be well-prepared to tackle the task of removing a door knob with confidence and efficiency. With the right equipment at your disposal, you can navigate each step of the process smoothly, ensuring a successful outcome.
Step 1: Remove the Screws
The first step in removing a door knob is to locate and remove the screws that secure the knob to the door. Begin by closely examining the base of the knob, where it meets the door surface. In most cases, you will find one or two screws holding the knob in place. These screws are typically located on the rosette or decorative plate of the knob assembly.
Using a Phillips head screwdriver that fits the screw heads snugly, carefully loosen and remove the screws. It's important to note that some door knobs may feature hidden or recessed screws, requiring you to rotate the knob or look for a small slot on the rosette to access the screws. If you encounter difficulty in locating the screws, refer to the manufacturer's instructions or seek online resources for specific guidance related to your door knob model.
As you remove the screws, be sure to keep them in a safe place, as they will be needed when installing a new door knob or reassembling the existing one. Additionally, it's a good practice to place the screws in a small container or bag to prevent them from getting misplaced.
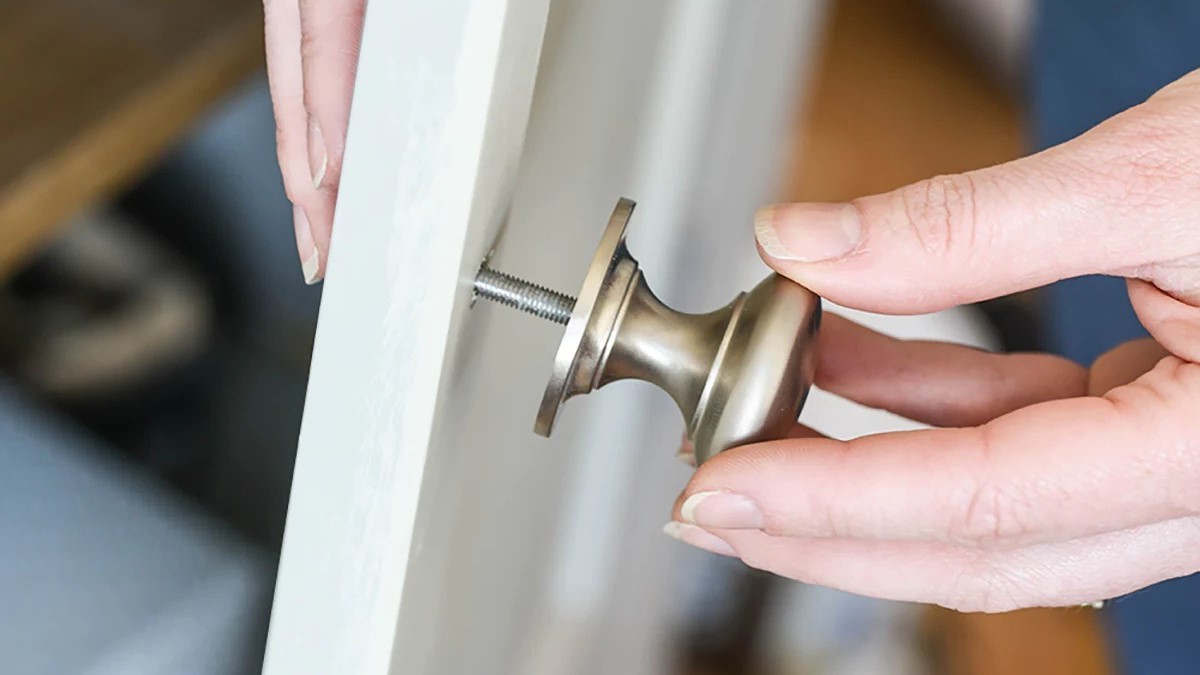
Once the screws are removed, you can gently pull the knob and rosette away from the door, exposing the inner components of the knob assembly. If the knob does not easily come off, you may need to apply gentle pressure or use a flathead screwdriver to carefully pry the knob away from the door. Exercise caution to avoid damaging the door surface or the knob components during this process.
By successfully removing the screws, you have completed the initial step in the door knob removal process. With the knob and rosette detached, you can proceed to the next step, which involves detaching the knob from the door and accessing the latch assembly. This step-by-step approach ensures a methodical and organized removal process, setting the stage for a seamless transition to the subsequent steps of the door knob removal and replacement procedure.
Step 2: Detach the Knob
With the screws removed and the rosette or decorative plate separated from the door, the next phase involves detaching the knob from the door itself. This step requires a careful approach to ensure that the knob is removed without causing damage to the door or the internal components of the knob assembly.
To detach the knob, you will need to identify the specific method by which it is secured to the door. In most cases, the knob will be attached to a central spindle or shaft that extends through the door and connects to the latch assembly on the opposite side. Depending on the design of the knob, there are several common methods for detaching it from the door:
-
Twist and Pull: Some knobs are designed to be twisted counterclockwise or pulled directly away from the door to release them from the spindle. This method is often found in traditional or vintage-style knobs and requires a gentle but firm motion to disengage the knob from the spindle.
-
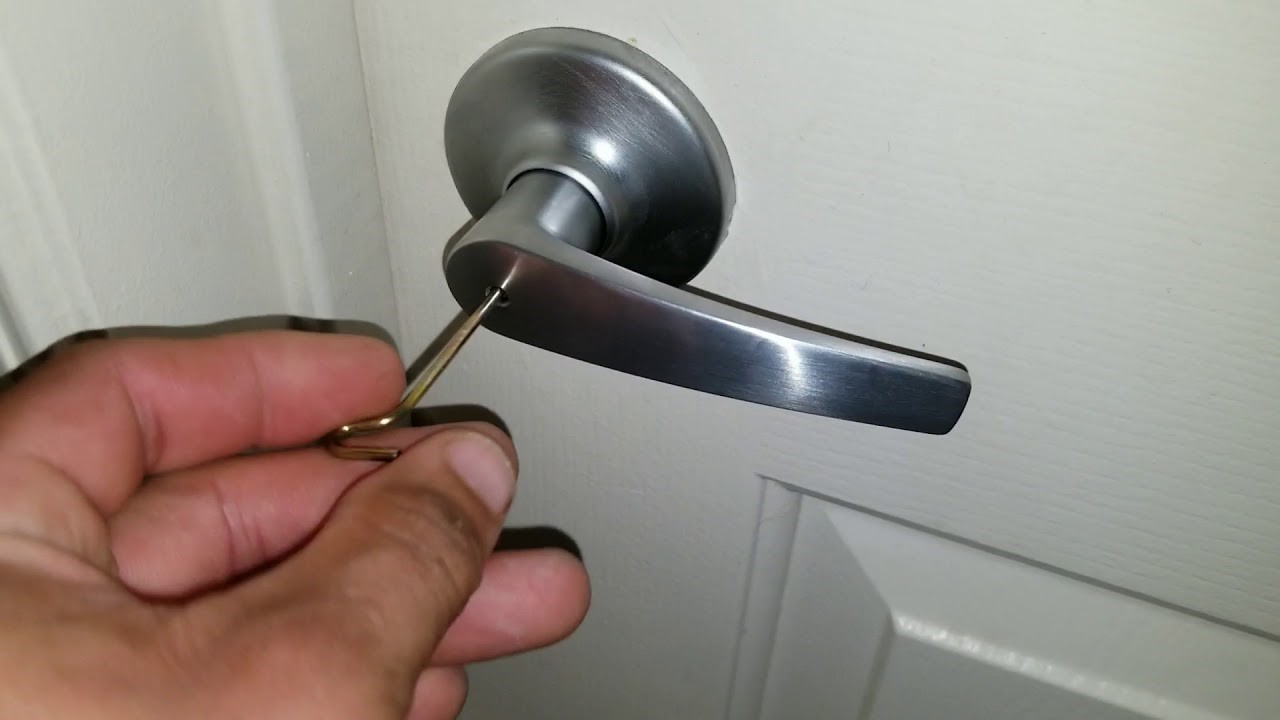
Set Screw Release: Modern or contemporary knobs may feature a small set screw located on the base of the knob. Using an Allen wrench (hex key), you can loosen and remove the set screw, allowing the knob to be separated from the spindle.
-
Exposed Screws: In certain knob designs, the screws that secure the knob to the spindle may be visible once the rosette or decorative plate is removed. By locating and removing these screws, the knob can be detached from the spindle and removed from the door.
Carefully inspect the base of the knob and the surrounding area to determine the method of attachment. If the knob does not readily detach using one of the above methods, a flathead screwdriver can be used to gently pry the base of the knob away from the door. Exercise caution to avoid applying excessive force, as this can lead to damage to the knob or the door surface.
As you successfully detach the knob from the door, take note of the orientation and arrangement of any components that may be present, such as decorative elements or trim pieces. Keeping these components organized will facilitate a smooth reassembly process if you plan to reinstall the same knob or prepare for the installation of a new one.
By completing this step, you have effectively removed the knob from the door, setting the stage for the subsequent phase of the removal process, which involves accessing and removing the latch assembly. This methodical approach ensures that each step is executed with precision, leading to a successful and seamless door knob removal experience.
Step 3: Remove the Latch Assembly
With the door knob and rosette successfully detached from the door, the next crucial step in the removal process involves removing the latch assembly. The latch assembly, also known as the latch mechanism or door latch, is the component responsible for securing the door in the closed position and allowing it to be opened from either side using the door knob or lever.
To access and remove the latch assembly, begin by examining the edge of the door where the latch is located. You will typically find the latch assembly housed within a rectangular or circular metal plate, known as the latch faceplate, which is installed flush with the door's edge. The latch faceplate may be held in place by screws or be secured through a spring-loaded mechanism, depending on the specific design of the door and latch assembly.
If the latch faceplate is held in place by screws, use a Phillips head screwdriver to carefully loosen and remove the screws. Keep the screws in a secure location, as they will be needed if you plan to install a new latch assembly or reassemble the existing one. Once the screws are removed, gently pull the latch faceplate away from the door, exposing the inner components of the latch assembly.
In some cases, the latch faceplate may be secured through a spring-loaded mechanism, requiring you to depress a small tab or lever to release it from the door. Carefully inspect the latch faceplate for any visible release mechanisms and follow the manufacturer's instructions if specific steps are required to disengage the latch assembly.
After removing the latch faceplate, you will have clear access to the internal components of the latch assembly, including the latch bolt and the mechanism that operates it. The latch bolt is the component that extends from the edge of the door into the door frame, securing the door in the closed position. To remove the latch assembly completely, carefully maneuver the latch bolt and associated components out of the door, taking care not to damage the surrounding door frame or trim.
As you remove the latch assembly, take note of its orientation and the arrangement of any accompanying components, such as the strike plate and screws. Keeping these components organized will facilitate a smooth reassembly process if you plan to reinstall the same latch assembly or prepare for the installation of a new one.
By successfully removing the latch assembly, you have completed a critical phase of the door knob removal process, setting the stage for the subsequent steps, which involve cleaning and preparing the door for the installation of a new knob. This methodical approach ensures that each component is handled with precision, leading to a successful and seamless door knob removal experience.
Step 4: Clean and Prepare the Door
After successfully removing the door knob and latch assembly, it's essential to take the time to clean and prepare the door for the installation of a new knob or to ensure that it remains in optimal condition if you plan to reassemble the existing hardware. This step not only enhances the visual appeal of the door but also allows for a smooth and secure installation of the new door knob.
Begin by inspecting the door surface for any accumulated dirt, grime, or residue that may have been concealed by the presence of the knob and latch assembly. Using a mild cleaning solution and a soft cloth, gently wipe down the entire surface of the door, paying particular attention to the area where the knob and latch were previously installed. This thorough cleaning process will help remove any buildup and ensure a clean and smooth surface for the new knob installation.
In addition to cleaning the door surface, take the opportunity to inspect the door's condition, particularly around the area where the latch assembly was located. Check for any signs of wear, damage, or misalignment that may affect the functionality of the new door knob. If necessary, make any minor repairs or adjustments to ensure that the door is in optimal condition for the installation of the new hardware.
If you plan to install a new door knob, this is an ideal time to consider any additional enhancements or modifications, such as updating the door's finish or making adjustments to the strike plate and hinges. By addressing these aspects during the preparation phase, you can ensure that the door is fully optimized to accommodate the new knob and that any related components are in excellent condition.
Finally, if you intend to install a new door knob, consider using a latch plate template to mark the precise location for the new hardware. This template can help ensure accurate placement and alignment, resulting in a professional and polished installation. By taking the time to clean and prepare the door, you set the stage for a successful and visually appealing door knob installation, enhancing the overall aesthetic and functionality of the door.
With the door thoroughly cleaned and prepared, you are now ready to proceed to the final step: installing the new door knob. This meticulous approach ensures that the door is primed for the next phase of the process, setting the foundation for a seamless and efficient door knob replacement experience.
Step 5: Install the New Door Knob
With the door thoroughly cleaned and prepared, the final phase of the door knob replacement process involves installing the new door knob. Whether you are upgrading the style of your door hardware or replacing a faulty knob, the installation of a new door knob is an opportunity to enhance the functionality and aesthetic appeal of your door.
Begin by unpacking the new door knob and familiarizing yourself with its components. Most door knob sets include the knob or lever handles, the latch assembly, strike plate, and accompanying screws. Take a moment to review the manufacturer's instructions provided with the new door knob to ensure that you have a clear understanding of the installation process specific to your hardware.
Next, position the latch assembly in the edge of the door, ensuring that the beveled side of the latch faces the direction in which the door closes. Align the latch faceplate with the pre-existing recess or mortise in the door edge, and secure it in place using the provided screws. Take care to ensure that the latch assembly is installed flush with the door's edge, allowing for smooth and secure operation.
Once the latch assembly is in place, insert the spindle through the latch mechanism, ensuring that it extends through the door and aligns with the knob or lever handles. Depending on the design of the door knob, the spindle may feature grooves or slots that correspond to the internal components of the handles, facilitating a secure connection.
With the spindle in position, affix the exterior knob or lever handle by aligning it with the spindle and gently pressing it into place. If the knob features a set screw, use an Allen wrench to secure the knob to the spindle, ensuring a snug and stable connection. For knobs with a twist-and-lock mechanism, follow the manufacturer's instructions to engage the knob securely.
After installing the exterior knob, repeat the process for the interior knob or lever handle, ensuring that it aligns with the spindle and operates smoothly. Once both handles are in place, test the functionality of the door knob by turning the handles and verifying that the latch retracts and extends as intended.
Finally, affix the strike plate to the door frame, ensuring that it aligns with the latch assembly and allows for seamless engagement when the door is closed. Use the provided screws to secure the strike plate, ensuring a stable and secure connection.
By following these steps, you can successfully install a new door knob, elevating the functionality and visual appeal of your door while ensuring a secure and reliable operation. With the new door knob in place, you can enjoy the enhanced aesthetic and functionality of your door, reflecting your personal style and attention to detail.
Read more: How To Measure A Door
Conclusion
In conclusion, mastering the art of removing a door knob is a valuable skill that empowers homeowners and DIY enthusiasts to maintain and enhance their living spaces. By following the step-by-step process outlined in this guide, individuals can confidently tackle the task of door knob removal, whether for the purpose of updating the door hardware, addressing a faulty knob, or undertaking home improvement projects.
The journey of removing a door knob begins with gathering the essential tools and materials, including screwdrivers, pliers, and cleaning solutions. These items form the foundation for a successful removal process and ensure that individuals are well-equipped to handle each phase with precision and efficiency.
The subsequent steps of removing the screws, detaching the knob, and removing the latch assembly require a methodical approach and attention to detail. By carefully navigating each phase, individuals can successfully disassemble the door knob and access the internal components, setting the stage for a seamless transition to the installation of a new knob or the reassembly of the existing hardware.
The importance of cleaning and preparing the door surface cannot be overstated, as this step not only enhances the visual appeal of the door but also ensures a smooth and secure installation of the new knob. By taking the time to clean and inspect the door, individuals can address any underlying issues and optimize the door for the installation of the new hardware, resulting in a polished and professional outcome.
Finally, the installation of the new door knob marks the culmination of the removal and replacement process, offering individuals the opportunity to elevate the functionality and aesthetic appeal of their doors. With careful attention to detail and adherence to manufacturer's instructions, individuals can successfully install a new door knob, reflecting their personal style and enhancing the overall ambiance of their living spaces.
In essence, the journey of removing a door knob is not merely a practical task but a transformative experience that allows individuals to exercise creativity, attention to detail, and a sense of accomplishment. By mastering this essential home maintenance skill, individuals can confidently navigate the world of door hardware, unlocking the potential to personalize and elevate their living spaces with confidence and expertise.