Home>Home and Garden>How To Reset Garbage Disposal
Home and Garden
How To Reset Garbage Disposal
Published: March 4, 2024
Learn how to reset your garbage disposal with our step-by-step guide. Keep your home and garden running smoothly with these simple tips.
(Many of the links in this article redirect to a specific reviewed product. Your purchase of these products through affiliate links helps to generate commission for Noodls.com, at no extra cost. Learn more)
Table of Contents
Introduction
Resetting a garbage disposal is a common task that can save you time and money. Whether your disposal is jammed, making strange noises, or simply not working, knowing how to reset it can be a valuable skill for any homeowner. In this guide, we'll walk you through the step-by-step process of resetting your garbage disposal safely and effectively.
A malfunctioning garbage disposal can be a major inconvenience in the kitchen, disrupting your daily routine and causing frustration. By understanding the simple yet crucial steps involved in resetting a garbage disposal, you can quickly address common issues and restore functionality to this essential kitchen appliance.
Whether you're a seasoned DIY enthusiast or a novice homeowner, learning how to reset a garbage disposal is a practical skill that can empower you to tackle household maintenance tasks with confidence. By following the guidelines outlined in this article, you'll be equipped with the knowledge and techniques necessary to troubleshoot and reset your garbage disposal, ensuring a smoothly functioning kitchen environment.
Now, let's delve into the safety precautions you should keep in mind before attempting to reset your garbage disposal. Taking these precautions seriously will help prevent accidents and ensure a smooth and successful reset process.
Read more: How To Remove A Garbage Disposal
Safety Precautions
Before embarking on the process of resetting your garbage disposal, it's crucial to prioritize safety to prevent any potential accidents or injuries. By adhering to the following safety precautions, you can ensure a secure environment for yourself and others involved in the reset process.
-
Power Off: Always start by disconnecting the power supply to the garbage disposal. This can typically be done by locating the circuit breaker or the dedicated power switch for the disposal unit. Confirm that the power is completely turned off before proceeding with any further steps.
-
Avoid Physical Contact: Refrain from placing your hands or any tools inside the disposal unit until you are certain that the power source is disconnected. Even when the power is off, exercise caution and handle tools with care to prevent accidental injuries.
-
Use Protective Gear: Consider wearing protective gloves and safety goggles to shield your hands and eyes from potential debris or sharp objects within the disposal unit. This extra layer of protection can minimize the risk of injury during the reset process.
-
Inspect for Foreign Objects: Before attempting to reset the garbage disposal, visually inspect the area around the unit for any foreign objects or debris. Remove any items that may have fallen into the disposal, as they can pose a hazard during the reset procedure.
-
Clear the Workspace: Ensure that the area surrounding the garbage disposal is clear of any obstacles or clutter. This will provide you with ample space to work and maneuver during the reset process, reducing the likelihood of accidents or mishaps.
-
Follow Manufacturer Guidelines: Refer to the manufacturer's instructions or manual for specific safety recommendations and reset procedures tailored to your garbage disposal model. Adhering to these guidelines can help you navigate the reset process with confidence and precision.
By prioritizing safety and adhering to these precautions, you can approach the task of resetting your garbage disposal with a heightened sense of awareness and preparedness. These measures are designed to mitigate potential risks and create a secure environment for carrying out the reset procedure effectively.
With safety at the forefront, you are now ready to proceed with the step-by-step process of resetting your garbage disposal. This will involve systematically addressing common issues and restoring functionality to the unit, ensuring a smoothly functioning kitchen environment.
Step 1: Turn Off the Power
The first and most critical step in resetting a garbage disposal is to ensure that the power supply to the unit is completely turned off. This is a fundamental safety measure that must be strictly adhered to before proceeding with any further actions. By disconnecting the power, you create a secure environment for the reset process and minimize the risk of electrical accidents or injuries.
To turn off the power to the garbage disposal, locate the dedicated circuit breaker in your home's electrical panel. Alternatively, some disposals are equipped with a specific power switch that can be found under the sink or in a nearby cabinet. Once you have identified the appropriate power source, switch off the circuit breaker or power switch to cut off electricity to the disposal unit.
It is crucial to verify that the power is indeed turned off before proceeding. You can do this by attempting to turn on the disposal using the wall switch or by carefully listening for any signs of electrical activity. Additionally, using a non-contact voltage tester can provide confirmation that the power has been successfully disconnected, adding an extra layer of assurance to the process.
By diligently following this initial step and ensuring that the power supply is effectively shut off, you create a safe working environment for the subsequent stages of the reset process. This proactive approach to safety sets the foundation for a smooth and secure reset procedure, allowing you to proceed with confidence and peace of mind.
With the power safely turned off, you are now prepared to advance to the next step in resetting your garbage disposal. This will involve utilizing a hex key to address potential blockages or obstructions within the unit, paving the way for a successful reset and restoration of functionality.
Step 2: Use a Hex Key
After ensuring that the power supply to the garbage disposal is safely turned off, the next step in the reset process involves utilizing a hex key to address potential blockages or obstructions within the unit. A hex key, also known as an Allen wrench, is a simple yet indispensable tool for troubleshooting and resolving common issues that may impede the proper functioning of the disposal.
Locate the hex key that corresponds to the size of the reset opening on the underside of the disposal unit. This opening is typically located at the center bottom of the disposal and is designed to accommodate the hex key for manual operation. Insert the hex key into the reset opening and rotate it back and forth in both directions. This manual turning motion helps dislodge any stuck or jammed components within the disposal, allowing for smoother operation and facilitating the reset process.
By using the hex key to manually rotate the disposal's grinding mechanism, you can effectively address minor blockages or obstructions that may be hindering its functionality. This method is particularly useful for freeing up the disposal's impellers and breaking down any accumulated debris, restoring the unit to its optimal working condition.
It's important to exercise patience and caution when using the hex key, applying gentle and steady pressure to maneuver the disposal's internal components. Avoid excessive force or aggressive movements, as these can potentially damage the disposal and exacerbate the underlying issue. By employing a methodical and deliberate approach, you can effectively navigate the hex key through the reset opening, gradually dislodging any impediments and preparing the disposal for the subsequent steps in the reset process.
The utilization of the hex key serves as a practical and effective means of troubleshooting and addressing common issues within the garbage disposal. By leveraging this tool to manually rotate the disposal's mechanism, you can proactively tackle blockages and obstructions, setting the stage for a successful reset and restoration of functionality. With the hex key serving as a valuable ally in the reset process, you are now ready to proceed to the next crucial step: clearing the blockage within the disposal unit.
Step 3: Clear the Blockage
Once you have utilized the hex key to manually rotate the disposal's grinding mechanism, the next pivotal step in the reset process involves clearing any blockages or obstructions within the disposal unit. Blockages can impede the proper functioning of the disposal, leading to inefficiency and potential malfunctions. By systematically addressing and removing these impediments, you can pave the way for a successful reset and restoration of functionality.
To begin the process of clearing the blockage, it is essential to visually inspect the disposal unit for any visible debris, foreign objects, or accumulated material that may be obstructing the grinding mechanism. Using a flashlight, carefully examine the interior of the disposal to identify any potential blockages or obstructions. Common culprits include food particles, grease buildup, small utensils, or non-disposable items that may have inadvertently found their way into the disposal.
Once you have identified the source of the blockage, proceed to remove it using appropriate tools or techniques. For minor blockages caused by food particles or organic matter, you can use long-handled tongs or pliers to carefully extract the debris from the disposal. Exercise caution and precision to avoid damaging the disposal's internal components while removing the blockage.
In the case of more stubborn or compacted blockages, consider employing a disposal wrench or similar tool to manually rotate the grinding mechanism and dislodge the obstruction. This method can help break down and clear out persistent blockages, restoring the disposal to its optimal working condition.
Additionally, flushing the disposal with cold water can aid in dislodging remaining debris and cleansing the unit of any residual material. Running cold water through the disposal for several minutes can help clear out the system and ensure that any loosened debris is effectively flushed away.
By diligently addressing and clearing the blockage within the disposal unit, you can effectively eliminate the underlying cause of malfunction and prepare the unit for the final steps of the reset process. This proactive approach to troubleshooting and maintenance sets the stage for a successful reset, allowing you to proceed with confidence and precision.
With the blockage successfully cleared, you are now ready to advance to the subsequent step: resetting the disposal to restore its functionality and operational efficiency.
Step 4: Reset the Disposal
With the blockage successfully cleared and the disposal unit prepared for the final stages of the reset process, the next crucial step involves resetting the disposal to restore its functionality and operational efficiency. The reset procedure serves as a pivotal moment in the overall maintenance of the garbage disposal, allowing you to recalibrate the unit and address any lingering issues that may have contributed to its malfunction.
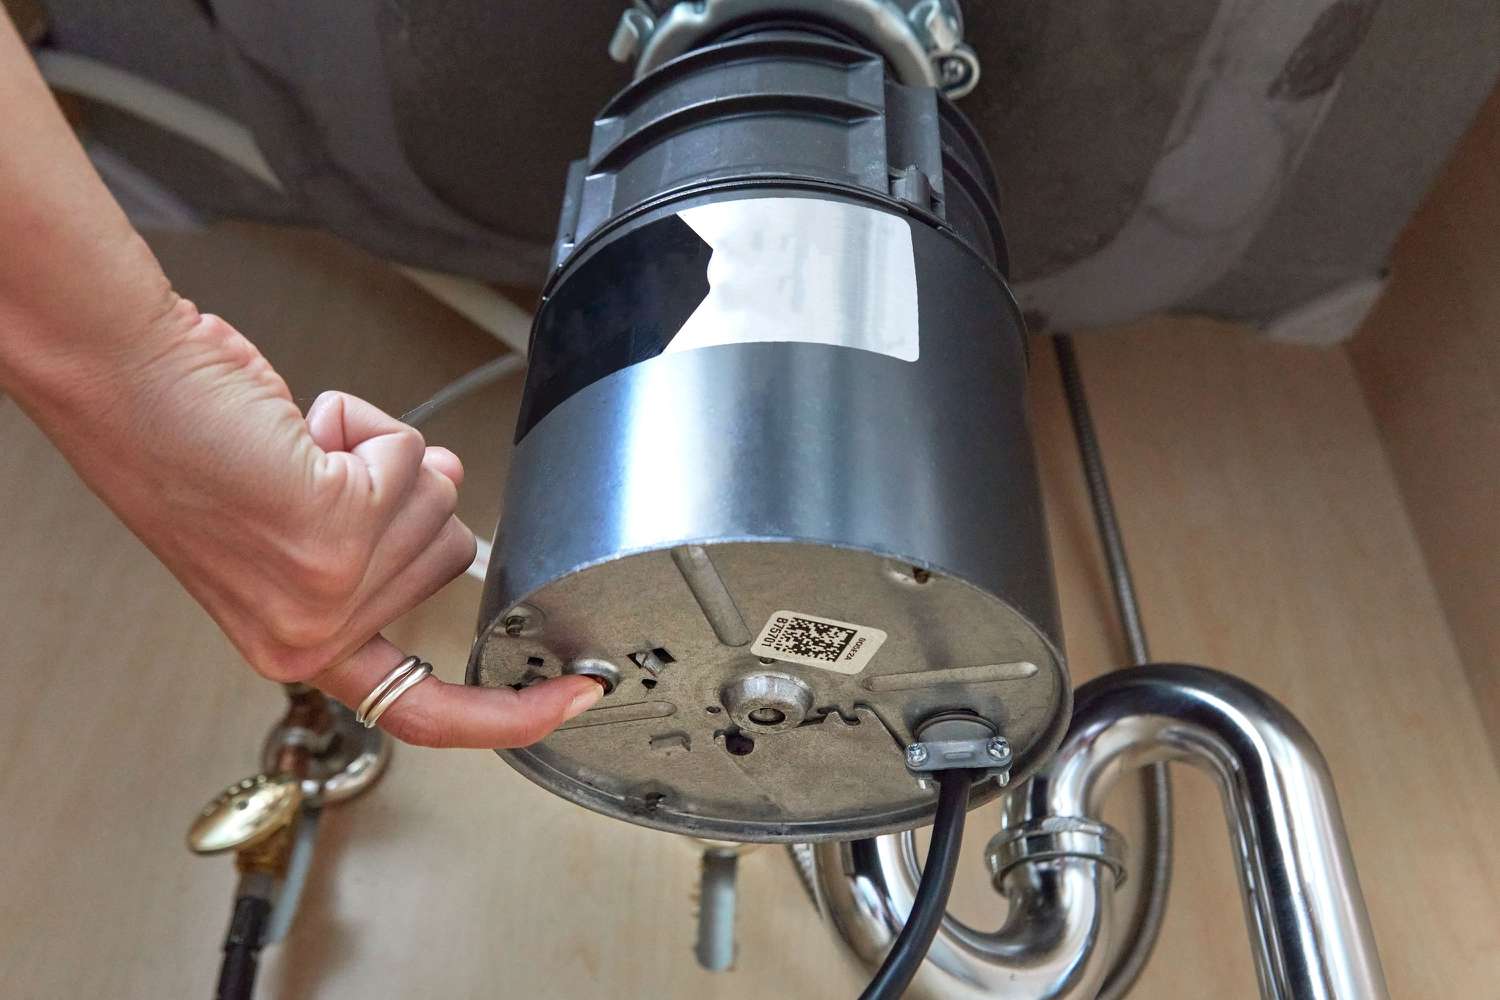
To initiate the reset, locate the reset button on the underside of the disposal unit. This button is typically positioned near the power cord or within the reset opening and is designed to restore the disposal to its default state. Press the reset button firmly, ensuring that it engages and remains in the reset position. This action effectively resets the internal mechanisms of the disposal, clearing any residual faults or irregularities that may have impeded its performance.
Upon pressing the reset button, it is essential to allow the disposal to remain idle for a few minutes, enabling the reset process to take effect. During this brief period, the disposal undergoes a recalibration of its internal components, ensuring that any underlying issues are effectively addressed and resolved. This moment of reset serves as a pivotal juncture in the maintenance of the disposal, marking the transition from troubleshooting to restoration.
As the disposal undergoes the reset process, it is important to monitor the unit for any signs of unusual noise, vibration, or irregular behavior. These indicators can provide valuable insights into the effectiveness of the reset and the overall condition of the disposal. By attentively observing the unit during this critical phase, you can ascertain whether the reset has successfully rectified any lingering issues and restored the disposal to its optimal working state.
Following the completion of the reset process, it is advisable to conduct a brief operational test to confirm the functionality of the disposal. Turn on the power supply to the disposal and activate the unit using the wall switch. Observe the disposal's performance, paying attention to its sound, responsiveness, and overall operation. This test allows you to validate the success of the reset and ensure that the disposal is functioning as intended.
By diligently executing the reset procedure and monitoring the disposal's response, you can effectively restore the unit to its optimal working condition, addressing any underlying issues and ensuring its operational efficiency. With the disposal successfully reset, you are now prepared to proceed to the final step: turning the power back on to complete the reset process and resume normal operation.
Step 5: Turn the Power Back On
After successfully resetting the garbage disposal and confirming its restored functionality, the final step in the reset process involves turning the power back on to complete the procedure and resume normal operation. This pivotal step marks the culmination of the reset process, allowing you to reintroduce electrical power to the disposal unit and verify its seamless functionality.
To turn the power back on, return to the dedicated circuit breaker in your home's electrical panel or the specific power switch designated for the disposal unit. With caution and attentiveness, switch the circuit breaker back to the "on" position or activate the power switch to restore electrical supply to the disposal. It is essential to ensure that the power is securely reconnected, creating a stable and reliable electrical source for the disposal's operation.
As the power is reinstated, take a moment to listen for any unusual sounds or observe the disposal for any signs of irregular behavior. This brief monitoring period allows you to confirm that the disposal is receiving power and operating smoothly following the reset procedure. By attentively assessing the disposal's response to the restored power, you can validate the successful completion of the reset process and the unit's readiness for regular use.
With the power safely turned back on and the disposal functioning as intended, you have effectively completed the reset process, addressing any underlying issues and restoring the unit to its optimal working condition. This proactive approach to troubleshooting and maintenance ensures that your garbage disposal is primed for continued efficiency and reliability in handling kitchen waste.
By systematically following the step-by-step process of resetting your garbage disposal and exercising caution and precision at each stage, you have demonstrated a proactive and informed approach to household maintenance. Equipped with the knowledge and techniques necessary to troubleshoot and reset your garbage disposal, you can confidently navigate similar maintenance tasks in the future, ensuring a smoothly functioning kitchen environment.
With the power safely reinstated and the disposal operating seamlessly, you have successfully completed the reset process, empowering you to enjoy the convenience and efficiency of a fully functional garbage disposal in your kitchen.
Conclusion
In conclusion, mastering the art of resetting a garbage disposal is a valuable skill that empowers homeowners to address common issues and restore functionality to this essential kitchen appliance. By diligently following the step-by-step process outlined in this guide, you have gained the knowledge and techniques necessary to troubleshoot and reset your garbage disposal with confidence and precision.
Throughout the reset process, prioritizing safety precautions and adhering to fundamental guidelines has been paramount. By turning off the power, using a hex key, clearing blockages, resetting the disposal, and turning the power back on, you have demonstrated a proactive and informed approach to maintaining your garbage disposal. These measures not only ensure a secure environment for the reset process but also contribute to the efficient and reliable operation of the disposal unit.
By understanding the significance of each step and exercising caution and attentiveness, you have successfully navigated the reset process, addressing potential blockages, irregularities, and malfunctions within the disposal. This proactive approach to troubleshooting and maintenance sets the stage for a smoothly functioning kitchen environment, allowing you to enjoy the convenience and efficiency of a fully operational garbage disposal.
As you reflect on the comprehensive process of resetting your garbage disposal, it is essential to recognize the practical skills and insights gained through this experience. By embracing the principles of safety, precision, and proactive maintenance, you have equipped yourself with the confidence and capability to tackle household maintenance tasks effectively.
Moving forward, the knowledge and techniques acquired from this guide will serve as valuable assets in your homeowner's toolkit, enabling you to address similar maintenance tasks with ease and proficiency. Whether it's troubleshooting a malfunctioning appliance or addressing common household issues, the proactive and informed approach demonstrated in resetting your garbage disposal will continue to benefit you in various aspects of home maintenance.
With the successful completion of the reset process and the restoration of your garbage disposal to its optimal working condition, you can take pride in your ability to navigate household maintenance tasks with confidence and precision. By embracing a proactive and informed approach, you have ensured the continued efficiency and reliability of your kitchen environment, setting the stage for a seamless and enjoyable culinary experience.