Home>Home and Garden>How To Remove A Garbage Disposal
Home and Garden
How To Remove A Garbage Disposal
Published: March 4, 2024
Learn how to remove a garbage disposal with our step-by-step guide. Keep your home and garden in top shape with our expert tips.
(Many of the links in this article redirect to a specific reviewed product. Your purchase of these products through affiliate links helps to generate commission for Noodls.com, at no extra cost. Learn more)
Table of Contents
- Introduction
- Step 1: Gather Necessary Tools and Materials
- Step 2: Turn Off Power to the Garbage Disposal
- Step 3: Disconnect the Drain and Electrical Connections
- Step 4: Remove the Garbage Disposal Unit
- Step 5: Install a New Drain Flange and Mounting Assembly
- Step 6: Reconnect the Drain and Electrical Connections
- Step 7: Test the New Garbage Disposal Unit
Introduction
Removing a garbage disposal may seem like a daunting task, but with the right tools and a systematic approach, it can be accomplished with relative ease. Whether you're upgrading to a new disposal unit or opting for a different kitchen setup, understanding the step-by-step process is crucial for a successful removal. This comprehensive guide will walk you through the necessary steps to safely and effectively remove a garbage disposal unit from your kitchen sink.
Before embarking on this project, it's important to gather all the essential tools and materials to ensure a smooth and efficient removal process. From turning off the power to the disposal unit to disconnecting the drain and electrical connections, each step plays a crucial role in the safe removal of the unit. Once the disposal is removed, you'll also learn how to install a new drain flange and mounting assembly, followed by reconnecting the drain and electrical connections. Finally, testing the new garbage disposal unit will ensure that everything is functioning as it should.
By following these step-by-step instructions, you can confidently tackle the task of removing a garbage disposal unit, whether for replacement or a change in kitchen setup. With a clear understanding of each step and the necessary precautions, you'll be well-equipped to complete the removal process efficiently and safely. So, roll up your sleeves and let's dive into the detailed process of removing a garbage disposal unit from your kitchen sink.
Read more: How To Reset Garbage Disposal
Step 1: Gather Necessary Tools and Materials
Before initiating the removal process, it's crucial to gather all the essential tools and materials to ensure a smooth and efficient operation. Here's a comprehensive list of items you'll need:
Tools:
- Adjustable Wrench: This versatile tool will be essential for loosening and tightening various connections during the removal process.
- Screwdriver Set: Both flathead and Phillips head screwdrivers will come in handy for removing screws and disconnecting electrical connections.
- Pliers: Having a pair of pliers will aid in gripping and maneuvering components during the disassembly.
- Plumber's Putty Knife: This tool will assist in removing the old plumber's putty and sealing materials from the sink flange.
- Bucket: Keep a bucket nearby to catch any water or debris that may come out during the removal process.
Materials:
- New Garbage Disposal Unit: If you're planning to replace the existing unit, ensure that you have the new disposal ready for installation after the removal.
- Drain Flange and Mounting Assembly: In some cases, you may need to replace these components, so it's advisable to have them on hand.
- Plumber's Putty: This will be required for creating a watertight seal when installing the new drain flange.
- Electrical Tape: Use electrical tape to secure and insulate the electrical connections during the removal process.
- Safety Gloves and Goggles: It's important to prioritize safety, so wearing gloves and goggles is recommended to protect your hands and eyes from any debris or potential hazards.
By ensuring that you have all the necessary tools and materials at your disposal, you'll be well-prepared to proceed with the subsequent steps of turning off the power, disconnecting the drain and electrical connections, and ultimately removing the garbage disposal unit from your kitchen sink. This proactive approach will contribute to a seamless and efficient removal process, setting the stage for a successful transition to the next phase of the project.
Step 2: Turn Off Power to the Garbage Disposal
The second step in removing a garbage disposal unit involves ensuring that the power supply to the unit is completely shut off. This is a critical safety measure that must be diligently followed to prevent any electrical mishaps during the removal process.
To begin, locate the circuit breaker or fuse box in your home. Typically, the garbage disposal unit is connected to a dedicated circuit, making it easier to identify the corresponding switch or fuse. However, if the disposal unit shares a circuit with other appliances, exercise caution and verify the correct circuit before proceeding.
Once you've identified the appropriate circuit, switch off the power by toggling the corresponding breaker to the "off" position or removing the fuse. It's essential to double-check that the power is indeed disconnected by attempting to turn on the disposal unit. If the unit remains inactive, you can proceed with confidence, knowing that the power supply has been effectively cut off.
In addition to deactivating the power at the circuit breaker or fuse box, it's advisable to use a voltage tester to confirm that there is no electrical current flowing to the disposal unit. This extra precaution provides an added layer of safety, ensuring that you can proceed with the removal process without any risk of electrical shock.
By diligently following these steps to turn off the power to the garbage disposal, you prioritize safety and minimize the potential for accidents during the subsequent stages of disconnection and removal. This proactive approach sets the stage for a smooth and secure removal process, laying the groundwork for the next steps in disconnecting the drain and electrical connections as you progress toward the successful removal of the disposal unit from your kitchen sink.
Step 3: Disconnect the Drain and Electrical Connections
With the power supply to the garbage disposal unit safely turned off, the next crucial step in the removal process involves disconnecting both the drain and electrical connections. This phase requires careful attention to detail and a systematic approach to ensure a smooth disassembly.
Disconnecting the Drain Connection
-
Remove the P-Trap: Begin by placing a bucket underneath the P-trap, which is the curved pipe located beneath the sink. Use a wrench to loosen the slip nuts at both ends of the P-trap, allowing any residual water and debris to drain into the bucket. Once the nuts are loosened, carefully detach the P-trap from the drain pipes.
-
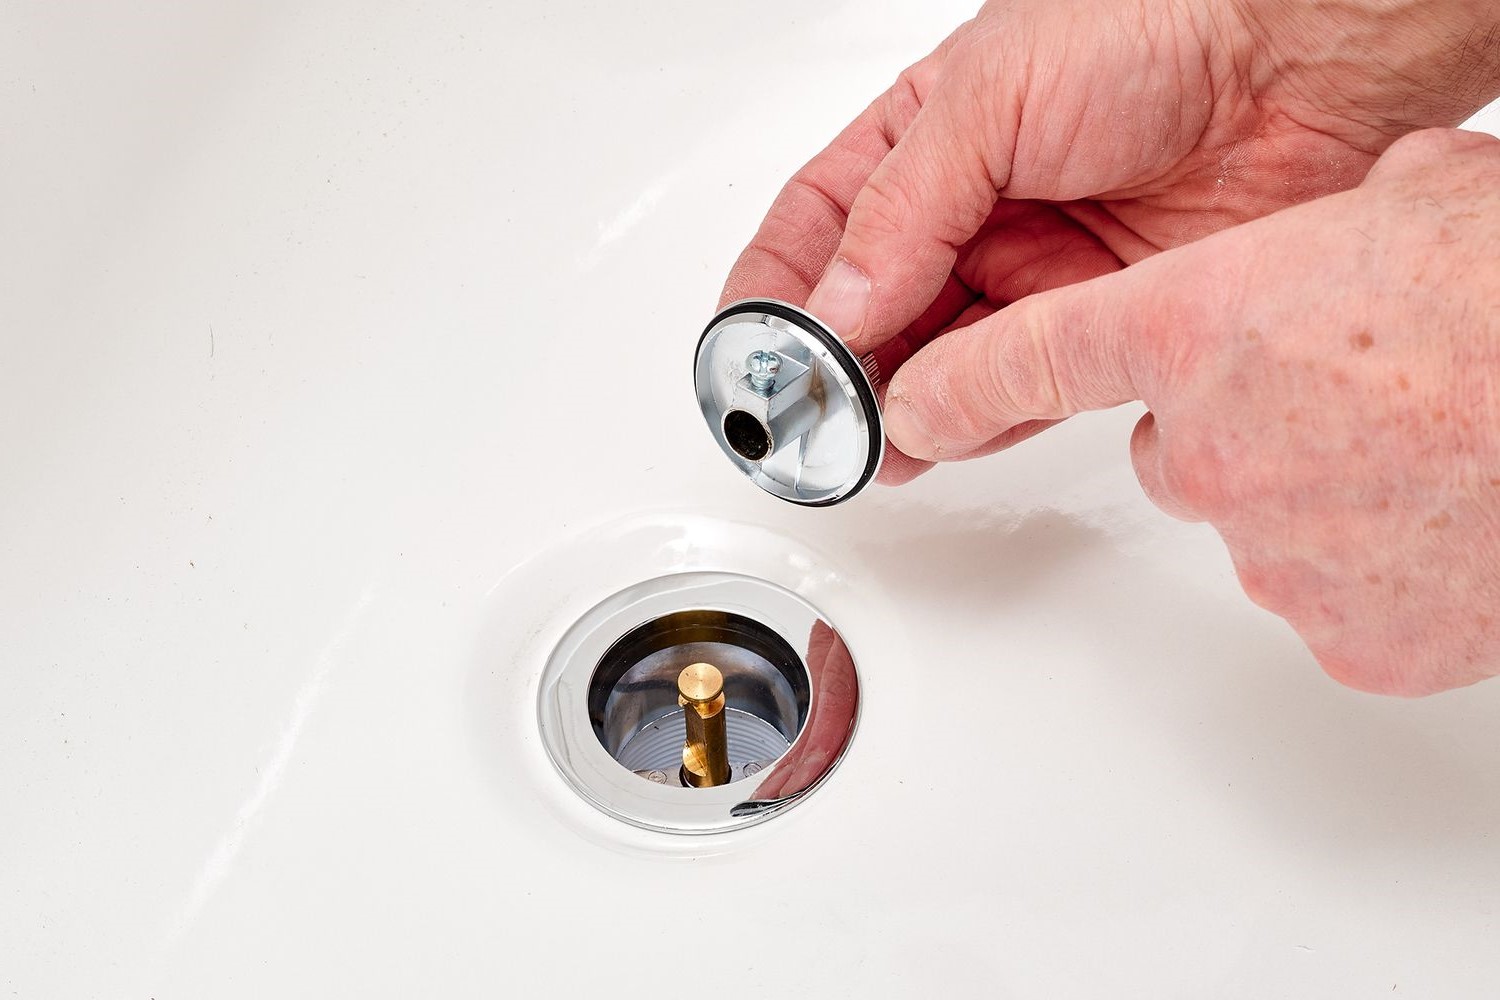
Loosen the Drain Flange: Using a screwdriver, loosen the screws securing the drain flange to the sink. Once the screws are removed, the drain flange can be carefully lifted out, freeing the disposal unit from the sink.
Disconnecting the Electrical Connections
-
Identify the Electrical Connections: Locate the electrical wiring connected to the disposal unit. These connections are typically housed within an electrical box mounted on the disposal unit or directly wired to the unit.
-
Secure the Wires: Before proceeding, use electrical tape to secure the electrical wires, ensuring that they do not accidentally fall back into the electrical box or become entangled during the disconnection process.
-
Disconnect the Wires: Carefully disconnect the electrical wires by removing the wire nuts and separating the individual wires. It's crucial to exercise caution and ensure that the wires are completely detached to avoid any electrical hazards.
By meticulously following these steps to disconnect the drain and electrical connections, you pave the way for a seamless and safe removal of the garbage disposal unit. This meticulous approach sets the stage for the subsequent steps of removing the disposal unit and preparing for the installation of a new drain flange and mounting assembly. With the drain and electrical connections successfully disconnected, you are well-positioned to proceed confidently to the next phase of the removal process, bringing you closer to the successful completion of the project.
Step 4: Remove the Garbage Disposal Unit
With the drain and electrical connections successfully disconnected, the next pivotal step in the removal process is the actual removal of the garbage disposal unit from the kitchen sink. This phase requires a methodical approach and attention to detail to ensure a smooth and efficient disassembly.
-
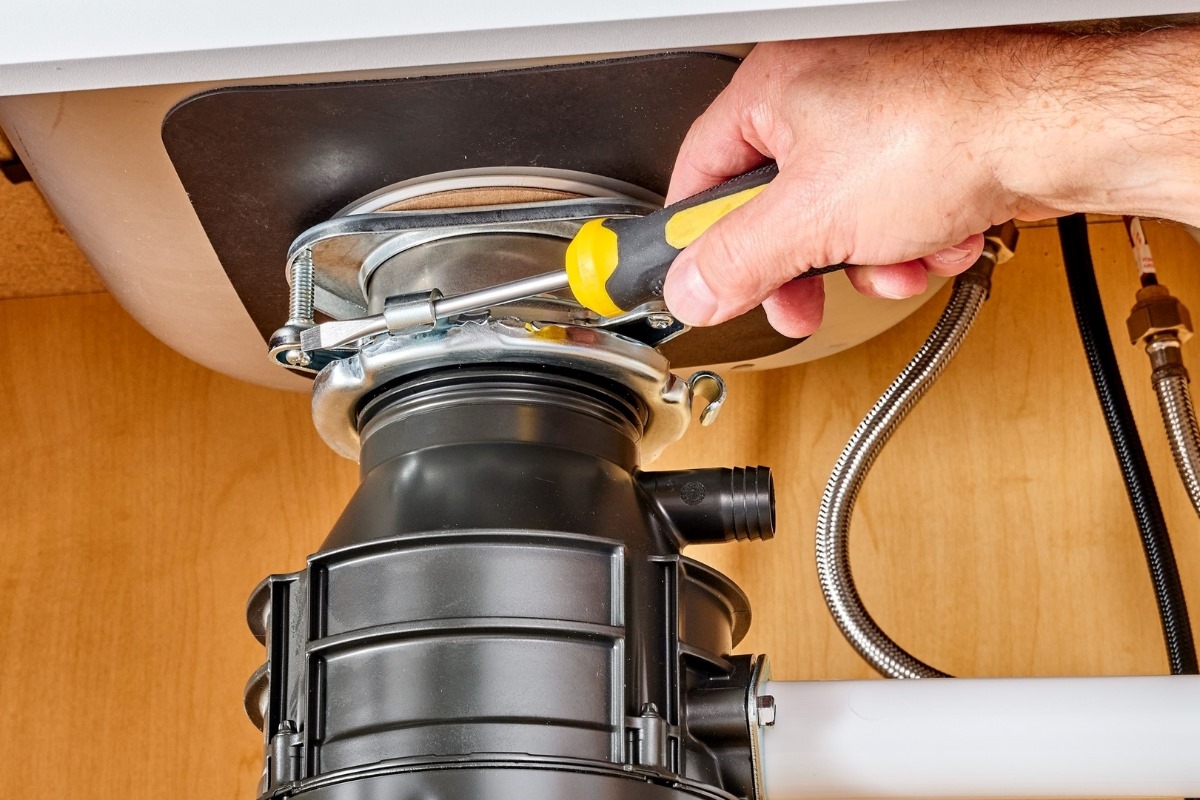
Loosen Mounting Assembly: Begin by locating the mounting assembly that secures the disposal unit to the underside of the sink. Using a screwdriver, loosen the mounting screws or release the mounting bracket, depending on the specific installation. This will free the disposal unit from its secured position, allowing for its removal.
-
Support the Disposal Unit: As the mounting assembly is loosened, it's essential to provide support for the disposal unit to prevent it from dropping suddenly. Use one hand to support the unit while gradually loosening the mounting screws or bracket with the other hand.
-
Lower the Disposal Unit: Once the mounting assembly is sufficiently loosened, carefully lower the disposal unit from the underside of the sink. Exercise caution to avoid any sudden movements that may cause damage to the surrounding plumbing or fixtures.
-
Clear the Area: As the disposal unit is lowered, ensure that the area beneath the sink is clear of any obstacles or debris. This proactive measure prevents any potential obstructions or hazards during the removal process.
-
Place the Disposal Unit in a Safe Location: After successfully removing the disposal unit from the sink, place it in a secure and designated area. This ensures that it is safely stored and out of the way, allowing for a clear workspace as you prepare for the subsequent steps of installing a new drain flange and mounting assembly.
By meticulously following these steps to remove the garbage disposal unit, you advance further in the removal process, bringing you closer to the successful completion of the project. With the disposal unit safely removed from the sink, you are well-positioned to proceed confidently to the next phase, ultimately leading to the installation of a new drain flange and the successful transition to a new disposal unit or modified kitchen setup.
Read more: How To Dispose Of A Microwave
Step 5: Install a New Drain Flange and Mounting Assembly
After successfully removing the old garbage disposal unit, the next crucial step involves installing a new drain flange and mounting assembly. This phase is essential for preparing the sink for the installation of a new disposal unit or transitioning to an alternative kitchen setup. By following a systematic approach, you can effectively install the new components, ensuring a secure and watertight connection.
Installing the Drain Flange
-
Clean the Sink Opening: Begin by thoroughly cleaning the opening in the sink where the drain flange will be installed. Remove any residual plumber's putty or debris to create a clean and smooth surface for the new flange.
-
Apply Plumber's Putty: Roll a small amount of plumber's putty into a rope-like shape and carefully press it around the underside of the new drain flange. This creates a watertight seal when the flange is installed in the sink opening.
-
Insert the Drain Flange: Gently insert the new drain flange into the sink opening, ensuring that it sits flush with the surface. Press down firmly to secure the flange in place, allowing the excess putty to squeeze out.
-
Secure the Flange: From underneath the sink, place the rubber gasket and backup ring over the flange tailpiece. Proceed to tighten the mounting ring by rotating it clockwise until the flange is firmly secured in place.
Installing the Mounting Assembly
-
Position the Mounting Ring: With the drain flange in place, position the mounting ring over the flange tailpiece. Ensure that it aligns properly and sits securely on the flange.
-
Attach the Mounting Bracket: Depending on the specific mounting assembly design, attach the mounting bracket to the underside of the sink. This component provides support for the new disposal unit and facilitates a secure installation.
-
Adjust the Mounting Screws: Adjust the mounting screws to the appropriate length, allowing for a snug fit between the disposal unit and the mounting assembly. This step ensures that the unit is securely held in place without any unnecessary movement.
By meticulously following these steps to install a new drain flange and mounting assembly, you pave the way for a successful transition to a new garbage disposal unit or modified kitchen setup. This meticulous approach sets the stage for the subsequent steps of reconnecting the drain and electrical connections, bringing you closer to the completion of the project with a secure and functional installation.
Step 6: Reconnect the Drain and Electrical Connections
With the new drain flange and mounting assembly securely in place, the next pivotal step in the process of removing a garbage disposal unit involves reconnecting both the drain and electrical connections. This phase requires a meticulous approach and attention to detail to ensure a seamless and secure reassembly.
Read more: How To Remove Blinds
Reconnecting the Drain Connection
-
Prepare the Drain Pipes: Prior to reconnecting the drain, ensure that the drain pipes are clean and free of any debris or old sealing materials. This proactive measure sets the stage for a watertight and secure connection.
-
Apply Plumber's Putty: Roll a small amount of plumber's putty into a rope-like shape and carefully apply it around the underside of the drain flange. This step is crucial for creating a watertight seal when the drain pipes are reconnected.
-
Reattach the P-Trap: Position the P-trap beneath the sink and reconnect it to the drain pipes. Use a wrench to tighten the slip nuts at both ends of the P-trap, ensuring a secure and leak-free connection.
-
Test for Leaks: Once the drain pipes are reconnected, run water through the sink to test for any leaks. This proactive measure allows you to identify and address any potential issues before proceeding to the next phase.
Reconnecting the Electrical Connections
-
Inspect the Electrical Wiring: Before reconnecting the electrical connections, carefully inspect the wiring to ensure that it is in good condition and free from any damage or wear.
-
Reconnect the Wires: Match the corresponding wires from the electrical supply to the disposal unit and use wire nuts to securely reconnect them. It's crucial to ensure that the connections are tight and insulated to prevent any electrical hazards.
-
Secure the Wires: After reconnecting the wires, use electrical tape to secure and insulate the electrical connections. This additional layer of protection ensures the safety and integrity of the electrical supply to the disposal unit.
By meticulously following these steps to reconnect the drain and electrical connections, you advance further in the reassembly process, bringing you closer to the successful completion of the project. With the drain and electrical connections securely reconnected, you are well-positioned to proceed confidently to the final phase of testing the new garbage disposal unit, ultimately leading to a functional and efficient installation.
Step 7: Test the New Garbage Disposal Unit
With the new drain flange and mounting assembly securely installed and the drain and electrical connections successfully reconnected, the final and crucial step in the process of removing a garbage disposal unit is to test the functionality of the new unit. This phase is essential for ensuring that the installation is complete and that the disposal unit operates efficiently and safely.
To test the new garbage disposal unit, follow these steps:
-
Restore Power: Begin by returning to the circuit breaker or fuse box and restoring power to the garbage disposal unit. Toggle the corresponding breaker to the "on" position or replace the fuse, effectively restoring the electrical supply to the unit.
-
Run Water: With the power restored, run water through the sink to ensure that the drain flange and connections are watertight and free from any leaks. This step allows you to verify the integrity of the drain assembly and address any potential issues promptly.
-
Activate the Disposal Unit: Turn on the new garbage disposal unit using the designated switch or button. Listen for any unusual noises or vibrations that may indicate improper installation or mechanical issues. The unit should operate smoothly and efficiently without any irregularities.
-
Test Grinding Function: Introduce small food scraps or waste into the disposal unit and activate the grinding function. Observe the unit's performance as it processes the waste, ensuring that it effectively grinds and disposes of the material without any clogging or unusual sounds.
-
Check for Leaks: While the disposal unit is operational, inspect the area beneath the sink for any signs of leaks or moisture. This visual inspection allows you to identify and address any potential leaks promptly, ensuring a secure and watertight installation.
-
Verify Electrical Safety: Throughout the testing process, pay attention to the electrical connections and the disposal unit's performance. Ensure that the electrical supply remains stable, and there are no signs of overheating or electrical malfunctions.
By meticulously following these steps to test the new garbage disposal unit, you can confidently verify the successful installation and functionality of the unit. This meticulous approach ensures that the disposal unit operates efficiently and safely, providing a reliable solution for managing kitchen waste and maintaining a clean and functional kitchen environment. With the successful completion of the testing phase, you can enjoy the benefits of a new garbage disposal unit, knowing that it has been installed with precision and attention to detail.