Home>Home and Garden>How To Remove Tub Drain
Home and Garden
How To Remove Tub Drain
Published: March 4, 2024
Learn how to remove a tub drain with our step-by-step guide. Get expert tips and tricks for easy home and garden maintenance.
(Many of the links in this article redirect to a specific reviewed product. Your purchase of these products through affiliate links helps to generate commission for Noodls.com, at no extra cost. Learn more)
Table of Contents
Introduction
Removing a tub drain may seem like a daunting task, but with the right tools and a systematic approach, it can be a manageable DIY project. Over time, tub drains can become clogged with debris, making it necessary to remove the drain for cleaning or replacement. Whether you're dealing with a stubborn clog or simply want to give your tub a thorough cleaning, understanding how to remove the tub drain is essential.
By following the step-by-step guide outlined in this article, you'll gain the confidence and knowledge needed to tackle this home maintenance task. With a few basic tools and a bit of patience, you can successfully remove the tub drain and ensure that your bathwater flows freely once again.
Understanding the anatomy of a tub drain and familiarizing yourself with the necessary tools and materials will set the stage for a successful removal process. From removing the stopper to cleaning the drain and reassembling the components, each step plays a crucial role in restoring your tub's functionality.
So, roll up your sleeves, gather your tools, and let's dive into the process of removing a tub drain. With the right guidance and a can-do attitude, you'll soon be on your way to a smoothly functioning tub and a sense of accomplishment in mastering this essential home maintenance skill.
Read more: How To Properly Remove A Hot Tub
Tools and Materials Needed
Before embarking on the task of removing a tub drain, it's essential to gather the necessary tools and materials. Having the right equipment at hand will streamline the process and ensure that you can tackle each step with confidence. Here's a comprehensive list of the tools and materials you'll need:
Tools:
- Screwdriver Set: A set of screwdrivers, including both flathead and Phillips head varieties, will be indispensable for loosening and removing screws and other fasteners.
- Needle-Nose Pliers: These long, narrow pliers are ideal for reaching into tight spaces and gripping small components, such as the crossbars or screws within the drain assembly.
- Adjustable Wrench: An adjustable wrench will enable you to loosen and remove the drain flange, providing the necessary leverage for this task.
- Plumbers' Putty Knife: This specialized tool is designed for removing old plumbers' putty from the drain flange, ensuring a clean surface for resealing during reassembly.
- Tub Drain Key: In some cases, a tub drain key may be necessary to remove the drain flange. This tool provides a secure grip on the flange, allowing for smooth extraction.
Materials:
- Replacement Gasket: If you're planning to reinstall the existing drain components, having a replacement gasket on hand will ensure a secure and watertight seal upon reassembly.
- Plumbers' Putty: This malleable, waterproof sealing compound is essential for creating a tight seal between the drain flange and the tub surface.
- Cleaning Solution: Depending on the condition of the drain components, a mild cleaning solution or vinegar may be needed to remove any accumulated grime or mineral deposits.
- Rags or Towels: Keeping a supply of clean rags or towels nearby will allow you to wipe away excess water, debris, and cleaning solution as you work on the drain.
By assembling these tools and materials before you begin, you'll be well-prepared to navigate each step of the tub drain removal process. With these essentials at your disposal, you can approach the task with confidence, knowing that you have everything needed to complete the job effectively and efficiently.
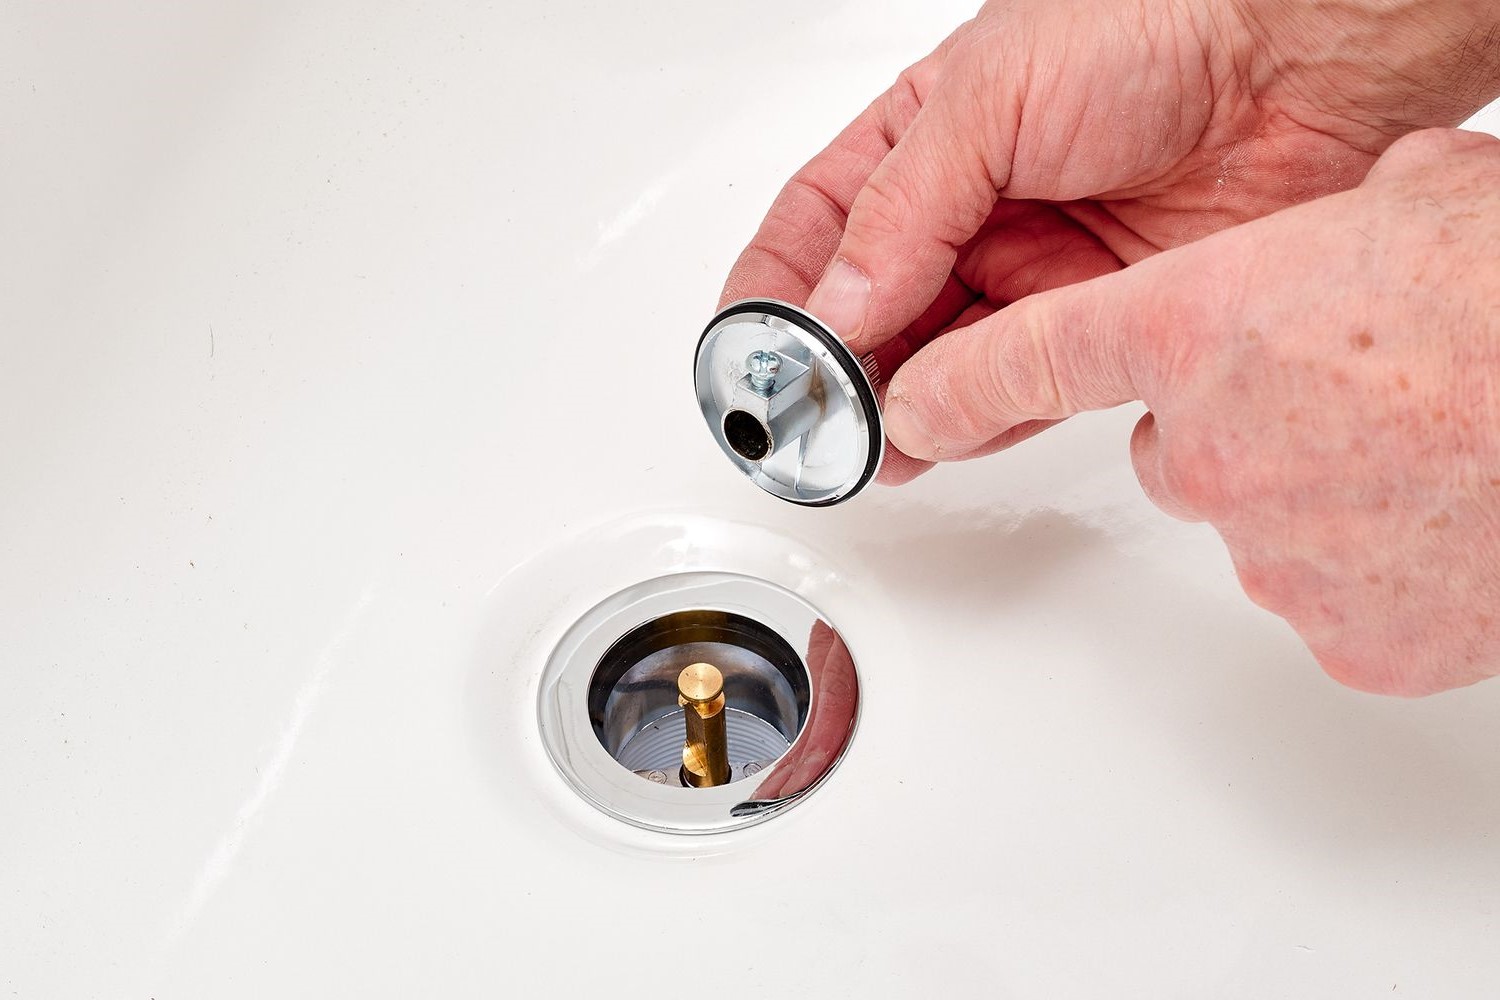
Step 1: Remove the Stopper
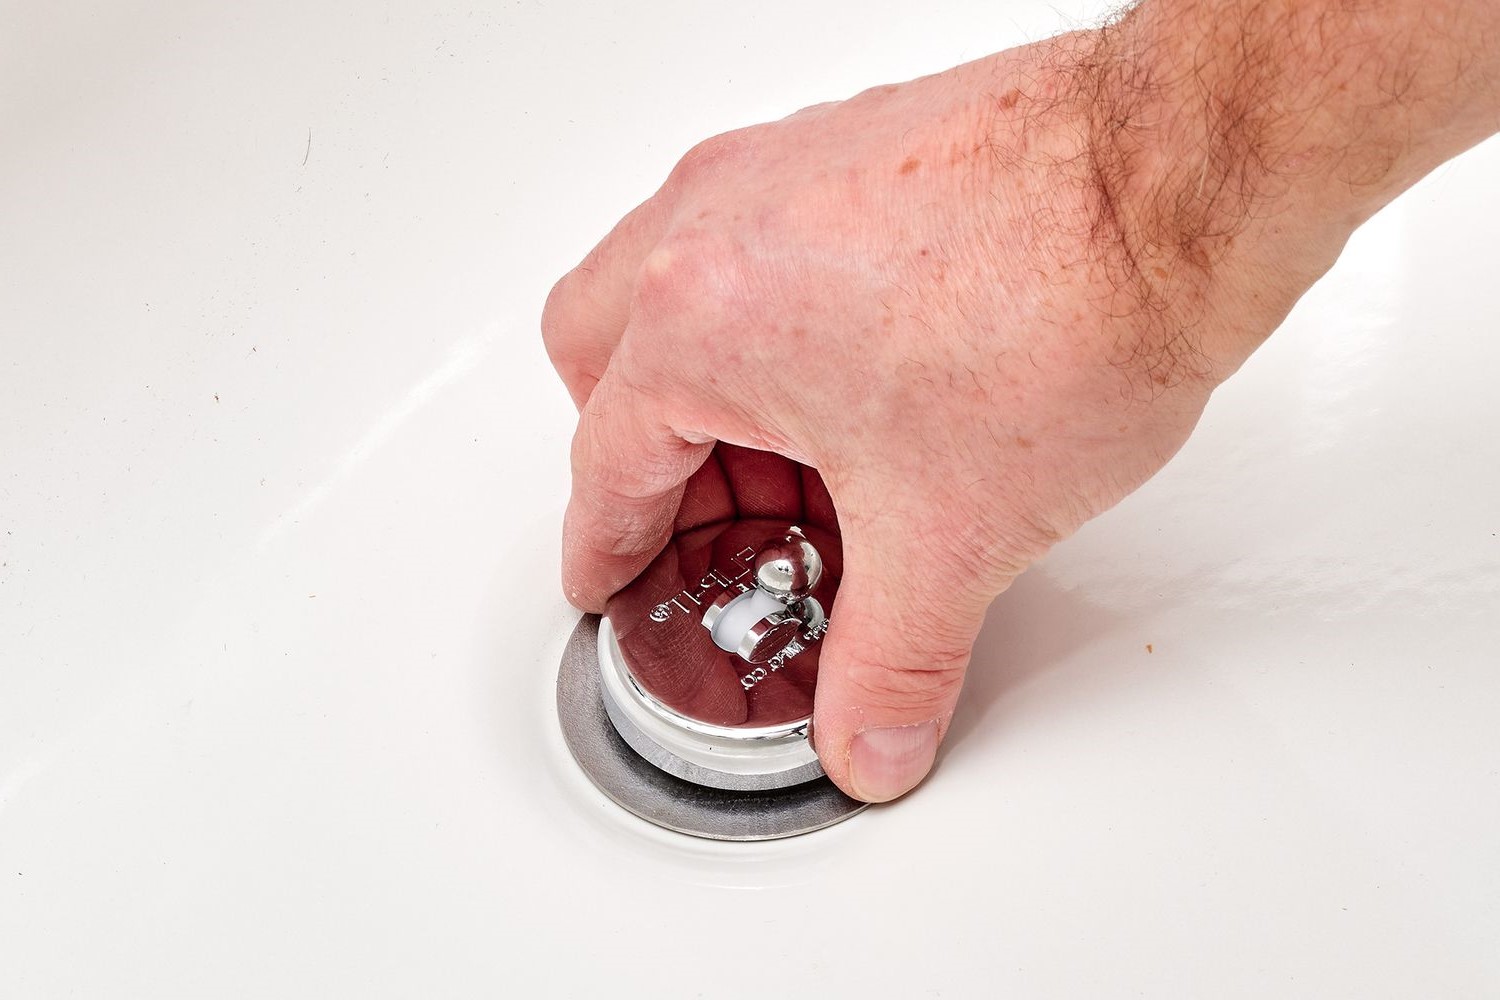
The first step in removing a tub drain involves taking out the stopper. This component, often located inside the tub, is designed to prevent water from draining out while the tub is in use. Removing the stopper is essential for gaining access to the drain assembly beneath it. Here's a detailed guide on how to accomplish this crucial first step:
-
Identify the Stopper Type: Tub stoppers come in various designs, including lift-and-turn, push-and-pull, and toe-touch styles. Each type requires a specific removal method. For lift-and-turn stoppers, you'll need to twist the stopper counterclockwise to release it. Push-and-pull stoppers can be removed by pulling them straight up, while toe-touch stoppers are typically unscrewed by twisting them counterclockwise.
-
Lift and Remove the Stopper: Once you've determined the stopper type, proceed to lift and remove it from the drain. For lift-and-turn stoppers, twist them counterclockwise until they release from the drain. Push-and-pull stoppers can be pulled straight up to disengage them, while toe-touch stoppers require a counterclockwise twisting motion to unscrew them from the drain.
-
Inspect and Clean the Stopper: After removing the stopper, take a moment to inspect it for any accumulated debris or hair that may be hindering its function. Use a mild cleaning solution and a brush to remove any buildup, ensuring that the stopper is clean and free of obstructions.
-
Set the Stopper Aside: Once the stopper is clean and free of debris, set it aside in a safe place. Keeping track of the stopper and its components will ensure that they can be easily reinstalled after the drain removal process is complete.
By successfully removing the stopper, you've completed the first critical step in the tub drain removal process. With the stopper out of the way, you can now proceed to the next phase, which involves loosening and removing the drain flange to access the underlying drain components. This methodical approach sets the stage for a smooth and effective tub drain removal process, allowing you to address any clogs or maintenance needs with confidence and precision.
Read more: How To Remove Shower Drain
Step 2: Loosen the Drain Flange
With the stopper successfully removed, the next crucial step in the tub drain removal process involves loosening the drain flange. The drain flange is the visible portion of the drain assembly located inside the tub and is typically secured in place with screws or a locking mechanism. Loosening the drain flange is essential for gaining access to the drain components beneath it. Here's a detailed guide on how to effectively loosen the drain flange:
-
Inspect the Drain Flange: Before proceeding, take a moment to inspect the drain flange. Depending on the specific design of your tub's drain assembly, the flange may feature visible screws or a locking mechanism. Understanding the configuration of the flange will inform the approach you'll take to loosen it.
-
Identify the Fastening Method: Determine whether the drain flange is secured with screws or a locking mechanism. If screws are present, they will likely be located around the perimeter of the flange. In the case of a locking mechanism, it may require a specialized tool, such as a tub drain key, to disengage it.
-
Loosen the Screws: If the drain flange is secured with screws, use an appropriate screwdriver to loosen and remove them. Carefully insert the screwdriver into the screw heads and turn counterclockwise to loosen and extract the screws. It's important to exercise caution to avoid stripping the screw heads during this process.
-
Engage the Locking Mechanism: In the case of a locking mechanism, such as a crossbar or specialized flange design, utilize the necessary tool to disengage it. A tub drain key is often employed for this purpose, providing a secure grip on the flange for controlled loosening. Follow the manufacturer's instructions for the specific tool being used to ensure proper disengagement of the locking mechanism.
-
Apply Gentle Pressure: As you work to loosen the drain flange, apply gentle and consistent pressure to gradually release it from its secured position. Avoid using excessive force, as this can potentially damage the flange or surrounding components.
By effectively loosening the drain flange, you've successfully cleared the path for the next phase of the tub drain removal process. With the flange now accessible, you can proceed to the subsequent step, which involves removing the drain flange to reveal the underlying drain components. This methodical progression ensures that each phase of the removal process is approached with precision and attention to detail, setting the stage for a successful and satisfying outcome.
Step 3: Remove the Drain Flange
With the drain flange now accessible, the next pivotal step in the tub drain removal process involves the careful extraction of the flange from its position within the tub. The drain flange serves as the visible component of the drain assembly and is essential for maintaining a secure and watertight seal. Removing the flange is crucial for gaining access to the underlying drain components and addressing any maintenance or cleaning needs. Here's a detailed guide on how to effectively remove the drain flange:
-
Detach the Drain Flange: Begin by carefully detaching the drain flange from its position within the tub. Depending on the specific design of the flange, it may require a gentle twisting motion or upward lifting to disengage it from the drain assembly. Exercise patience and precision during this step to avoid causing any damage to the flange or surrounding components.
-
Inspect for Residue: Once the drain flange is removed, take a moment to inspect the area around the drain opening for any residual plumbers' putty or sealing compound. Use a plumbers' putty knife or a similar tool to gently remove any remaining residue, ensuring that the surface is clean and free of obstructions. This preparatory step is essential for creating a smooth and secure seal during the reassembly process.
-
Clean the Drain Flange: While the drain flange is removed, take the opportunity to clean it thoroughly. Use a mild cleaning solution and a brush to remove any accumulated grime, soap scum, or mineral deposits from the flange's surface. Ensuring that the flange is clean and free of debris will contribute to a more effective resealing process and promote optimal drain functionality.
-
Inspect the Drain Components: With the drain flange removed, take a moment to inspect the underlying drain components, including the drain body and any associated gaskets or seals. This visual inspection will provide insight into the condition of the components and any potential maintenance needs. Addressing any issues at this stage will contribute to the overall effectiveness of the tub drain removal process.
-
Set Aside the Drain Flange: Once the drain flange has been removed, set it aside in a safe and designated area. Keeping track of the flange and its components will ensure that they can be easily reinstalled after any necessary maintenance or cleaning has been completed.
By methodically removing the drain flange and attending to the associated preparatory steps, you've advanced through a critical phase of the tub drain removal process. With the flange successfully extracted, you're now poised to proceed to the subsequent step, which involves cleaning the drain and reassembling the components. This systematic approach ensures that each stage of the removal process is approached with care and attention to detail, setting the stage for a successful and satisfying outcome.
Step 4: Clean the Drain and Reassemble
With the drain flange successfully removed, the next crucial step in the tub drain removal process involves cleaning the drain components and preparing for reassembly. This phase is essential for ensuring optimal functionality and longevity of the tub drain system. Here's a detailed guide on how to effectively clean the drain and reassemble the components:
Clean the Drain Components
-
Inspect the Drain Body: Begin by inspecting the drain body and surrounding components for any accumulated debris, mineral deposits, or residue. Use a flashlight to illuminate the area and visually assess the condition of the drain components.
-
Remove Debris and Buildup: Utilize a combination of a cleaning solution and a brush to remove any debris, hair, or soap scum from the drain body and associated components. Pay particular attention to the drain opening and the internal surfaces to ensure thorough cleaning.
-
Address Mineral Deposits: If mineral deposits are present, consider using a mild acidic solution, such as vinegar, to dissolve and remove the buildup. Allow the solution to sit for a brief period before gently scrubbing the affected areas to dislodge the deposits.
-
Rinse and Dry: Once the cleaning process is complete, thoroughly rinse the drain components with water to remove any residual cleaning solution. Use a clean rag or towel to dry the surfaces, ensuring that the drain body and surrounding areas are free of moisture.
Read more: How To Unclog A Washer Drain
Reassemble the Components
-
Apply Plumbers' Putty: If a new gasket or plumbers' putty is required for resealing the drain flange, apply a uniform bead of plumbers' putty around the underside of the flange. This step is essential for creating a watertight seal between the flange and the tub surface.
-
Position the Drain Flange: Carefully position the clean and prepared drain flange over the drain body, ensuring that it aligns properly with the drain opening. Apply gentle pressure to seat the flange securely in place, taking care not to displace the plumbers' putty during this process.
-
Secure the Flange: If the drain flange is secured with screws, carefully insert and tighten them using an appropriate screwdriver. Exercise caution to avoid overtightening the screws, as this can potentially damage the flange or compromise the seal.
-
Inspect and Test: Once the drain flange is reassembled, visually inspect the area for any signs of excess plumbers' putty or misalignment. Test the reassembled drain by running water and checking for any leaks or seepage around the flange.
By meticulously cleaning the drain components and reassembling the drain flange, you've completed the final phase of the tub drain removal process. This thorough approach ensures that the drain system is clean, properly sealed, and ready for reliable functionality. With the reassembly process successfully executed, you can take pride in mastering this essential home maintenance task and enjoy the satisfaction of a smoothly functioning tub drain.