Home>Home and Garden>How To Repair Drywall

Home and Garden
How To Repair Drywall
Published: March 4, 2024
Learn how to repair drywall with our step-by-step guide. Get expert tips and tricks for fixing drywall in your home and garden.
(Many of the links in this article redirect to a specific reviewed product. Your purchase of these products through affiliate links helps to generate commission for Noodls.com, at no extra cost. Learn more)
Table of Contents
Introduction
Repairing drywall is a common home maintenance task that can be easily accomplished with the right tools and a bit of know-how. Whether your drywall has suffered a small dent, a large hole, or a crack, knowing how to repair it can save you time and money. By following a few simple steps, you can restore your wall to its former glory and maintain the aesthetic appeal of your home.
Drywall, also known as gypsum board or wallboard, is a popular building material used to create interior walls and ceilings. It is durable and relatively easy to install, but it is not impervious to damage. Accidents happen, and over time, wear and tear can take a toll on your walls. From accidental impacts to settling foundations, there are numerous factors that can lead to drywall damage.
Understanding how to repair drywall is a valuable skill for any homeowner. It not only helps maintain the appearance of your home but also prevents further damage that could lead to more extensive and costly repairs down the line. By addressing drywall issues promptly, you can preserve the structural integrity of your walls and ensure that your living space remains comfortable and visually appealing.
In this comprehensive guide, we will walk you through the step-by-step process of repairing drywall. From assessing the damage to applying joint compound, sanding, priming, and painting, we will cover everything you need to know to tackle this common home improvement task. By the end of this guide, you will have the knowledge and confidence to repair drywall like a pro, restoring the beauty of your walls and maintaining the value of your home. So, roll up your sleeves and let's get started on this rewarding DIY journey!
Read more: How To Repair An Oil Leak
Tools and Materials Needed
Repairing drywall requires a specific set of tools and materials to ensure a successful outcome. Before embarking on this project, it's essential to gather the following items:
Tools:
- Utility Knife: A sharp utility knife is essential for cutting and shaping drywall.
- Putty Knife: Used for applying joint compound and smoothing the surface of the repair.
- Drywall Saw or Keyhole Saw: These saws are designed for cutting through drywall to create clean openings for repairs.
- Sanding Block or Sandpaper: To smooth the joint compound and prepare the surface for painting.
- Tape Measure: Precise measurements are crucial for accurately cutting replacement drywall or patching materials.
- T-Square or Ruler: Ensures straight and accurate cuts when working with drywall.
- Drywall Trowel: Used for applying joint compound to larger areas and achieving a smooth finish.
- Drywall Screws and Screwdriver: Necessary for securing new drywall patches or securing loose drywall.
- Mud Pan: A shallow, flat-bottomed container used for holding joint compound during application.
- Drywall Joint Tape: Self-adhesive mesh tape used to reinforce seams and prevent cracking.
- Paintbrushes and Rollers: Essential for priming and painting the repaired area.
Materials:
- Drywall Joint Compound: Also known as "mud," this is used to fill and cover the seams and fastener heads.
- Drywall Patch or Replacement Piece: Depending on the extent of the damage, you may need a small patch or a larger piece of drywall.
- Primer: Helps to seal the repaired area and ensure proper adhesion of the paint.
- Paint: Choose a paint that matches the existing wall color for a seamless finish.
- Drywall Screws: If replacing or securing loose drywall, ensure you have an adequate supply of screws.
- Sandpaper: Various grits may be needed for smoothing the joint compound and preparing the surface for painting.
- Dust Mask and Safety Glasses: Essential for protecting yourself from dust and debris during the repair process.
- Drop Cloth or Plastic Sheeting: To protect the surrounding area from dust, debris, and paint splatter.
- Painter's Tape: Use to mask off areas that you don't want to paint, such as baseboards or trim.
By ensuring you have these tools and materials on hand, you'll be well-prepared to tackle the task of repairing your drywall effectively and efficiently.
Assessing the Damage
Before diving into the repair process, it's crucial to thoroughly assess the extent of the damage to the drywall. This initial step sets the stage for a successful repair, ensuring that the appropriate techniques and materials are employed to restore the wall to its original condition.
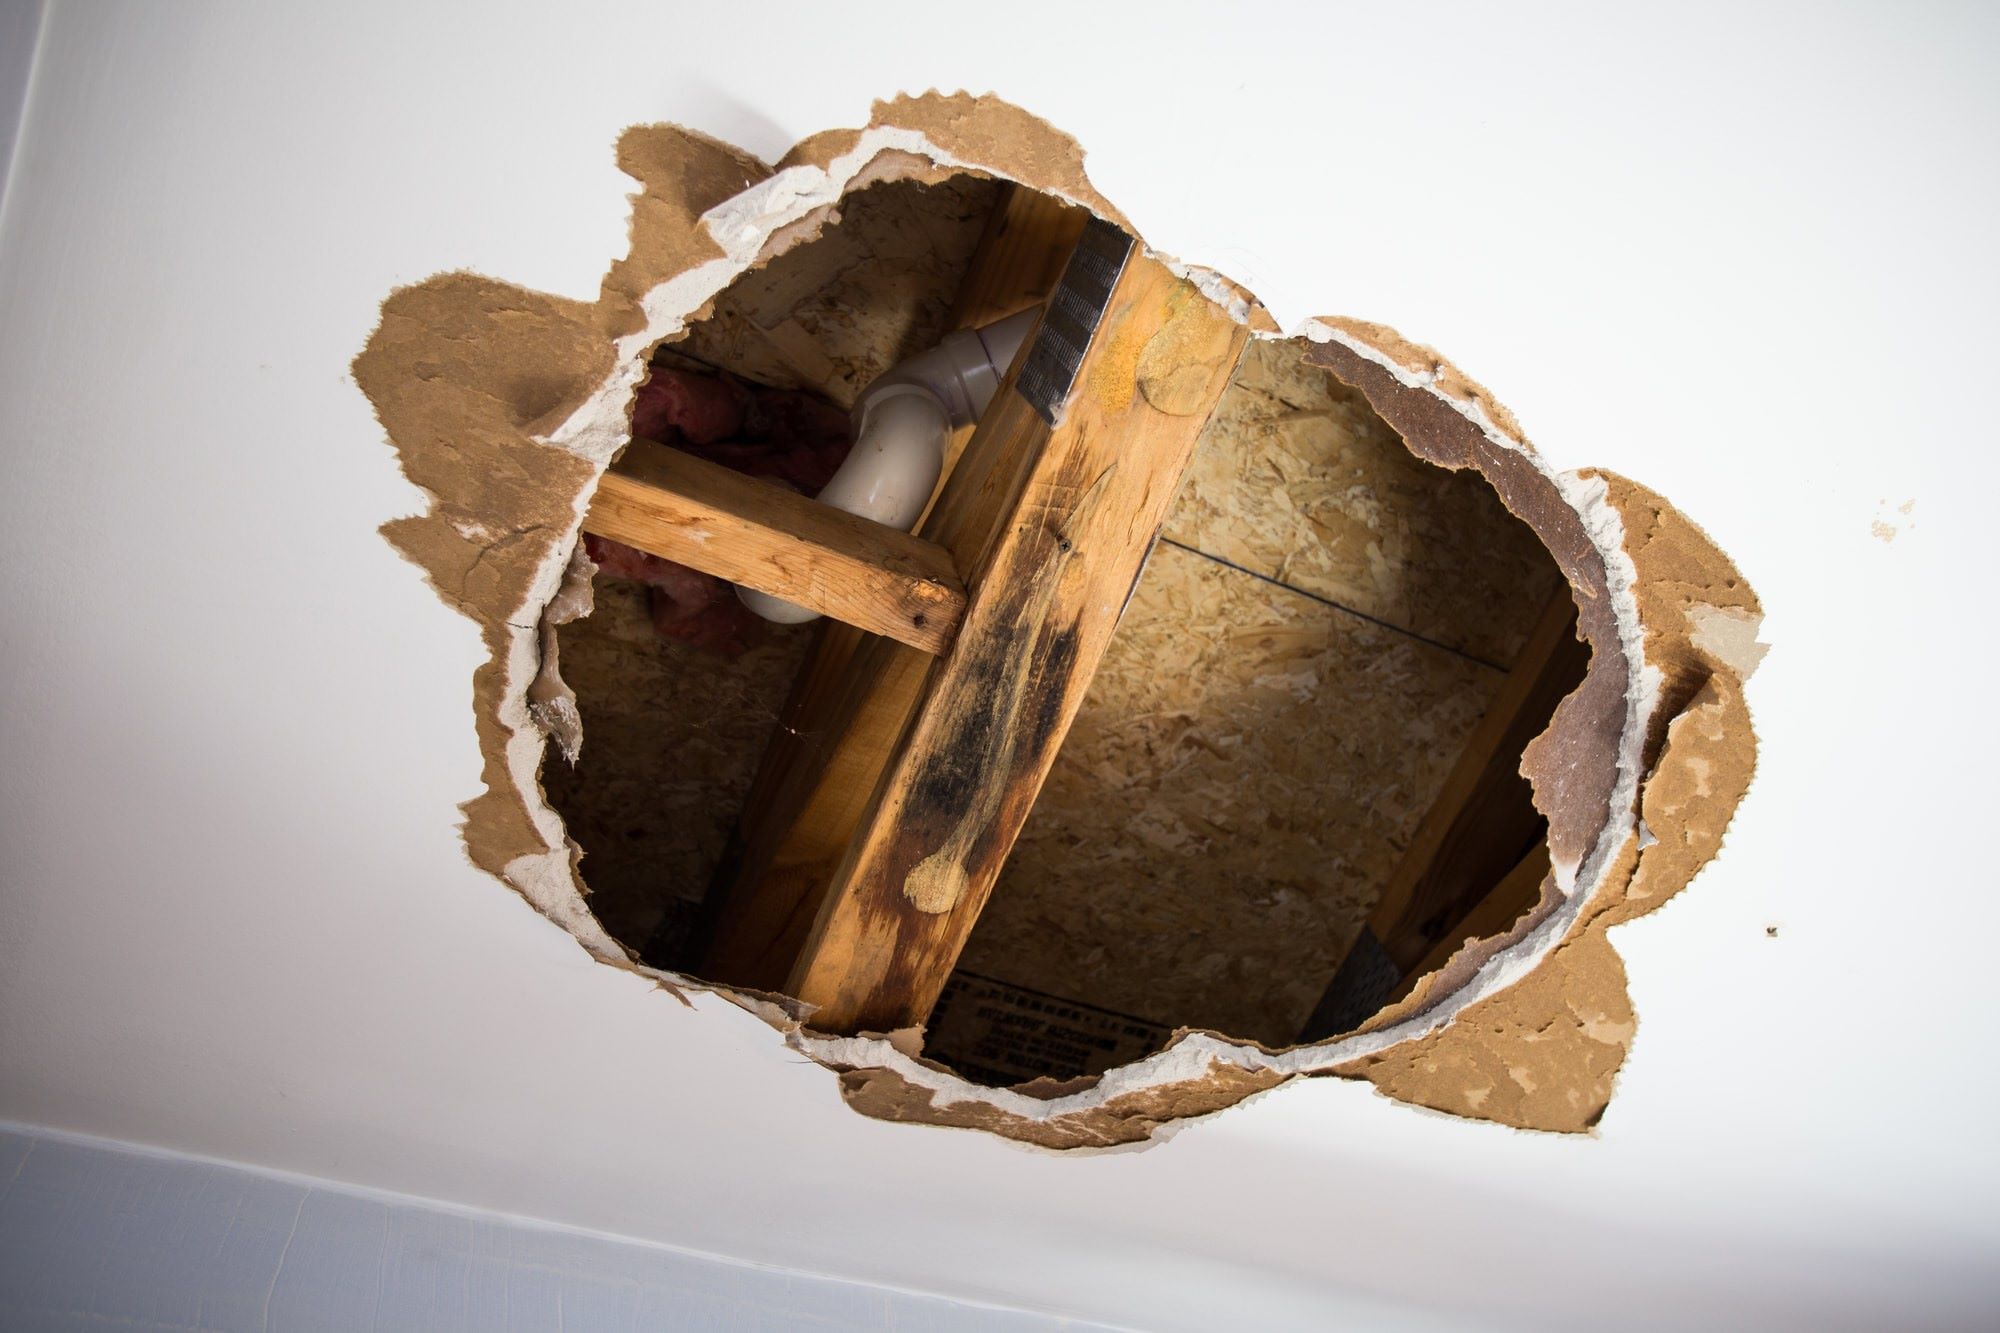
Begin by closely examining the damaged area. Look for visible signs of impact, such as dents, holes, or cracks. It's essential to determine the size and nature of the damage, as this will dictate the specific repair approach. Small nail holes or minor dents may require a different repair method than larger holes or extensive cracks.
Next, assess the structural integrity of the drywall. Determine if the damage has compromised the stability of the wall. For example, if there is a large hole or extensive cracking, it's important to ensure that the surrounding drywall is still securely attached and not at risk of further damage.
Consider the location of the damage. Is it in a high-traffic area where the wall is more susceptible to future impacts? Understanding the location of the damage can help in implementing preventive measures to reinforce the repaired area and minimize the risk of future issues.
Additionally, take note of any existing paint or texture on the wall. If the damaged area has a textured finish, matching the texture during the repair process will be essential to seamlessly blend the repaired section with the surrounding wall.
Assessing the damage also involves identifying the cause of the issue. Whether it's the result of accidental impact, moisture damage, or structural settling, understanding the underlying cause can help prevent similar damage in the future.
Finally, consider the time and effort required for the repair based on the assessed damage. Small cosmetic repairs may be relatively quick and straightforward, while larger or more complex damage will necessitate a more comprehensive repair approach.
By thoroughly assessing the damage, you'll be equipped with the necessary information to proceed with the most effective and appropriate repair techniques, ensuring a successful outcome and a seamlessly restored wall.
Preparing the Area
Before diving into the actual repair work, it's crucial to prepare the surrounding area to ensure a smooth and efficient process. Proper preparation not only facilitates the repair but also minimizes the potential for mess and damage to adjacent surfaces. Here's a detailed guide on how to prepare the area for your drywall repair project:
Clear the Workspace
Begin by removing any furniture, decorations, or objects near the damaged area. Clearing the workspace provides ample room to maneuver and work comfortably. Additionally, it prevents these items from being accidentally damaged or accumulating dust and debris during the repair process.
Protect the Surrounding Area
Cover the floor and any remaining furniture with a drop cloth or plastic sheeting to safeguard them from dust, joint compound, and paint splatter. This protective measure ensures that your floors and belongings remain clean and unscathed throughout the repair process.
Remove Loose Debris
If the damaged area has loose debris, such as crumbled drywall or protruding edges, carefully remove these using a utility knife or sandpaper. Smoothing out the edges and removing loose material creates a clean surface for the repair and prevents any irregularities from affecting the final result.
Secure Loose Drywall
Inspect the surrounding drywall for any loose or protruding sections. If any areas are not securely attached, use drywall screws to reattach and stabilize the existing drywall. This step is essential for ensuring a solid foundation for the repair and preventing future issues.
Mask Off Adjacent Surfaces
Use painter's tape to mask off adjacent surfaces, such as baseboards, trim, or adjacent walls, that you want to protect from joint compound and paint. This precise masking ensures that the repair work remains contained to the targeted area, preventing unintentional damage to surrounding surfaces.
Gather Necessary Tools and Materials
Ensure that all the required tools and materials for the repair are within reach. Having everything readily available saves time and minimizes disruptions during the repair process. It's also helpful to organize the tools and materials in a designated area near the workspace for easy access.
By meticulously preparing the area before commencing the repair work, you set the stage for a successful and efficient drywall repair. This thoughtful preparation not only streamlines the process but also contributes to a clean and professional outcome, ensuring that your repaired wall seamlessly blends with its surroundings.
Applying the Joint Compound
Applying joint compound is a critical step in the process of repairing drywall. Also known as "mud," joint compound is a versatile material that fills gaps, covers seams, and creates a smooth surface for painting. Here's a detailed guide on how to effectively apply joint compound to achieve a seamless and professional-looking repair:
Step 1: Prepare the Joint Compound
Begin by opening the container of joint compound and thoroughly stirring it to achieve a smooth, consistent texture. If the compound appears too thick, you can add a small amount of water and mix it until you reach the desired consistency. It's important to ensure that the joint compound is free of lumps and easy to spread.
Step 2: Apply the First Coat
Using a putty knife or drywall trowel, scoop a generous amount of joint compound onto the blade. Starting from the center of the damaged area, apply the compound over the seams, cracks, or holes in a smooth, even layer. The goal is to completely cover the damaged area while feathering the edges to seamlessly blend with the surrounding wall. For larger repairs, consider using a wider trowel to achieve a more uniform application.
Step 3: Embed Joint Tape (If Necessary)
If the repair involves a seam or crack, apply self-adhesive drywall joint tape over the wet joint compound. Gently press the tape into the compound, ensuring that it adheres firmly and lies flat along the seam. This tape reinforces the repair, preventing future cracking, and provides additional support for the joint compound.
Step 4: Apply Subsequent Coats
For larger repairs or areas with significant damage, multiple coats of joint compound may be necessary. Allow each coat to dry completely before applying the next. After the initial coat has dried, use a fine-grit sanding block to lightly smooth any imperfections before applying subsequent coats. Each layer should be progressively wider than the previous one, gradually blending the repair into the surrounding wall.
Step 5: Feather and Blend
As you apply each coat of joint compound, focus on feathering the edges to create a seamless transition between the repair and the existing wall. Feathering involves gradually thinning out the compound toward the edges, ensuring that there are no visible ridges or bumps. This technique is crucial for achieving a smooth and imperceptible repair.
Step 6: Allow for Drying Time
After the final coat of joint compound has been applied and smoothed, allow ample time for it to dry completely. Drying times can vary based on the compound used and environmental conditions. It's essential to ensure that the compound is fully dry before proceeding to the next step to avoid compromising the integrity of the repair.
By following these detailed steps, you can effectively apply joint compound to repair drywall, achieving a flawless finish that seamlessly blends with the surrounding wall. The application of joint compound is a crucial stage in the repair process, setting the foundation for a successful restoration of your drywall.
Sanding and Smoothing
Sanding and smoothing the joint compound is a pivotal stage in the drywall repair process, as it refines the surface, eliminates imperfections, and prepares the area for priming and painting. This meticulous step ensures that the repaired section seamlessly integrates with the existing wall, creating a uniform and professional finish. Here's a comprehensive guide on how to effectively sand and smooth the joint compound to achieve a flawless result:
Step 1: Select the Right Sandpaper
Begin by choosing the appropriate sandpaper for the job. For initial sanding of the dried joint compound, opt for a medium-grit sandpaper, such as 120-grit, to gently smooth out any ridges or uneven areas. As the repair progresses, transition to a finer-grit sandpaper, such as 220-grit, for a smoother and more refined finish. It's essential to use a sanding block or sanding sponge to maintain a flat and even surface during the sanding process.
Step 2: Sand with Light Pressure
When sanding the joint compound, apply light and even pressure to the sandpaper. Use long, smooth strokes to gradually level the repaired area and blend it with the surrounding wall. Avoid applying excessive pressure, as this can result in over-sanding and compromise the integrity of the repair. The goal is to achieve a seamless transition between the joint compound and the existing wall, ensuring that no visible discrepancies remain.
Step 3: Check for Smoothness
Periodically stop and run your hand over the sanded area to assess its smoothness. This tactile evaluation allows you to detect any remaining imperfections or rough patches that require further attention. By feeling the surface, you can identify areas that may need additional sanding to achieve the desired level of smoothness and uniformity.
Step 4: Feather the Edges
Pay particular attention to feathering the edges of the repaired section. Feathering involves gently tapering the joint compound toward the surrounding wall, ensuring that there are no abrupt transitions or visible edges. This technique creates a seamless blend between the repair and the existing wall, resulting in a virtually indistinguishable finish.
Step 5: Clean the Area
After sanding, use a clean, dry cloth or a vacuum with a brush attachment to remove the dust and debris generated during the sanding process. It's crucial to thoroughly clean the area to prepare it for priming and painting, ensuring that the surface is free of any residual particles that could affect the final finish.
By meticulously following these steps, you can effectively sand and smooth the joint compound, achieving a flawlessly refined surface that seamlessly integrates with the existing wall. This meticulous attention to detail sets the stage for a successful priming and painting process, ensuring that your repaired drywall exhibits a professional and visually appealing result.
Priming and Painting
Priming and painting are the final steps in the drywall repair process, culminating in the restoration of the wall's aesthetic appeal and structural integrity. These crucial stages not only provide a protective finish but also ensure that the repaired area seamlessly blends with the surrounding wall, creating a cohesive and professional appearance.
Step 1: Apply Primer
Before painting, it is essential to apply a high-quality primer to the repaired area. The primer serves multiple purposes, including sealing the joint compound, promoting adhesion of the paint, and providing an even base for the final coat. Using a paintbrush or roller, apply a uniform coat of primer over the entire repaired section, extending slightly beyond the edges to ensure seamless integration with the existing wall. Allow the primer to dry completely according to the manufacturer's instructions before proceeding to the next step.
Step 2: Choose the Right Paint
Selecting the appropriate paint is crucial for achieving a seamless finish. Choose a paint color and finish that closely match the existing wall. It's advisable to use the same type of paint that was originally applied to the wall to ensure consistency. Consider factors such as sheen, durability, and washability when choosing the paint, especially for high-traffic areas.
Step 3: Apply the Paint
Once the primer has dried, it's time to apply the paint. Using a high-quality paintbrush or roller, carefully apply an even coat of paint over the primed area. Feather the edges to seamlessly blend the paint with the surrounding wall, ensuring a uniform finish. Depending on the color and coverage, additional coats may be necessary to achieve the desired result. Allow each coat to dry completely before applying subsequent layers.
Step 4: Evaluate the Finish
After the final coat of paint has been applied and dried, evaluate the finish to ensure that it seamlessly integrates with the existing wall. Check for uniform coverage, smoothness, and color consistency. Inspect the repaired area from different angles and under various lighting conditions to identify any imperfections that may require touch-ups.
Step 5: Final Touches and Clean Up
Once the paint has fully dried and the desired finish has been achieved, perform any necessary final touches, such as minor touch-ups or blending the repaired area with the surrounding wall texture. Clean up the workspace by removing any protective coverings and ensuring that the area is free of dust and debris.
By meticulously following these steps, you can effectively prime and paint the repaired drywall, achieving a seamless and professional finish that restores the wall to its original beauty. These final stages of the repair process not only enhance the visual appeal of your home but also provide long-lasting protection for the repaired area, ensuring that your walls remain pristine and visually captivating.
Final Touches and Clean Up
After completing the priming and painting process, attention to final touches and meticulous clean up is essential to ensure a seamless and professional outcome for your drywall repair project. This stage not only adds the finishing touches to the repaired area but also contributes to a clean and polished overall appearance of the wall.
Begin by carefully inspecting the painted surface to identify any imperfections or areas that may require touch-ups. Use a keen eye to assess the uniformity of the paint application, ensuring that the repaired section seamlessly blends with the surrounding wall. Address any inconsistencies or blemishes by carefully applying additional paint as needed, feathering the edges to achieve a flawless finish.
If the repaired area had a textured finish, it's crucial to replicate the texture to seamlessly integrate the repair with the existing wall. Depending on the original texture, this may involve using specialized texturing tools or techniques to match the surrounding surface. By meticulously recreating the texture, you can ensure that the repaired section harmonizes with the rest of the wall, creating a cohesive and visually appealing result.
Once the final touches have been completed, shift your focus to the clean-up process. Begin by removing any protective coverings, such as drop cloths or plastic sheeting, from the surrounding area. Carefully fold or roll these coverings to contain any dust or debris and dispose of them responsibly. Use a vacuum with a brush attachment to remove any residual dust or particles from the floor and nearby surfaces, ensuring that the area is left clean and free of any repair-related remnants.
Inspect the workspace for any stray paint drips or splatters, and use a damp cloth or sponge to gently remove these imperfections from adjacent surfaces. Pay particular attention to baseboards, trim, and nearby walls to ensure that they remain pristine and unaffected by the repair process. By meticulously cleaning up any stray paint, you can maintain the overall cleanliness and visual appeal of the surrounding area.
Finally, take a moment to admire your handiwork and appreciate the transformation of the repaired drywall. By focusing on the final touches and conducting a thorough clean-up, you can ensure that the repaired area seamlessly integrates with the existing wall, creating a flawless and professional finish that enhances the overall aesthetic of your living space.
