Home>Home and Garden>How To Remove Vinyl Flooring
Home and Garden
How To Remove Vinyl Flooring
Published: March 4, 2024
Learn how to remove vinyl flooring with our step-by-step guide. Get expert tips for a successful home and garden project.
(Many of the links in this article redirect to a specific reviewed product. Your purchase of these products through affiliate links helps to generate commission for Noodls.com, at no extra cost. Learn more)
Table of Contents
Introduction
Removing vinyl flooring can be a daunting task, but with the right tools, materials, and know-how, it can be a manageable and rewarding project. Whether you're renovating your home or simply updating the flooring, knowing how to remove vinyl flooring properly is essential to ensure a smooth and successful process.
Vinyl flooring is a popular choice for many homeowners due to its durability, water resistance, and easy maintenance. However, over time, it may become worn, outdated, or damaged, prompting the need for removal. Additionally, if you're planning to install new flooring, removing the old vinyl is a crucial first step to ensure a clean and level surface for the new installation.
In this comprehensive guide, we will walk you through the step-by-step process of removing vinyl flooring, from gathering the necessary tools and materials to cleaning up and disposing of the old flooring. By following these instructions, you can tackle this project with confidence and achieve professional-looking results.
Whether you're a seasoned DIY enthusiast or a novice homeowner looking to take on your first flooring project, this guide will equip you with the knowledge and skills needed to tackle the task effectively. So, roll up your sleeves, put on your work gloves, and let's dive into the process of removing vinyl flooring to transform your space and breathe new life into your home.
Read more: How To Cut Vinyl Flooring
Step 1: Gather the necessary tools and materials
Before embarking on the task of removing vinyl flooring, it's essential to gather the right tools and materials to ensure a smooth and efficient process. Here's a comprehensive list of what you'll need:
Tools:
- Utility Knife: A sharp utility knife will be your primary tool for cutting and scoring the vinyl flooring, allowing for precise and controlled removal.
- Pry Bar: This tool will come in handy for lifting and prying up the vinyl flooring, especially in areas where it may be firmly adhered to the subfloor.
- Heat Gun or Hair Dryer: Applying heat to the vinyl flooring can help loosen the adhesive, making it easier to remove. A heat gun or hair dryer can serve this purpose effectively.
- Floor Scraper: A sturdy floor scraper will aid in lifting and scraping away the vinyl flooring and any residual adhesive.
- Safety Gear: It's crucial to prioritize safety, so be sure to have protective gear such as work gloves, safety goggles, and a dust mask to shield yourself from debris and fumes.
Materials:
- Floor Adhesive Remover: If the vinyl flooring is strongly bonded to the subfloor, a quality adhesive remover can help dissolve the adhesive, facilitating easier removal.
- Trash Bags: Have a supply of heavy-duty trash bags on hand to dispose of the removed vinyl flooring and any debris.
- Drop Cloth or Tarp: To protect the surrounding area from dust, debris, and potential damage, lay down a drop cloth or tarp before starting the removal process.
- Cleaning Supplies: Once the vinyl flooring is removed, you'll need cleaning supplies such as a broom, dustpan, and a suitable floor cleaner to prepare the subfloor for any subsequent flooring installation.
By ensuring that you have all the necessary tools and materials at your disposal, you'll be well-prepared to tackle the task of removing vinyl flooring effectively and efficiently. With these essentials in hand, you can proceed to the next steps with confidence, knowing that you have everything you need to achieve successful results.
Step 2: Prepare the work area
Preparing the work area is a crucial preliminary step before diving into the process of removing vinyl flooring. By taking the time to set the stage for the task at hand, you can minimize potential hazards, protect surrounding surfaces, and create an organized environment for a smoother removal process.
Read more: How To Remove Iron On Vinyl
Clear the Space
Begin by clearing the room of any furniture, appliances, or obstacles that may impede your ability to maneuver and work effectively. This includes removing rugs, chairs, tables, and any other items that are situated on the vinyl flooring. Clearing the space not only provides you with ample room to work but also reduces the risk of accidents and damage to belongings during the removal process.
Protect Surrounding Surfaces
Vinyl flooring removal can generate dust, debris, and adhesive residue, which may inadvertently spread to adjacent surfaces. To safeguard walls, baseboards, and other flooring materials from potential damage, it's advisable to apply painter's tape or masking tape along the edges where the vinyl flooring meets these surfaces. Additionally, laying down a drop cloth or tarp in adjacent rooms can prevent debris from spreading and simplify the cleanup process.
Ventilate the Area
As you prepare to remove the vinyl flooring, adequate ventilation is essential to disperse any fumes or airborne particles that may arise during the process. Open windows and doors to promote air circulation, and consider using fans to further enhance ventilation. If the removal involves the use of adhesive removers or heat guns, proper ventilation is crucial to ensure a safe and comfortable work environment.
Inspect and Address Subfloor Issues
Before proceeding with the removal, take a moment to inspect the subfloor beneath the vinyl flooring. Look for any signs of damage, moisture, or irregularities that may need attention. Addressing subfloor issues at this stage can prevent complications during the subsequent flooring installation. If you encounter moisture or significant damage, it's advisable to consult a professional to assess and address these concerns before proceeding.
Read more: How To Relax Pelvic Floor Muscles
Organize Tools and Materials
Having all the necessary tools and materials within reach can streamline the removal process and minimize disruptions. Organize your tools and materials in the work area, ensuring easy access when needed. This proactive approach can save time and effort, allowing you to focus on the task at hand without unnecessary interruptions.
By meticulously preparing the work area, you can set the stage for a successful vinyl flooring removal project. Taking these preparatory steps demonstrates foresight and attention to detail, laying the foundation for a smooth and efficient removal process. With the work area primed and ready, you're now poised to move on to the next phase of removing the vinyl flooring and revitalizing your space.
Step 3: Start removing the vinyl flooring
With the work area meticulously prepared and all the necessary tools and materials at your disposal, it's time to embark on the process of removing the vinyl flooring. This step-by-step guide will walk you through the methods for effectively and efficiently removing the vinyl flooring from your space.
1. Begin at the Edge
Start by locating a corner or an edge of the vinyl flooring. Using a utility knife, carefully score the vinyl along the edge to create a clean cut. This initial incision will allow you to lift and peel back the vinyl, initiating the removal process.
2. Apply Heat (If Necessary)
In cases where the vinyl flooring is strongly adhered to the subfloor, applying heat can help soften the adhesive, making it easier to lift and remove the flooring. Use a heat gun or a hair dryer to apply heat to small sections of the vinyl, working in manageable areas to prevent the adhesive from cooling and hardening again.
Read more: How To Get Paint Off Hardwood Floors
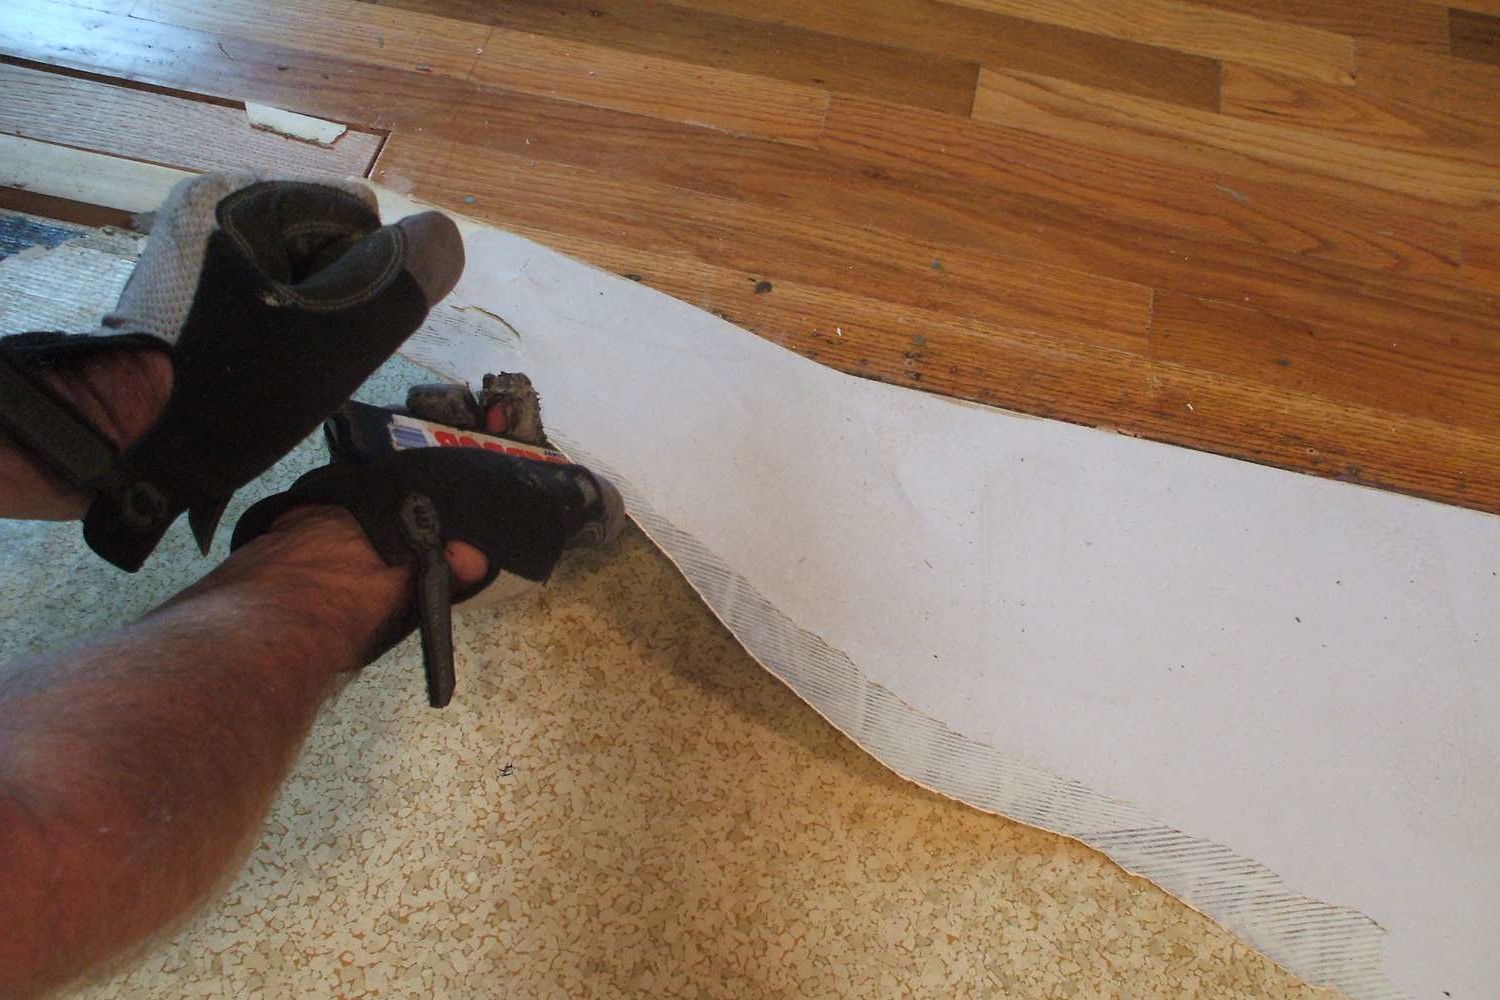
3. Lift and Peel
Once the vinyl is scored and, if applicable, heated, use a pry bar or floor scraper to gently lift and peel back the flooring. Work methodically, gradually lifting and peeling the vinyl to reveal the subfloor beneath. Exercise caution to avoid damaging the subfloor during this process.
4. Remove Adhesive Residue
As the vinyl flooring is lifted, you may encounter residual adhesive clinging to the subfloor. Use a floor scraper or adhesive remover to effectively remove any remaining adhesive. Ensuring that the subfloor is clean and free of adhesive residue is essential for preparing it for any subsequent flooring installation.
5. Dispose of the Old Flooring
As you progress through the removal process, gather the removed vinyl flooring and any debris, placing them in heavy-duty trash bags for disposal. Keeping the work area clear of debris and discarded materials will maintain a safe and organized environment for the remainder of the project.
6. Inspect the Subfloor
Once the vinyl flooring is completely removed, take a moment to inspect the subfloor for any remaining adhesive, damage, or irregularities. Address any issues as needed to ensure that the subfloor is clean, level, and ready for the next phase, whether it involves installing new flooring or preparing the surface for alternative treatments.
By following these steps, you can effectively remove vinyl flooring from your space, paving the way for a fresh and updated look. With patience, attention to detail, and the right approach, you can successfully complete this phase of the project, setting the stage for the next steps in transforming your space with new flooring.
Read more: How To Get Paint Off The Floor
Step 4: Clean up and dispose of the old flooring
Once the vinyl flooring has been successfully removed, the next crucial step is to thoroughly clean up the work area and responsibly dispose of the old flooring and any associated debris. This phase of the project is essential for maintaining a safe and organized environment and preparing the space for any subsequent flooring installation or renovation activities.
1. Clearing Debris
Begin by clearing the work area of any loose debris, discarded vinyl flooring remnants, and other materials generated during the removal process. Use a broom and dustpan to sweep the subfloor and surrounding areas, ensuring that all debris is collected and removed. This initial cleanup sets the stage for a more detailed cleaning process.
2. Subfloor Inspection
With the vinyl flooring removed, take the opportunity to inspect the subfloor thoroughly. Look for any remaining adhesive residue, dust, or particles that may have accumulated during the removal process. Address any residual adhesive using an appropriate adhesive remover, following the manufacturer's instructions to ensure effective removal without damaging the subfloor.
3. Subfloor Cleaning
Once any remaining adhesive has been addressed, proceed to clean the subfloor using a suitable floor cleaner or a mixture of mild detergent and water. Thoroughly scrub the subfloor to remove any traces of adhesive, dirt, or grime, ensuring that the surface is clean, smooth, and free of any obstructions that could affect the installation of new flooring.
Read more: How To Remove Tint
4. Disposing of Old Flooring
Gather the removed vinyl flooring and any associated debris, placing them in heavy-duty trash bags for proper disposal. Ensure that the bags are securely sealed to prevent the release of dust or particles. If the amount of removed flooring is substantial, consider arranging for its disposal in accordance with local waste management regulations or seek out recycling options for vinyl materials where available.
5. Final Cleanup
After disposing of the old flooring, perform a final cleanup of the work area, including the surrounding surfaces and any tools or equipment used during the removal process. Wipe down walls, baseboards, and other adjacent areas to remove any dust or residue, and return any displaced furniture or belongings to their original positions.
By meticulously cleaning up the work area and responsibly disposing of the old flooring, you can ensure that the space is primed and ready for the next phase of your home improvement project. This thorough cleanup not only enhances the aesthetics of the space but also sets the foundation for a seamless transition to new flooring installation or other renovation endeavors.
Conclusion
Congratulations on successfully completing the process of removing vinyl flooring from your space! By following the step-by-step guide outlined in this comprehensive resource, you have demonstrated a commendable commitment to enhancing your home environment and embarking on a transformative home improvement project.
As you reflect on the journey of removing the vinyl flooring, it's important to acknowledge the dedication and attention to detail that you've invested in this endeavor. From meticulously gathering the necessary tools and materials to preparing the work area with care and precision, you've exemplified the qualities of a conscientious homeowner committed to achieving professional-quality results.
The removal of the old vinyl flooring marks a significant milestone in your home improvement journey, signaling the transition to a new chapter of revitalization and renewal. By taking the time to methodically lift, peel, and clean the subfloor, you have set the stage for the installation of fresh, updated flooring that will breathe new life into your space.
As you look ahead to the next phases of your home improvement project, whether it involves installing new flooring, refinishing the subfloor, or exploring alternative design options, remember that the effort and dedication you've invested in removing the old vinyl flooring have laid a solid foundation for the future transformation of your space.
Furthermore, the skills and knowledge you've gained from this experience can serve as valuable assets as you continue to enhance and personalize your home environment. The confidence and proficiency you've developed in tackling the removal of vinyl flooring can be applied to future projects, empowering you to take on new challenges with assurance and expertise.
In closing, the successful removal of the vinyl flooring exemplifies your commitment to creating a space that reflects your vision and style. As you proceed with the next steps in your home improvement journey, carry forward the sense of accomplishment and empowerment that comes from transforming your living environment with your own hands.
Embrace the possibilities that lie ahead, and may the renewed space bring joy, comfort, and inspiration to your everyday life. Your dedication to creating a home that resonates with your unique personality and aspirations is a testament to the transformative power of DIY home improvement.
With the old vinyl flooring removed and the path to new beginnings laid out before you, take pride in the progress you've made and the potential that awaits as you continue to shape and elevate your living space. Cheers to your successful vinyl flooring removal and the exciting chapters of home improvement that lie ahead!