Home>Home and Garden>How To Flatten A Rug
Home and Garden
How To Flatten A Rug
Published: March 4, 2024
Learn how to flatten a rug and improve the look of your home with our expert tips and tricks. Discover easy home and garden solutions today!
(Many of the links in this article redirect to a specific reviewed product. Your purchase of these products through affiliate links helps to generate commission for Noodls.com, at no extra cost. Learn more)
Table of Contents
Introduction
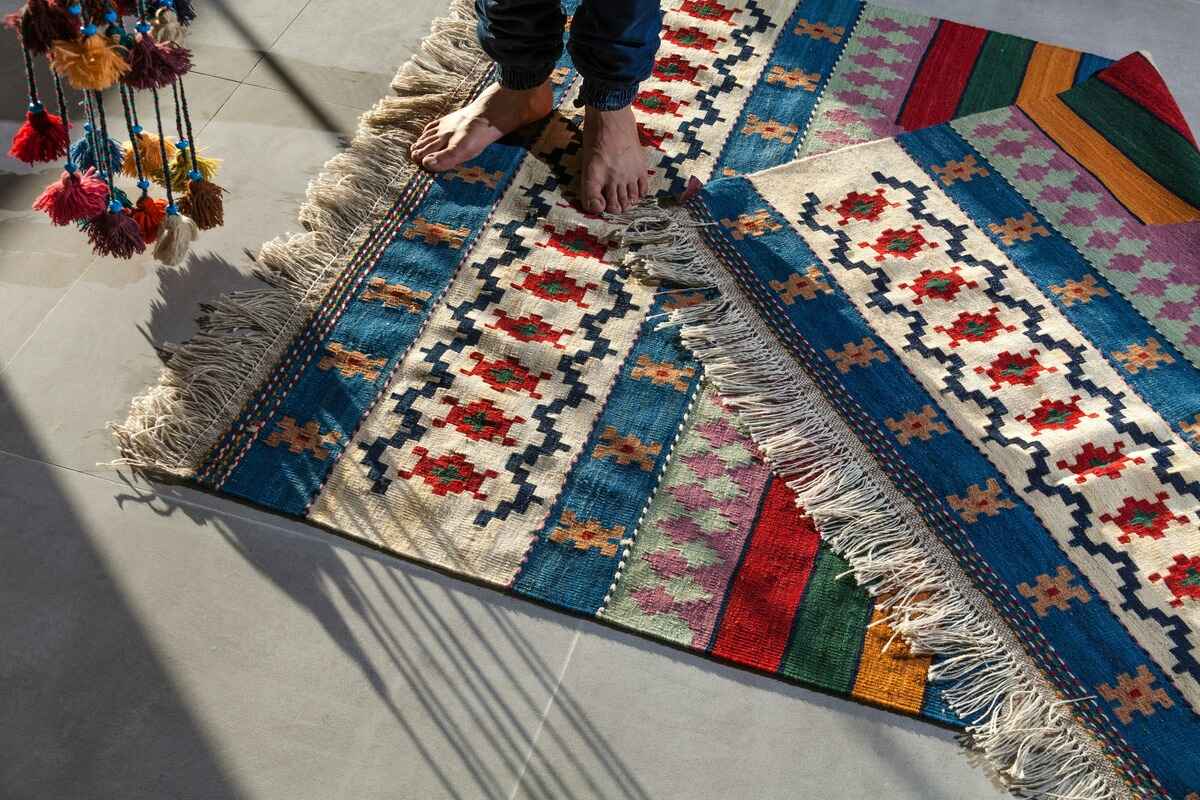
Flattening a rug is a common challenge faced by many homeowners. Whether you've recently purchased a new rug or noticed that an existing one has developed unsightly wrinkles and creases, restoring its smooth, flat appearance is essential for maintaining the aesthetic appeal of your living space. Fortunately, with the right techniques and a bit of patience, you can easily flatten a rug and revitalize its appearance.
A wrinkled or curled rug not only detracts from the overall look of a room but can also pose a tripping hazard and make vacuuming and cleaning more difficult. By addressing this issue promptly, you can ensure that your rug not only looks its best but also remains functional and safe for everyday use.
In the following steps, we will explore various methods for flattening a rug, ranging from simple DIY techniques to specialized products designed specifically for this purpose. Whether you have a small area rug or a large, ornate carpet, these methods can be tailored to suit your specific needs and the material of your rug. With a combination of careful preparation, strategic placement, and targeted treatments, you can effectively eliminate wrinkles and creases, restoring your rug to its original, flat state.
By following the steps outlined in this guide, you can take proactive measures to maintain the condition and appearance of your rug, prolonging its lifespan and preserving its visual appeal. Let's delve into the practical strategies for flattening a rug and reclaiming the smooth, even surface that enhances the beauty of your home.
Read more: How To Clean A Shag Rug
Step 1: Prepare the rug
Before embarking on the process of flattening a rug, it's crucial to prepare the rug and its surrounding environment to ensure optimal results. This initial step sets the foundation for the subsequent techniques and treatments, allowing for a more effective and efficient flattening process.
First and foremost, clear the area where the rug is located. Remove any furniture or objects that may obstruct the rug or impede the flattening process. Creating a clear, open space around the rug will facilitate unrestricted access and maneuverability, enabling you to work on the rug more easily.
Next, thoroughly clean the rug to remove any dirt, debris, or dust that may have accumulated on its surface. Use a vacuum cleaner or a gentle brush to eliminate loose particles and ensure that the rug is clean and free of any obstructions. This not only enhances the overall appearance of the rug but also prevents any debris from interfering with the flattening process.
If the rug is reversible, flip it over and vacuum the underside as well. This helps to remove any trapped dirt or particles that may contribute to unevenness or wrinkles in the rug. By addressing both sides of the rug, you can create a clean, smooth foundation for the flattening techniques.
Additionally, inspect the rug for any existing damage, such as frayed edges or loose threads. Addressing these issues before proceeding with the flattening process can prevent further damage and ensure that the rug is in good condition for the subsequent treatments.
Finally, assess the material and construction of the rug to determine the most suitable flattening method. Different types of rugs, such as wool, synthetic, or delicate antique rugs, may require specific approaches to avoid damage or distortion. Understanding the characteristics of the rug will guide the selection of appropriate techniques and products for flattening.
By meticulously preparing the rug and its surroundings, you can lay the groundwork for a successful flattening process, setting the stage for the subsequent steps to effectively restore the rug to its smooth, flat state.
Step 2: Lay the rug flat
Laying the rug flat is a fundamental step in the process of flattening a rug. By ensuring that the rug is positioned smoothly and evenly, you create a stable foundation for the subsequent flattening techniques. This step is essential for addressing wrinkles, creases, and uneven areas, allowing the rug to gradually regain its original flatness.
To begin, carefully unroll the rug in a spacious, open area. If the rug is already laid out but has wrinkles or curls, gently smooth out the surface to eliminate any existing folds. Pay close attention to the edges and corners, as these areas are prone to curling and may require extra attention to achieve a flat, uniform appearance.
Once the rug is laid out, use your hands to gently press and smooth the surface, working from the center towards the edges. This helps to release any trapped air and allows the rug to settle into a flat position. Avoid using excessive force or pulling on the rug, as this may stretch or distort the material.
If the rug exhibits stubborn wrinkles or creases, consider using a rug pad or nonslip underlay beneath the rug. These supportive layers provide additional stability and help to prevent the rug from shifting or bunching up, promoting a smoother, flatter surface.
For larger rugs, enlisting the assistance of another person can be beneficial. Working together, gently tug and adjust the rug to ensure that it lays flat and even across the entire surface. This collaborative effort can expedite the process and ensure that the rug is positioned correctly for the subsequent flattening methods.
Throughout this step, maintain a patient and methodical approach, taking the time to adjust and readjust the rug as needed. By meticulously laying the rug flat and smoothing out any irregularities, you create a solid starting point for the subsequent steps, setting the stage for a successful rug-flattening process.
By laying the rug flat with care and precision, you establish the groundwork for addressing wrinkles and creases, paving the way for the subsequent techniques to effectively restore the rug to its original, flat condition.
Step 3: Use weights or heavy objects
Utilizing weights or heavy objects is a practical and effective method for flattening a rug that exhibits persistent wrinkles or creases. By applying controlled pressure across the surface of the rug, you can encourage the gradual release of folds and undulations, allowing the rug to regain its smooth, flat appearance.
To begin, identify heavy objects or weights that are suitable for use on the rug. These can include books, weighted boxes, or even dumbbells, depending on the size and weight of the rug. It's important to select items that distribute weight evenly and do not have sharp edges or protrusions that could damage the rug.
Once you have chosen the appropriate weights, position them strategically on the surface of the rug. Focus on areas where wrinkles or creases are most prominent, placing the weights in a manner that applies gentle but consistent pressure to the affected areas. Avoid concentrating the weight in one specific spot, as this may cause uneven flattening or create new creases.
For larger rugs, it may be necessary to use multiple weights distributed across the surface to ensure comprehensive coverage. Take care to space the weights evenly and adjust their positioning as needed to address different sections of the rug.
Leave the weights in place for an extended period to allow the rug to gradually conform to the flat surface beneath. Depending on the severity of the wrinkles and the material of the rug, this process may take several hours or even a few days. Regularly check the rug's progress and make adjustments to the weights as necessary to ensure consistent pressure and optimal flattening.
It's important to exercise caution when using weights on delicate or antique rugs, as excessive pressure may cause damage. In such cases, consider using lighter weights or placing a protective barrier, such as a cloth or towel, between the weights and the rug to mitigate the risk of compression marks or imprints.
By employing weights or heavy objects in a strategic and controlled manner, you can effectively expedite the flattening process and encourage the gradual release of wrinkles and creases. This method harnesses the force of gravity to coax the rug into a flat position, allowing you to restore its smooth, even surface with patience and precision.
Step 4: Apply heat
Applying heat is a proven technique for flattening a rug and addressing stubborn wrinkles and creases. By subjecting the rug to controlled heat, you can encourage the fibers to relax and conform to a flat position, effectively smoothing out any irregularities and restoring the rug's original appearance.
One of the most accessible methods for applying heat to a rug is through the use of a steam iron or garment steamer. Before proceeding, it's essential to verify the compatibility of the rug material with heat and to exercise caution to prevent damage. Begin by setting the iron or steamer to a low or medium heat setting, ensuring that it is not excessively hot, which could potentially scorch or distort the rug fibers.
Place a clean, dry cloth or towel over the wrinkled or creased areas of the rug to serve as a protective barrier. This helps to distribute the heat evenly and prevents direct contact between the iron or steamer and the rug, reducing the risk of damage. Gently press the iron or steamer onto the cloth-covered sections of the rug, moving in a slow, sweeping motion to apply heat evenly across the surface.
As the heat permeates the rug fibers, the gentle moisture from the steam can help to relax the material, allowing it to release the wrinkles and creases. Avoid lingering in one spot for too long, as excessive heat or moisture may have adverse effects on certain rug materials. Instead, maintain a consistent, rhythmic motion to gradually encourage the rug to flatten out.
For larger rugs or those with extensive wrinkling, consider working in sections to ensure thorough coverage and effective heat application. As you progress, periodically lift the cloth to assess the rug's progress and adjust the heat settings as needed. This allows you to tailor the heat application to the specific requirements of the rug, ensuring a careful and controlled process.
It's important to note that not all rug materials are suitable for heat treatment, and certain delicate or synthetic fibers may be sensitive to heat. In such cases, alternative methods, such as using a hairdryer on a low, cool setting, may be more appropriate to avoid potential damage.
By applying heat with precision and care, you can harness its transformative properties to encourage the rug to release wrinkles and creases, gradually restoring its smooth, flat surface. This method, when executed thoughtfully, offers an effective means of rejuvenating the appearance of your rug and enhancing the overall aesthetic of your living space.
Read more: How To Clean Outdoor Rug
Step 5: Use a rug straightening product
When traditional methods alone prove insufficient in flattening a stubbornly wrinkled or creased rug, turning to specialized rug straightening products can offer an effective solution. These products are specifically formulated to relax and reshape rug fibers, facilitating the elimination of persistent wrinkles and creases. By leveraging the properties of these targeted treatments, you can expedite the flattening process and restore your rug to its original, smooth condition.
Rug straightening products are available in various forms, including sprays, mists, and specialized solutions designed to be applied directly to the affected areas of the rug. Before using any rug straightening product, it's essential to carefully review the manufacturer's instructions and recommendations to ensure proper application and compatibility with your rug's material.
To begin, select a high-quality rug straightening product that aligns with the specific needs of your rug, taking into account factors such as the material, pile height, and construction. Thoroughly inspect the rug to identify areas of wrinkling or creasing that require attention, and prepare the rug by ensuring it is clean and free of debris.
Once the rug is ready, apply the rug straightening product according to the manufacturer's guidelines, focusing on the targeted areas of wrinkling and creasing. In most cases, a light, even application is sufficient to initiate the straightening process, allowing the product to penetrate the fibers and encourage them to relax and settle into a flat position.
After applying the rug straightening product, allow sufficient time for it to take effect, typically following the recommended duration specified by the manufacturer. During this period, the product works to soften and reshape the rug fibers, gradually coaxing out the wrinkles and creases. Regularly monitor the rug's progress, adjusting the application or reapplying the product as needed to achieve the desired results.
It's important to exercise patience and allow the rug straightening product ample time to work its magic, particularly for deeply ingrained wrinkles or persistent creases. Depending on the severity of the rug's condition, multiple applications may be necessary to achieve optimal flattening and restore the rug to its smooth, even state.
By incorporating a rug straightening product into your flattening process, you can leverage its targeted formulation to expedite the release of wrinkles and creases, rejuvenating your rug and enhancing the visual appeal of your living space. This method offers a specialized approach to addressing stubborn rug imperfections, providing a valuable tool for restoring the pristine appearance of your cherished rugs.
Step 6: Roll the rug in the opposite direction
Rolling the rug in the opposite direction is a strategic maneuver that can effectively contribute to the flattening process, particularly for rugs with persistent wrinkles and creases. This method leverages the inherent flexibility of rug fibers, encouraging them to adapt to a new orientation and gradually release any existing folds or undulations.
To initiate this step, carefully lift one end of the rug and begin rolling it in the opposite direction of its natural curl or wrinkle. By reversing the direction in which the rug has been stored or positioned, you introduce a gentle but deliberate shift in the alignment of the fibers, prompting them to relax and straighten out.
As you roll the rug, maintain a steady and controlled motion, ensuring that the rug's surface remains smooth and even throughout the process. Pay particular attention to any areas of pronounced wrinkling or creasing, gently coaxing the rug to conform to the new orientation and encouraging the release of any trapped air or tension within the fibers.
For larger rugs, enlisting the assistance of another person can facilitate the rolling process, allowing for a more coordinated and systematic approach. Working together, carefully guide the rug into the reversed position, taking care to maintain even tension and prevent any abrupt or forceful movements that could potentially damage the rug.
Once the rug has been rolled in the opposite direction, allow it to rest in this new orientation for an extended period. This period of acclimatization enables the rug fibers to gradually adjust to the reversed position, releasing any residual tension and allowing the rug to settle into a flatter, more uniform state.
Regularly monitor the rug's progress during this phase, periodically unrolling and repositioning it to ensure that the flattening process is progressing effectively. Depending on the severity of the wrinkles and the material of the rug, this method may require several iterations to achieve the desired results.
By rolling the rug in the opposite direction with care and precision, you can harness the inherent flexibility of the rug fibers to encourage the release of wrinkles and creases, gradually restoring the rug to its original, flat state. This method offers a proactive and strategic approach to addressing persistent rug imperfections, contributing to the overall rejuvenation of your cherished rugs.
Conclusion
In conclusion, flattening a rug is a task that requires patience, attention to detail, and a strategic approach. By following the comprehensive steps outlined in this guide, you can effectively address wrinkles, creases, and unevenness in your rugs, restoring them to their original smooth and flat state.
The initial preparation of the rug, including clearing the surrounding area and ensuring its cleanliness, sets the stage for the subsequent flattening techniques. By meticulously laying the rug flat and smoothing out any irregularities, you create a solid foundation for the rest of the process.
Utilizing weights or heavy objects, applying heat, and incorporating specialized rug straightening products offer targeted solutions for addressing persistent wrinkles and creases. These methods leverage controlled pressure, transformative heat, and specialized formulations to encourage the gradual release of imperfections, rejuvenating the appearance of your rugs.
Rolling the rug in the opposite direction provides a strategic maneuver to encourage the fibers to relax and adapt to a new orientation, contributing to the overall flattening process. This method harnesses the inherent flexibility of rug fibers, gradually coaxing them into a flatter, more uniform state.
By combining these techniques and approaches, you can effectively restore the visual appeal and functionality of your rugs, ensuring that they not only look their best but also contribute to a safe and comfortable living environment. Whether you have a small area rug or a large, ornate carpet, these methods can be tailored to suit your specific needs and the material of your rug.
Maintaining the condition and appearance of your rugs through proactive measures prolongs their lifespan and preserves their aesthetic appeal. By taking the time to address wrinkles and creases promptly, you can ensure that your rugs remain a source of beauty and comfort in your home for years to come.