Home>Home and Garden>How To Winterize A Camper
Home and Garden
How To Winterize A Camper
Published: March 1, 2024
Learn how to properly winterize your camper to protect it from the cold weather. Follow our expert tips for a hassle-free winter storage. Perfect for home and garden enthusiasts!
(Many of the links in this article redirect to a specific reviewed product. Your purchase of these products through affiliate links helps to generate commission for Noodls.com, at no extra cost. Learn more)
Table of Contents
Introduction
As the vibrant colors of autumn fade into the crisp embrace of winter, it's time to prepare your beloved camper for the chilly months ahead. Winterizing your camper is crucial to safeguarding it from the harsh elements and ensuring it remains in top condition for your next adventure. From insulating the interior to protecting the plumbing system, there are several essential steps to take to winterize your camper effectively.
Preparing your camper for winter is not only about preserving its physical integrity but also about maintaining the comfort and functionality that make it a home away from home. By following the proper winterization process, you can prevent costly damage and ensure that your camper emerges unscathed when the thaw arrives.
In this comprehensive guide, we will delve into the essential steps for winterizing your camper, covering everything from insulating the interior to preparing the exterior for the frosty season. Whether you're a seasoned camper or a novice adventurer, this guide will equip you with the knowledge and confidence to protect your camper from the winter's icy grip.
So, grab a warm beverage, cozy up, and let's embark on the journey of winterizing your camper. With the right preparation, you can bid farewell to worries about frozen pipes, drafty interiors, and weather-worn exteriors. Let's ensure that your camper remains a haven of comfort and a gateway to unforgettable experiences, even in the coldest of seasons.
Read more: How To Keep Mice Out Of Camper
Insulating the Camper
When winter's chill permeates the air, insulating your camper becomes paramount in maintaining a cozy and comfortable interior. The insulation serves as a protective barrier, shielding the interior from the frigid temperatures outside. Here's how to effectively insulate your camper for the winter months:
-
Seal Any Gaps and Cracks: Begin by meticulously inspecting the camper for any gaps, cracks, or openings that could allow cold air to infiltrate. Use weather-stripping or caulk to seal these areas, focusing on windows, doors, and any other potential entry points for drafts.
-
Install Thermal Curtains or Insulated Blinds: Thermal curtains or insulated blinds not only add a touch of coziness to the interior but also provide an additional layer of insulation. These window treatments help trap heat inside the camper, preventing it from escaping through the glass.
-
Add Rugs and Carpets: Covering the floors with rugs or carpets not only enhances the aesthetic appeal but also serves a practical purpose. These soft coverings act as insulators, preventing the cold from seeping through the floor and creating a warmer, more comfortable environment inside the camper.
-
Utilize Draft Stoppers: Draft stoppers, also known as draft snakes, are long, narrow pillows that can be placed along the bottom of doors to block drafts. By preventing cold air from creeping in, draft stoppers contribute to maintaining a consistent and pleasant temperature inside the camper.
-
Insulate the Walls and Ceiling: Consider adding additional insulation to the walls and ceiling of the camper. This can be achieved by using foam boards, reflective insulation, or thermal liners. These materials effectively trap heat inside the camper, ensuring that the interior remains snug and insulated from the wintry weather outside.
By implementing these insulation measures, you can create a warm and inviting sanctuary within your camper, shielding it from the harsh realities of winter. With a well-insulated interior, you can look forward to cozy evenings and restful nights, regardless of the frosty conditions outside.
Protecting the Plumbing System
As winter descends with its icy grip, safeguarding the plumbing system of your camper is of utmost importance to prevent costly damage and ensure a seamless return to adventure when the warmer days arrive. The vulnerability of water pipes to freezing temperatures makes protecting the plumbing system a critical aspect of winterizing your camper. Here's a detailed look at the essential steps to safeguard your camper's plumbing system during the winter months:
-
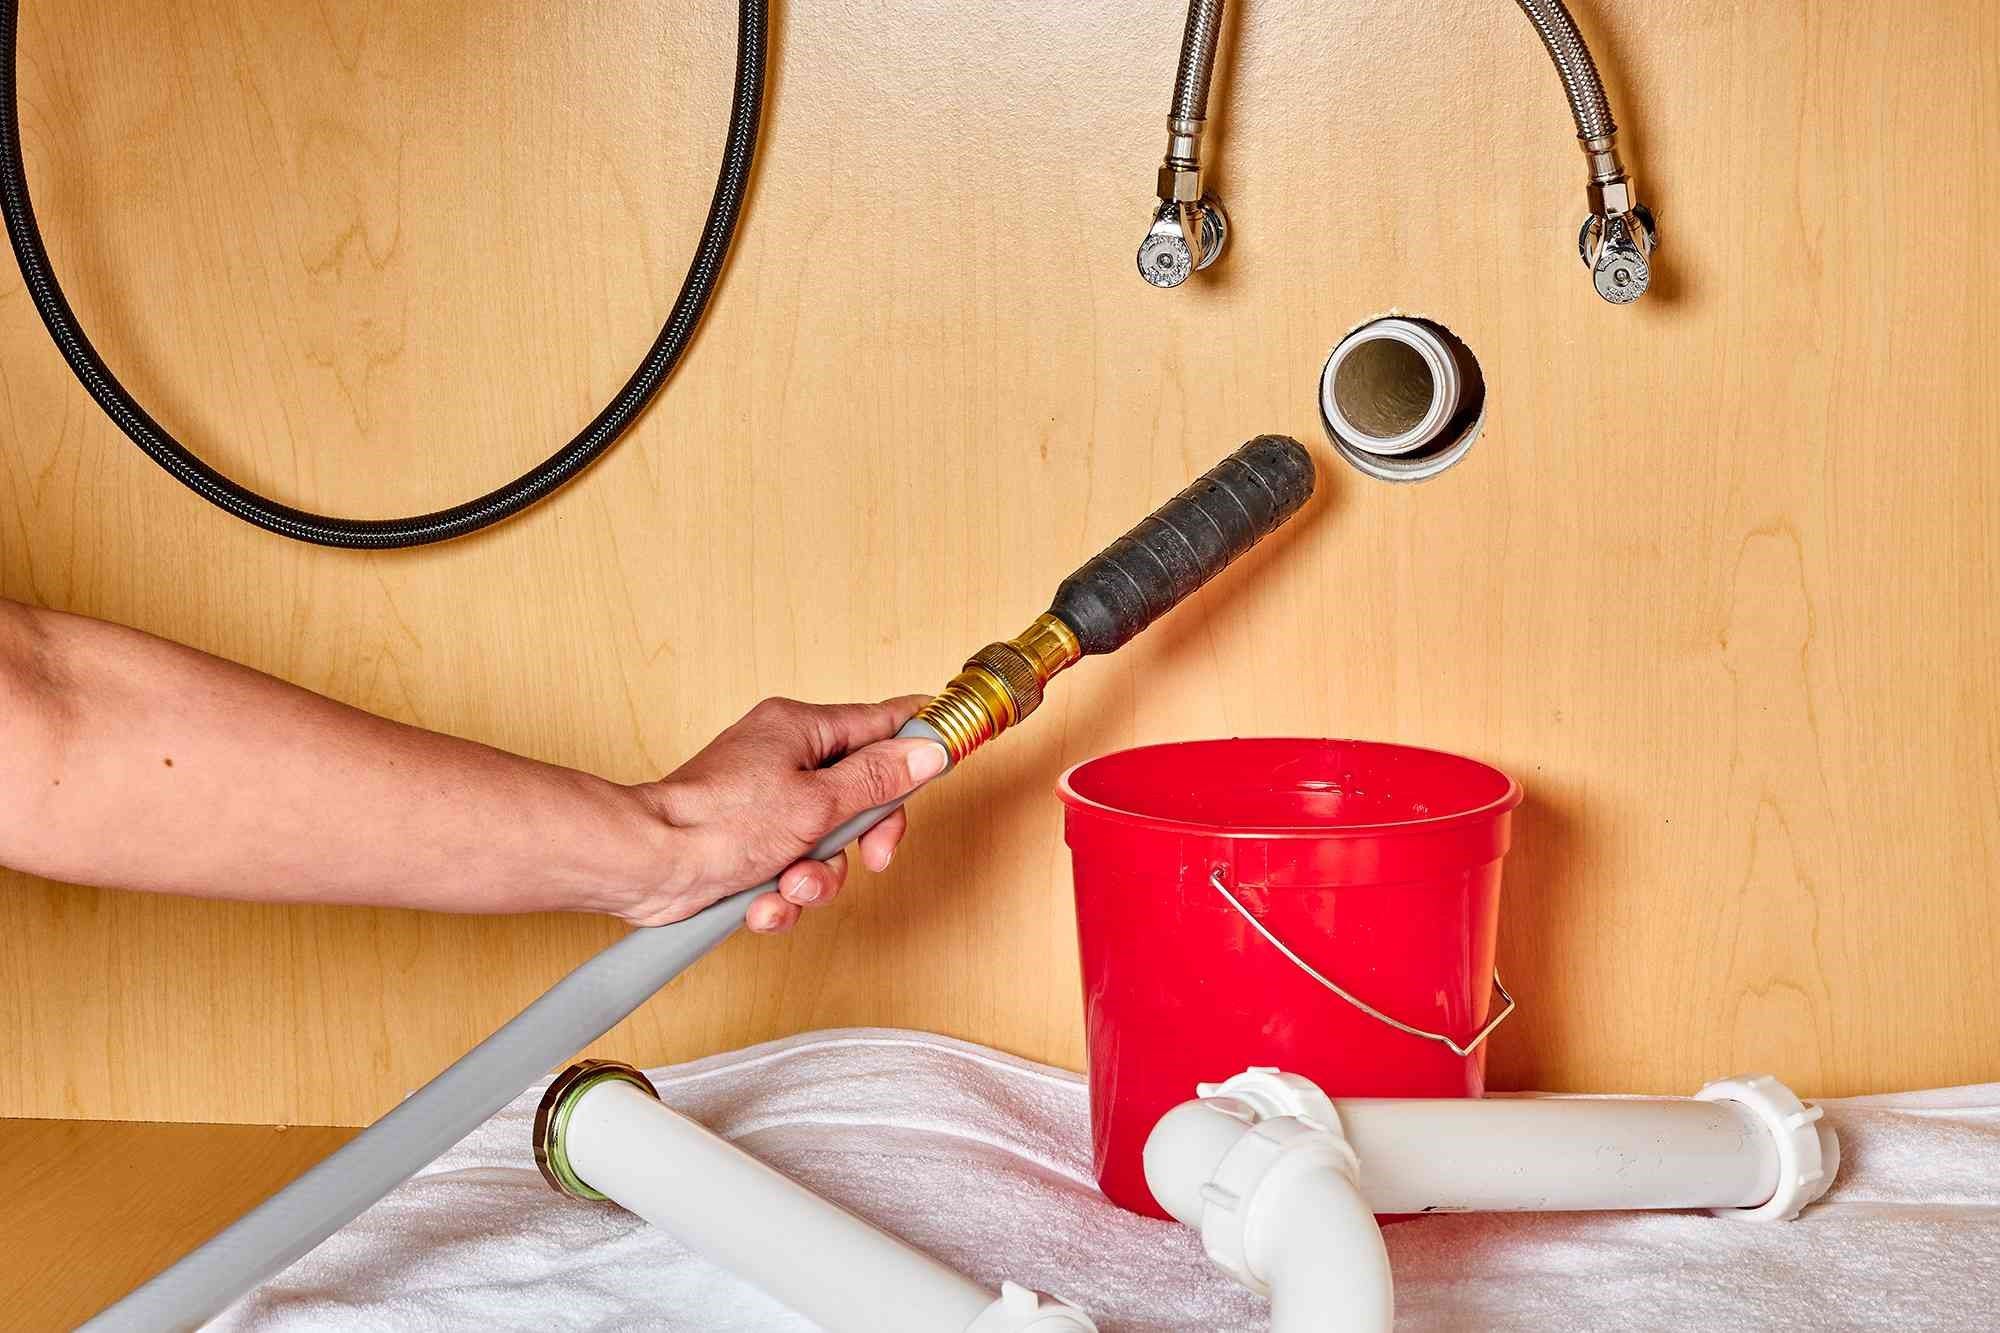
Drain the Water System: Begin by thoroughly draining the water system, including the fresh water tank, water heater, and all water lines. Ensure that all faucets, including the kitchen and bathroom sinks, as well as the shower, are opened to allow the water to completely drain out. Additionally, flush the toilet to remove any remaining water from the system.
-
Bypass the Water Heater: If your camper is equipped with a water heater, it's advisable to bypass it during the winterization process. This involves closing the inlet and outlet valves of the water heater and using a bypass kit to redirect the water flow, preventing the water heater from filling with antifreeze.
-
Use Antifreeze: After draining the water system, it's crucial to introduce RV antifreeze to prevent any residual water from freezing and causing damage. Using a water pump converter kit or the water inlet connection, pump the antifreeze through the water lines until it flows from all faucets and fixtures, including the toilet and shower. This ensures that the entire plumbing system is protected from freezing temperatures.
-
Protect Exterior Hoses and Connections: Disconnect any exterior hoses, such as the city water inlet hose, and ensure that all connections are thoroughly drained and free from water. Storing these hoses in a dry, insulated space can prevent them from becoming brittle or damaged due to freezing temperatures.
-
Insulate Exposed Pipes: For added protection, consider insulating any exposed pipes outside the camper. Foam pipe insulation or heating tape can be used to safeguard these vulnerable areas from freezing, reducing the risk of potential damage to the plumbing system.
By diligently following these steps to protect the plumbing system of your camper, you can rest assured that it will emerge unscathed from the winter months. Safeguarding the plumbing system not only preserves the integrity of your camper but also sets the stage for a seamless return to your outdoor adventures when the thaw arrives. With a well-protected plumbing system, you can look forward to embarking on new journeys with confidence, knowing that your camper is ready to accompany you on countless memorable escapades.
Sealing Windows and Doors
Ensuring that the windows and doors of your camper are effectively sealed is a crucial step in winterizing your mobile haven. By addressing potential drafts and heat loss through these openings, you can create a more comfortable and energy-efficient interior environment. Here's a detailed exploration of the essential measures to seal the windows and doors of your camper for the winter season.
-
Inspect and Repair Weather Stripping: Begin by thoroughly inspecting the weather stripping around the windows and doors. Over time, weather stripping can degrade, leading to gaps that allow cold air to seep into the interior. Replace any worn or damaged weather stripping to create a tight seal and prevent heat loss.
-
Apply Caulk to Gaps and Cracks: Use a high-quality caulk to seal any visible gaps or cracks around the window frames and door frames. Pay close attention to areas where the frames meet the exterior of the camper, as these are common sites for air leakage. By applying caulk to these areas, you can effectively block drafts and enhance the overall insulation of the camper.
-
Install Storm Windows and Doors: Consider installing storm windows and doors to provide an additional layer of protection against the elements. These secondary windows and doors create an insulating air space, reducing heat transfer and minimizing drafts. Opt for storm windows and doors that are specifically designed for campers and RVs to ensure a proper fit.
-
Utilize Window Insulation Film: Window insulation film is a cost-effective and easy-to-install solution for improving the thermal performance of windows. This transparent film is applied directly to the interior of the windows and can significantly reduce heat loss while still allowing natural light to enter the camper.
-
Use Draft Stoppers for Doors: Place draft stoppers along the bottom of exterior doors to block cold air from entering and warm air from escaping. These simple yet effective draft stoppers can make a noticeable difference in maintaining a consistent and comfortable temperature inside the camper.
By meticulously sealing the windows and doors of your camper, you can create a snug and well-insulated interior environment that is resistant to the chill of winter. These measures not only enhance comfort but also contribute to energy efficiency, allowing you to make the most of your camper even in the coldest of seasons. With a properly sealed interior, you can look forward to cozy retreats and memorable adventures, knowing that your camper is well-equipped to weather the winter months.
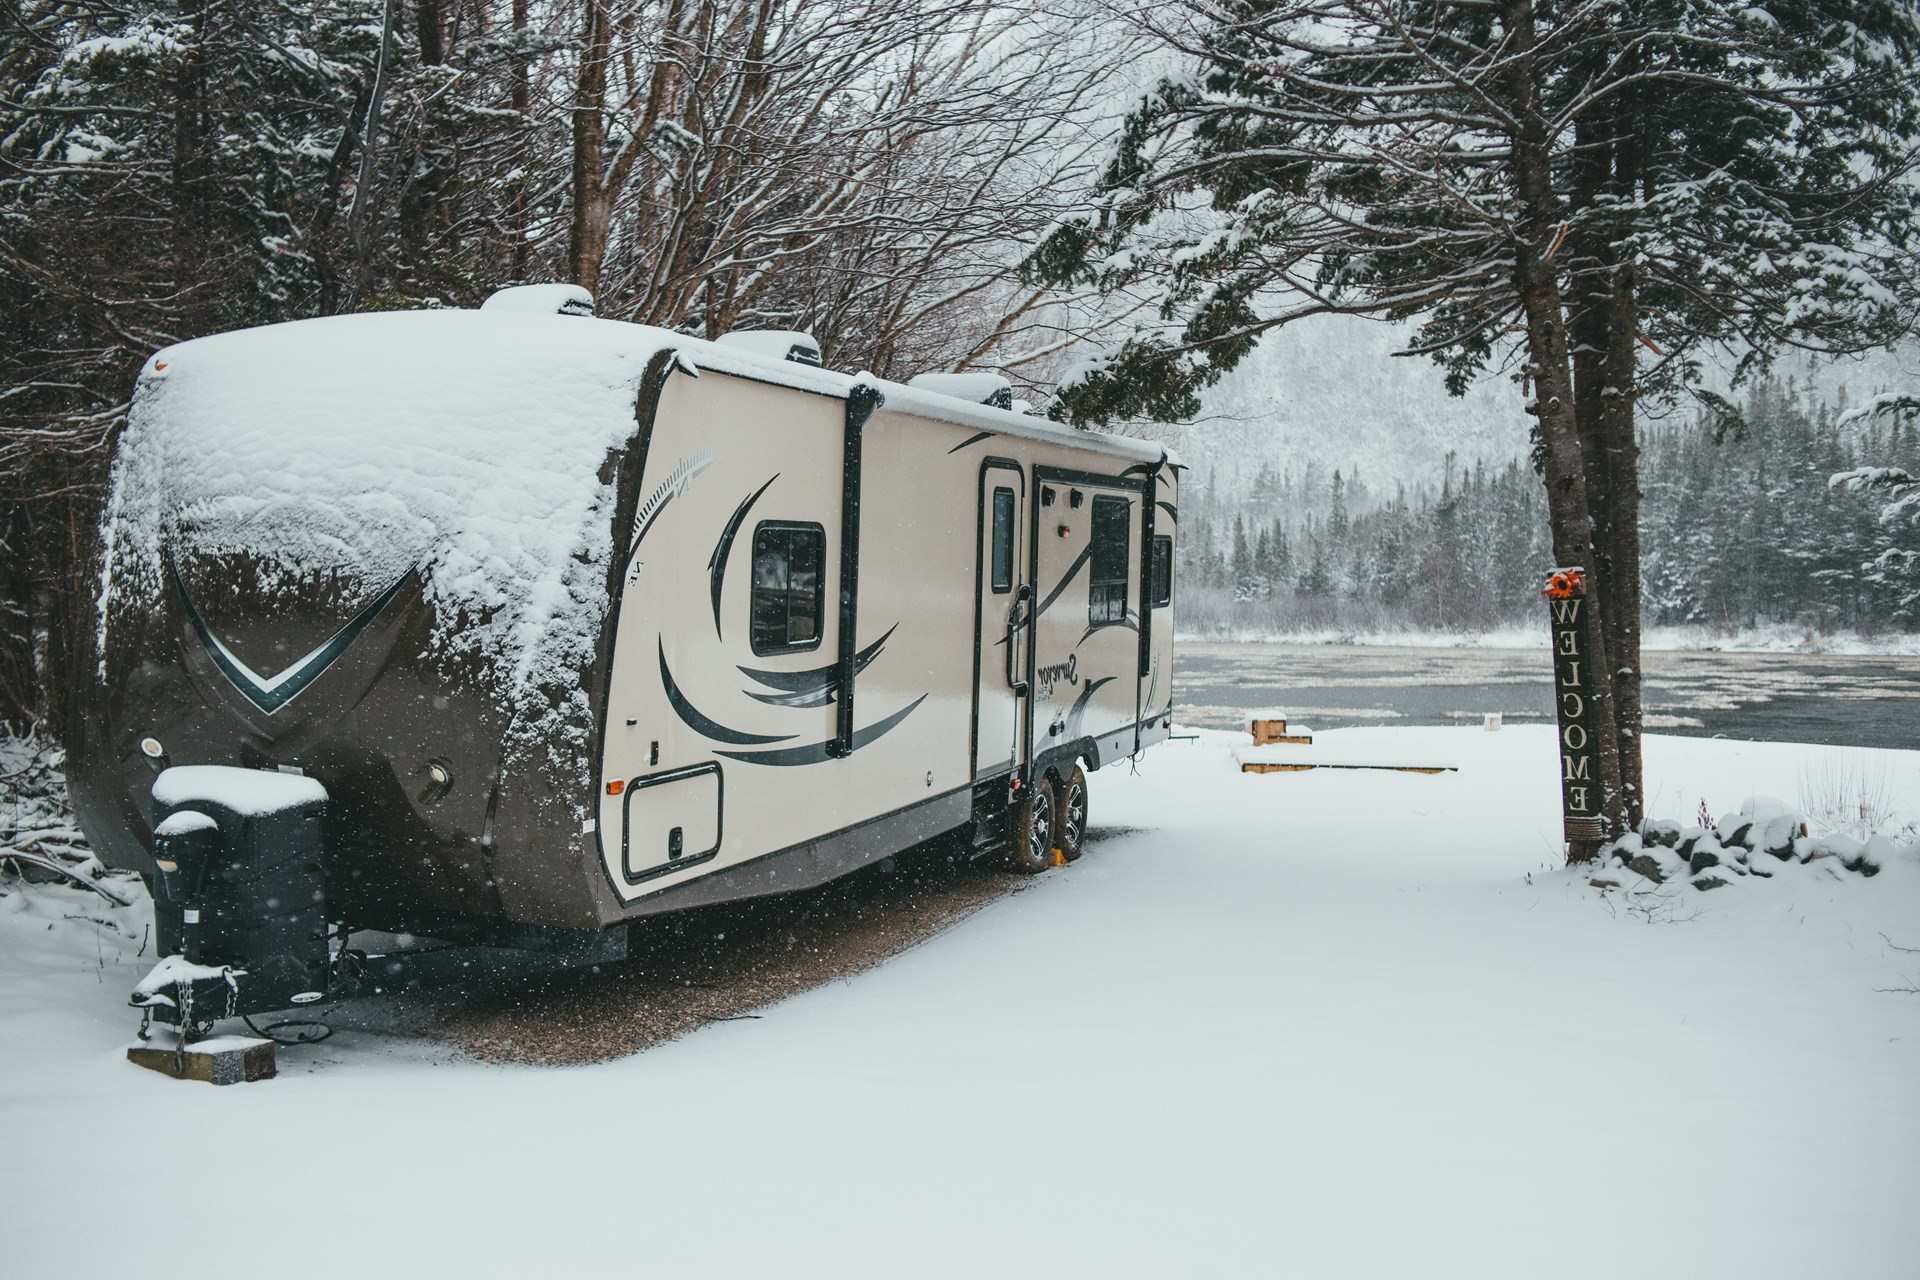
Preparing the Exterior
As you embark on the journey of winterizing your camper, paying attention to the exterior is just as crucial as tending to the interior. The exterior of your camper is the first line of defense against the elements, and preparing it for the winter months is essential to safeguard its structural integrity and aesthetic appeal. Here's a comprehensive guide to preparing the exterior of your camper for the chilly season:
-
Clean and Protect the Exterior Surfaces: Begin by thoroughly cleaning the exterior surfaces of the camper to remove any dirt, grime, or road residue. Use a gentle cleanser specifically formulated for campers or RVs to avoid damaging the finish. Once clean, consider applying a protective wax or sealant to the exterior to create a barrier against the harsh winter elements. This not only enhances the visual appeal but also shields the camper from potential damage caused by snow, ice, and road salt.
-
Inspect and Maintain Seals and Caulking: Carefully inspect all seals and caulking around windows, doors, vents, and other exterior openings. Over time, these seals can deteriorate, leading to potential leaks and drafts. Replace any worn or damaged seals and reapply caulking as needed to ensure that the exterior remains watertight and well-insulated.
-
Cover and Protect External Components: If your camper is equipped with external components such as air conditioning units, awnings, or satellite dishes, take measures to protect them from the winter weather. Consider covering these components with specialized protective covers to shield them from snow, ice, and debris. Additionally, retract or store awnings to prevent them from becoming damaged due to heavy snow or strong winds.
-
Inspect and Maintain the Roof: The roof of your camper is a critical area that requires attention during the winterization process. Inspect the roof for any signs of damage, such as cracks, punctures, or deteriorating seals around vents and skylights. Address any issues promptly and consider applying a roof sealant to reinforce the protective barrier against moisture and cold temperatures.
-
Prepare the Tires for Winter Travel: If you anticipate traveling with your camper during the winter, it's essential to prepare the tires for the conditions. Ensure that the tires are properly inflated to the recommended pressure and inspect them for signs of wear or damage. Consider using specialized winter tires or tire chains for added traction and stability in snowy or icy environments.
By meticulously preparing the exterior of your camper for the winter months, you can fortify its resilience against the challenges posed by cold weather and inclement conditions. A well-maintained and protected exterior not only preserves the structural integrity of the camper but also sets the stage for a seamless return to outdoor adventures when the spring thaw arrives. With a winter-ready exterior, you can look forward to embarking on new journeys with confidence, knowing that your camper is equipped to weather the elements and accompany you on countless memorable escapades.
Storing the Camper for Winter
As the winter season takes hold, properly storing your camper is essential to ensure its longevity and readiness for the next adventure. Whether you plan to tuck it away in a dedicated storage facility or on your property, taking the appropriate steps to store your camper for the winter can make a significant difference in its condition when spring arrives.
Clean and Declutter the Interior
Begin the winter storage process by thoroughly cleaning and decluttering the interior of your camper. Remove any perishable items, including food, beverages, and toiletries, to prevent odors and potential pest infestations. Wipe down all surfaces, vacuum the floors, and ensure that the interior is dry to prevent mold and mildew growth during the period of storage.
Check and Maintain the Battery
Properly maintaining the camper's battery during the winter storage period is crucial to ensure that it remains in optimal condition. Consider removing the battery and storing it in a cool, dry location, connected to a battery maintainer or trickle charger to prevent it from losing charge. Alternatively, if the battery remains in the camper, disconnect it to avoid drainage and periodically check its charge level.
Protect the Upholstery and Fabrics
To safeguard the upholstery and fabrics inside the camper, consider covering furniture and mattresses with breathable, protective covers. This helps prevent dust accumulation and potential damage from prolonged storage. Additionally, crack open the windows periodically to allow for air circulation, reducing the risk of musty odors and moisture buildup.
Conduct Exterior Maintenance
Perform a thorough inspection of the camper's exterior, addressing any necessary maintenance tasks before storing it for the winter. This includes checking for any signs of damage, such as cracks or dents, and addressing them promptly. Clean and treat the exterior surfaces as needed, ensuring that the camper is well-protected from the elements during its period of storage.
Choose the Right Storage Location
Selecting the appropriate storage location for your camper is crucial to its preservation during the winter months. If possible, opt for a covered storage facility or consider investing in a breathable, weatherproof cover for outdoor storage. Ensure that the chosen location provides protection from snow, ice, and extreme temperatures, minimizing the camper's exposure to harsh winter conditions.
Maintain Ventilation and Air Circulation
Proper ventilation is essential to prevent the buildup of stale air and moisture inside the camper during storage. Crack open the roof vents or windows slightly to allow for air circulation, reducing the risk of condensation and maintaining a fresh interior environment. This simple measure can contribute to preserving the overall condition of the camper.
Implement Pest Prevention Measures
To deter unwanted pests from taking up residence in your camper during the winter, take proactive measures to prevent infestations. Seal any potential entry points, such as gaps around doors and windows, and consider using pest deterrents or traps designed for campers and RVs. Additionally, periodically inspect the interior for signs of pest activity and address any issues promptly.
Monitor the Camper Periodically
While the camper is in storage, it's advisable to periodically check on its condition to ensure that everything remains in order. This includes inspecting for any signs of leaks, assessing the battery's charge level, and ensuring that the interior environment is dry and well-ventilated. By staying proactive, you can address any potential issues before they escalate.
By meticulously following these steps to store your camper for the winter, you can safeguard its condition and ensure that it emerges from its period of hibernation ready for new adventures. With the right preparation and care, your camper can remain a reliable and cherished companion, poised to accompany you on countless journeys when the winter gives way to the warmth of spring.