Lifestyle
How To Shrink A Fitted Hat
Published: March 1, 2024
Learn how to shrink a fitted hat and customize your lifestyle with the perfect fit. Discover hat shrinking techniques and tips for a comfortable and stylish look.
(Many of the links in this article redirect to a specific reviewed product. Your purchase of these products through affiliate links helps to generate commission for Noodls.com, at no extra cost. Learn more)
Table of Contents
Introduction
Fitted hats are a popular fashion accessory, often worn to showcase personal style or support a favorite sports team. However, finding the perfect fit can be a challenge, especially if the hat is slightly too large. Fortunately, there are effective methods to shrink a fitted hat and achieve the desired size without compromising its shape or quality.
In this comprehensive guide, we will explore the step-by-step process of shrinking a fitted hat to ensure a snug and comfortable fit. Whether you have a cherished hat that has stretched over time or recently acquired one that is just a tad too big, these techniques will help you achieve the ideal fit without the need for professional alteration.
By following the methods outlined in this article, you can confidently take control of the hat-shrinking process and customize the fit to your liking. With a few simple materials and a bit of patience, you can transform an ill-fitting hat into a perfectly snug accessory that complements your style.
Let's delve into the process of shrinking a fitted hat and discover how to achieve the ideal fit with ease and precision.
Read more: How To Draw A Hat
Step 1: Gather necessary materials
Before embarking on the process of shrinking a fitted hat, it's essential to gather the necessary materials to ensure a successful outcome. The following items are crucial for implementing the hat-shrinking techniques effectively:
-
Fitted Hat: The hat that needs to be shrunk is the primary material required for this process. Ensure that the hat is made of a material that is suitable for shrinking, such as cotton or wool. It's important to note that certain materials, such as synthetic fibers, may not respond well to the shrinking methods and could be damaged in the process.
-
Warm Water: Having access to warm water is essential for the hat-shrinking process. The warmth helps to relax the fibers of the hat, making it more pliable and receptive to the shrinking techniques. It's advisable to use water that is comfortably warm to the touch but not scalding hot, as excessive heat can damage the hat.
-
Spray Bottle: A spray bottle filled with warm water is a convenient tool for applying moisture to specific areas of the hat. This allows for targeted shrinking in areas where a snugger fit is desired, such as the inner band of the hat.
-
Hair Dryer or Steamer: A hair dryer or steamer is used to apply heat to the hat after it has been moistened. The combination of heat and moisture helps to shrink the fibers of the hat, allowing for a customized fit. Both hair dryers and steamers are effective tools for this purpose, and the choice between the two depends on personal preference and availability.
-
Towel: Keeping a clean towel on hand is useful for gently patting the hat dry after the shrinking process. Additionally, the towel can be used to reshape the hat as it dries, ensuring that it maintains its intended form and fit.
By ensuring that these materials are readily available, you can proceed with confidence through the subsequent steps of the hat-shrinking process. With the right tools at your disposal, you'll be well-equipped to achieve the perfect fit for your fitted hat.
Step 2: Determine the desired size
Before initiating the process of shrinking a fitted hat, it's crucial to determine the desired size for the hat. This step involves assessing the current fit of the hat and identifying the specific areas that require adjustment to achieve the ideal size.
Start by wearing the fitted hat and carefully evaluating how it sits on your head. Pay close attention to any areas where the fit feels loose or excessively roomy. Common areas for assessment include the inner band of the hat, the crown, and the overall circumference. Take note of any areas where the hat feels too large or lacks a snug, secure fit.
Next, consider the intended fit that you wish to achieve. Visualize the ideal size of the hat and how it should comfortably conform to your head. Determine whether you prefer a slightly tighter fit or a more significant reduction in size to address any looseness or slippage.
It's important to strike a balance between achieving a snug fit and ensuring that the hat remains comfortable to wear. Keep in mind that the goal is to customize the fit to your liking without compromising the overall shape and structure of the hat.
If the hat is being adjusted for someone else, such as a friend or family member, communicate with them to understand their preferences regarding the fit. This collaborative approach ensures that the hat is tailored to the wearer's specific comfort and style requirements.
By taking the time to assess the current fit of the hat and envisioning the desired size, you can proceed to the subsequent steps of the hat-shrinking process with a clear understanding of the adjustments needed. This thoughtful approach sets the stage for effectively customizing the fit of the fitted hat to align with your personal preferences and ensure a comfortable, stylish outcome.
Step 3: Use heat and moisture to shrink the hat
Once you have determined the desired size for your fitted hat, it's time to employ the combination of heat and moisture to facilitate the shrinking process. This step is crucial in achieving a customized fit while maintaining the integrity of the hat's material and structure.
Begin by lightly dampening the specific areas of the hat that require shrinking. A spray bottle filled with warm water is an effective tool for this purpose, allowing you to precisely target the areas in need of adjustment. Gently mist the inner band of the hat and any other areas where a snugger fit is desired, ensuring that the moisture is evenly distributed.
Following the application of moisture, the next step involves applying heat to the hat to expedite the shrinking process. There are two primary methods for accomplishing this: using a hair dryer or a steamer. If using a hair dryer, set it to a moderate heat setting and hold it a few inches away from the dampened areas of the hat. Keep the dryer in constant motion to prevent overheating and potential damage to the hat. Alternatively, a steamer can be utilized by directing the steam onto the targeted areas, allowing the heat and moisture to work together in shrinking the hat.
As the heat and moisture interact with the hat, the fibers will gradually contract, resulting in a reduction in size. It's important to monitor the shrinking process carefully, periodically checking the fit of the hat to ensure that it aligns with your desired size. Avoid excessive exposure to heat, as this can lead to over-shrinking and potential distortion of the hat's shape.
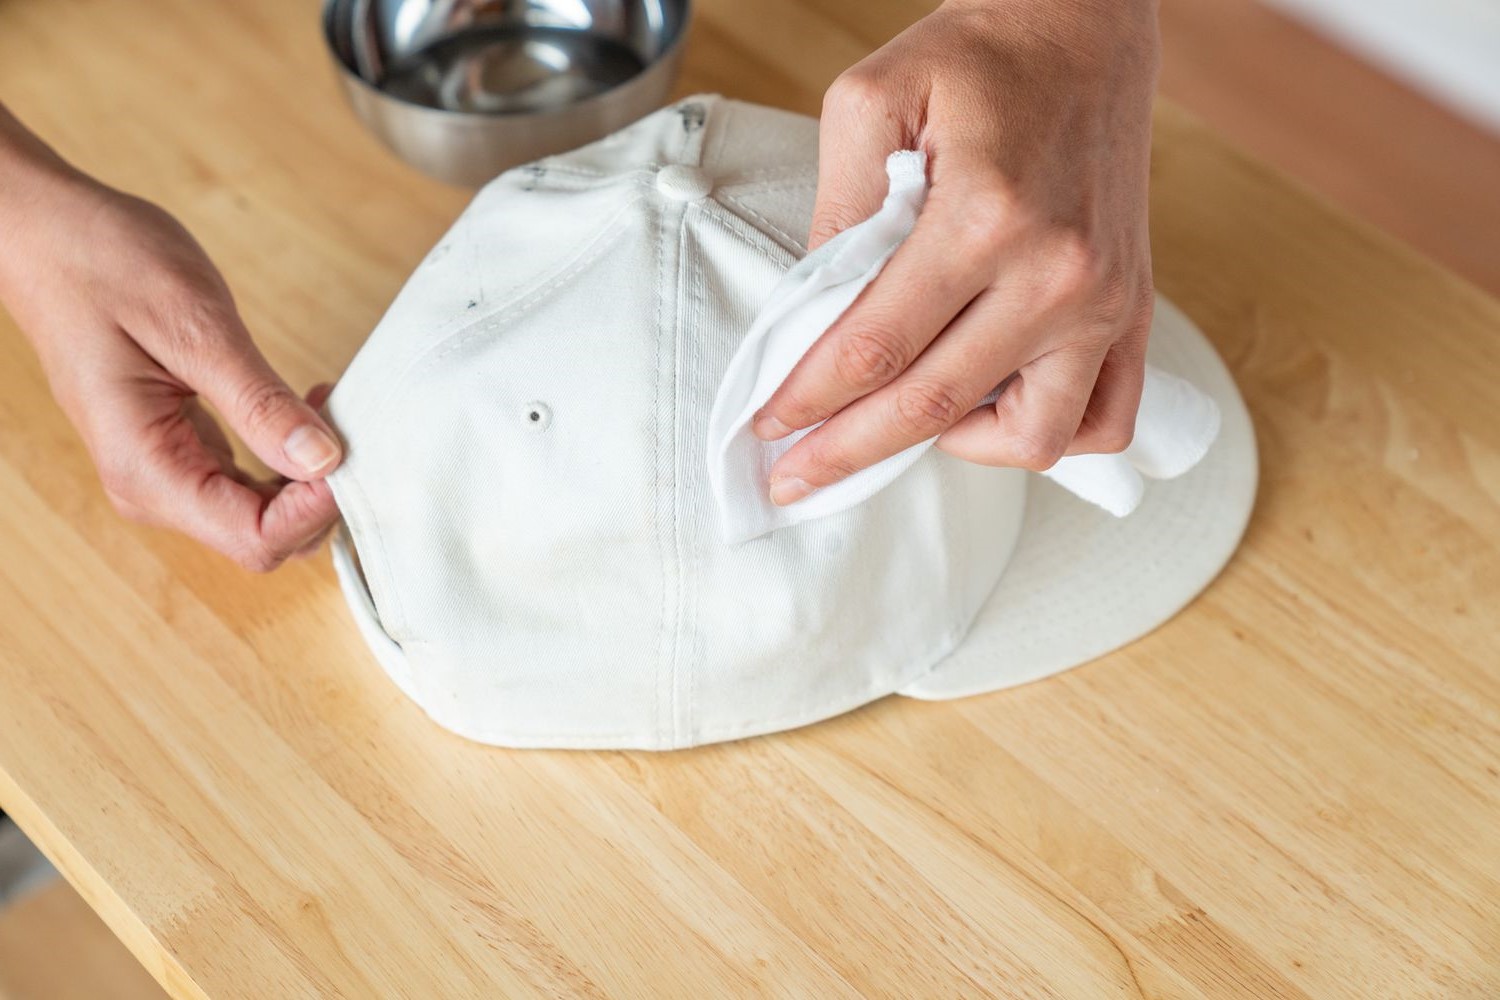
Once the hat has reached the desired size, remove it from the heat source and allow it to air dry naturally. Use a clean towel to gently pat the hat dry, absorbing any excess moisture and aiding in the reshaping process. As the hat dries, take the opportunity to adjust its form to ensure that it maintains the intended shape and fit.
By effectively harnessing the power of heat and moisture, you can confidently shrink your fitted hat to achieve a customized fit that aligns with your preferences. This methodical approach ensures that the hat retains its quality and shape while being tailored to provide a comfortable and stylish addition to your wardrobe.
Step 4: Check the fit and make adjustments if necessary
After applying the heat and moisture to shrink your fitted hat, it's essential to meticulously assess the fit and make any necessary adjustments to ensure that the hat conforms perfectly to your head. This step is crucial in achieving the ideal fit and ensuring that the hat remains comfortable and stylish.
Begin by carefully trying on the hat to evaluate the extent of the shrinking and how it aligns with your initial vision of the desired size. Pay close attention to how the hat sits on your head, noting any areas where the fit feels too tight or, conversely, where additional shrinking may be required. It's important to assess the overall comfort and security of the hat's fit, ensuring that it remains snug without causing any discomfort or constriction.
As you assess the fit, take note of any specific areas that may require further attention. For instance, if the inner band of the hat still feels slightly loose, consider applying targeted moisture and heat to achieve a more precise fit in that area. Conversely, if the hat feels overly snug in certain areas, such as the crown or circumference, gentle stretching or reshaping may be necessary to restore a comfortable fit.
Throughout this process, it's crucial to exercise patience and attentiveness, as making gradual, incremental adjustments will yield the best results. Avoid rushing the assessment and adjustment phase, as this meticulous approach ensures that the hat is tailored to your exact specifications while maintaining its structural integrity.
If the hat is being adjusted for someone else, such as a friend or family member, encourage them to try on the hat and provide feedback on the fit. This collaborative approach allows for personalized adjustments based on the wearer's comfort and style preferences, ensuring that the hat is perfectly suited to their individual needs.
Once you are satisfied with the fit of the hat and have made any necessary adjustments, take a moment to appreciate the transformation. Your meticulous efforts have resulted in a customized fit that enhances the overall appeal of the fitted hat, making it a stylish and comfortable accessory that complements your personal flair.
By conscientiously checking the fit and making precise adjustments as needed, you can confidently complete the hat-shrinking process, knowing that the end result aligns with your vision of the perfect fit. This attention to detail ensures that your fitted hat is not only a fashion statement but also a reflection of your individuality and attention to quality.
Read more: How To Shrink Bunions Naturally
Conclusion
In conclusion, the process of shrinking a fitted hat is a rewarding endeavor that empowers individuals to customize the fit of their beloved headwear with precision and care. By following the step-by-step techniques outlined in this guide, hat enthusiasts can confidently embark on the journey of achieving the ideal fit for their hats without the need for professional alteration.
The art of hat shrinking encompasses a thoughtful blend of heat and moisture, strategically applied to mold the hat to the desired size while preserving its quality and shape. From assessing the initial fit to envisioning the perfect size, each step in the process contributes to a tailored outcome that reflects personal style and comfort.
As individuals engage in the hat-shrinking process, they are encouraged to embrace patience and attentiveness, recognizing that gradual adjustments yield the most favorable results. Whether it's gently misting the hat with warm water or delicately applying heat to facilitate shrinking, each action is a deliberate step toward achieving a customized fit that aligns with individual preferences.
Moreover, the collaborative aspect of hat shrinking, where wearers provide feedback on the fit and comfort, fosters a sense of shared ownership and satisfaction. This inclusive approach ensures that the hat is tailored to the unique needs and preferences of the wearer, enhancing the overall experience of hat customization.
Ultimately, the conclusion of the hat-shrinking journey marks a transformative moment, where an ill-fitting hat is reborn as a snug, stylish accessory that complements personal flair. The attention to detail and the dedication invested in achieving the perfect fit culminate in a sense of accomplishment and pride, as the hat becomes a true reflection of individuality and quality craftsmanship.
In essence, the process of shrinking a fitted hat transcends mere alteration; it is a testament to the artistry and personalization that individuals can infuse into their everyday accessories. By embracing the techniques outlined in this guide and approaching hat shrinking as a thoughtful, creative endeavor, individuals can confidently embark on the path to achieving the perfect fit for their fitted hats, ensuring that each wear is a testament to style, comfort, and individuality.