Home>Arts and Culture>How To Draw A Hat
Arts and Culture
How To Draw A Hat
Published: February 29, 2024
Learn how to draw a hat with easy step-by-step instructions. Explore your creativity and improve your drawing skills with this arts and culture tutorial.
(Many of the links in this article redirect to a specific reviewed product. Your purchase of these products through affiliate links helps to generate commission for Noodls.com, at no extra cost. Learn more)
Table of Contents
Introduction
Drawing is a wonderful form of self-expression and creativity. Whether you're an aspiring artist or simply looking to explore a new hobby, learning how to draw a hat can be a rewarding and enjoyable experience. Hats come in a myriad of styles, shapes, and textures, making them an intriguing subject for artists of all levels.
In this guide, we will walk through the step-by-step process of drawing a hat, from the basic shape to the intricate details and textures that bring it to life on paper. Whether you're aiming to sketch a classic fedora, a cozy beanie, or a wide-brimmed sun hat, the techniques covered here can be adapted to suit the specific style you have in mind.
By the end of this tutorial, you will have gained valuable insights into the art of drawing hats, honed your observational skills, and developed a deeper appreciation for the nuances of form and texture. So, grab your drawing materials and let's embark on this creative journey together. Let's bring the charm and character of hats to life on the page!
Read more: How To Draw A Cowboy Hat
Materials Needed
Before we dive into the artistic process of drawing a hat, it's essential to gather the necessary materials. Having the right tools at your disposal can significantly enhance the drawing experience and facilitate the creation of a visually captivating hat illustration. Here's a comprehensive list of materials that you'll need to embark on this artistic endeavor:
-
Drawing Paper: Select a high-quality drawing paper that is suitable for the medium you plan to use. The paper should have a smooth surface to allow for precise lines and shading.
-
Pencils: A set of graphite pencils with varying degrees of hardness (ranging from 2H to 6B) will enable you to achieve a wide range of tones and textures in your hat drawing.
-
Eraser: A soft, kneaded eraser is ideal for making subtle corrections and lightening areas of the drawing without damaging the paper.
-
Blending Stump: This tool is invaluable for blending and smudging graphite to create smooth transitions and realistic textures in your hat illustration.
-
Reference Images: Gather reference images of different types of hats to inspire and guide your drawing. Observing real-life hats or high-quality photographs can provide valuable insights into the structure and details of various hat styles.
-
Light Source: Ensure that you have adequate lighting in your workspace to accurately observe the play of light and shadow on the hat as you draw.
-
Optional: Colored Pencils or Markers: If you wish to add color to your hat drawing, having a set of colored pencils or markers can expand your creative possibilities.
By assembling these materials, you'll be well-equipped to embark on the artistic journey of drawing a hat with precision, attention to detail, and a keen understanding of light and shadow. With these tools at your disposal, you can fully immerse yourself in the process of bringing a hat to life on paper, capturing its unique character and charm with finesse and creativity.
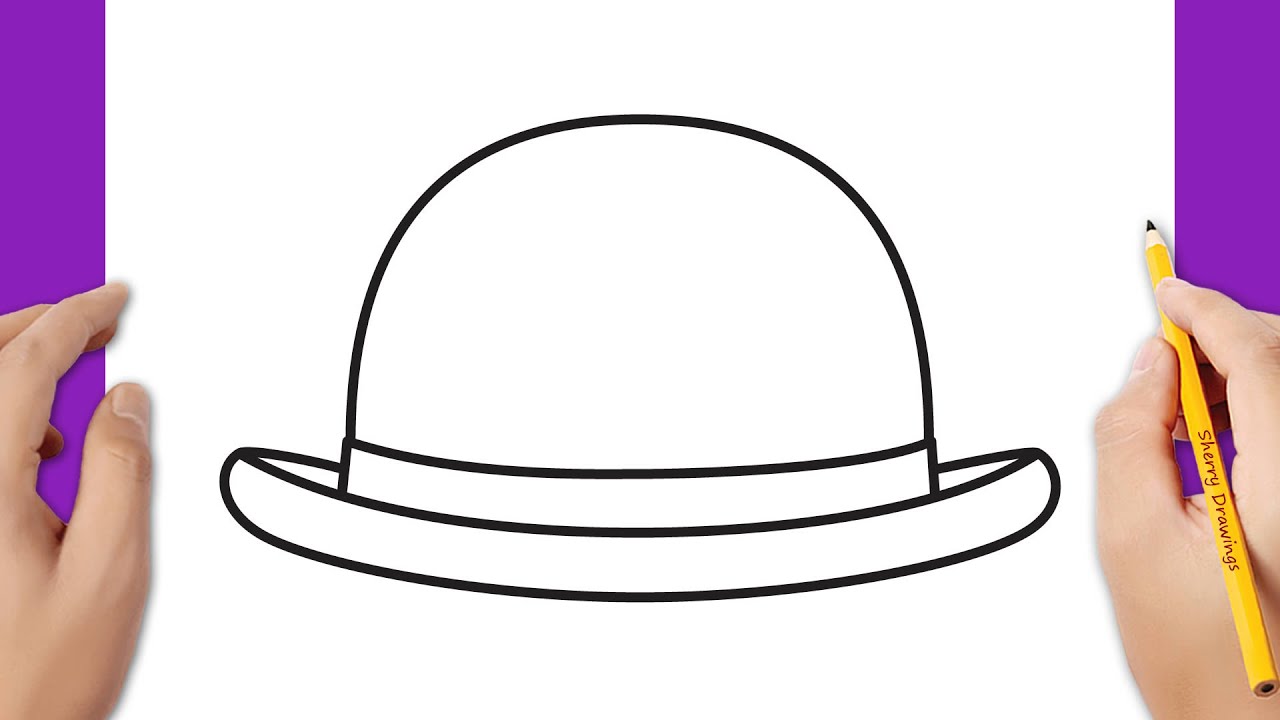
Step 1: Drawing the Basic Shape
To begin the artistic journey of drawing a hat, it's essential to lay the foundation by sketching the basic shape. This initial step sets the stage for the intricate details and textures that will bring the hat to life on paper. Whether you're envisioning a sleek fedora, a floppy sun hat, or a cozy beanie, mastering the basic shape is crucial for capturing the distinct silhouette of the hat style you aim to portray.
Start by lightly sketching the outline of the hat's crown, which is the top part that rests on the head. Consider the overall shape of the crown, whether it's cylindrical, tapered, or rounded, and use light, fluid strokes to define its form. Pay attention to the curvature and proportions, ensuring that the shape aligns with your vision for the specific type of hat you're drawing.
Next, extend your focus to the brim of the hat, if applicable. The brim adds character and dimension to the hat, and its size and curvature can vary significantly based on the style. Whether it's a narrow, upturned brim or a wide, downturned brim, carefully sketch the outline to complement the crown's shape. Take note of any asymmetrical elements or unique angles that contribute to the hat's distinctive appearance.
As you refine the basic shape, consider the angle at which the hat will be positioned. Will it be perched jauntily to one side, or will it sit squarely atop the head? Adjust the proportions and alignment of the crown and brim to convey the desired tilt or angle, adding a dynamic touch to your hat drawing.
Throughout this process, maintain a light touch with your pencil, allowing for fluid adjustments and modifications as you capture the essence of the hat's form. Remember that the basic shape serves as the framework for the subsequent steps, guiding the development of details, textures, and shading that will imbue the hat with depth and realism.
By mastering the art of drawing the basic shape, you lay a solid groundwork for the intricate nuances that will elevate your hat illustration to a captivating work of art. With the foundational structure in place, you're ready to embark on the next steps of adding details, textures, and final touches to bring your hat drawing to fruition.
Step 2: Adding Details
With the foundational shape of the hat sketched out, it's time to infuse character and personality into the illustration by adding intricate details. This step is where the unique features of the hat style come to life, distinguishing it from other headwear and capturing the essence of its design.
Begin by focusing on the crown of the hat, where subtle details often contribute to its distinct appeal. If the hat features a ribbon, band, or decorative embellishments, carefully outline these elements to accentuate the hat's style. Pay attention to the placement and curvature of such details, ensuring that they complement the overall shape of the crown.
Moving on to the brim, take note of any specific textures or patterns that adorn its surface. Whether it's a ribbed texture, a woven pattern, or a smooth finish, these details play a pivotal role in conveying the material and character of the hat. Use light, precise strokes to capture these textures, allowing the brim to emerge as a focal point of visual interest within the illustration.
If the hat includes embellishments such as feathers, flowers, or decorative pins, delicately sketch these elements to enhance the hat's allure. Consider the placement and arrangement of these adornments, envisioning how they contribute to the overall aesthetic of the hat and complement its wearer.
Additionally, pay close attention to any seams, stitching, or structural elements that define the hat's construction. These subtle details can add depth and realism to the illustration, showcasing the craftsmanship and artistry inherent in the hat's design.
As you add details, remain attuned to the proportions and balance of the hat, ensuring that each element harmonizes with the overall composition. Embrace the opportunity to infuse creativity and flair into the illustration, allowing the details to reflect the unique character and charm of the hat style you're portraying.
By meticulously incorporating these intricate details, you breathe life into the hat illustration, transforming it from a basic shape into a captivating work of art that resonates with authenticity and visual appeal. With the details artfully rendered, the hat begins to exude its distinctive allure, inviting viewers to appreciate the artistry and craftsmanship encapsulated in this timeless accessory.
Step 3: Adding Texture and Shadows
As we delve into the third step of drawing a hat, we venture into the realm of texture and shadows, where the artistry truly comes to life. Texture and shadows are instrumental in infusing depth, dimension, and realism into the hat illustration, elevating it from a two-dimensional sketch to a visually captivating portrayal of form and materiality.
Texture plays a pivotal role in conveying the tactile qualities of the hat's fabric or material. Whether it's the smooth sheen of a satin hat, the coarse weave of a straw hat, or the plush softness of a woolen beanie, capturing these textural nuances adds a layer of authenticity to the illustration. Begin by observing the reference images of the hat style you're drawing, paying close attention to the surface texture and how light interacts with it. With a keen eye, use your pencil to emulate these textures, employing varied strokes and pressures to mimic the tactile feel of the hat's material. For instance, for a straw hat, consider employing cross-hatching techniques to simulate the woven texture, while for a sleek satin hat, opt for smooth, controlled shading to convey its lustrous surface.
Shadows play a crucial role in defining the hat's form and interaction with light. As you observe the hat or reference images, take note of the areas where shadows naturally fall, accentuating the contours and curvature of the hat. Consider the direction of light and how it casts shadows, creating depth and visual interest. With a nuanced understanding of light and shadow, use your pencil to delicately render these shadowed areas, employing varying degrees of pressure to achieve gradations of tone. By skillfully incorporating shadows, you impart a sense of volume and three-dimensionality to the hat, allowing it to emerge as a compelling and realistic depiction.
Throughout the process of adding texture and shadows, maintain a keen focus on the interplay of light and dark, leveraging these elements to imbue the hat illustration with a sense of dynamism and presence. Embrace the opportunity to infuse your drawing with a heightened sense of realism, allowing the hat to transcend its static form and exude a palpable sense of materiality and depth.
With texture and shadows artfully integrated, the hat illustration blossoms into a captivating portrayal that resonates with authenticity and visual allure. The interplay of texture and shadows breathes life into the drawing, infusing it with a sense of tactile richness and visual depth that captivates the viewer's imagination.
Read more: How To Clean White Hat
Step 4: Adding Final Touches
As we approach the culmination of the hat drawing process, the final touches serve as the crowning moments that elevate the illustration to a polished and captivating masterpiece. This pivotal step allows for meticulous refinements and subtle enhancements that bring cohesiveness and finesse to the hat portrayal, ensuring that every detail harmonizes to create a compelling visual narrative.
One of the key aspects of adding final touches involves refining the transitions between light and shadow. By carefully assessing the interplay of light on the hat's surface, you can delicately adjust the shading to achieve seamless gradations and subtle tonal variations. This attention to detail enhances the hat's three-dimensional presence, infusing it with a heightened sense of realism and depth.
Furthermore, consider accentuating specific focal points of the hat, such as intricate embellishments, textural details, or areas of visual interest. By selectively refining these focal elements with precision and clarity, you draw the viewer's gaze to the captivating nuances that define the hat's character and allure. Whether it's a gleaming hat pin, a delicately rendered ribbon, or the intricate weave of a straw hat, these final refinements imbue the illustration with a sense of refinement and artistry.
Incorporating subtle highlights can also contribute to the hat's visual impact, adding a touch of luminosity and vitality to the illustration. By strategically applying highlights to areas where light catches and reflects off the hat's surface, you infuse the drawing with a sense of vitality and luminance, enhancing its overall visual appeal and allure.
Additionally, consider fine-tuning the contours and proportions of the hat, ensuring that its silhouette exudes a sense of balance and elegance. Refining the curves, edges, and structural elements with precision and attention to detail allows the hat to emerge as a harmonious and visually captivating focal point within the illustration.
As you add the final touches, approach the process with a discerning eye and a commitment to achieving a cohesive and refined portrayal of the hat. Each subtle adjustment and enhancement contributes to the overall impact of the illustration, culminating in a visually striking and evocative representation of the hat's unique charm and character.
With the addition of these final refinements, the hat illustration transcends mere representation, evolving into a captivating work of art that resonates with authenticity and visual allure. The culmination of the final touches marks the completion of a creative journey, resulting in a meticulously crafted portrayal that celebrates the timeless elegance and allure of hats.
Conclusion
In conclusion, the art of drawing a hat encompasses a rich tapestry of creativity, observation, and technical skill. From the initial sketch of the basic shape to the meticulous rendering of textures, shadows, and final refinements, the process of capturing the essence of a hat on paper is a journey of artistic exploration and expression.
Through this creative endeavor, aspiring artists and enthusiasts alike have the opportunity to hone their observational skills, deepen their understanding of form and texture, and cultivate a profound appreciation for the intricate details that define the character of different hat styles. The act of translating the visual allure of hats onto the canvas or paper fosters a heightened sensitivity to the interplay of light and shadow, the tactile qualities of materials, and the nuanced craftsmanship inherent in hat design.
Moreover, drawing a hat serves as a testament to the timeless allure and cultural significance of headwear. Hats have long been emblematic of style, identity, and tradition, embodying a diverse array of meanings across various cultures and historical periods. By delving into the art of drawing hats, artists engage in a dialogue with this rich tapestry of cultural symbolism, infusing their illustrations with a sense of narrative and resonance that transcends mere representation.
Furthermore, the process of drawing a hat offers a gateway to boundless creativity and self-expression. Whether it's the sleek sophistication of a fedora, the whimsical charm of a beret, or the rugged elegance of a cowboy hat, each style presents a unique opportunity for artists to imbue their illustrations with personality, flair, and individuality. The act of capturing the distinct character of each hat style fosters a sense of creative exploration and imaginative interpretation, inviting artists to infuse their drawings with a touch of their own artistic sensibility.
Ultimately, drawing a hat is not merely an exercise in technical skill, but a celebration of the artistry, cultural significance, and creative potential encapsulated in this timeless accessory. As artists embark on the journey of bringing hats to life on paper, they partake in a rich tapestry of visual storytelling, craftsmanship, and self-discovery, culminating in illustrations that resonate with authenticity, charm, and the enduring allure of hats.