Home>Arts and Culture>How To Clean Cricut Mat
Arts and Culture
How To Clean Cricut Mat
Published: March 1, 2024
Learn the best techniques for cleaning your Cricut mat to keep it in top condition for your arts and culture projects. Discover easy tips and tricks for maintaining your cutting mat.
(Many of the links in this article redirect to a specific reviewed product. Your purchase of these products through affiliate links helps to generate commission for Noodls.com, at no extra cost. Learn more)
Table of Contents
Introduction
Cricut machines have revolutionized the world of arts and crafts, empowering enthusiasts to bring their creative visions to life with precision and ease. Central to the functionality of these cutting machines is the Cricut mat, a crucial component that provides stability and grip for various materials during the cutting process. Over time, the Cricut mat accumulates debris, lint, and residue from the materials used, which can compromise its adhesive properties and affect the quality of the cuts. To ensure optimal performance and longevity of your Cricut mat, regular cleaning and maintenance are essential.
In this comprehensive guide, we will walk you through the step-by-step process of effectively cleaning your Cricut mat, restoring its tackiness, and extending its lifespan. By following these simple yet crucial maintenance steps, you can continue to create stunning projects with precision and confidence, knowing that your Cricut mat is in prime condition.
Let's dive into the materials needed and the detailed steps to rejuvenate your Cricut mat and keep it in top-notch condition for all your crafting endeavors.
Read more: How To Detangle Matted Hair
Materials Needed
To embark on the journey of reviving your Cricut mat, you will need a few simple yet essential materials. These items are readily available and will facilitate the cleaning and restoration process, ensuring that your Cricut mat is rejuvenated to its optimal state. Here's what you'll need:
-
Lint Roller: A lint roller is a handy tool for swiftly removing debris, dust, and tiny fibers that have accumulated on the surface of the mat. It effectively lifts and traps these particles, preparing the mat for a deeper cleaning process.
-
Mild Liquid Soap: Opt for a gentle, mild liquid soap that is free from harsh chemicals and additives. This will be used to cleanse the mat and remove any stubborn residue without compromising its adhesive properties.
-
Soft Bristle Brush or Sponge: A soft-bristled brush or sponge will aid in the gentle scrubbing of the mat, assisting in the removal of any embedded particles and ensuring a thorough cleaning process.
-
Clean Towels or Paper Towels: These will be utilized for drying the mat after cleaning and rinsing, ensuring that it is completely free from moisture before proceeding to the next step.
-
Warm Water: Warm water is an essential component of the cleaning process, as it helps to dissolve and remove any residual debris and cleaning agents from the mat's surface.
-
Rubbing Alcohol (Optional): In some cases, rubbing alcohol can be used to tackle persistent residue or buildup on the mat. It serves as a powerful solvent, effectively breaking down and lifting stubborn substances.
Gathering these materials before you begin the cleaning process will streamline the experience and ensure that you have everything you need to restore your Cricut mat to its former glory. With these items at your disposal, you are well-equipped to embark on the journey of rejuvenating your Cricut mat and maintaining its peak performance.
Step 1: Remove Debris
The first step in revitalizing your Cricut mat involves the meticulous removal of debris, dust, and particles that have accumulated on its surface. This initial phase is crucial, as it sets the foundation for a thorough cleaning process and prepares the mat for the subsequent rejuvenation steps.
To commence this essential stage, begin by utilizing a lint roller to gently but effectively lift and remove any loose debris and tiny fibers that may be clinging to the mat. The adhesive nature of the lint roller makes it an ideal tool for swiftly capturing these particles, ensuring that the mat's surface is free from any superficial contaminants.
As you roll the lint roller across the mat, pay close attention to areas where debris tends to accumulate, such as the edges and corners. By methodically addressing these regions, you can ensure that the entire surface of the mat is effectively cleared of any loose particles, setting the stage for a more comprehensive cleaning process.
In addition to the lint roller, a soft-bristled brush or sponge can be employed to gently dislodge any embedded debris that may be more stubborn or ingrained in the mat's surface. With delicate yet deliberate motions, lightly brush or sponge the mat, focusing on areas that require extra attention. This gentle agitation helps to loosen and lift any residual particles, further priming the mat for the subsequent cleaning steps.
By diligently removing debris from the Cricut mat in this methodical manner, you are laying the groundwork for a successful rejuvenation process. This meticulous approach ensures that the mat is free from surface-level contaminants, setting the stage for a deeper and more effective cleansing in the following steps. With the debris effectively removed, the mat is now ready to undergo the next phase of the cleaning process, bringing it one step closer to its revitalized state.
This careful attention to detail in removing debris sets the tone for the comprehensive cleaning and restoration of your Cricut mat, ensuring that it is primed for optimal performance and longevity in your crafting endeavors.
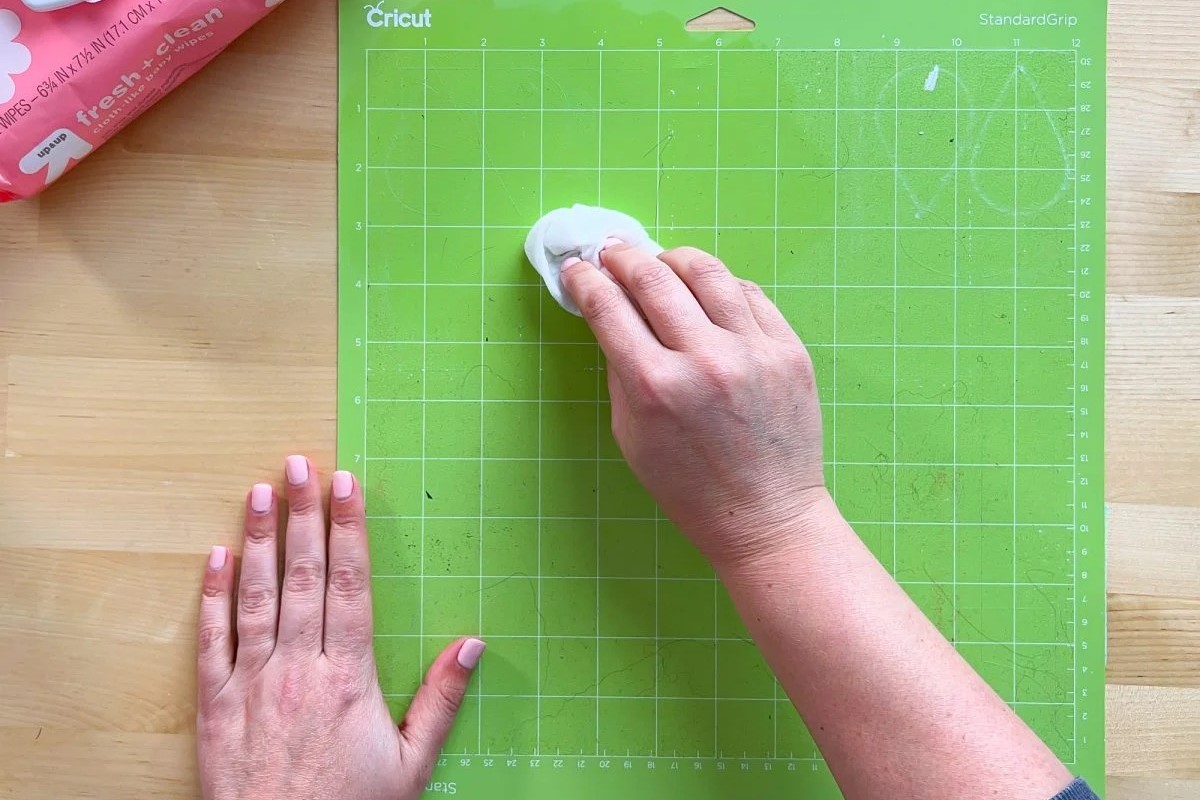
Step 2: Wash with Soap and Water
With the debris effectively removed from the Cricut mat, the next pivotal step in its rejuvenation process involves a thorough cleansing with a mild liquid soap and warm water. This step is instrumental in eliminating any lingering residue, restoring the mat's tackiness, and ensuring that it is primed for optimal performance in future crafting endeavors.
To initiate the washing process, prepare a gentle solution by combining a small amount of mild liquid soap with warm water. It is crucial to use a mild soap that is free from harsh chemicals and additives, as these can compromise the adhesive properties of the mat. The warm water aids in the dissolution of any residual debris and cleaning agents, facilitating a more effective cleansing process.
Using a soft-bristled brush or sponge, delicately apply the soapy solution to the surface of the Cricut mat. With gentle and methodical motions, work the solution into the mat, focusing on areas that may have accumulated stubborn residue or buildup. This meticulous approach ensures that the entire surface of the mat is thoroughly cleansed, preparing it for the subsequent restoration steps.
As you cleanse the mat, pay particular attention to any areas that have exhibited reduced tackiness or adhesion, as these regions may require additional care and attention. By systematically addressing these areas with the soapy solution, you can effectively lift and remove any residual substances that may be impeding the mat's performance.
Once the mat has been cleansed with the soapy solution, rinse it thoroughly with warm water to remove any remaining soap and debris. It is essential to ensure that the mat is completely free from soap residue, as this can affect its adhesive properties and compromise the quality of future cuts.
After rinsing, gently pat the mat with clean towels or paper towels to remove excess moisture, taking care not to rub or agitate the surface excessively. It is crucial to allow the mat to air dry completely before proceeding to the next step, ensuring that it is free from moisture and ready for the final phase of its rejuvenation.
By meticulously washing the Cricut mat with a gentle soap and warm water, you are effectively removing residual debris and buildup, restoring its tackiness, and preparing it for the subsequent steps in its revitalization. This thorough cleansing sets the stage for the mat to regain its optimal adhesive properties, ensuring that it is ready to deliver precise and flawless cuts in your future crafting endeavors.
Step 3: Air Dry
After the thorough washing process, the Cricut mat must undergo a crucial phase of the rejuvenation process: air drying. This step is essential to ensure that the mat is completely free from moisture before proceeding to the final restoration phase. Proper air drying is instrumental in preserving the adhesive properties of the mat and preparing it for seamless integration into your crafting projects.
To commence the air drying process, place the washed Cricut mat in a clean and well-ventilated area, ensuring that it is laid flat on a dry surface. It is imperative to avoid exposing the mat to direct sunlight or excessive heat during the drying process, as this can potentially compromise its adhesive properties. Instead, opt for a location with adequate airflow and minimal humidity to facilitate the efficient evaporation of moisture from the mat.
Allow the mat to air dry naturally, refraining from using any artificial heat sources or accelerants to expedite the process. While it may be tempting to hasten the drying time, it is crucial to exercise patience and allow the mat to dry at its own pace. This gradual drying process ensures that the adhesive surface of the mat is preserved and that it is ready to deliver optimal performance in your future crafting endeavors.
The duration of the air drying process may vary depending on environmental factors such as humidity and airflow. It is advisable to periodically check the mat during the drying phase, ensuring that it is progressing towards complete dryness. Patience is key during this phase, as thorough air drying is essential to the overall rejuvenation of the Cricut mat.
As the mat gradually dries, it is important to refrain from touching or manipulating its surface, as this can introduce contaminants or disrupt the drying process. Maintaining a hands-off approach during air drying ensures that the mat remains free from interference, allowing it to reach its fully dried state without any impediments.
Once the mat has air dried completely, it is ready to proceed to the final phase of its restoration. The thorough air drying process ensures that the mat is free from moisture and primed for the subsequent steps, setting the stage for its seamless integration into your crafting projects.
By allowing the Cricut mat to air dry naturally, you are preserving its adhesive properties and ensuring that it is ready to deliver precise and reliable performance in your future creative endeavors. This patient and meticulous approach to air drying is integral to the overall rejuvenation process, culminating in a revitalized Cricut mat that is prepared to elevate your crafting projects with precision and finesse.
Read more: How To Wash Squishmallows
Step 4: Restick the Mat
Once the Cricut mat has undergone the essential steps of debris removal, washing, and thorough air drying, it is primed for the pivotal phase of resticking. This critical step is instrumental in rejuvenating the mat's adhesive properties, ensuring that it provides optimal grip and stability for various crafting materials during the cutting process.
To initiate the resticking process, it is essential to utilize a method that effectively restores the mat's tackiness without compromising its surface or adhesive integrity. One widely favored approach involves the use of a gentle adhesive spray or repositionable adhesive designed specifically for Cricut mats. These specialized products are formulated to rejuvenate the adhesive surface of the mat, allowing it to regain its tackiness and grip without leaving any residue or causing damage.
Before applying the adhesive spray or repositionable adhesive, it is crucial to ensure that the mat is clean, dry, and free from any residual debris or moisture. This sets the stage for the successful restoration of its adhesive properties, allowing the mat to seamlessly integrate into your crafting projects with precision and reliability.
With the mat prepared, apply the adhesive spray or repositionable adhesive evenly across its surface, ensuring comprehensive coverage without oversaturation. It is important to follow the specific instructions provided by the manufacturer of the adhesive product, as these guidelines are tailored to optimize the resticking process and ensure the longevity of the mat's adhesive properties.
After applying the adhesive spray or repositionable adhesive, allow the mat to rest undisturbed for the recommended duration specified by the product instructions. This period allows the adhesive to set and bond effectively with the mat's surface, rejuvenating its tackiness and preparing it for seamless utilization in your crafting endeavors.
Once the resticking process is complete, gently pat the mat with a clean towel to ensure that the adhesive is evenly distributed and any excess product is removed. It is crucial to allow the mat to rest undisturbed for the specified curing time, facilitating the optimal restoration of its adhesive properties.
With the resticking process concluded, the Cricut mat is now revitalized and ready to deliver precise and reliable performance in your crafting projects. The successful restoration of its adhesive properties ensures that the mat provides the necessary grip and stability for various materials, empowering you to create stunning designs with confidence and precision.
This meticulous approach to resticking the Cricut mat culminates in its rejuvenation, setting the stage for seamless integration into your crafting endeavors and ensuring that it continues to be a vital tool in bringing your creative visions to life.
Conclusion
In conclusion, the process of cleaning and rejuvenating your Cricut mat is a vital aspect of maintaining its optimal performance and longevity. By diligently following the step-by-step guide outlined in this comprehensive article, you have embarked on a journey to restore your Cricut mat to its prime condition, ensuring that it continues to be a reliable and indispensable tool in your crafting endeavors.
The meticulous removal of debris, thorough washing with a mild soap and warm water, patient air drying, and the pivotal resticking process have collectively contributed to the revitalization of your Cricut mat. Through these essential steps, you have effectively eliminated accumulated residue, restored the mat's tackiness, and prepared it for seamless integration into your future creative projects.
As you reflect on the rejuvenation process, it is important to recognize the significance of regular maintenance in preserving the functionality and effectiveness of your Cricut mat. By incorporating these cleaning and restoration steps into your crafting routine, you are actively investing in the longevity and performance of this essential tool, ensuring that it continues to facilitate your creative pursuits with precision and reliability.
Furthermore, the revitalization of your Cricut mat serves as a testament to the care and attention you have dedicated to your crafting equipment. By prioritizing the maintenance and upkeep of your tools, you are fostering an environment that nurtures creativity and empowers you to explore new artistic horizons with confidence.
As you prepare to reintegrate your revitalized Cricut mat into your crafting projects, take a moment to appreciate the dedication and effort you have invested in its rejuvenation. The revitalized mat stands as a testament to your commitment to excellence and your unwavering passion for the art of crafting.
With a revitalized Cricut mat at your disposal, you are poised to embark on a journey of creativity and innovation, empowered by a tool that has been meticulously restored to its optimal state. As you embark on future projects, may the revitalized Cricut mat serve as a steadfast companion, enabling you to bring your creative visions to life with precision, finesse, and unwavering reliability.