Lifestyle
How To Tie Belt On Dress
Published: March 1, 2024
Learn the best techniques for tying a belt on a dress to elevate your style and enhance your lifestyle. Discover step-by-step instructions and tips for achieving the perfect look.
(Many of the links in this article redirect to a specific reviewed product. Your purchase of these products through affiliate links helps to generate commission for Noodls.com, at no extra cost. Learn more)
Table of Contents
Introduction
Tying a belt around a dress is a simple yet effective way to accentuate your waist and add a touch of elegance to your outfit. Whether you're dressing up for a special occasion or simply elevating your everyday look, mastering the art of tying a belt on a dress can instantly elevate your style game. By following a few easy steps, you can effortlessly transform your ensemble and create a flattering silhouette that complements your body shape.
Tying a belt on a dress allows you to customize the fit and add a personal touch to your attire. It's a versatile styling technique that can be adapted to various dress styles, from flowy maxi dresses to structured sheath dresses. Additionally, the right belt can serve as a fashion statement, adding a pop of color or a touch of texture to your ensemble.
In this comprehensive guide, we will walk you through the step-by-step process of tying a belt on a dress, offering valuable tips to ensure a polished and stylish result. Whether you prefer a classic knot or a trendy bow, understanding the fundamentals of belt tying will empower you to experiment with different looks and express your unique sense of style.
So, whether you're getting ready for a casual outing, a formal event, or simply looking to elevate your everyday attire, learning how to tie a belt on a dress is a valuable skill that can enhance your fashion repertoire. Let's dive into the steps and discover the art of effortlessly accentuating your dress with a chic belt.
Read more: How To Tie A Wrap Dress
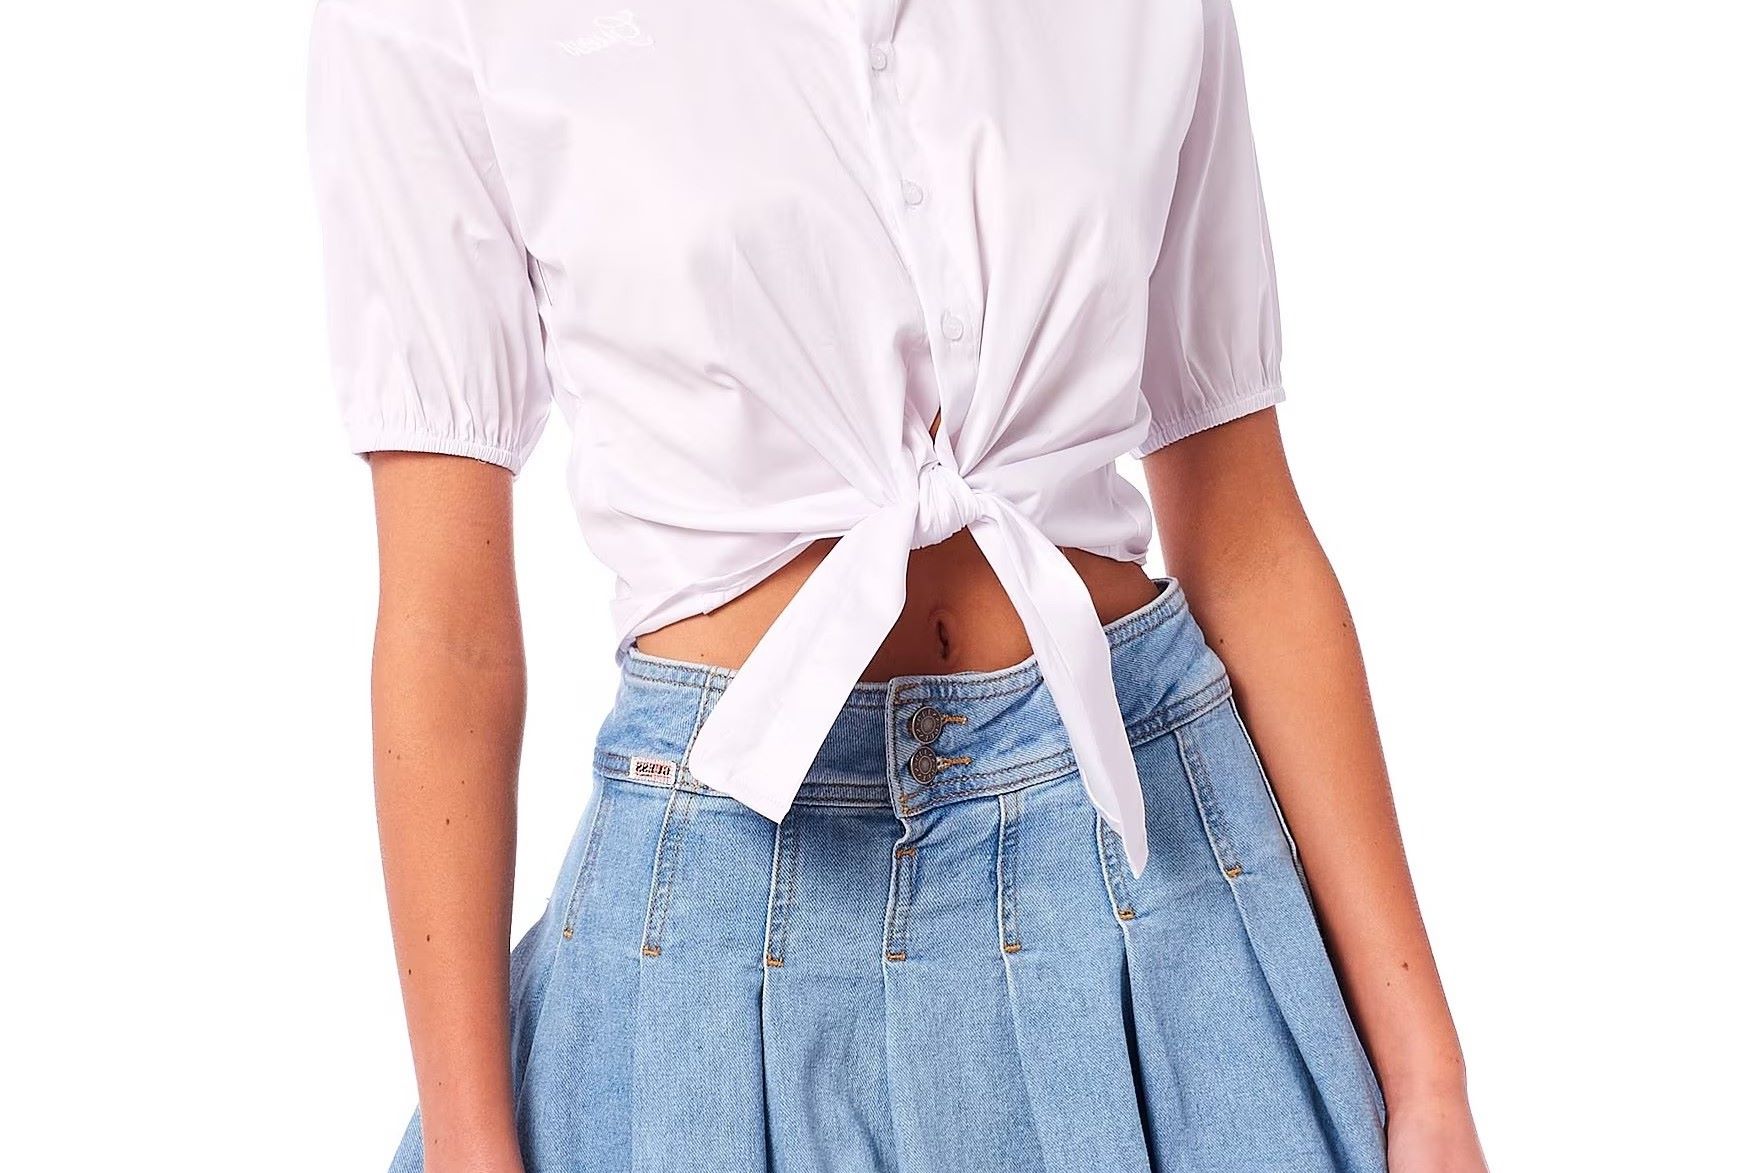
Step 1: Wrap the belt around your waist
Begin by holding the dress against your body and identifying the natural waistline, which is typically the narrowest part of your torso. This step is crucial as it ensures that the belt is positioned at the most flattering point on your body, accentuating your curves and creating a defined silhouette.
Once you've located your natural waist, drape the belt around your waistline, ensuring that both ends hang evenly on each side. For a sleek and symmetrical look, make sure the belt is positioned parallel to the hemline of the dress. This initial placement sets the foundation for the subsequent steps and determines the overall appearance of the tied belt.
When wrapping the belt around your waist, be mindful of the fabric and thickness of the belt. For a more structured dress, a wider belt can add a bold statement, while a thinner belt complements a delicate or flowy dress. Additionally, consider the color and texture of the belt, as it can serve as a striking contrast or a harmonious complement to the dress.
As you secure the belt around your waist, ensure that it is comfortably snug without being overly tight. The goal is to create a defined waistline without sacrificing comfort. Pay attention to the positioning of the belt, ensuring that it sits securely without sliding or bunching up as you proceed to the next steps.
By wrapping the belt around your waist with precision and attention to detail, you set the stage for a polished and sophisticated look. This foundational step forms the basis for the subsequent maneuvers, allowing you to seamlessly proceed to the next phase of tying the belt on your dress.
With the belt elegantly encircling your waist, you are now ready to move on to the next step, where the art of tying the perfect knot or creating a stylish bow will further enhance the visual appeal of your dress. As you proceed to the following steps, the carefully wrapped belt will serve as the focal point, adding a touch of refinement and personal flair to your ensemble.
Step 2: Cross the ends of the belt
After wrapping the belt around your waist, the next step in tying a belt on a dress involves crossing the ends of the belt to prepare for the final knot or bow. This pivotal maneuver sets the stage for creating a visually appealing and secure fastening that enhances the overall look of your dress.
To cross the ends of the belt, gently take hold of each end and ensure they are of equal length. This symmetrical alignment is essential for achieving a balanced and harmonious appearance. With precision and attention to detail, carefully cross the ends of the belt, ensuring that they intersect at the center of your waistline.
As you cross the belt ends, take a moment to assess the positioning and alignment. The crossover point should be neat and centered, creating a seamless transition from the initial wrapping to the subsequent knot or bow. This deliberate crossing of the belt ends serves as a foundational element, setting the stage for the final embellishment that will elevate the aesthetic appeal of your dress.
Consider the type of knot or bow you intend to create, as this will influence the manner in which you cross the belt ends. For a classic knot, a simple crossover suffices, while a stylish bow may require a more intricate intertwining of the ends. By visualizing the desired end result, you can tailor the crossing of the belt ends to align with your preferred style, ensuring a cohesive and polished appearance.
As you complete the crossover, take a moment to adjust the tension of the belt ends, ensuring that they are securely positioned and ready for the subsequent steps. This attention to detail ensures that the crossed ends are poised for the final manipulation, whether it be a snug knot or an artfully tied bow.
With the ends of the belt elegantly crossed and poised for the next maneuver, you are now ready to proceed to the subsequent step, where the art of fastening the belt reaches its culmination. As you transition to the following phase, the carefully crossed belt ends serve as a testament to your meticulous approach, laying the groundwork for the final embellishment that will adorn your dress with sophistication and style.
Step 3: Bring one end of the belt through the loop
With the belt ends elegantly crossed at the center of your waist, the next pivotal step in tying a belt on a dress involves bringing one end of the belt through the loop created by the crossover. This maneuver sets the stage for securing the belt in place and adds a touch of finesse to the overall presentation of your dress.
To bring one end of the belt through the loop, carefully select one of the crossed ends and gently guide it underneath the layer where the two ends intersect. This deliberate threading creates a secure foundation for the subsequent knot or bow, ensuring that the belt remains firmly fastened and visually appealing.
As you guide the end of the belt through the loop, pay attention to the positioning and alignment, ensuring that the fabric glides smoothly and forms a neat fold. This meticulous approach contributes to a refined and polished appearance, elevating the overall aesthetic of the tied belt and accentuating your dress with sophistication.
Consider the type of knot or bow you intend to create, as this will influence the manner in which you thread the belt end through the loop. For a classic knot, a straightforward passage through the loop suffices, while a stylish bow may require a more intricate manipulation of the fabric. By visualizing the desired end result, you can tailor the threading of the belt end to align with your preferred style, ensuring a cohesive and elegant presentation.
As you complete the threading, take a moment to adjust the tension of the belt, ensuring that it is snug and secure. This attention to detail ensures that the threaded end is poised for the final manipulation, whether it be a discreet knot or an artfully tied bow, adding a touch of flair to your dress.
With one end of the belt elegantly threaded through the loop, you are now ready to proceed to the subsequent step, where the art of securing the belt reaches its culmination. As you transition to the following phase, the carefully threaded belt end serves as a testament to your meticulous approach, laying the groundwork for the final embellishment that will adorn your dress with sophistication and style.
Step 4: Pull the ends to tighten the belt
As you approach the pivotal stage of tightening the belt, the transformative potential of this maneuver comes to the forefront. With one end elegantly threaded through the loop and the other end poised for manipulation, the act of pulling the ends to tighten the belt represents the culmination of your meticulous efforts, adding the finishing touch to your dress ensemble.
Begin by gently grasping both ends of the belt, ensuring a firm yet delicate hold that allows for controlled manipulation. As you prepare to tighten the belt, maintain a keen awareness of the desired level of snugness, as this will determine the overall silhouette and visual impact of the tied belt.
With a subtle yet purposeful motion, begin to pull the ends of the belt in opposite directions, gradually cinching the fabric and creating a tailored fit around your waist. This gradual tightening allows for precision and refinement, ensuring that the belt snugly embraces your waist without compromising comfort.
As you adjust the tension of the belt, take a moment to assess the symmetry and alignment, ensuring that both ends are equally taut and elegantly positioned. This harmonious balance contributes to a polished and cohesive appearance, elevating the overall aesthetic of the tied belt and accentuating your dress with sophistication.
Consider the fabric and texture of the belt as you tighten it, as different materials may require varying degrees of manipulation. A supple leather belt may respond differently than a woven fabric belt, requiring a nuanced approach to achieve the desired fit. By adapting your technique to suit the unique characteristics of the belt, you can ensure a seamless and refined result.
As the belt gradually tightens around your waist, take a moment to revel in the transformative power of this simple yet impactful maneuver. The carefully orchestrated tightening process not only accentuates your silhouette but also serves as a testament to your attention to detail and sartorial finesse.
With the belt elegantly secured and tailored to perfection, you have now completed the pivotal stage of tightening the belt, setting the stage for the final embellishment that will adorn your dress with sophistication and style. As you proceed to the subsequent step, the art of adjusting the belt for the desired look will further enhance the visual appeal of your ensemble, allowing you to showcase your unique sense of style with confidence and grace.
Read more: How To Tie A Durag
Step 5: Adjust the belt for desired look
With the belt elegantly secured around your waist, the final step in tying a belt on a dress involves the art of adjusting the belt to achieve the desired look. This pivotal maneuver allows you to fine-tune the presentation of your dress ensemble, ensuring that the belt complements the overall aesthetic and accentuates your personal style with finesse.
As you prepare to adjust the belt for the desired look, take a moment to assess the positioning and tension, ensuring that the fabric drapes smoothly and enhances the silhouette of the dress. Whether you opt for a sleek and understated finish or a more pronounced and embellished style, the manner in which you adjust the belt can significantly impact the overall visual appeal of your ensemble.
Consider the type of dress you are wearing and the occasion for which you are styling your outfit. For a casual daytime look, you may prefer a relaxed and slightly asymmetrical positioning of the belt, adding a touch of effortless charm to your attire. In contrast, a formal evening ensemble may call for a meticulously centered and impeccably aligned belt, exuding a sense of refinement and sophistication.
Take into account the fabric and design of the dress as you adjust the belt, ensuring that the two elements harmonize seamlessly. A structured dress may benefit from a precisely positioned belt that accentuates the waistline, while a flowing or draped dress may allow for a more fluid and relaxed adjustment, creating an air of graceful elegance.
Furthermore, consider the embellishments or details on the dress, such as pleats, ruching, or decorative elements. Adapting the positioning of the belt to complement these features can elevate the overall impact of your ensemble, creating a cohesive and harmonious look that exudes style and confidence.
As you finesse the positioning of the belt, take a step back and assess the overall effect, ensuring that the adjustment enhances the visual appeal of your dress without overpowering its inherent charm. The goal is to achieve a balanced and harmonious presentation that accentuates your figure and showcases your unique sense of style.
By artfully adjusting the belt for the desired look, you complete the transformative process of tying a belt on a dress, culminating in a polished and sophisticated ensemble that reflects your individuality and sartorial flair. With the belt serving as a stylish accent that enhances the silhouette and adds a personalized touch to your dress, you are ready to step out with confidence, knowing that your outfit exudes elegance and refinement.
Conclusion
In conclusion, mastering the art of tying a belt on a dress is a valuable skill that empowers individuals to elevate their fashion ensembles with sophistication and style. By following the step-by-step process outlined in this comprehensive guide, you can effortlessly transform your dress into a polished and flattering ensemble that accentuates your silhouette and showcases your unique sense of style.
Tying a belt on a dress offers a myriad of benefits, allowing you to customize the fit, add a touch of elegance, and create a personalized statement with your attire. Whether you opt for a classic knot or a trendy bow, the art of tying a belt enables you to experiment with different looks and express your individuality through fashion.
The process begins with wrapping the belt around your waist, ensuring that it is positioned at the most flattering point on your body. By carefully crossing the ends of the belt and threading one end through the loop, you lay the foundation for the final embellishment that will adorn your dress with finesse. As you proceed to pull the ends to tighten the belt and adjust it for the desired look, you have the opportunity to fine-tune the presentation of your ensemble, creating a cohesive and harmonious appearance.
The transformative power of tying a belt on a dress lies in its ability to enhance the visual appeal of your outfit, accentuate your figure, and infuse your attire with a touch of refinement. Whether you're preparing for a casual outing, a formal event, or simply looking to elevate your everyday attire, the art of tying a belt offers endless possibilities for personal expression and sartorial creativity.
As you embrace the art of tying a belt on a dress, remember that attention to detail and a keen eye for aesthetics are key to achieving a polished and sophisticated result. By understanding the fundamentals of belt tying and infusing your unique personality into the process, you can effortlessly elevate your dress ensembles and exude confidence and grace with every step.
In essence, tying a belt on a dress transcends mere functionality; it is a form of self-expression and a testament to your individual style. With the knowledge and skills gained from this guide, you are equipped to embark on a sartorial journey filled with creativity, elegance, and the joy of effortlessly enhancing your dress with a chic and stylish belt.