Lifestyle
How To Tie Elastic Bracelet
Published: February 28, 2024
Learn how to tie elastic bracelets and add a stylish touch to your lifestyle with our easy-to-follow guide. Discover the latest trends and create your own unique accessories.
(Many of the links in this article redirect to a specific reviewed product. Your purchase of these products through affiliate links helps to generate commission for Noodls.com, at no extra cost. Learn more)
Table of Contents
Introduction
Creating your own elastic bracelet is a fun and rewarding way to express your personal style. Whether you're a beginner or an experienced crafter, making elastic bracelets allows you to unleash your creativity and design unique accessories that complement your outfits. With just a few materials and a little bit of time, you can craft beautiful bracelets that make a statement and showcase your individuality.
Designing and crafting elastic bracelets is not only a creative outlet but also a relaxing and enjoyable activity. It provides an opportunity to unwind, focus on the present moment, and engage in a mindful practice that can be both meditative and fulfilling. As you select beads, charms, and other embellishments for your bracelet, you'll find yourself immersed in a world of colors, textures, and shapes, allowing you to explore your artistic inclinations and experiment with different combinations to achieve the perfect look.
Moreover, creating your own elastic bracelets enables you to customize your accessories to suit your preferences and reflect your personality. Whether you prefer minimalist designs with delicate beads or bold statement pieces adorned with eye-catching charms, the possibilities are endless. You have the freedom to choose the colors, patterns, and styles that resonate with you, resulting in bracelets that are truly one-of-a-kind and tailored to your taste.
Additionally, crafting elastic bracelets can be a meaningful and thoughtful way to create personalized gifts for friends and loved ones. By incorporating elements that hold special significance, such as birthstones, initials, or symbols with sentimental value, you can craft bracelets that carry heartfelt messages and serve as cherished tokens of affection. The act of gifting a handmade bracelet not only demonstrates your creativity and thoughtfulness but also conveys a sense of care and appreciation for the recipient.
In the following sections, we will explore the step-by-step process of creating your own elastic bracelets, from gathering the necessary materials to tying secure knots and adding embellishments. By following these instructions, you'll be able to embark on a creative journey and produce stunning elastic bracelets that reflect your unique style and creativity. Let's dive into the world of bracelet crafting and unleash your imagination!
Read more: How To Tie A Shemagh
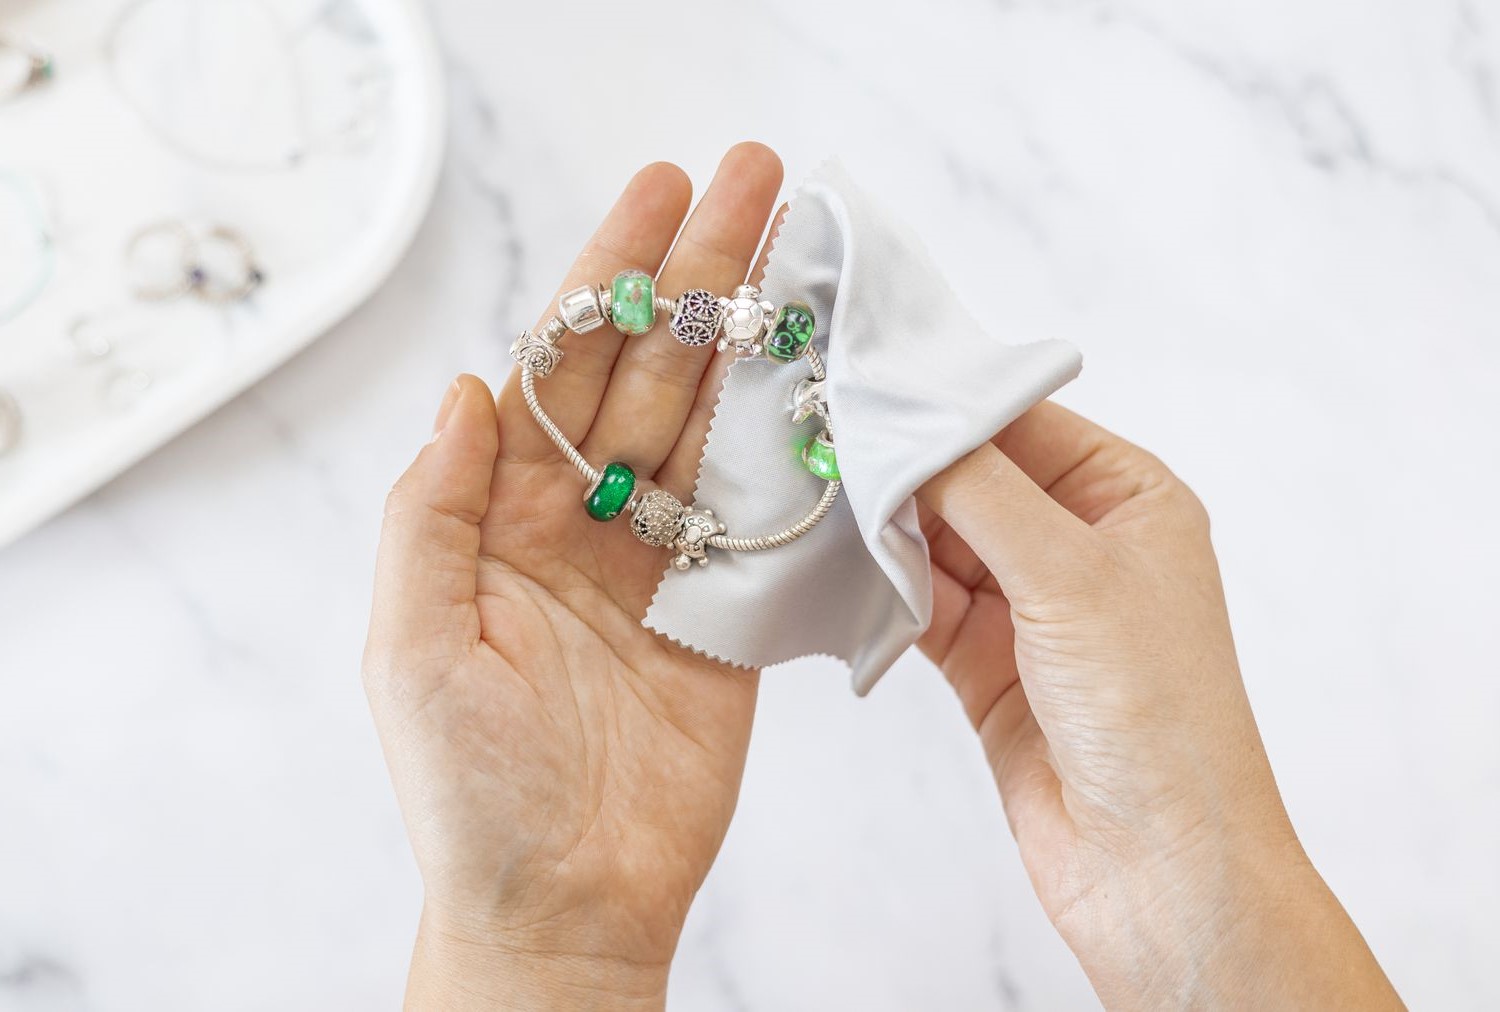
Materials Needed
To embark on the exciting journey of creating your own elastic bracelets, you'll need a few essential materials to bring your designs to life. Gathering the following items will set the stage for a fulfilling and enjoyable crafting experience:
-
Elastic Cord: Select a high-quality elastic cord specifically designed for jewelry making. Opt for a durable and stretchy cord that can withstand regular wear and maintain its elasticity over time. The thickness of the cord should complement the size of your beads and provide a secure foundation for your bracelet.
-
Beads and Charms: Explore a diverse selection of beads and charms to infuse your bracelet with personality and style. Choose from an array of materials, including glass, crystal, metal, wood, or gemstone beads, to achieve the desired aesthetic. Consider incorporating unique charms that resonate with your interests or hold sentimental value, adding a personal touch to your creations.
-
Scissors: A pair of sharp scissors is essential for cutting the elastic cord to the desired length. Opt for precision scissors that allow for clean and accurate cuts, ensuring a professional finish for your bracelets.
-
Bead Board or Tray: While not mandatory, a bead board or tray can facilitate the design process by providing a designated space to arrange and organize your beads before stringing them onto the elastic cord. This tool helps visualize the layout of your bracelet and experiment with different bead combinations.
-
Clear Nail Polish or Glue: To secure the knots and prevent the elastic cord from unraveling, have clear nail polish or jewelry glue on hand. Applying a small amount to the knots will reinforce their stability, ensuring that your bracelet withstands daily wear without compromising its integrity.
-
Optional Embellishments: Depending on your design preferences, you may choose to incorporate additional embellishments such as spacer beads, tassels, or decorative findings to enhance the visual appeal of your bracelet. These elements offer creative opportunities to elevate your designs and add intricate details.
By assembling these fundamental materials, you'll be well-equipped to embark on your bracelet-making journey and unleash your creativity. With a curated selection of beads, a reliable elastic cord, and essential tools at your disposal, you're ready to delve into the step-by-step process of crafting stunning elastic bracelets that reflect your unique style and artistic vision.
Step 1: Measure and Cut the Elastic
Before diving into the creative process of designing your elastic bracelet, it's essential to begin with the foundational step of measuring and cutting the elastic cord. This crucial stage sets the groundwork for a well-fitting and comfortable bracelet that aligns with your vision. Follow these detailed instructions to ensure precision and accuracy in preparing the elastic cord for your bracelet:
-
Determine the Length: Start by measuring the circumference of your wrist using a flexible tape measure or a piece of string. Wrap the measuring tool around your wrist, ensuring a snug yet comfortable fit. Take note of the measured length, which will serve as a guide for determining the required length of the elastic cord.
-
Add Extra Length: To accommodate the knotting process and allow for ease of stringing beads, add approximately 1 to 1.5 inches to the measured wrist circumference. This additional length provides the necessary allowance for securing the ends of the elastic cord and ensures that the bracelet fits comfortably without feeling too tight.
-
Cut the Elastic Cord: Using a sharp pair of scissors, carefully cut the elastic cord to the calculated length. It's important to execute a clean and straight cut to facilitate the subsequent steps of crafting the bracelet. A precise cut contributes to a professional finish and minimizes the risk of fraying or uneven ends.
By meticulously measuring and cutting the elastic cord according to these guidelines, you establish a solid foundation for the bracelet-making process. This initial step lays the groundwork for a well-proportioned and secure bracelet that aligns with your desired fit and comfort level. With the elastic cord prepared to the appropriate length, you're ready to progress to the next stage of adding beads or charms to infuse your bracelet with personality and style.
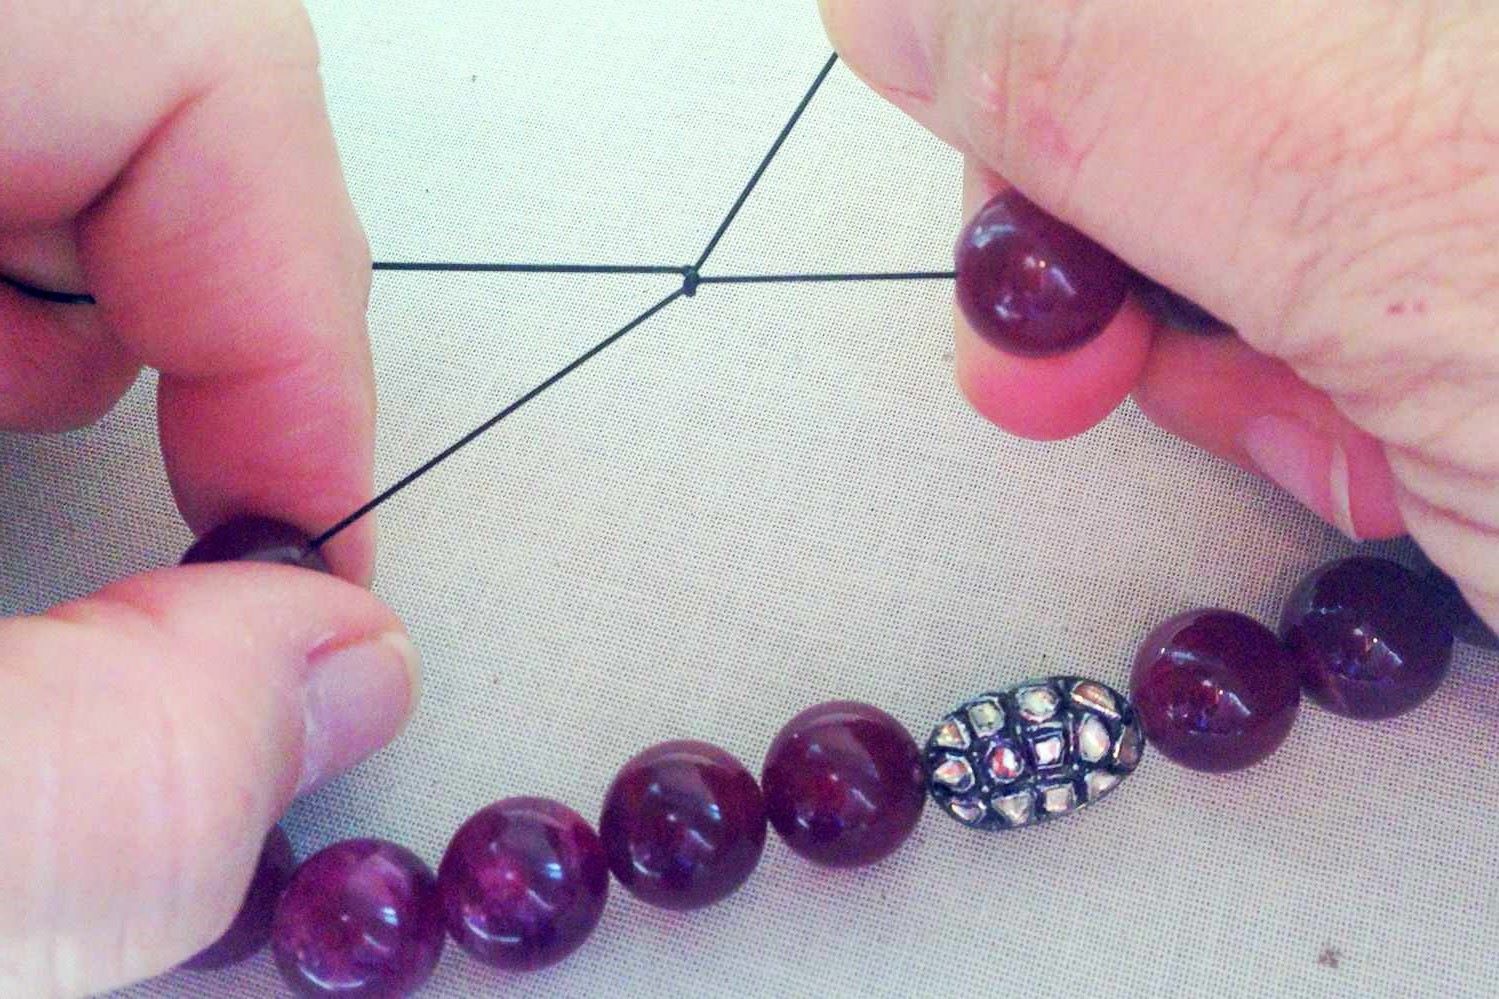
Step 2: Add Beads or Charms
With the elastic cord prepared to the appropriate length, the next step in crafting your elastic bracelet involves the creative process of adding beads or charms to infuse your design with personality and style. This stage offers a myriad of opportunities to experiment with colors, textures, and patterns, allowing you to tailor the bracelet to your unique preferences. Follow these detailed instructions to seamlessly string beads or attach charms to the elastic cord, bringing your vision to life with precision and artistry.
-
Selecting Beads or Charms: Begin by carefully selecting beads or charms that resonate with your aesthetic sensibilities and complement the overall theme of your bracelet. Whether you opt for vibrant glass beads, dazzling crystal accents, or intricately designed metal charms, the choices are limitless. Consider the visual impact, size, and arrangement of the beads to achieve a harmonious and visually appealing composition.
-
Planning the Layout: Lay out the chosen beads or charms in a designated area, such as a bead board or tray, to visualize the arrangement and sequence before stringing them onto the elastic cord. This preparatory step allows you to experiment with different combinations, ensuring that the final design reflects your desired aesthetic and captures the essence of your creative vision.
-
Stringing the Beads: With the layout planned, carefully thread the beads or charms onto the elastic cord in the predetermined sequence. Exercise patience and precision to avoid tangling or misalignment, ensuring that each element is securely positioned along the cord. As you string the beads, pay attention to the spacing and distribution to maintain a balanced and cohesive appearance.
-
Creating Patterns and Variations: Embrace the opportunity to incorporate patterns, color gradients, or alternating bead sizes to introduce visual interest and complexity to your design. Experiment with different arrangements to achieve a captivating and dynamic composition that reflects your artistic flair. Whether you prefer symmetrical patterns or asymmetrical arrangements, let your creativity guide the process.
-
Securing the Ends: Once all the beads or charms are in place, gently pull the elastic cord to ensure a snug fit and secure positioning of the elements. This step allows you to assess the overall appearance of the bracelet and make any necessary adjustments before proceeding to the next stage of tying a secure knot to complete the assembly.
By meticulously adding beads or charms to the elastic cord, you infuse your bracelet with a personalized touch and artistic expression. This transformative stage allows you to bring your creative vision to fruition, resulting in a stunning and unique accessory that reflects your individual style and craftsmanship. With the beads or charms elegantly strung along the elastic cord, your bracelet begins to take shape, setting the stage for the final steps of tying a secure knot and trimming any excess elastic to achieve a polished and professional finish.
Step 3: Tie a Secure Knot
Tying a secure knot is a critical step in the bracelet-making process, as it ensures the longevity and durability of your creation. A well-executed knot not only holds the beads or charms in place but also provides the necessary closure to maintain the bracelet's shape and fit. Follow these detailed instructions to master the art of tying a secure knot, elevating your bracelet from a collection of elements to a cohesive and wearable accessory.
-
Double Knot Technique: Begin by overlapping the ends of the elastic cord, forming a loop with the two strands. Proceed to tie a double knot by passing one end of the cord through the loop and pulling it tightly to create a secure knot. Repeat this process to form a second knot, reinforcing the closure and minimizing the risk of unraveling.
-
Additional Security: For added reassurance, consider applying a small amount of clear nail polish or jewelry glue to the knots. This extra step further fortifies the closure, preventing the elastic cord from slipping or loosening over time. Allow the nail polish or glue to dry completely before proceeding to the next stage, ensuring a solid and reliable finish.
-
Trimming Excess Elastic: Once the knots are securely fastened and reinforced, carefully trim any excess elastic cord close to the knots using sharp scissors. Exercise caution to achieve a clean and precise cut, removing the surplus cord without compromising the integrity of the knots. A neat trim contributes to a professional and polished appearance, enhancing the overall aesthetic of the bracelet.
By mastering the technique of tying a secure knot, you impart strength and stability to your elastic bracelet, transforming it into a wearable and enduring piece of jewelry. The meticulous execution of the double knot, coupled with the application of clear nail polish or jewelry glue, ensures that your bracelet withstands daily wear and maintains its form without sacrificing comfort. With the excess elastic cord trimmed, your bracelet is now ready to adorn your wrist, showcasing your creativity and craftsmanship with every wear.
As you embark on your bracelet-making journey, remember that the process of tying a secure knot is not merely a practical necessity but a testament to your attention to detail and commitment to producing high-quality accessories. With this essential step mastered, you're well-equipped to create an array of stunning elastic bracelets that reflect your unique style and resonate with your artistic vision.
Read more: How To Tie A Durag
Step 4: Trim Excess Elastic
Trimming the excess elastic cord is the final touch that elevates your elastic bracelet from a collection of components to a refined and wearable accessory. This crucial step not only contributes to the visual appeal of the bracelet but also ensures a comfortable fit and professional finish. With precision and care, the process of trimming excess elastic cord enhances the overall aesthetic and functionality of the bracelet, culminating in a polished and refined creation.
Upon securing the knots with the double knot technique and reinforcing them with clear nail polish or jewelry glue, it's essential to address any surplus elastic cord to achieve a seamless and tidy appearance. The following guidelines outline the meticulous process of trimming the excess elastic cord to achieve a professional and polished finish:
-
Assessing the Excess: After tying the secure knots and allowing the clear nail polish or jewelry glue to dry, carefully examine the bracelet to identify any protruding or uneven lengths of elastic cord. This visual assessment provides insight into the areas that require trimming, guiding the subsequent steps to achieve a uniform and streamlined appearance.
-
Precision Trimming: Using sharp scissors, delicately trim the excess elastic cord as close to the knots as possible, ensuring a clean and precise cut. Exercise caution to avoid cutting the knots or causing fraying, maintaining a steady hand and a focused approach. The goal is to remove any visible surplus cord while preserving the integrity of the knots and the overall structure of the bracelet.
-
Neat Finish: As you trim the excess elastic cord, prioritize achieving a neat and seamless finish that seamlessly integrates with the knots. The precision of the trim contributes to the overall presentation of the bracelet, enhancing its professional and refined look. By meticulously addressing any protruding elastic cord, you elevate the visual appeal of the bracelet and create a cohesive and polished final product.
-
Quality Assurance: After trimming the excess elastic cord, conduct a thorough visual inspection to ensure that the bracelet exhibits a uniform and tidy appearance. Verify that the knots remain securely fastened and that the trimmed ends of the elastic cord seamlessly blend with the overall design. This quality assurance step guarantees that the bracelet meets the highest standards of craftsmanship and aesthetics.
By meticulously trimming the excess elastic cord, you refine the bracelet into a sophisticated and wearable accessory that reflects your attention to detail and dedication to producing high-quality jewelry. The seamless integration of the trimmed ends with the secure knots results in a visually appealing and professional finish, elevating the overall presentation of the bracelet. With the excess elastic cord expertly addressed, your bracelet is now ready to adorn your wrist, showcasing your creativity and craftsmanship with every wear.
Conclusion
In conclusion, the art of crafting elastic bracelets transcends the realm of jewelry-making, offering a gateway to self-expression, creativity, and personalized adornment. Through the meticulous process of measuring and cutting the elastic cord, adding beads or charms, tying secure knots, and trimming excess elastic, individuals embark on a transformative journey that culminates in the creation of unique and meaningful accessories.
The act of designing and crafting elastic bracelets serves as a testament to the boundless potential of artistic expression, allowing individuals to infuse their creations with personal narratives, aesthetic preferences, and symbolic significance. Each bracelet becomes a canvas for self-discovery and exploration, enabling the manifestation of individual style and the celebration of creativity.
Furthermore, the process of crafting elastic bracelets fosters a sense of mindfulness and tranquility, providing a meditative outlet for individuals to immerse themselves in the present moment and engage in a tactile and sensory experience. As beads are carefully strung, knots are tied, and excess cord is trimmed, a profound connection is established between the creator and the creation, resulting in a tangible manifestation of artistic vision and craftsmanship.
Moreover, the versatility of elastic bracelets extends beyond personal enjoyment, presenting an opportunity to share heartfelt sentiments and gestures of affection through handmade gifts. By customizing bracelets with elements that hold sentimental value, such as birthstones, initials, or thematic charms, individuals can convey profound emotions and create lasting mementos that resonate with the recipients on a profound level.
Ultimately, the process of crafting elastic bracelets transcends the mere act of assembling jewelry; it embodies a holistic and enriching experience that intertwines creativity, mindfulness, and meaningful expression. Whether embarking on this creative journey as a solitary pursuit or as a communal activity shared with friends and loved ones, the art of bracelet-making holds the power to inspire, uplift, and connect individuals through the shared appreciation of craftsmanship and self-expression.
As individuals continue to explore the art of crafting elastic bracelets, they are invited to embrace the inherent joy of creation, the therapeutic nature of artistic expression, and the profound impact of personalized adornments. With each bracelet serving as a testament to creativity, individuality, and heartfelt gestures, the art of bracelet-making transcends the tangible outcome, leaving an indelible mark on the hearts and minds of both creators and recipients.