Home>Arts and Culture>Master The Gorgeous Crochet Shell Stitch Pattern With These Easy Steps!
Arts and Culture
Master The Gorgeous Crochet Shell Stitch Pattern With These Easy Steps!
Published: February 11, 2024
Learn how to master the beautiful crochet shell stitch pattern with our easy step-by-step guide! Perfect for arts and culture enthusiasts looking to enhance their crochet skills.
(Many of the links in this article redirect to a specific reviewed product. Your purchase of these products through affiliate links helps to generate commission for Noodls.com, at no extra cost. Learn more)
Table of Contents
Introduction
Welcome to the enchanting world of crochet, where creativity knows no bounds and every stitch tells a story. Among the myriad of captivating crochet patterns, the shell stitch stands out as a timeless classic, exuding elegance and charm. Whether you're a seasoned crochet enthusiast or a novice eager to embark on a new creative journey, mastering the shell stitch pattern will undoubtedly elevate your crochet repertoire.
The shell stitch pattern is characterized by its graceful, scalloped appearance, reminiscent of delicate seashells adorning the ocean's shore. Its rhythmic undulations and intricate texture make it a versatile choice for a wide array of projects, from dainty baby blankets to airy shawls and intricate afghans. With a few simple tools and a dash of creativity, you can effortlessly infuse this pattern into your crochet creations, adding a touch of sophistication and allure.
In this comprehensive guide, we will unravel the secrets of the shell stitch pattern, equipping you with the knowledge and confidence to embark on your crochet adventure. From understanding the intricacies of the pattern to mastering each step with ease, you'll soon find yourself immersed in the captivating art of crochet, creating stunning pieces that reflect your unique style and flair.
So, grab your crochet hook, select your favorite yarn, and prepare to delve into the mesmerizing world of the shell stitch pattern. Whether you're seeking a relaxing pastime or a fulfilling creative outlet, this guide will pave the way for you to unleash your imagination and bring your crochet visions to life. Let's embark on this delightful journey together, as we unravel the beauty and intricacy of the gorgeous crochet shell stitch pattern.
Understanding the Crochet Shell Stitch Pattern
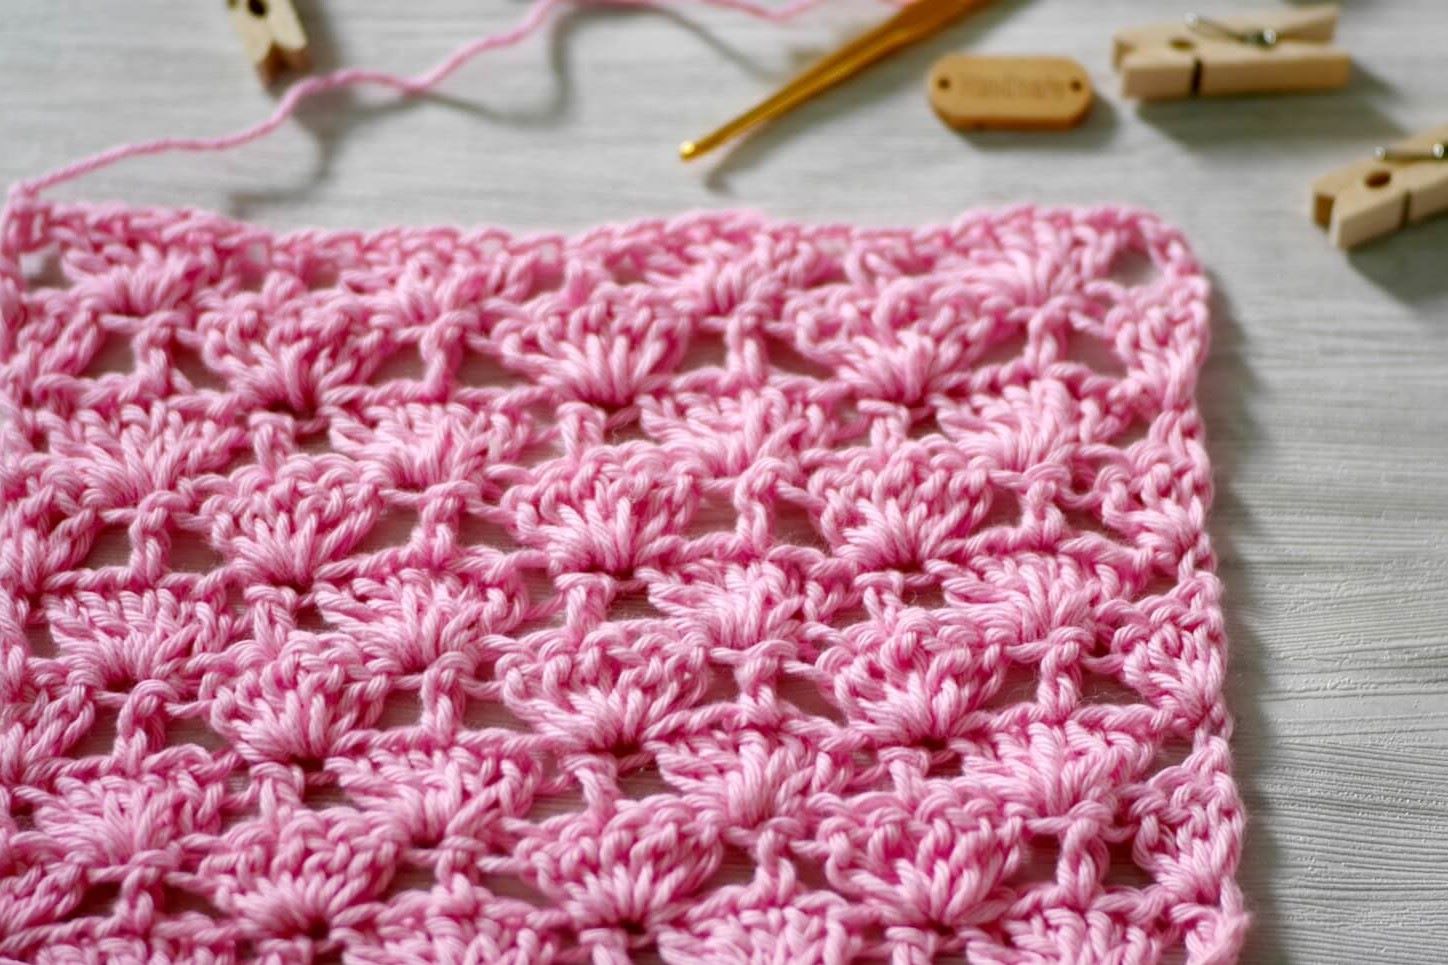
The crochet shell stitch pattern is a captivating and versatile design that adds a touch of elegance to any crochet project. It is characterized by the formation of shell-like clusters, creating a beautifully textured fabric with a scalloped appearance. The shell stitch pattern is often used to create intricate borders, lacy shawls, cozy blankets, and a variety of other stunning creations.
At its core, the shell stitch pattern is comprised of a series of double crochets or treble crochets worked into the same stitch or space, creating a cluster that resembles a shell. These clusters are typically separated by chains, which add to the airy and open nature of the pattern. The number of stitches within each shell, as well as the spacing between shells, can be varied to achieve different effects, making it a highly adaptable and customizable stitch pattern.
One of the most appealing aspects of the shell stitch pattern is its versatility. By adjusting the height and width of the shells, crocheters can create a range of looks, from delicate and lacy to bold and substantial. Additionally, the pattern can be worked in a single color for a classic and uniform appearance, or in multiple colors to showcase stunning color transitions and gradients.
The shell stitch pattern also lends itself well to experimentation and embellishment. Crocheters can incorporate additional stitches, such as picots or clusters of different heights, to add further intricacy and visual interest to their projects. Furthermore, the pattern can be combined with other stitches and techniques to create unique textures and designs, allowing for endless creative possibilities.
Whether you're a seasoned crocheter looking to expand your repertoire or a beginner eager to explore new techniques, mastering the shell stitch pattern opens the door to a world of creative expression. Its timeless appeal and adaptability make it a beloved choice for a wide range of projects, and its rhythmic, undulating texture adds a touch of sophistication to any crochet creation.
As we delve deeper into the art of crocheting the shell stitch pattern, you'll discover the joy of bringing this exquisite design to life with your own hands, creating pieces that reflect your individual style and artistic vision. So, let's embark on this enchanting journey and unravel the beauty and intricacy of the gorgeous crochet shell stitch pattern together.
Materials Needed
Before embarking on your crochet adventure with the shell stitch pattern, it's essential to gather the necessary materials to ensure a smooth and enjoyable crafting experience. Here's a comprehensive list of the items you'll need to bring your crochet vision to life:
-
Crochet Hook: Select a crochet hook that corresponds to the weight of your chosen yarn. For the shell stitch pattern, a hook size that complements the yarn's thickness is recommended to achieve the desired drape and texture.
-
Yarn: Choose a yarn that aligns with your project goals, whether it's a lightweight, airy yarn for a delicate shawl or a cozy, plush yarn for a comforting blanket. The color and texture of the yarn will play a significant role in defining the visual impact of your shell stitch creation.
-
Yarn Needle: A yarn needle, also known as a tapestry needle, is essential for weaving in loose ends and finishing off your project with a polished touch.
-
Scissors: A pair of sharp, durable scissors will come in handy for cutting yarn and tidying up loose ends as you work through your crochet masterpiece.
-
Measuring Tape: To ensure that your project meets the desired dimensions, a flexible measuring tape is indispensable for checking gauge and tracking your progress.
-
Yarn Bowl or Bag: Keeping your yarn organized and tangle-free is crucial for a seamless crocheting experience. A yarn bowl or bag will help keep your yarn clean and prevent it from rolling away as you work.
-
Stitch Markers: These handy tools can be used to mark the beginning of a round or highlight specific stitches, aiding in pattern tracking and ensuring accuracy in your work.
-
Pattern: Whether you're following a written pattern or chart, having a clear and concise guide to the shell stitch pattern will serve as your roadmap to success.
By assembling these essential materials, you'll be well-equipped to embark on your crochet journey with the shell stitch pattern, ready to unleash your creativity and bring your unique vision to life through the art of crochet.
Step 1: Creating the Foundation Chain
The foundation chain serves as the starting point for your crochet project, providing a sturdy base upon which the shell stitch pattern will gracefully unfold. To begin, select your desired yarn and an appropriately sized crochet hook, ensuring that the combination yields the desired drape and texture for your project.
-
Selecting the Yarn and Crochet Hook: Before diving into the foundation chain, consider the characteristics of your chosen yarn and the corresponding crochet hook. For a delicate, lacy effect, opt for a lightweight yarn and a smaller hook size. Conversely, if you envision a more substantial and textured outcome, a thicker yarn and larger hook will be suitable.
-
Making the Slip Knot: To initiate the foundation chain, start by creating a slip knot at the end of your yarn. This adjustable loop will secure the yarn to the crochet hook, allowing you to begin your crochet journey with confidence.
-
Forming the First Chain: With the slip knot in place, grasp the crochet hook and yarn, and proceed to form the first chain. This initial loop sets the stage for the subsequent chains that will form the foundation of your project.
-
Continuing the Chain: As you continue to create chains, maintain a consistent tension to ensure an even and flexible foundation. The number of chains you create will depend on the specific requirements of your project, as outlined in your chosen pattern or based on your individual design.
-
Checking the Length: Once the foundation chain reaches the desired length, take a moment to verify that it aligns with the dimensions specified in your pattern or design plan. Using a measuring tape can help ensure accuracy and uniformity in your foundation chain.
By meticulously crafting a well-proportioned and sturdy foundation chain, you set the stage for the captivating shell stitch pattern to unfold with grace and precision. With the foundation in place, you are now ready to embark on the next phase of your crochet journey, as we delve into the art of creating the first row of shells, infusing your project with texture and allure.
Step 2: Making the First Row of Shells
With the foundation chain serving as the sturdy canvas for your crochet masterpiece, it's time to embark on the enchanting process of creating the first row of shells. This pivotal step sets the tone for the intricate texture and rhythmic undulations that define the shell stitch pattern. As you pick up your crochet hook and yarn, prepare to infuse your project with elegance and allure through the artful formation of these captivating shell clusters.
-
Preparing for the First Row: Before diving into the creation of the shell clusters, ensure that your foundation chain is securely anchored to your crochet hook. Position the yarn in a comfortable and accessible manner, allowing for smooth and unhindered movement as you work through the row.
-
Forming the Initial Shell: To initiate the first shell, begin by working a series of double crochets or treble crochets into the designated stitch or space, as specified in your pattern or design plan. The number of stitches within each shell, as well as the spacing between shells, will contribute to the overall aesthetic and texture of your project.
-
Creating a Harmonious Sequence: As you continue along the row, maintain a consistent rhythm and spacing between the shell clusters, ensuring a balanced and visually appealing progression. The deliberate placement of each shell will contribute to the seamless flow and captivating allure of the shell stitch pattern.
-
Embracing Creativity and Precision: While adhering to the guidelines of your chosen pattern, allow room for creative expression and precision in your stitchwork. Pay close attention to the tension of your stitches and the alignment of your shells, aiming for a cohesive and polished appearance.
-
Adapting to Pattern Variations: Depending on the specific requirements of your project, you may encounter variations in the formation of the first row of shells. Whether it involves incorporating additional stitches, adjusting the height of the shells, or implementing color changes, embrace these variations as opportunities to infuse your project with character and individuality.
As you diligently work through the creation of the first row of shells, envision the captivating texture and visual impact that will unfold with each meticulously crafted cluster. This foundational row sets the stage for the rhythmic undulations and timeless elegance of the shell stitch pattern, paving the way for a crochet creation that exudes sophistication and charm. With the first row of shells gracefully taking shape, you are poised to embark on the next phase of your crochet journey, as we delve deeper into the art of turning and starting the second row, seamlessly continuing the mesmerizing shell stitch pattern.
Read more: Master The BTS Fan Chant In 5 Easy Steps!
Step 3: Turning and Starting the Second Row
As you approach the completion of the first row of shell clusters, the seamless transition to the second row is a pivotal moment in the creation of your crochet masterpiece. Turning your work and embarking on the next phase of the shell stitch pattern requires a delicate balance of precision and artistry, ensuring that the rhythmic undulations and captivating texture continue to unfold with grace and allure.
Upon reaching the end of the first row, take a moment to admire the intricate clusters that have taken shape, each one contributing to the timeless elegance of the shell stitch pattern. As you prepare to turn your work, it's essential to maintain a steady and focused mindset, embracing the rhythmic flow of the pattern as you embark on the creation of the second row.
To initiate the turning process, carefully rotate your work, allowing the completed first row to serve as a foundation for the upcoming stitches. As you position your crochet hook and yarn, ensure that the tension remains consistent, facilitating a smooth and uniform transition to the second row.
With your work turned and the yarn positioned for the next phase, it's time to embark on the artful process of starting the second row of shell clusters. Begin by securing the yarn and establishing a solid foundation for the upcoming stitches, setting the stage for the rhythmic undulations and captivating texture to gracefully continue.
As you work through the initial stitches of the second row, pay close attention to the alignment and spacing of the shell clusters, aiming for a harmonious and visually appealing progression. The deliberate placement of each cluster contributes to the seamless flow and captivating allure of the shell stitch pattern, infusing your project with sophistication and charm.
Embrace the opportunity to infuse your work with creativity and precision, allowing each stitch to reflect your individual style and artistic vision. As the second row begins to take shape, envision the captivating texture and visual impact that will unfold with each meticulously crafted cluster, further enhancing the timeless elegance of the shell stitch pattern.
With the turning process expertly executed and the second row gracefully underway, you are poised to continue your crochet journey with confidence and artistry, seamlessly advancing through the mesmerizing shell stitch pattern. As the rhythmic undulations and intricate texture continue to unfold, your project will exude sophistication and allure, a testament to your dedication and skill in mastering the art of crochet.
Step 4: Continuing the Shell Stitch Pattern
As you seamlessly transition from the second row to the subsequent rows of the shell stitch pattern, the captivating rhythm and intricate texture of your crochet masterpiece continue to unfold with grace and allure. With each carefully crafted shell cluster, your project takes on a timeless elegance, reflecting the artistry and dedication infused into every stitch.
Continuing the shell stitch pattern involves maintaining a harmonious sequence of shell clusters, ensuring that each cluster aligns seamlessly with the ones preceding it. As you work through the subsequent rows, the rhythmic undulations and captivating texture of the pattern come to life, creating a fabric that exudes sophistication and charm.
Embrace the opportunity to infuse your work with creativity and precision, allowing each stitch to reflect your individual style and artistic vision. Whether you're creating a delicate shawl, a cozy blanket, or a decorative border, the adaptability of the shell stitch pattern allows for endless creative possibilities, enabling you to tailor the pattern to suit your unique project goals.
As you progress through the continuation of the shell stitch pattern, take a moment to appreciate the mesmerizing interplay of stitches, each contributing to the overall allure of your creation. Whether you're working in a single color or incorporating captivating color transitions, the shell stitch pattern adapts effortlessly, allowing you to explore the interplay of hues and textures with finesse.
With each row, the fabric grows, revealing the captivating texture and visual impact that define the shell stitch pattern. The deliberate placement of each shell cluster contributes to the seamless flow and timeless elegance of the pattern, resulting in a crochet creation that is as enchanting as it is versatile.
As you continue to crochet, the shell stitch pattern becomes a canvas for your creativity, a testament to the beauty and intricacy that can be achieved through the art of crochet. With each stitch, you breathe life into your project, infusing it with a touch of sophistication and allure that is uniquely yours.
As you immerse yourself in the continuation of the shell stitch pattern, revel in the joy of creating a piece that reflects your passion for crochet, a masterpiece that embodies the timeless allure of the shell stitch pattern.
Step 5: Finishing Off the Project
As you approach the completion of your crochet masterpiece adorned with the mesmerizing shell stitch pattern, the final steps in finishing off the project are essential to ensure a polished and professional outcome. With each carefully executed stitch and rhythmic undulation, your creation has blossomed into a testament of dedication and artistry, ready to be showcased and cherished. Now, as you prepare to bring your project to its culmination, the finishing touches will elevate it to a level of sophistication and allure that is truly captivating.
To begin the process of finishing off the project, carefully assess the overall dimensions and appearance of your creation, ensuring that it aligns with your initial vision and design goals. Take a moment to appreciate the intricate texture and timeless elegance of the shell stitch pattern, which has infused your project with a touch of grace and charm.
As you approach the final stitches, pay close attention to the tension and alignment, aiming for a cohesive and polished finish. Whether you're working on a delicate shawl, a cozy blanket, or a decorative border, the last few stitches are an opportunity to infuse your project with a sense of completion and refinement.
Once the final stitches have been expertly crafted, it's time to secure the yarn and weave in any loose ends, ensuring that they are seamlessly integrated into the fabric. A yarn needle, also known as a tapestry needle, will be your trusted companion in this process, allowing you to tidy up any remaining strands with precision and care.
As you meticulously weave in the ends, take pride in the journey that has led to this moment, celebrating the artistry and dedication that have shaped your crochet masterpiece. Each strand neatly tucked away is a testament to the craftsmanship and attention to detail that define your work.
With the loose ends woven in and the fabric exhibiting a polished and refined appearance, your project is now ready to be admired and cherished. Whether it's a gift for a loved one or a cherished addition to your own collection, the finished piece embodies the timeless allure of the shell stitch pattern, a reflection of the beauty and intricacy that can be achieved through the art of crochet.
As you revel in the satisfaction of completing your project, take a moment to admire the captivating texture and visual impact that define the shell stitch pattern. Your creation stands as a testament to the joy of crochet, a masterpiece that exudes sophistication and allure, a true embodiment of your passion and skill in mastering the art of crochet.
Conclusion
In the enchanting realm of crochet, the mastery of the shell stitch pattern unveils a world of timeless elegance and creative expression. As we conclude this comprehensive guide, it's evident that the shell stitch pattern transcends the realms of mere stitches, evolving into a captivating art form that allows crocheters to weave their unique narratives into every project.
Through the rhythmic undulations and intricate texture of the shell stitch pattern, crocheters embark on a journey that celebrates the fusion of precision and creativity. From the creation of the foundation chain to the seamless continuation of the pattern, each step unfolds with a sense of artistry and dedication, resulting in crochet masterpieces that exude sophistication and allure.
The versatility of the shell stitch pattern is a testament to its enduring appeal. Whether adorning a delicate shawl, a cozy blanket, or a decorative border, the shell stitch pattern adapts effortlessly, allowing crocheters to explore a myriad of creative possibilities. The interplay of colors, the variation in shell heights, and the incorporation of embellishments all contribute to the unique charm and individuality of each project.
As we reflect on the art of finishing off a project, we are reminded of the meticulous care and attention to detail that elevate a crochet creation to a level of polished refinement. The final stitches and the weaving in of loose ends serve as a testament to the craftsmanship and dedication that define the work of a skilled crocheter.
Ultimately, the conclusion of a crochet project adorned with the mesmerizing shell stitch pattern marks the culmination of a journey filled with creativity, passion, and skill. Each completed piece stands as a testament to the joy of crochet, a masterpiece that embodies the timeless allure of the shell stitch pattern.
As we bid adieu to this guide, let us carry forward the enchanting art of the shell stitch pattern, infusing our future projects with the grace and allure that define this timeless crochet technique. Whether we are seasoned crochet enthusiasts or budding novices, the shell stitch pattern beckons us to embark on a creative journey filled with endless possibilities and boundless inspiration.
So, let's pick up our crochet hooks, select our favorite yarn, and allow the captivating rhythm of the shell stitch pattern to guide us as we continue to weave our stories, one stitch at a time.