Home>Home and Garden>5 Easy Steps To Unclog Your Washing Machine Drain
Home and Garden
5 Easy Steps To Unclog Your Washing Machine Drain
Modified: March 5, 2024
Learn how to unclog your washing machine drain in 5 easy steps. Keep your home and garden running smoothly with these simple maintenance tips.
(Many of the links in this article redirect to a specific reviewed product. Your purchase of these products through affiliate links helps to generate commission for Noodls.com, at no extra cost. Learn more)
Table of Contents
Introduction
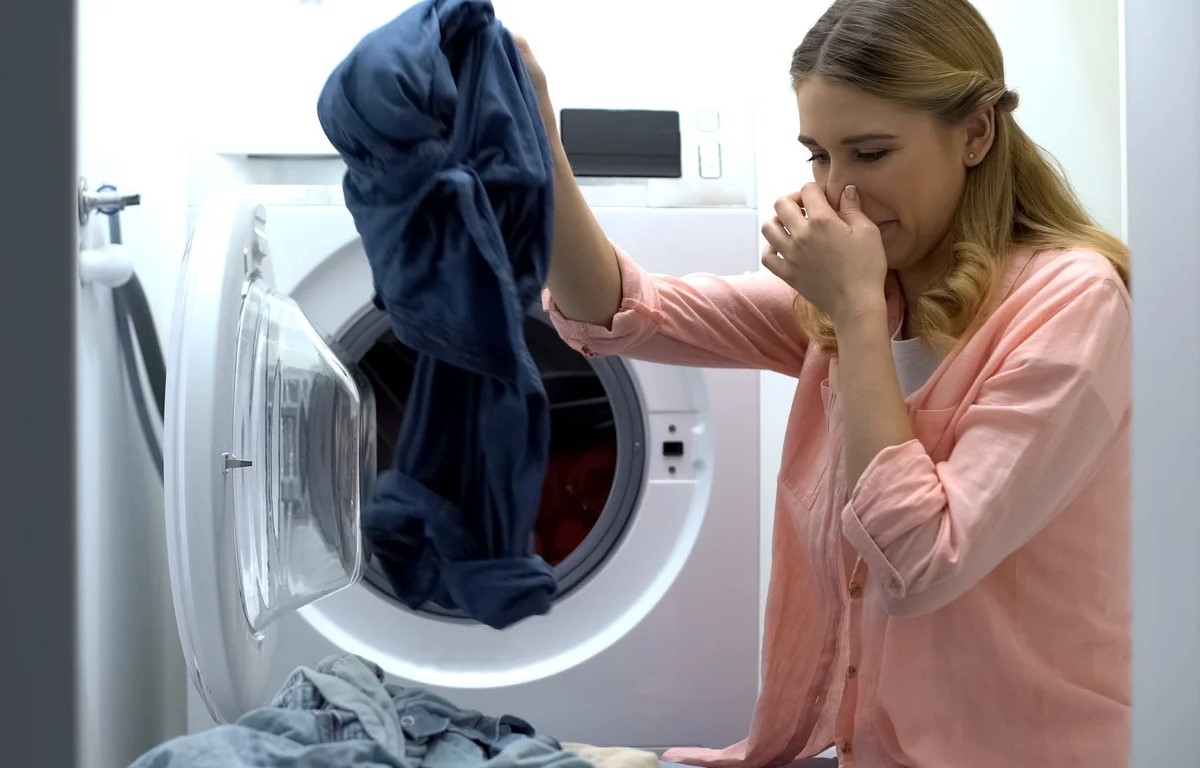
A washing machine is a vital appliance in any home, simplifying the daunting task of laundry. However, a clogged washing machine drain can quickly turn this convenience into a frustrating ordeal. When the drain becomes obstructed, it can lead to water backup, foul odors, and even potential damage to the machine. Fortunately, with a few simple steps, you can unclog the washing machine drain and restore its optimal functionality.
In this comprehensive guide, we will walk you through the process of unclogging your washing machine drain in five easy steps. By following these steps, you can address the issue promptly and prevent future clogs, ensuring that your washing machine continues to operate smoothly. Whether you are a seasoned DIY enthusiast or a novice homeowner, this guide will equip you with the knowledge and confidence to tackle this common household maintenance task.
A clogged washing machine drain can result from various factors, including the accumulation of lint, debris, soap scum, and even foreign objects such as coins or small articles of clothing. Over time, these obstructions can impede the flow of water, leading to drainage problems and potential malfunctions. By addressing the issue proactively, you can maintain the efficiency and longevity of your washing machine while avoiding costly repairs or replacements.
Throughout this guide, we will provide clear and actionable instructions, accompanied by helpful tips and insights to streamline the unclogging process. Additionally, we will highlight the importance of regular maintenance to prevent future clogs and preserve the optimal performance of your washing machine. With a proactive approach and the right tools at your disposal, you can effectively troubleshoot and resolve washing machine drain issues, restoring seamless operation and peace of mind.
Now, let's embark on this journey to unclog your washing machine drain, empowering you to take control of this essential aspect of home maintenance. By the end of this guide, you will have the knowledge and practical skills to address this common issue with confidence and efficiency, ensuring that your washing machine continues to serve you reliably for years to come.
Step 1: Gather necessary materials
Before embarking on the task of unclogging your washing machine drain, it is essential to gather the necessary materials to ensure a smooth and efficient process. By assembling the right tools and supplies, you can streamline the unclogging procedure and address the issue effectively. Here's a comprehensive list of materials you will need:
-
Protective Gear: Prioritize your safety by wearing protective gear, including rubber gloves and safety goggles. These items will shield your hands and eyes from potential debris and cleaning solutions, ensuring a secure and comfortable working environment.
-
Pliers: A pair of pliers will be indispensable for loosening and removing the hose clamps that secure the washing machine drain hose. Opt for a sturdy and reliable set of pliers to facilitate the disconnection of the hose from the drain pipe.
-
Bucket and Towels: Prepare a bucket and a stack of absorbent towels to contain any water or debris that may spill during the unclogging process. Placing the bucket strategically beneath the drain hose will help minimize mess and facilitate cleanup.
-
Cleaning Solution: Select a suitable cleaning solution to effectively dissolve and remove stubborn clogs and residue from the washing machine drain. You can choose from commercial drain cleaners or opt for a natural solution such as a mixture of baking soda and vinegar, known for its powerful cleaning properties.
-
Pipe Brush or Snake: A pipe brush or plumbing snake will be instrumental in dislodging and removing obstructions within the drain pipe. These tools can navigate through the pipe, effectively clearing away accumulated debris and restoring proper water flow.
-
Screwdriver: Depending on the type of washing machine and its access panel, you may require a screwdriver to remove the panel and gain access to the drain hose and pump. Ensure that you have the appropriate screwdriver size and type for the panel's fasteners.
By gathering these essential materials, you will be well-prepared to tackle the task of unclogging your washing machine drain with confidence and efficiency. With the right tools at your disposal, you can proceed to the next steps, addressing the issue methodically and restoring optimal functionality to your washing machine.
Step 2: Locate and access the washing machine drain
Locating and accessing the washing machine drain is a crucial preliminary step in the process of unclogging the drain. The exact location of the drain may vary depending on the make and model of the washing machine, as well as the layout of the laundry area. To begin, it is essential to familiarize yourself with the typical components associated with the washing machine drain, including the drain hose, drain pump, and access panel.
-
Identify the Drain Hose: The drain hose is a flexible tube that extends from the back of the washing machine and is responsible for carrying wastewater from the machine to the drain pipe or laundry sink. It is often secured in place with hose clamps and may be connected to the drain pump, which facilitates the expulsion of water during the machine's drainage cycle.
-
Locate the Access Panel: Depending on the design of the washing machine, an access panel may be present, providing entry to the internal components, including the drain hose and pump. The access panel is typically located at the rear or front of the machine and can be secured with screws or clips. Use a screwdriver or the appropriate tool to remove the fasteners and gain access to the interior of the machine.
-
Position the Bucket and Towels: Before proceeding to access the drain, position the bucket and towels beneath the washing machine to capture any residual water that may spill during the unclogging process. This proactive measure will help contain potential mess and simplify cleanup, ensuring a more organized and efficient workflow.
-
Disconnect the Drain Hose: Once the access panel is removed, locate the point where the drain hose connects to the washing machine or drain pump. Use pliers to loosen the hose clamps and carefully detach the hose, taking care to minimize spillage. Direct the free end of the hose into the prepared bucket to allow any trapped water to drain out.
-
Inspect the Drain Pump: With the drain hose disconnected, you can inspect the drain pump for any visible obstructions or debris that may be impeding the flow of water. Clearing away any accumulated debris from the pump can contribute to the overall effectiveness of the unclogging process.
By following these steps, you can successfully locate and access the washing machine drain, laying the groundwork for the subsequent stages of the unclogging procedure. This proactive approach sets the stage for a systematic and thorough resolution of the drainage issue, empowering you to address the problem with confidence and precision.
Step 3: Remove clogs and debris
With the washing machine drain accessed and the necessary materials at hand, the next critical step is to focus on removing clogs and debris that are obstructing the flow of water. This process involves a systematic approach to dislodging and clearing any accumulated residue within the drain hose, pump, and surrounding components. By addressing these obstructions effectively, you can restore unimpeded water flow and alleviate the underlying cause of the drainage issue.
Clearing the Drain Hose
Begin by inspecting the drain hose for any visible clogs or blockages. If the hose is visibly clogged, use a pipe brush or plumbing snake to gently dislodge the debris and facilitate its removal. Carefully maneuver the brush or snake through the hose, applying gentle pressure to break apart and dislodge the accumulated residue. As you work through the hose, periodically check for signs of improved water flow, indicating the successful removal of obstructions.
Read more: How To Drain A Washing Machine
Cleaning the Drain Pump
Once the drain hose is addressed, shift your focus to the drain pump, a critical component responsible for expelling wastewater from the washing machine. Inspect the pump for any debris or foreign objects that may be impeding its functionality. Use a flashlight to illuminate the interior of the pump, enabling you to identify and remove any obstructions effectively. Employ pliers or a suitable tool to extract debris, taking care to clear the pump's inlet and outlet thoroughly.
Utilizing a Cleaning Solution
In cases where stubborn residue or organic buildup is present within the drain hose or pump, the application of a cleaning solution can aid in dissolving and dislodging the obstructions. If opting for a commercial drain cleaner, carefully follow the manufacturer's instructions to ensure safe and effective usage. Alternatively, a natural cleaning solution comprising a mixture of baking soda and vinegar can be poured into the drain hose and pump, allowing it to work its way through the system and break down stubborn clogs.
Reconnecting the Drain Hose
After the clogs and debris have been successfully removed, reattach the drain hose to the washing machine or drain pump, securing it in place with the appropriate hose clamps. Ensure that the connection is tight and leak-free, minimizing the risk of future drainage issues. With the hose reconnected, proceed to the next step, focusing on the thorough cleaning of the drain and surrounding area to complete the unclogging process.
By meticulously addressing and removing clogs and debris from the washing machine drain, you can effectively eliminate the underlying causes of drainage problems, paving the way for restored functionality and optimal performance. This proactive approach sets the stage for a seamless transition to the subsequent steps, culminating in a thoroughly unclogged washing machine drain and a renewed sense of reliability and efficiency.
Step 4: Clean the drain and surrounding area
After addressing the clogs and debris within the washing machine drain, it is essential to focus on thoroughly cleaning the drain and its surrounding area to ensure optimal functionality and prevent future issues. This step involves a meticulous approach to remove residual buildup, eliminate lingering odors, and promote a hygienic environment within the washing machine system.
Read more: How To Unclog A Washer Drain
Clearing Residual Debris
Begin by inspecting the interior of the drain pipe and surrounding components for any residual debris or buildup that may have accumulated during the unclogging process. Use a flashlight to illuminate the area, enabling you to identify and remove any remaining obstructions. Employ a pipe brush or plumbing snake to gently clear the drain pipe, ensuring that it is free from any lingering debris that could impede water flow.
Rinsing with Water
Once the visible debris is removed, flush the drain pipe and surrounding area with a generous amount of water to dislodge any remaining residue and ensure thorough cleanliness. This rinsing process can be facilitated by pouring water directly into the drain pipe or utilizing a handheld sprayer to flush out the system effectively. The goal is to achieve a clear and unobstructed pathway for water to flow from the washing machine to the drainage point.
Sanitizing the Surrounding Area
In addition to cleaning the drain itself, it is crucial to sanitize the surrounding area to eliminate any lingering odors and maintain a hygienic environment. Prepare a solution of water and mild detergent or a specialized cleaning solution designed for washing machine maintenance. Use a clean cloth or sponge to apply the solution to the interior surfaces of the washing machine, focusing on the areas near the drain and the access panel. This process will help neutralize odors and remove any residual grime, contributing to a fresh and clean environment within the machine.
Inspecting and Reassembling
After cleaning and sanitizing the drain and surrounding area, take a moment to inspect the components for any signs of leaks, damage, or irregularities. Ensure that the drain hose is securely reconnected to the washing machine or drain pump, and that all fasteners and connections are tightened appropriately. This thorough inspection will provide peace of mind and help prevent potential issues that could compromise the effectiveness of the unclogging process.
By meticulously cleaning the drain and its surrounding area, you can ensure that the washing machine operates in an optimal and hygienic condition, free from residual debris and odors. This proactive approach sets the stage for the final step, focusing on testing the washing machine to confirm the successful resolution of the drainage issue and implementing preventive measures to avoid future clogs.
Step 5: Test the washing machine and prevent future clogs
After completing the unclogging process, it is crucial to test the washing machine to confirm the successful resolution of the drainage issue and implement preventive measures to avoid future clogs. This final step ensures that the washing machine operates seamlessly and equips you with the knowledge and strategies to maintain its optimal performance in the long run.
Testing the Washing Machine
Initiate the testing phase by reconnecting the power supply to the washing machine and allowing it to run through a complete wash cycle. Observe the drainage process closely, paying attention to the flow of water from the machine to the drain. Verify that the water is expelling efficiently and that no signs of backup or slow drainage are evident. Additionally, monitor the operation of the drain pump and hose to ensure that they function smoothly without any unusual noises or disruptions.
Implementing Preventive Measures
To prevent future clogs and maintain the integrity of the washing machine drain, consider incorporating preventive measures into your regular maintenance routine. These measures can significantly reduce the likelihood of drainage issues and contribute to the prolonged efficiency of the machine.
-
Regular Cleaning: Schedule periodic cleaning sessions specifically targeting the washing machine drain and surrounding components. This proactive approach can prevent the accumulation of debris and residue, minimizing the risk of clogs and ensuring consistent water flow.
-
Lint Traps and Filters: Install or clean lint traps and filters associated with the washing machine to capture lint, hair, and other debris before it enters the drain system. Regularly inspect and clean these components to prevent blockages and maintain optimal drainage.
-
Use of Mesh Bags: When washing delicate items such as small garments or undergarments, consider placing them in mesh laundry bags to prevent loose fibers and small articles from entering the drain system. This simple practice can mitigate the risk of clogs caused by foreign objects.
-
Maintenance Reminders: Set reminders or create a maintenance schedule to prompt regular inspection and cleaning of the washing machine drain. Consistent attention to this essential task can help identify potential issues early on and prevent major drainage problems.
By testing the washing machine and implementing preventive measures, you can confirm the successful resolution of the drainage issue and fortify the machine against future clogs. This proactive and systematic approach empowers you to maintain the optimal functionality of your washing machine, ensuring reliable performance and peace of mind for years to come.