Home>Automotive>How To Clean Vomit From Car
Automotive
How To Clean Vomit From Car
Published: February 25, 2024
Learn effective techniques for removing vomit stains and odors from your car's interior. Keep your automotive upholstery clean and fresh with these simple tips.
(Many of the links in this article redirect to a specific reviewed product. Your purchase of these products through affiliate links helps to generate commission for Noodls.com, at no extra cost. Learn more)
Table of Contents
Introduction
Dealing with vomit in your car can be a distressing and unpleasant experience. Whether it's due to motion sickness, a stomach bug, or overindulgence, cleaning vomit from your car is a task that requires prompt attention and the right approach. The odor and stains left behind can linger and worsen if not addressed effectively. However, with the right techniques and supplies, you can restore your car to its clean and fresh state.
In this comprehensive guide, we will walk you through the step-by-step process of cleaning vomit from your car. From gathering the necessary supplies to effectively removing the vomit and eliminating any lingering odors, we will provide you with practical tips and insights to make this daunting task more manageable.
By following the methods outlined in this guide, you can effectively tackle the aftermath of a vomit incident in your car and restore a clean, hygienic, and pleasant environment for yourself and your passengers. Let's dive into the step-by-step process of cleaning vomit from your car, ensuring that you have the knowledge and confidence to handle this challenging situation with ease.
Read more: How To Clean Vomit From Carpet
Step 1: Gather Supplies
When it comes to cleaning vomit from your car, having the right supplies at your disposal is crucial for a successful and efficient cleanup. Before you begin the cleaning process, it's essential to gather the following supplies:
1. Protective Gear
First and foremost, it's important to prioritize your safety and well-being. Consider wearing disposable gloves to protect your hands from direct contact with the vomit. Additionally, having a face mask or a cloth to cover your nose and mouth can help minimize exposure to unpleasant odors during the cleanup.
2. Absorbent Materials
To tackle the initial cleanup, you'll need absorbent materials such as paper towels, disposable rags, or absorbent pads. These will be used to carefully remove the excess vomit from the affected area. Ensure that you have an adequate supply of these materials to address the mess effectively.
3. Plastic Bags
Having a few plastic bags on hand is essential for disposing of the soiled materials, including the used paper towels or rags. Seal the vomit-soaked items in the plastic bags to contain the odor and prevent any potential leakage during disposal.
Read more: How To Clean Dog Vomit From Carpet
4. Cleaning Solution
Selecting an appropriate cleaning solution is crucial for eliminating stains and odors. Look for a mild yet effective cleaner that is safe for use on car interiors. You can opt for a commercial upholstery cleaner or prepare a DIY solution using mild dish soap and water. Additionally, consider having a small bottle of white vinegar, which can be effective for neutralizing odors.
5. Stain Remover
In the event of stubborn stains, having a dedicated stain remover designed for car upholstery can be invaluable. Look for a product specifically formulated to lift and remove tough stains without causing damage to the fabric or upholstery.
6. Odor Eliminator
To ensure that your car interior is free from lingering odors, consider using an odor eliminator designed for automotive use. Look for a product that targets organic odors and effectively neutralizes them, leaving behind a fresh and clean scent.
By gathering these essential supplies, you'll be well-prepared to commence the vomit cleanup process with confidence and efficiency. With the right tools at your disposal, you can effectively address the aftermath of the incident and restore your car's interior to a clean and hygienic state.
Step 2: Remove Excess Vomit
Upon encountering vomit in your car, the first step in the cleanup process is to swiftly and carefully remove the excess vomit from the affected area. This initial phase is crucial for minimizing the spread of the mess and preventing further staining and odor absorption into the car's upholstery or carpeting.
To begin, put on disposable gloves to protect your hands from direct contact with the vomit. If available, use a face mask or cover your nose and mouth with a cloth to minimize exposure to unpleasant odors during the cleanup.
Next, arm yourself with absorbent materials such as paper towels, disposable rags, or absorbent pads. Gently place the absorbent material over the vomit, allowing it to soak up the liquid. Avoid applying excessive pressure, as this may cause the vomit to spread further.
Carefully lift the saturated absorbent material, along with the vomit it has absorbed, and dispose of it in a plastic bag. Seal the bag securely to contain the odor and prevent any potential leakage during disposal.
If the vomit has seeped into the car's upholstery or carpet, use a blotting motion with fresh paper towels or rags to continue absorbing as much of the liquid as possible. Be thorough in this process, ensuring that you address all affected areas to prevent residual odors and stains.
Once you have removed the majority of the excess vomit and liquid, assess the affected area to determine if any remnants remain. If so, repeat the blotting process with fresh absorbent materials until the area appears visibly free of vomit and excess moisture.
By promptly and effectively removing the excess vomit from your car, you can contain the initial impact of the incident and prepare the affected area for the subsequent cleaning steps. This proactive approach sets the stage for a more successful and efficient cleanup process, ultimately aiding in the restoration of a clean and hygienic car interior.
Read more: How To Remove Stickers From Car
Step 3: Apply Cleaning Solution
With the excess vomit removed, the next crucial step in the vomit cleanup process involves the application of a suitable cleaning solution to address any remaining stains and lingering odors. Selecting the right cleaning solution is paramount, as it will determine the effectiveness of the cleanup and the restoration of your car's interior to a clean and fresh state.
If you have a commercial upholstery cleaner specifically formulated for car interiors, carefully follow the manufacturer's instructions for application. These cleaners are designed to target stains and odors while being safe for use on various upholstery materials. Alternatively, if you prefer a DIY approach, you can create a mild cleaning solution using a combination of water and a small amount of gentle dish soap. This homemade solution can be effective in lifting stains and eliminating odors without causing damage to the car's interior.
To apply the cleaning solution, begin by conducting a patch test in an inconspicuous area of the car's upholstery or carpeting. This test will help ensure that the cleaning solution does not cause discoloration or damage to the material. Once the suitability of the solution is confirmed, proceed to apply it to the affected area using a clean cloth or sponge. Gently blot the stained area with the cleaning solution, working from the outer edges of the stain towards the center. Avoid vigorous rubbing, as this may spread the stain or damage the fabric.
For particularly stubborn stains, a dedicated stain remover designed for car upholstery can be employed to target and lift the residual discoloration. Follow the product's instructions for application, ensuring that you allow an adequate dwell time for the stain remover to work its magic. After the specified duration, gently blot the treated area with a clean, damp cloth to remove the stain remover and any loosened residues.
In the case of lingering odors, the application of white vinegar can be an effective natural remedy. Dilute white vinegar with water in a 1:1 ratio and lightly mist the affected area. Vinegar is renowned for its odor-neutralizing properties and can help counteract the unpleasant smell of vomit, leaving behind a fresher scent.
By methodically applying the appropriate cleaning solutions to address stains and odors, you can significantly improve the overall cleanliness and hygiene of your car's interior. This proactive approach sets the stage for the subsequent steps in the cleanup process, ultimately contributing to the successful restoration of a clean and pleasant driving environment.
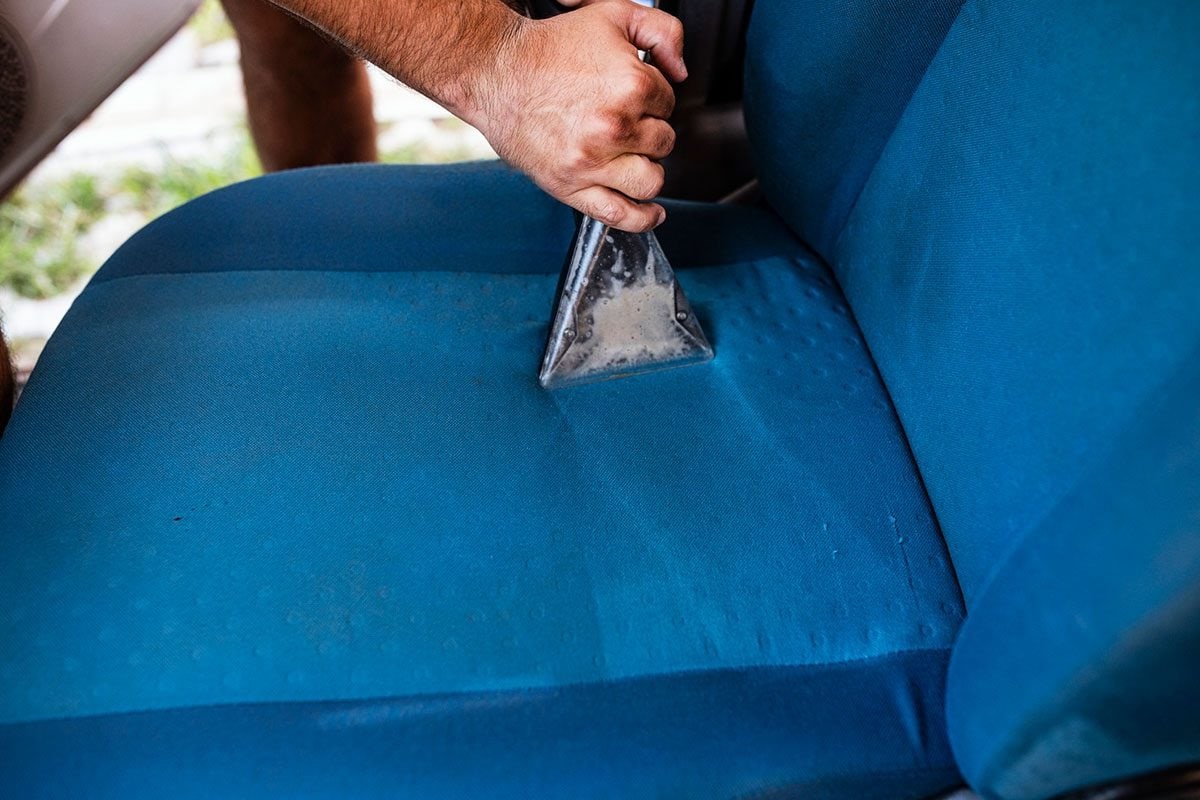
Step 4: Scrub and Wipe
With the application of cleaning solutions to address stains and odors, the next pivotal step in the vomit cleanup process involves thorough scrubbing and wiping of the affected area. This step is essential for lifting any remaining residues, ensuring a deep clean, and restoring the car's interior to its pristine condition.
Using a soft-bristled brush or a clean, damp cloth, gently scrub the treated area in a circular motion. This gentle agitation helps to dislodge any stubborn residues and allows the cleaning solution to penetrate deeper into the fabric or carpet fibers. Exercise caution to avoid excessive pressure, as aggressive scrubbing may damage the material or spread the stain further.
As you scrub the affected area, periodically inspect the cloth or brush for any signs of residual vomit or staining. If necessary, rinse the cloth or brush and continue the scrubbing process until the material shows no further traces of the vomit or discoloration.
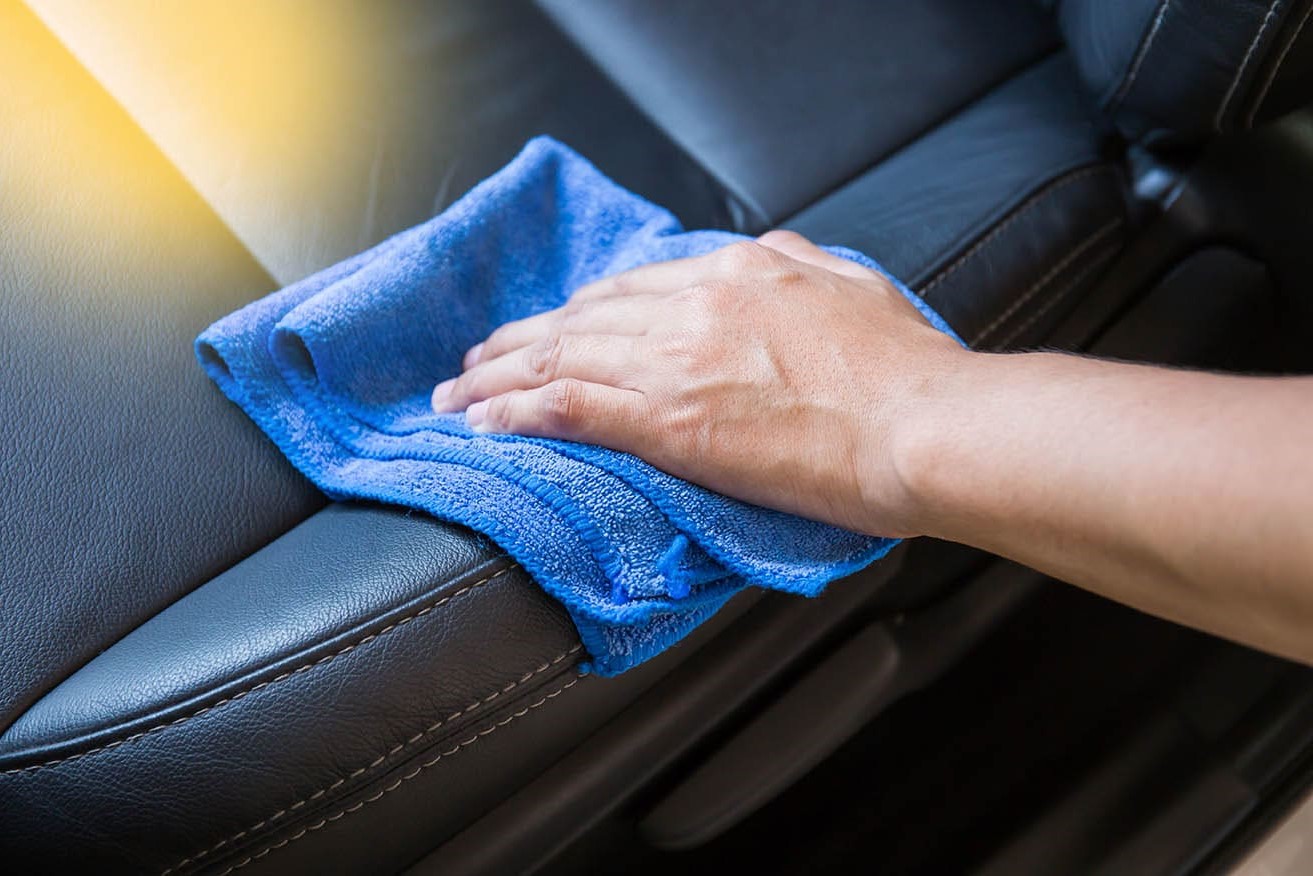
Following the scrubbing process, use a separate clean cloth dampened with water to thoroughly wipe the treated area. This step serves to remove any remaining cleaning solution, as well as to rinse the fabric or carpeting, leaving it refreshed and free of cleaning residues. Ensure that you cover the entire treated area, working methodically to achieve comprehensive coverage.
As you wipe the area, periodically inspect the cloth for any signs of lingering stains or odors. If persistent residues are detected, consider repeating the scrubbing and wiping process to further address the affected area. This meticulous approach is instrumental in achieving a thorough and effective cleanup, ensuring that no traces of vomit or odors remain in your car's interior.
By diligently scrubbing and wiping the treated area, you can significantly enhance the cleanliness and visual appeal of your car's interior. This proactive step contributes to the overall success of the vomit cleanup process, setting the stage for the final phase of restoring a clean, hygienic, and inviting environment within your vehicle.
Step 5: Deodorize the Area
After addressing the physical remnants of the vomit and thoroughly cleaning the affected area, the final step in the vomit cleanup process involves deodorizing the interior of your car. This crucial step is essential for eliminating any lingering odors and ensuring that your car's interior is left smelling fresh and pleasant.
To effectively deodorize the area, consider using a specialized odor eliminator designed for automotive use. These products are formulated to target organic odors, including those caused by vomit, and neutralize them at the molecular level. Select an odor eliminator that is safe for use on car upholstery and carpeting, ensuring that it is compatible with the materials in your vehicle.
Before applying the odor eliminator, ensure that the treated area is completely dry from the previous cleaning steps. This will allow the deodorizing product to work effectively without interference from residual moisture. Shake the odor eliminator product well and follow the manufacturer's instructions for application.
Spray or mist the odor eliminator generously over the affected area, covering it comprehensively to ensure that the product reaches all surfaces where the vomit may have come into contact. Pay particular attention to any areas that exhibited strong odors during the initial cleanup, as these may require additional treatment.
Allow the odor eliminator to air dry naturally, as this facilitates the thorough penetration of the product into the fabric or carpet fibers. During this time, ensure that the car interior is well-ventilated to aid in the dissipation of any remaining odors.
In addition to using a dedicated odor eliminator, consider utilizing natural deodorizing agents to further enhance the freshness of your car's interior. Baking soda, renowned for its odor-absorbing properties, can be sprinkled over the affected area and left to sit for a few hours before vacuuming it up. Similarly, placing activated charcoal sachets in the car can help absorb residual odors, leaving behind a cleaner scent.
By diligently deodorizing the affected area, you can effectively neutralize any remaining odors and elevate the overall cleanliness and freshness of your car's interior. This final step completes the comprehensive vomit cleanup process, ensuring that your vehicle is restored to a clean, hygienic, and inviting state for your future journeys.
Conclusion
In conclusion, dealing with vomit in your car can be a challenging and unpleasant experience, but with the right approach and supplies, you can effectively restore your car's interior to a clean and hygienic state. By following the step-by-step process outlined in this guide, you can tackle the aftermath of a vomit incident with confidence and efficiency.
Promptly addressing the issue by gathering the necessary supplies, removing the excess vomit, applying suitable cleaning solutions, and thoroughly scrubbing and wiping the affected area, you can significantly improve the cleanliness and visual appeal of your car's interior. Additionally, deodorizing the area ensures that any lingering odors are effectively neutralized, leaving behind a fresh and pleasant scent.
It's important to emphasize the significance of safety and precautionary measures when dealing with vomit cleanup. Wearing protective gear, such as disposable gloves and a face mask, can help minimize direct exposure to the vomit and its associated odors, ensuring a safer and more hygienic cleanup process.
Furthermore, the proactive approach to addressing vomit in your car not only contributes to the restoration of a clean and inviting driving environment but also helps prevent the potential escalation of odors and stains. By promptly attending to the cleanup process, you can mitigate the long-term impact of the incident and maintain the overall cleanliness and hygiene of your car's interior.
Ultimately, the comprehensive guide presented here equips you with the knowledge and practical insights needed to navigate the challenging task of cleaning vomit from your car. By following these methods and recommendations, you can effectively manage and overcome the aftermath of a vomit incident, ensuring that your car remains a clean, pleasant, and welcoming space for all your future journeys.