Home>Automotive>How To Turn Headlights On
Automotive
How To Turn Headlights On
Published: February 25, 2024
Learn how to turn headlights on in your car with our step-by-step guide. Get expert tips and advice on automotive lighting. Keep your headlights shining bright!
(Many of the links in this article redirect to a specific reviewed product. Your purchase of these products through affiliate links helps to generate commission for Noodls.com, at no extra cost. Learn more)
Table of Contents
Introduction
When it comes to driving, safety is paramount, and one of the most critical components of safe driving is visibility. Whether you're navigating through dimly lit streets at night or encountering adverse weather conditions, having properly functioning headlights is essential for ensuring your safety and the safety of others on the road. Understanding how to effectively operate your vehicle's headlights is a fundamental aspect of responsible driving.
In this comprehensive guide, we will delve into the intricacies of turning on and adjusting your headlights to optimize visibility in various driving conditions. From understanding the different headlight controls to utilizing high beams and low beams appropriately, this article will equip you with the knowledge needed to confidently manage your vehicle's lighting system. So, let's embark on this enlightening journey to master the art of illuminating the road ahead.
Understanding Your Vehicle's Headlight Controls
Before you can effectively operate your vehicle's headlights, it's crucial to familiarize yourself with the various controls at your disposal. The location and functionality of these controls may vary depending on the make and model of your vehicle, but the fundamental principles remain consistent across most cars.
-
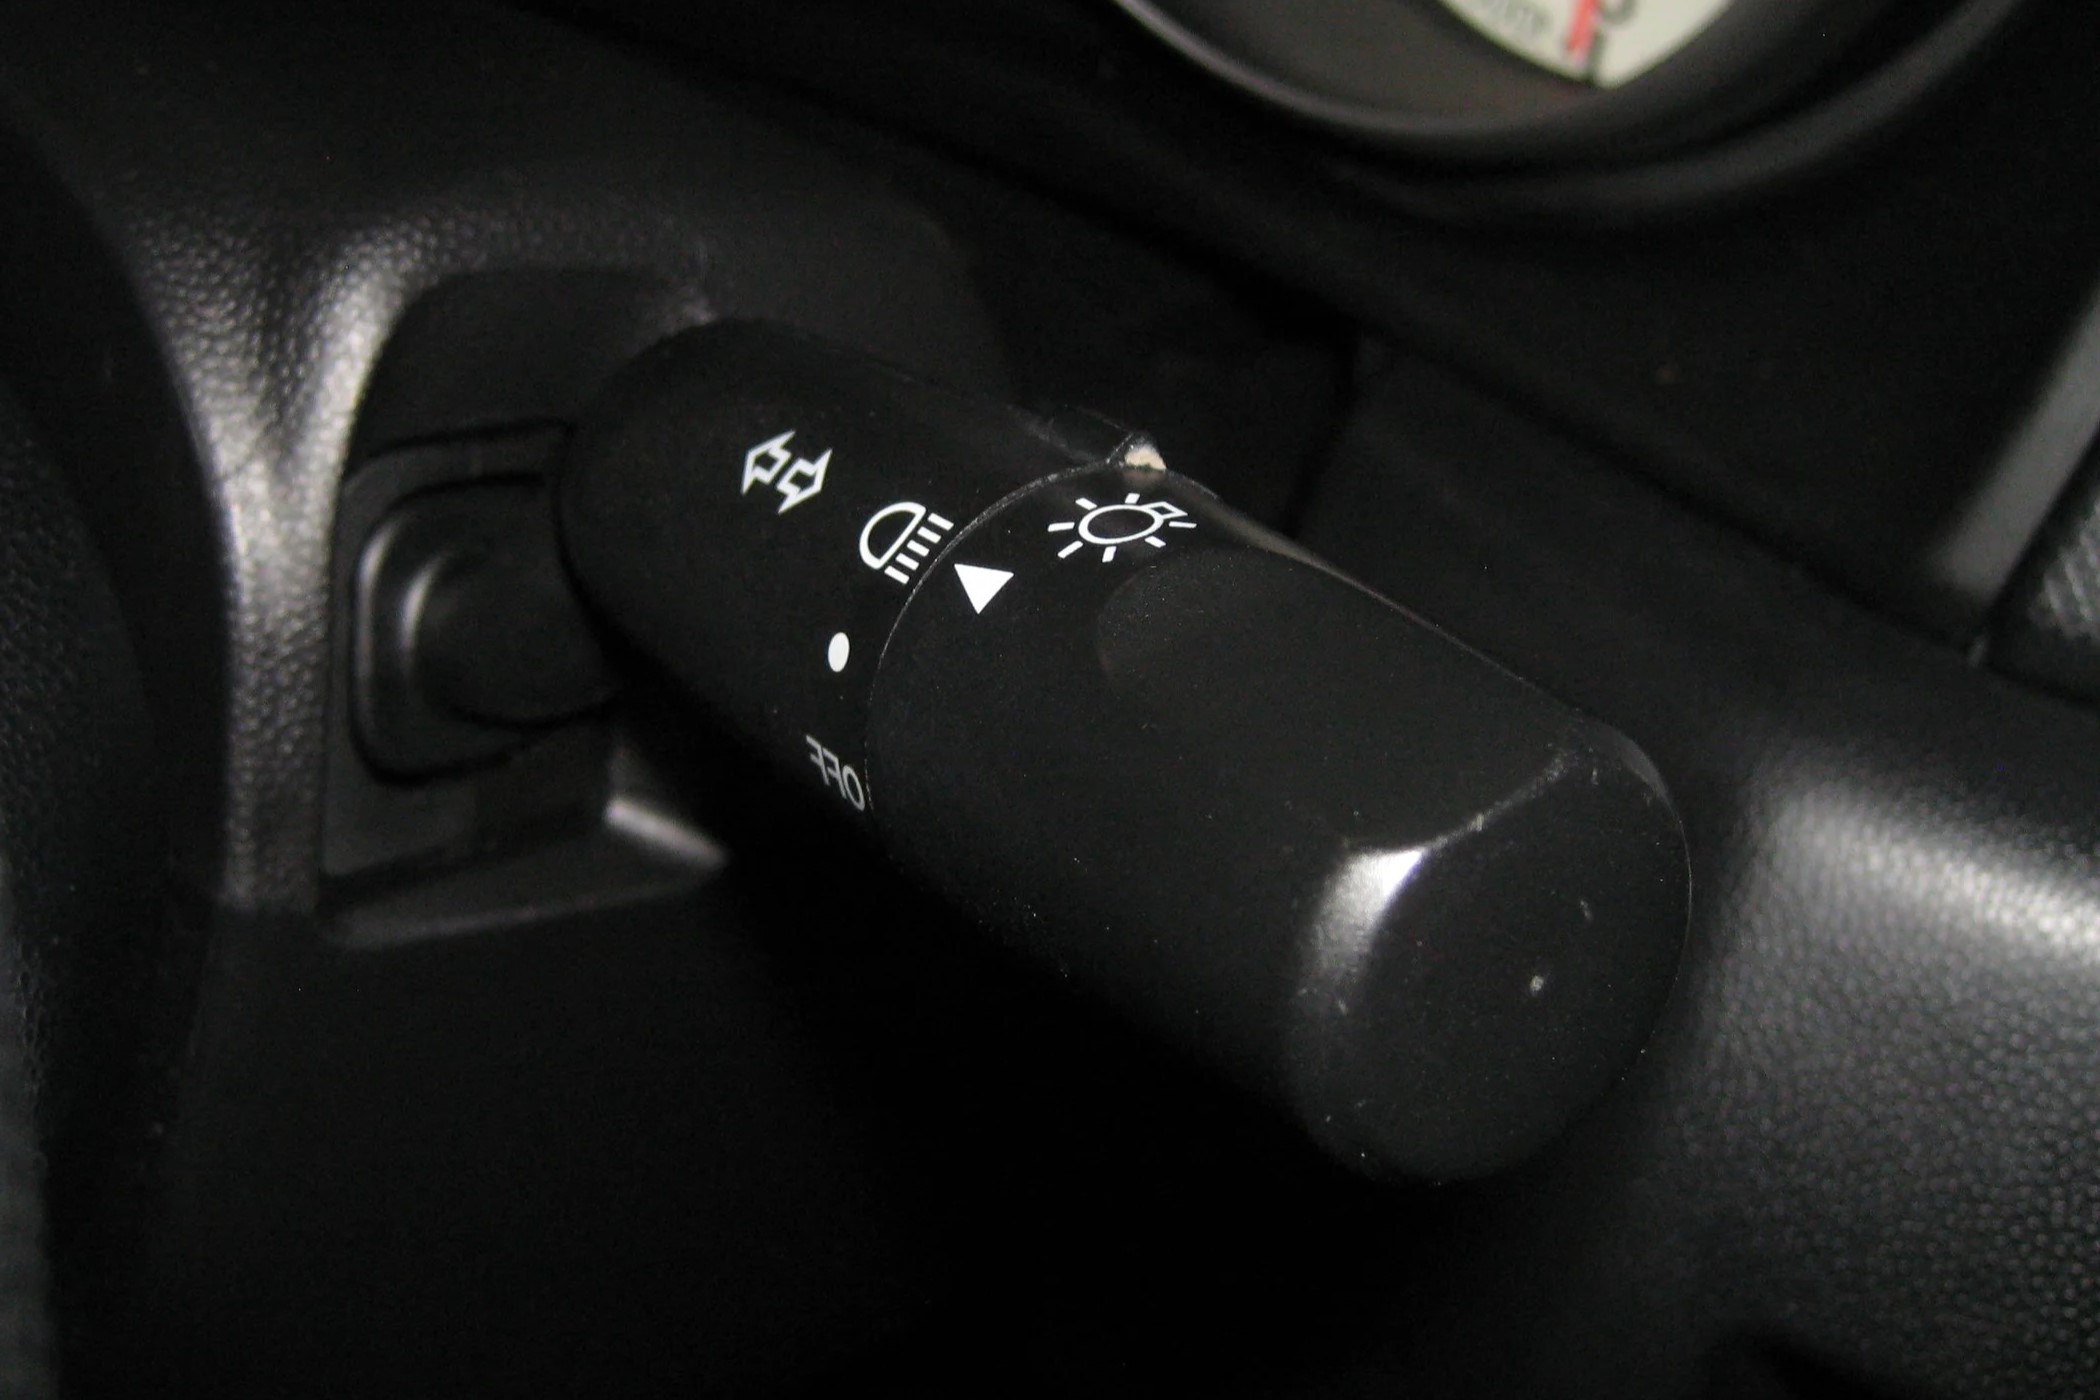
Headlight Switch: The headlight switch is typically located on the dashboard or the multifunction stalk attached to the steering column. It allows you to turn the headlights on and off, as well as activate the high beam and low beam settings.
-
High Beam/Low Beam Selector: This control enables you to switch between high beams and low beams. High beams provide maximum illumination and are ideal for use in rural or unlit areas, but they should be switched to low beams when approaching other vehicles to avoid blinding oncoming drivers.
-
Automatic Headlights: Many modern vehicles are equipped with automatic headlights that utilize sensors to detect ambient light levels. When set to "auto," the headlights will turn on and off based on the surrounding lighting conditions, providing added convenience and safety.
-
Fog Lights: Some vehicles are equipped with front and rear fog lights, which are designed to improve visibility in foggy or misty conditions. These lights have a distinct control separate from the main headlight switch.
Understanding the functionality and location of these controls is essential for effectively managing your vehicle's lighting system. Additionally, familiarizing yourself with the symbols and indicators associated with these controls will enable you to interpret the information displayed on your dashboard, ensuring that your headlights are operating as intended.
By mastering the intricacies of your vehicle's headlight controls, you can confidently navigate through various driving scenarios while optimizing visibility and safety for yourself and other road users.
Turning On Your Headlights
Turning on your headlights is a fundamental aspect of safe driving, especially during low-light conditions such as dusk, dawn, or nighttime. Whether you're embarking on a nocturnal journey or encountering inclement weather, the proper activation of your headlights is crucial for maintaining visibility and ensuring your safety on the road.
To initiate the process, locate the headlight switch, which is typically positioned on the dashboard or the multifunction stalk attached to the steering column. Depending on your vehicle, the headlight switch may feature multiple settings, including "off," "parking lights," and "headlights." To activate your headlights, simply rotate the switch to the "headlights" position. In some vehicles, the switch may also have an "auto" setting, allowing the headlights to function automatically based on ambient light levels.
Once your headlights are engaged, take a moment to verify their functionality by visually inspecting the front of your vehicle. Confirm that both the headlights and the accompanying daytime running lights, if equipped, are illuminated. This visual confirmation ensures that your headlights are operational and emitting the necessary light to enhance your visibility on the road.
It's important to note that many modern vehicles are equipped with daytime running lights (DRLs), which are designed to improve visibility during daylight hours. While DRLs enhance the conspicuity of your vehicle, they are not a substitute for headlights in low-light or adverse weather conditions. Therefore, it's imperative to activate your headlights manually when driving in dimly lit environments, as DRLs alone may not provide sufficient illumination.
In addition to enhancing your own visibility, properly functioning headlights also contribute to the visibility of your vehicle to other road users. This is particularly crucial in low-visibility scenarios, as illuminated headlights signal your presence to oncoming traffic and pedestrians, reducing the risk of collisions and enhancing overall road safety.
By mastering the art of turning on your headlights, you are not only prioritizing your own safety but also fulfilling your responsibility as a conscientious driver. Whether you're navigating through the twilight hours or braving the darkness of night, the simple act of activating your headlights can make a significant difference in ensuring a safe and secure journey for yourself and others on the road.
Using High Beams and Low Beams
Understanding the distinction between high beams and low beams is essential for optimizing visibility while driving in varying conditions. High beams, also known as full beams, provide maximum illumination and are designed for use in rural or unlit areas where there is minimal ambient light. When activated, high beams emit a powerful, long-range light that significantly enhances visibility, allowing drivers to detect potential hazards and obstacles from a greater distance.
Conversely, low beams, also referred to as dipped beams, offer a more focused and downward-directed light pattern. These are the standard headlights used for normal driving conditions, providing adequate illumination without causing glare for oncoming vehicles. Low beams are the default setting for urban and well-lit areas, as well as when driving in the presence of other vehicles to prevent blinding other drivers.
To switch between high beams and low beams, locate the high beam/low beam selector, which is typically integrated into the headlight switch or positioned as a separate control on the multifunction stalk. When transitioning from low beams to high beams, push or pull the selector as indicated, usually away from or towards you, depending on the vehicle's design. This action activates the high beams, flooding the road ahead with intensified light. When approaching oncoming traffic or driving in urban areas, revert to low beams by returning the selector to its original position, ensuring that the light pattern is adjusted for optimal visibility without causing discomfort or distraction to other road users.
It's important to exercise caution when using high beams, as they can potentially dazzle or blind other drivers if deployed inappropriately. Always adhere to traffic regulations and switch to low beams when approaching vehicles from the opposite direction or when driving in well-lit areas. Additionally, be mindful of using high beams in adverse weather conditions, as fog, rain, or snow can reflect the intense light back towards your own eyes, impairing visibility rather than improving it.
Mastering the art of utilizing high beams and low beams effectively empowers drivers to adapt to diverse driving environments while prioritizing safety and courtesy on the road. By judiciously employing the appropriate lighting settings, drivers can navigate through varying levels of illumination with confidence, ensuring optimal visibility without compromising the comfort and safety of fellow road users.
Adjusting Headlight Settings
Properly adjusted headlights are essential for optimizing visibility and ensuring safe driving conditions. Over time, factors such as vehicle aging, road vibrations, and minor collisions can cause headlights to become misaligned, compromising their effectiveness. Therefore, it's imperative for drivers to periodically inspect and adjust their headlights to maintain optimal illumination and minimize the risk of glare for other road users.
Read more: How To Turn On The Heater
Checking Headlight Alignment
Before adjusting your headlights, it's crucial to verify their alignment to determine if any corrective action is necessary. To conduct a preliminary assessment, park your vehicle on a level surface facing a flat wall or garage door. Measure the distance between the ground and the center of each headlight, and mark these points on the wall using masking tape or chalk. Subsequently, back the vehicle up approximately 25 feet, ensuring that it remains perpendicular to the wall.
Adjusting Headlight Aim
With the vehicle in the correct position, inspect the headlight beams' alignment against the marked points on the wall. Ideally, the beams should be positioned slightly below the marked center points, ensuring that they illuminate the road ahead without causing glare for oncoming drivers. If the beams appear misaligned or are projecting unevenly, adjustments are necessary.
Utilizing Adjustment Screws
Most vehicles are equipped with manual adjustment screws located near the headlight housing. These screws allow for precise vertical and horizontal alignment of the headlights. Using a screwdriver or a specialized headlight adjustment tool, carefully rotate the adjustment screws to reposition the headlight beams according to the manufacturer's specifications. It's essential to consult your vehicle's manual to identify the specific location and operation of the adjustment screws, as their placement may vary between different makes and models.
Seeking Professional Assistance
While minor adjustments can often be performed by drivers themselves, complex alignment issues or those resulting from significant impacts may require professional intervention. Automotive service centers and certified technicians possess the expertise and specialized equipment needed to accurately realign headlights, ensuring compliance with regulatory standards and optimal visibility on the road.
Read more: How To Turn On Gas Fireplace
Verifying Proper Alignment
Upon completing the adjustment process, it's advisable to reevaluate the headlight alignment to confirm that the beams are projecting correctly. This can be achieved by repeating the initial alignment check against the wall and making any necessary fine-tuning adjustments to achieve the desired beam placement.
By proactively adjusting and maintaining your vehicle's headlights, you not only enhance your own visibility and driving safety but also contribute to the overall well-being of fellow road users. Prioritizing the proper alignment of headlights reflects a commitment to responsible and considerate driving, fostering a safer and more harmonious driving environment for all.
Conclusion
In conclusion, mastering the operation and adjustment of your vehicle's headlights is a pivotal aspect of responsible and safe driving. By understanding the intricacies of headlight controls, including the high beam/low beam selector and automatic headlight functionality, drivers can effectively manage their lighting systems to optimize visibility in diverse driving conditions. The act of turning on headlights not only enhances the driver's own visibility but also serves as a crucial signal to other road users, contributing to overall road safety.
Furthermore, the judicious use of high beams and low beams empowers drivers to adapt to varying levels of illumination, ensuring optimal visibility without causing discomfort or hazards to fellow road users. By exercising caution and adhering to traffic regulations regarding headlight usage, drivers can navigate through different driving environments with confidence and courtesy.
The significance of adjusting headlight settings should not be overlooked, as properly aligned headlights are essential for minimizing glare and maximizing illumination. Regular inspection and, if necessary, adjustment of headlights contribute to safer driving conditions for both the driver and other road users.
In essence, the effective management of headlights is not merely a technical aspect of driving; it is a demonstration of responsibility, consideration, and a commitment to fostering a safer driving environment for all. By prioritizing visibility and safety through the proficient operation and maintenance of headlights, drivers play a vital role in promoting road safety and enhancing the overall driving experience.
As drivers, let us embrace the knowledge and skills presented in this guide to illuminate the road ahead responsibly, ensuring that every journey is characterized by enhanced visibility, safety, and consideration for fellow travelers.