Home>Technology and Computers>How To Turn Off Flash Notification On IPhone
Technology and Computers
How To Turn Off Flash Notification On IPhone
Published: March 5, 2024
Learn how to disable flash notifications on your iPhone and improve your user experience. Get step-by-step instructions for turning off this feature easily.
(Many of the links in this article redirect to a specific reviewed product. Your purchase of these products through affiliate links helps to generate commission for Noodls.com, at no extra cost. Learn more)
Table of Contents
Introduction
Flash notifications on an iPhone can be a useful feature for alerting users to incoming calls, messages, or app notifications. However, there are instances when these flashing alerts can be distracting or disruptive, especially in environments where silence and minimal visual disturbances are preferred. Fortunately, iPhone users have the flexibility to customize their notification settings, including the option to turn off flash notifications entirely or for specific apps. In this article, we will explore three methods to disable flash notifications on an iPhone, providing users with the freedom to tailor their notification experience to suit their preferences and surroundings. Whether it's for enhancing focus during work hours, ensuring uninterrupted sleep, or simply reducing visual distractions, these methods offer practical solutions for managing flash notifications on your iPhone. Let's delve into the step-by-step processes to regain control over your iPhone's notification behavior.
Read more: How To Turn On Flash On IPhone
Method 1: Turning off Flash Notification in Settings
To disable flash notifications on your iPhone, you can navigate to the Settings app and make the necessary adjustments within the Accessibility settings. Here's a step-by-step guide to turning off flash notifications:
-
Accessing Settings: Begin by tapping on the "Settings" app, which can be easily located on the home screen of your iPhone.
-
Locating Accessibility Settings: Within the Settings menu, scroll and select "Accessibility." This section is designed to accommodate various customization options to enhance the user experience.
-
Entering Audio/Visual Settings: Once in the Accessibility menu, tap on "Audio/Visual" to access the specific settings related to visual alerts and notifications.
-
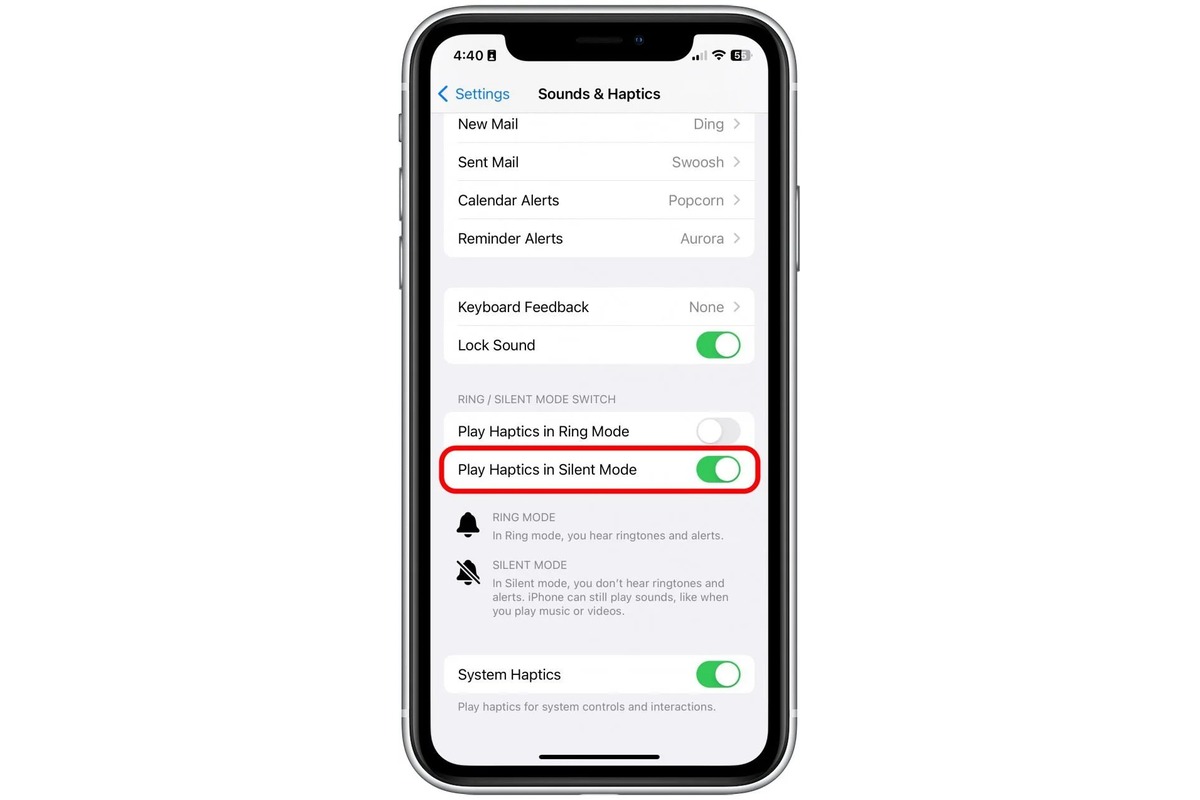
Disabling LED Flash for Alerts: Under the "Hearing" section, you will find the "LED Flash for Alerts" option. Toggle this setting off by tapping on the switch next to it. When the switch turns gray, it indicates that the LED flash for alerts has been successfully disabled.
-
Verifying the Changes: After turning off the LED flash for alerts, you can exit the Settings app and proceed to test the changes by sending a test notification to your device. If the flash notification no longer activates, the adjustment has been applied successfully.
By following these simple steps, you can effectively turn off flash notifications on your iPhone, providing a more tailored and distraction-free notification experience. Whether it's for creating a serene environment during meetings, preventing disruptions in quiet settings, or simply personal preference, this method offers a straightforward solution to manage visual alerts on your iPhone.
Method 2: Using Do Not Disturb Mode to Disable Flash Notification
Do Not Disturb mode is a versatile feature on the iPhone that allows users to silence calls, alerts, and notifications, providing uninterrupted periods of focus, relaxation, or sleep. Leveraging this functionality, users can effectively disable flash notifications without the need to delve into intricate settings. Here's a detailed guide on utilizing Do Not Disturb mode to manage flash notifications on your iPhone.
-
Accessing Do Not Disturb Settings: To initiate this method, navigate to the "Settings" app on your iPhone's home screen. Once inside the Settings menu, locate and tap on "Do Not Disturb." This section houses the customizable settings for managing notifications during quiet hours or when the user prefers minimal disruptions.
-
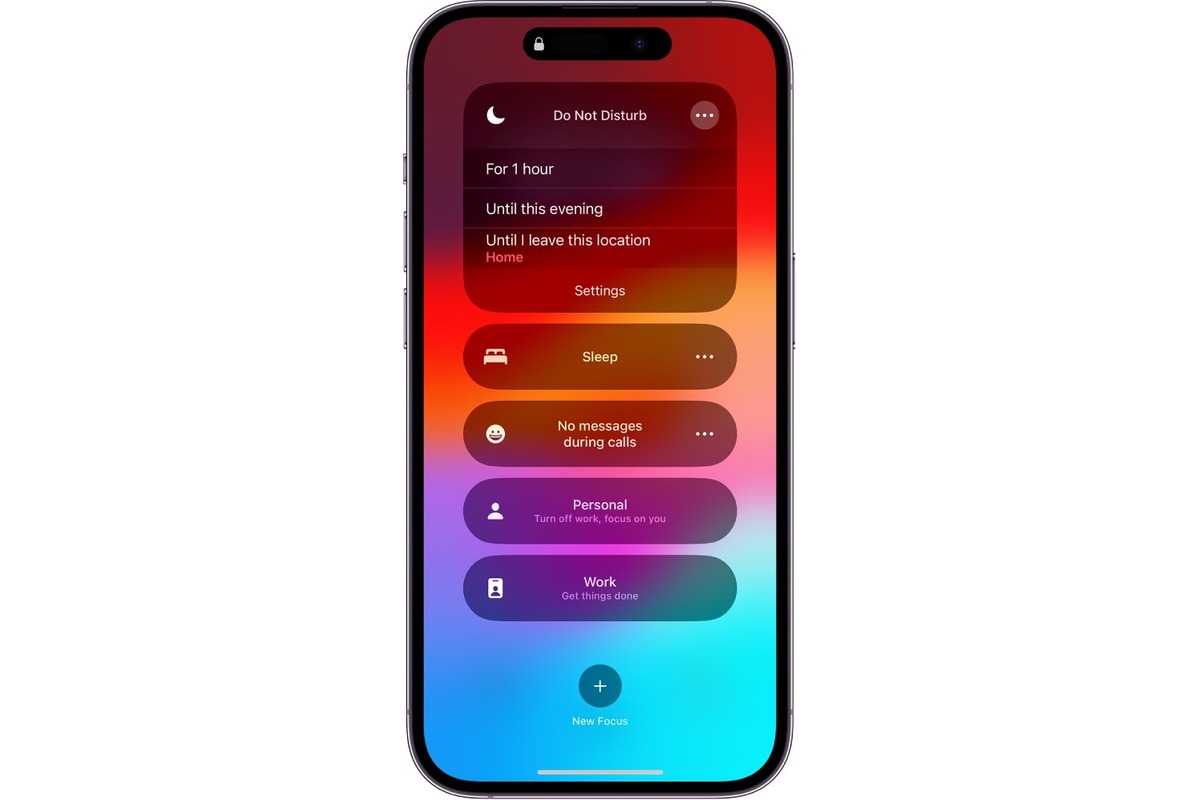
Enabling Do Not Disturb: Within the Do Not Disturb settings, toggle the switch next to "Do Not Disturb" to activate this mode. When enabled, the crescent moon icon will appear in the status bar, indicating that Do Not Disturb mode is active. This action ensures that incoming calls and notifications will be silenced, including flash alerts.
-
Customizing Do Not Disturb Options: To further tailor the Do Not Disturb mode to your preferences, you can adjust additional settings such as allowing calls from specific contacts, enabling repeated calls to bypass the silence, and scheduling Do Not Disturb to activate automatically during designated times.
-
Silencing Visual Notifications: While in Do Not Disturb mode, all visual notifications, including flash alerts, will be suppressed, providing a serene and distraction-free experience. This seamless approach allows users to effortlessly manage their notification preferences without the need for manual intervention each time they seek uninterrupted moments.
-
Exiting Do Not Disturb Mode: Once the period of focus or relaxation has concluded, users can simply return to the Do Not Disturb settings and toggle the switch off to deactivate this mode. This action restores the normal notification behavior, including visual alerts, ensuring that users remain in control of their notification experience.
By leveraging the Do Not Disturb mode, iPhone users can effortlessly disable flash notifications, fostering an environment conducive to focus, relaxation, or uninterrupted sleep. This method offers a convenient and versatile approach to managing visual alerts, empowering users to seamlessly customize their notification experience to align with their preferences and daily routines.
Method 3: Disabling Flash Notification for Specific Apps
In addition to turning off flash notifications globally or using the Do Not Disturb mode, iPhone users have the option to selectively disable flash notifications for specific apps. This level of customization allows for a more tailored approach to managing visual alerts, ensuring that essential notifications remain prominent while minimizing distractions from less critical apps. Here's a comprehensive guide on how to disable flash notifications for specific apps on your iPhone:
-
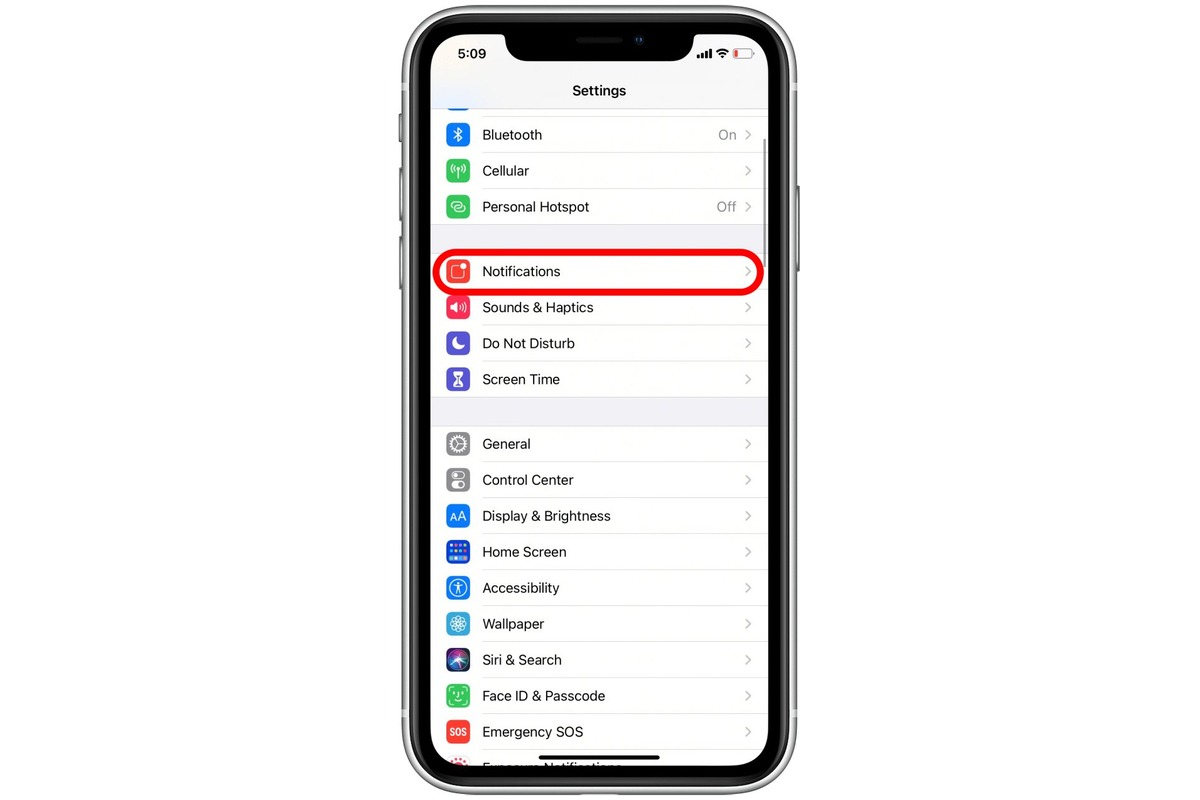
Accessing Notification Settings: Begin by navigating to the "Settings" app on your iPhone's home screen. Once inside the Settings menu, locate and tap on "Notifications." This section houses the individual notification settings for all installed apps, allowing users to customize the alert preferences for each app.
-
Selecting the App: Within the Notifications settings, scroll through the list of installed apps and select the app for which you wish to disable flash notifications. Once the app is selected, you will gain access to its specific notification settings.
-
Customizing Notification Preferences: Upon entering the app-specific notification settings, you will find various customization options, including sounds, badges, and alert styles. To disable flash notifications for this app, locate the "Badge App Icon" or "Lock Screen" options, depending on the specific notification style used by the app.
-
Disabling LED Flash for Alerts: Within the notification style settings for the selected app, you will find the "LED Flash for Alerts" option. Toggle this setting off by tapping on the switch next to it. Once disabled, the app will no longer trigger flash notifications, providing a more streamlined and focused notification experience.
-
Verifying the Changes: After disabling flash notifications for the specific app, you can exit the Settings app and await notifications from the app to confirm that the flash alerts no longer activate. This verification step ensures that the customization has been successfully applied.
By following these steps, iPhone users can effectively manage flash notifications for specific apps, tailoring their notification experience to prioritize essential alerts while minimizing visual distractions from less critical applications. This level of customization empowers users to create a notification environment that aligns with their preferences and usage patterns, enhancing overall user experience and productivity.
This method offers a practical and personalized approach to managing flash notifications, allowing users to strike a balance between staying informed and minimizing visual disruptions based on the importance of individual apps. Whether it's prioritizing work-related notifications, muting non-essential alerts during leisure time, or customizing the notification experience for specific apps, this method provides a versatile solution to optimize the visual notification behavior on your iPhone.
Conclusion
In conclusion, the ability to manage flash notifications on an iPhone provides users with the flexibility to tailor their notification experience to suit various environments and preferences. By exploring the three methods outlined in this article, iPhone users can effectively disable flash notifications, fostering a more serene and focused notification environment.
The first method, which involves turning off flash notifications in the Settings app, offers a straightforward approach to globally disable visual alerts. This method is ideal for users seeking a quick and comprehensive solution to eliminate flash notifications across all apps and system functions. By navigating through the Accessibility settings, users can seamlessly deactivate LED flash alerts, ensuring a distraction-free notification experience.
Utilizing the Do Not Disturb mode, as detailed in the second method, presents a versatile approach to managing flash notifications. This feature allows users to silence all notifications, including visual alerts, during designated periods, fostering uninterrupted focus, relaxation, or sleep. The convenience of customizing Do Not Disturb settings further empowers users to tailor their notification preferences without the need for manual intervention each time they seek uninterrupted moments.
The third method, which involves disabling flash notifications for specific apps, offers a granular level of customization. This approach allows users to prioritize essential notifications while minimizing visual distractions from less critical apps. By navigating the app-specific notification settings, users can effortlessly disable flash notifications for selected apps, ensuring that essential alerts remain prominent while reducing visual disruptions from non-essential applications.
In essence, these methods empower iPhone users to take control of their notification experience, aligning it with their daily routines, work requirements, and personal preferences. Whether it's for creating a conducive work environment, fostering relaxation during leisure time, or ensuring uninterrupted sleep, the ability to manage flash notifications offers a valuable tool for enhancing productivity, focus, and overall user experience.
By leveraging these methods, iPhone users can navigate through various scenarios while maintaining control over their notification behavior. Whether it's a bustling office environment, a serene home setting, or moments of leisure, the ability to manage flash notifications ensures that users can strike a balance between staying informed and minimizing visual disruptions based on their unique needs and usage patterns.
In essence, the methods outlined in this article provide practical solutions for iPhone users to manage flash notifications, fostering a more tailored and distraction-free notification experience. By embracing these customization options, users can navigate through their daily routines with enhanced focus, productivity, and peace of mind, ultimately optimizing their iPhone's notification behavior to align with their preferences and surroundings.