Home>Food and Cooking>How To Clean Grapes

Food and Cooking
How To Clean Grapes
Modified: March 2, 2024
Learn the best methods for cleaning grapes to ensure they are safe and delicious to eat. Discover expert tips for washing and storing grapes at home. Perfect for food and cooking enthusiasts!
(Many of the links in this article redirect to a specific reviewed product. Your purchase of these products through affiliate links helps to generate commission for Noodls.com, at no extra cost. Learn more)
Table of Contents
Introduction
Grapes are not only delicious but also packed with essential nutrients, making them a popular and healthy snack. However, before sinking your teeth into these juicy fruits, it's crucial to ensure that they are thoroughly clean. Grapes can harbor dirt, pesticides, and other residues, making proper cleaning a vital step in enjoying them safely.
In this comprehensive guide, we will walk you through the step-by-step process of cleaning grapes to guarantee that they are free from any contaminants. Whether you're preparing a fruit platter for a gathering or simply indulging in a refreshing snack at home, following these cleaning methods will help you savor the natural sweetness of grapes without any concerns about unwanted substances.
Cleaning grapes is not only about hygiene but also about enhancing their flavor. By removing any impurities, you can experience the true taste of the grapes, allowing their natural sweetness to shine through. Additionally, by cleaning grapes properly, you can extend their shelf life, ensuring that they stay fresh and appetizing for longer periods.
So, let's dive into the simple yet effective steps that will enable you to clean grapes with ease and confidence. Whether you prefer red, green, or black grapes, these cleaning methods are universally applicable, ensuring that you can enjoy your favorite variety without any worries. Let's get started on this journey to pristine, delectable grapes!
Read more: How To Wash Grapes
Step 1: Rinse the Grapes
Rinsing the grapes is the initial and crucial step in the cleaning process. It effectively removes any visible dirt, dust, or residues from the surface of the grapes. This step is essential for eliminating external contaminants before delving into more thorough cleaning methods.
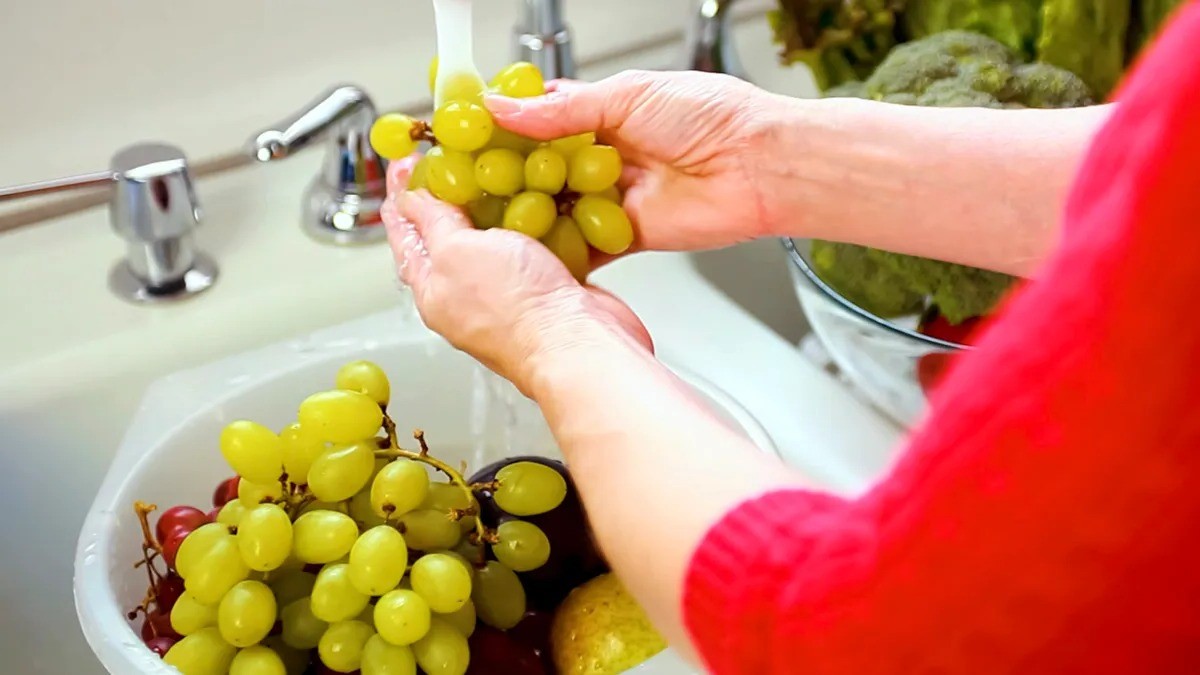
To begin, place the grapes in a colander or strainer under cool, running water. Gently swish the grapes around, ensuring that the water reaches all the clusters. This gentle agitation helps dislodge any loose particles clinging to the grapes. As the water flows over the grapes, you will notice any debris being washed away, leaving the grapes looking fresher and cleaner.
It's important to use cool water during this rinsing process, as hot water can cause the grapes to become mushy or lose their firmness. Additionally, cool water helps maintain the grapes' natural crispness and prevents them from becoming overly soft.
While rinsing, take a moment to inspect the grapes for any stems, leaves, or damaged fruit. Removing these unwanted elements at this stage simplifies the subsequent cleaning process and ensures that only the finest grapes make it to your table.
Rinsing the grapes not only serves the practical purpose of removing surface impurities but also provides an opportunity to appreciate their vibrant colors and plumpness. As the water cascades over the grapes, their luscious hues and enticing appeal become even more apparent, setting the stage for a delightful culinary experience.
By thoroughly rinsing the grapes, you lay the foundation for a hygienic and enjoyable snacking or cooking experience. This simple yet essential step sets the stage for the subsequent cleaning procedures, ensuring that the grapes are primed for consumption or inclusion in your favorite recipes.
Rinsing the grapes is a quick and effective way to kickstart the cleaning process, setting the stage for the subsequent steps that will further enhance the grapes' cleanliness and appeal. With the grapes now refreshed and free from visible impurities, it's time to move on to the next step in the journey to pristine, delectable grapes.
Step 2: Soak the Grapes
After the initial rinsing, the next step in the grape cleaning process involves soaking the grapes to ensure thorough removal of any remaining contaminants. Soaking is a highly effective method for dislodging dirt, pesticides, and other residues that may be lingering on the grape skins, guaranteeing a deeper level of cleanliness.
To begin, transfer the rinsed grapes into a large bowl or container. Fill the vessel with a mixture of cool water and a gentle fruit and vegetable wash or a solution of white vinegar and water. The mild acidity of the vinegar helps to break down any wax or pesticide residues, while the water provides a medium for the contaminants to be released from the grape surfaces.
Allow the grapes to soak in this solution for approximately 5-10 minutes. This duration allows ample time for the cleaning solution to penetrate the grape clusters, effectively loosening any stubborn residues. During this soaking period, gentle agitation or stirring of the grapes can further enhance the cleaning process, ensuring that all the grapes are thoroughly exposed to the cleaning solution.
As the grapes soak, you may notice that the water takes on a slightly cloudy appearance. This visual indication is a reassuring sign that the soaking process is actively lifting impurities from the grapes, further validating the effectiveness of this cleaning method.
After the soaking period, carefully drain the water from the bowl or container, taking care not to damage the delicate grape clusters. Once drained, rinse the grapes once again under cool, running water to remove any residual cleaning solution and dislodged contaminants. This final rinse ensures that the grapes are left pristine and free from any cleaning residues, ready to be enjoyed in their purest form.
Soaking the grapes serves as a pivotal step in the cleaning process, providing a comprehensive and thorough method for removing contaminants that may not have been eliminated during the initial rinsing. By allowing the grapes to immerse in a gentle cleaning solution, you can rest assured that they are cleansed to the highest standard, setting the stage for a delightful and worry-free culinary experience.
With the grapes now thoroughly soaked and rinsed, they are primed for the subsequent steps in the cleaning process, ensuring that they are impeccably clean and ready to be savored in all their natural glory.
Step 3: Gently Scrub the Grapes
Once the grapes have been rinsed and soaked, the next crucial step in the cleaning process involves gently scrubbing the grape clusters to ensure the thorough removal of any remaining impurities. This meticulous approach not only enhances the cleanliness of the grapes but also contributes to their overall visual appeal and palatability.
To begin, carefully transfer the soaked grapes to a clean colander or strainer. Position the colander under cool, running water, allowing the gentle flow to wet the grapes once again. As the water cascades over the grapes, use your fingertips to delicately rub the surfaces of the grape clusters. This gentle scrubbing action helps to dislodge any lingering residues, ensuring that the grapes are pristine and free from any unwanted substances.
While scrubbing, pay particular attention to the crevices and folds of the grape clusters, as these areas are often where contaminants may persist. By methodically working through each cluster, you can effectively target any remaining impurities, guaranteeing that the grapes are thoroughly cleaned and ready for consumption.
It's important to approach this step with a delicate touch, ensuring that the grapes are scrubbed gently to avoid damaging their delicate skins or causing the fruit to become mushy. The goal is to achieve a thorough cleaning without compromising the integrity of the grapes, preserving their natural firmness and juiciness.
As you engage in the gentle scrubbing process, take a moment to appreciate the vibrant colors and plumpness of the grapes. The water running over the clusters accentuates their natural beauty, highlighting their luscious hues and inviting appearance. This visual spectacle serves as a reminder of the delectable treat that awaits once the grapes are impeccably clean.
Once you have meticulously scrubbed all the grape clusters, give them a final rinse under cool, running water. This rinse serves to wash away any loosened residues and ensures that the grapes are left sparkling clean and free from any remnants of the cleaning process.
By gently scrubbing the grapes, you elevate their cleanliness to the highest standard, setting the stage for a truly enjoyable and worry-free culinary experience. With the grapes now immaculately cleaned, they are ready to be incorporated into your favorite recipes or enjoyed as a wholesome and refreshing snack.
Step 4: Rinse Again
After the meticulous process of rinsing, soaking, and gently scrubbing the grapes, the next step involves giving them a final rinse to ensure that they are impeccably clean and ready to be enjoyed. This additional rinsing step serves as the ultimate assurance that the grapes are free from any residual impurities or cleaning agents, allowing their natural flavors and qualities to shine through.
To commence this final rinsing stage, transfer the scrubbed grape clusters back into a clean colander or strainer. Position the colander under cool, running water, ensuring that all the grape clusters are thoroughly exposed to the gentle flow. As the water cascades over the grapes, take a moment to appreciate their refreshed appearance, with any remaining traces of impurities being washed away.
During this final rinse, gently agitate the grape clusters with your fingertips, allowing the water to reach all the surfaces and crevices. This gentle agitation serves to dislodge any last remnants of contaminants, ensuring that the grapes are left pristine and pure. As the water flows over the clusters, you may notice that it runs clear, indicating that the grapes have been thoroughly cleansed and are now ready for consumption.
The final rinse not only serves the practical purpose of removing any remaining residues but also provides an opportunity to admire the grapes' vibrant colors and plumpness. The water running over the clusters accentuates their natural beauty, highlighting their luscious hues and inviting appearance. This visual spectacle serves as a reminder of the delectable treat that awaits once the grapes are impeccably clean.
Once the grapes have been thoroughly rinsed, allow them to drain in the colander for a brief moment. This brief draining period ensures that excess water is removed, leaving the grapes refreshed and ready to be enjoyed. With the final rinse complete, the grapes are now impeccably clean, free from any lingering impurities, and primed for inclusion in your favorite recipes or as a wholesome and refreshing snack.
By giving the grapes a final rinse, you can savor the assurance that they are pristine and free from any remnants of the cleaning process, allowing their natural sweetness and juiciness to take center stage. With the grapes now sparkling clean and refreshed, they are prepared to elevate your culinary creations or simply offer a delightful burst of flavor and nutrition.
Read more: How To Clean Birkenstocks
Step 5: Dry the Grapes
After the thorough rinsing and cleansing process, it's essential to ensure that the grapes are adequately dried before consumption or storage. Properly drying the grapes not only enhances their presentation but also contributes to their longevity and overall quality.
To begin the drying process, gently transfer the rinsed and refreshed grape clusters onto a clean kitchen towel or paper towels. Arrange the grapes in a single layer, allowing ample space between each cluster to facilitate efficient drying. The absorbent surface of the towels helps to wick away excess moisture from the grapes, promoting a swift and effective drying process.
Carefully pat the grape clusters with another clean kitchen towel or paper towels, gently pressing down to absorb any lingering water droplets. It's important to exercise a delicate touch during this process to avoid damaging the grapes or causing them to become misshapen.
As the grape clusters are gently patted dry, take a moment to appreciate their vibrant colors and plumpness. The process of drying not only serves the practical purpose of removing excess moisture but also provides an opportunity to admire the grapes' refreshed appearance, setting the stage for a delightful culinary experience.
Once the grape clusters have been gently patted dry, transfer them to a fresh, dry plate or tray, ensuring that they are arranged in a single layer. This arrangement allows for continued air circulation around the grapes, further promoting the drying process.
Allow the grape clusters to air dry for approximately 10-15 minutes, or until they appear visibly dry to the touch. During this brief drying period, the grapes regain their natural firmness and luster, signaling that they are ready to be enjoyed.
With the grapes now adequately dried, they are primed for consumption, whether as a standalone snack, a flavorful addition to fruit salads, or as a key ingredient in various culinary creations. Additionally, properly dried grapes can be stored in airtight containers or resealable bags, extending their shelf life and preserving their freshness for future enjoyment.
By ensuring that the grapes are thoroughly dried, you can savor their natural sweetness and juiciness to the fullest, knowing that they have been meticulously prepared for your culinary pleasure. With the grapes now impeccably cleaned, refreshed, and dried, they are ready to elevate your dining experience with their irresistible flavor and wholesome appeal.
Conclusion
In conclusion, the process of cleaning grapes is not only a practical necessity for ensuring their safety and hygiene but also a delightful journey that allows us to appreciate the natural beauty and flavors of these luscious fruits. By following the step-by-step methods outlined in this guide, you can transform ordinary grapes into pristine, delectable treats that are ready to be savored in a variety of culinary applications.
From the initial rinsing that refreshes the grapes and removes visible impurities to the subsequent soaking, gentle scrubbing, and final rinsing that ensure thorough cleanliness, each step contributes to the overall quality and appeal of the grapes. The careful attention to detail in cleaning the grapes not only eliminates contaminants but also enhances their visual allure, setting the stage for a truly enjoyable snacking or cooking experience.
As the grapes are gently dried to perfection, their natural sweetness and juiciness are preserved, ready to be enjoyed in their purest form. Whether you choose to indulge in these pristine grapes as a standalone snack, incorporate them into vibrant fruit salads, or use them as a flavorful ingredient in various recipes, their immaculate cleanliness ensures that you can savor their delightful qualities with confidence and peace of mind.
Furthermore, the journey of cleaning grapes serves as a reminder of the simple pleasures that nature offers, from the vibrant colors of the grape clusters to the refreshing burst of flavor they provide. It is a testament to the care and appreciation we extend to the food we consume, allowing us to forge a deeper connection with the nourishing gifts of the earth.
By embracing the process of cleaning grapes with mindfulness and attention, we not only ensure their purity and safety but also honor the bountiful harvest that enriches our lives. Whether enjoyed as a wholesome snack, a culinary ingredient, or a symbol of nature's abundance, these meticulously cleaned grapes embody the essence of pure, unadulterated goodness.
In essence, the journey of cleaning grapes transcends the practical realm of food preparation, becoming a celebration of nature's bounty and a testament to the joy of savoring simple pleasures. As you embark on this journey with each batch of grapes, may you find delight in the meticulous care bestowed upon these fruits and revel in the pure, unblemished essence they offer to enrich your culinary experiences.

