Home>Home and Garden>How To Adjust Water Level In Toilet Bowl

Home and Garden
How To Adjust Water Level In Toilet Bowl
Published: March 4, 2024
Learn how to easily adjust the water level in your toilet bowl with our simple home and garden tips. Keep your bathroom in top shape with this quick DIY solution.
(Many of the links in this article redirect to a specific reviewed product. Your purchase of these products through affiliate links helps to generate commission for Noodls.com, at no extra cost. Learn more)
Table of Contents
Introduction
Adjusting the water level in a toilet bowl is a fundamental aspect of maintaining a properly functioning toilet. The water level in the toilet bowl plays a crucial role in ensuring efficient flushing and preventing potential issues such as clogs and inadequate waste removal. Understanding how to adjust the water level empowers homeowners to address minor toilet problems without the need for professional assistance, ultimately saving time and money.
By learning the simple yet essential process of adjusting the water level in the toilet bowl, homeowners can take proactive measures to optimize their toilet's performance. This knowledge not only promotes efficient water usage but also contributes to a more sustainable and eco-friendly household. With the right tools and a clear understanding of the steps involved, anyone can successfully adjust the water level in their toilet bowl, ensuring its smooth operation and longevity.
In the following sections, we will delve into the intricacies of adjusting the water level in a toilet bowl, providing a comprehensive guide that empowers homeowners to take charge of their toilet maintenance. From understanding the significance of the water level to the practical steps and troubleshooting tips, this guide aims to equip readers with the knowledge and confidence to tackle this essential aspect of home maintenance. Whether you are a seasoned DIY enthusiast or a homeowner looking to expand your practical skills, mastering the art of adjusting the water level in the toilet bowl is a valuable addition to your home maintenance repertoire.
Understanding the Water Level in the Toilet Bowl
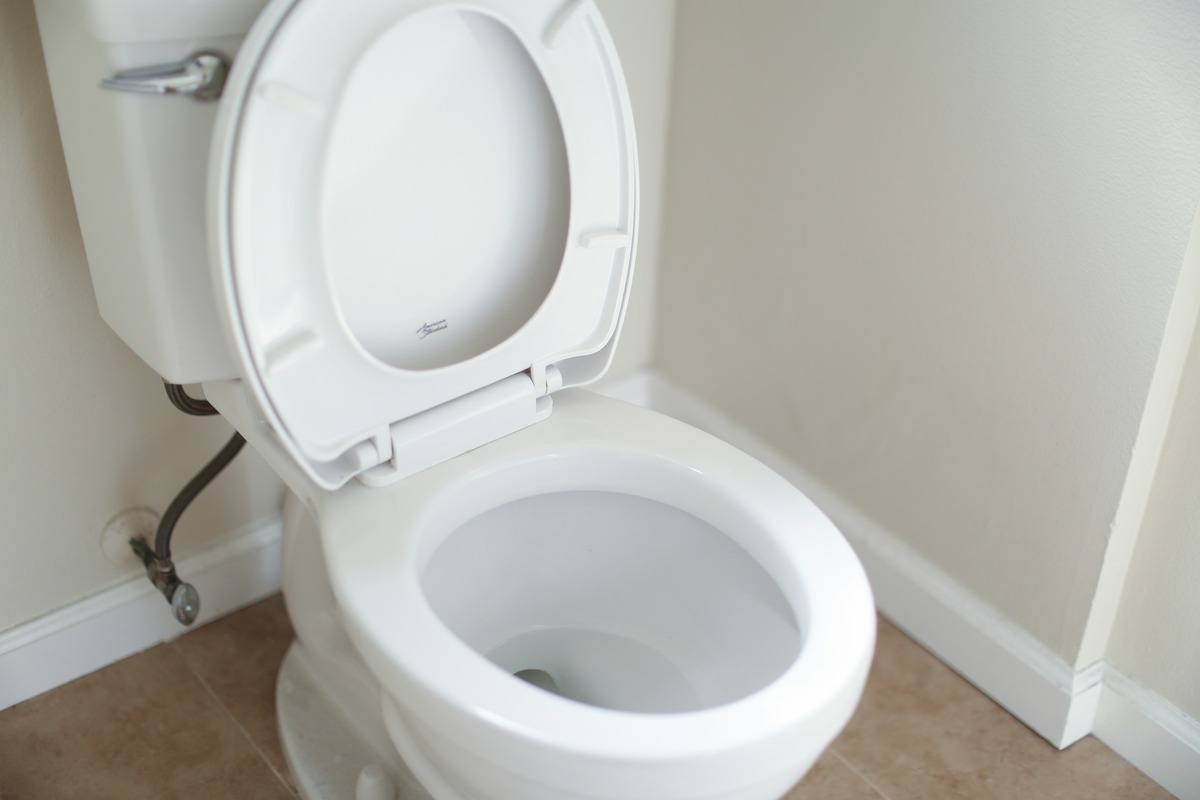
The water level in a toilet bowl is a critical factor that directly influences the toilet's functionality and efficiency. It refers to the height of the water within the toilet bowl when it is in a resting state, i.e., after a flush. This level is carefully calibrated to ensure optimal performance during each flush cycle. Understanding the significance of the water level is essential for maintaining a properly functioning toilet.
The water level in the toilet bowl is directly related to the trap seal, which is the barrier of water that prevents sewer gases from entering the home. When the water level is too low, the trap seal may be compromised, allowing unpleasant odors to permeate the bathroom. Conversely, if the water level is too high, it can lead to inefficient flushing and potential water wastage.
Moreover, the water level in the toilet bowl impacts the effectiveness of waste removal during flushing. If the water level is inadequate, there may not be enough force to carry waste through the drain, leading to potential clogs and incomplete flushing. On the other hand, an excessively high water level can result in unnecessary water usage and may not contribute to improved flushing performance.
Understanding the water level in the toilet bowl also involves recognizing the role of the fill valve and the overflow tube in maintaining this level. The fill valve controls the inflow of water into the toilet tank, while the overflow tube serves as a safety feature to prevent overfilling. By comprehending the interplay between these components, homeowners can gain insight into the factors that influence the water level and how to make adjustments as needed.
In essence, the water level in the toilet bowl is a crucial aspect of the toilet's overall functionality, impacting odor control, flushing efficiency, and water conservation. By grasping the significance of this element, homeowners can appreciate the importance of maintaining an optimal water level and promptly addressing any deviations from the ideal range. This understanding forms the foundation for effectively managing the water level in the toilet bowl, ensuring a well-maintained and efficient toilet system.
Tools and Materials Needed
When it comes to adjusting the water level in a toilet bowl, having the right tools and materials at your disposal is essential for a successful and hassle-free process. Here's a comprehensive list of items you'll need to effectively adjust the water level in your toilet bowl:
-
Adjustable Wrench: This versatile tool is crucial for loosening and tightening various components of the toilet, such as the fill valve and the lock nut.
-
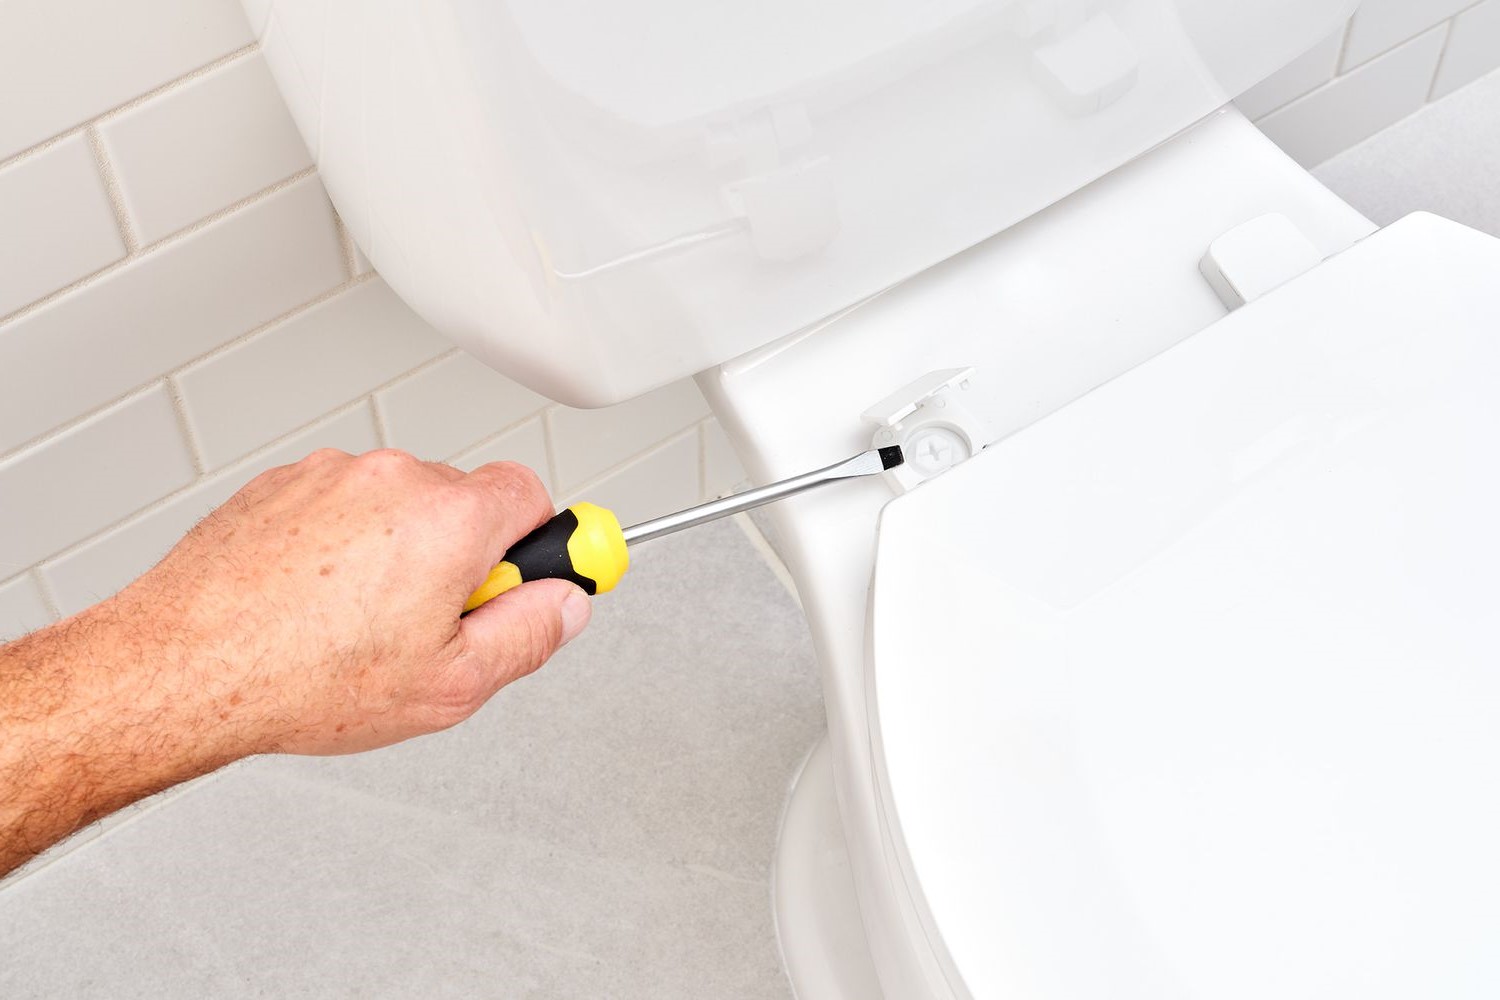
Flathead Screwdriver: An indispensable tool for accessing and adjusting the water level adjustment screw, which controls the water level in the toilet bowl.
-
Measuring Tape: While not always necessary, a measuring tape can be helpful for ensuring the water level is within the recommended range after adjustments.
-
Rubber Gloves: It's advisable to wear rubber gloves to maintain hygiene and protect your hands during the adjustment process.
-
Bucket: Having a bucket on hand can be useful for collecting excess water that may spill during the adjustment process.
-
Flashlight: In case the area around the toilet is dimly lit, a flashlight can aid in visibility while making adjustments.
-
Replacement Parts (if necessary): Depending on the condition of your toilet's components, you may need replacement parts such as a fill valve, flapper, or overflow tube. It's a good idea to have these on standby in case any components need to be replaced during the adjustment process.
-
Safety Glasses: While not always required, safety glasses can provide added protection, especially when working in tight spaces or handling water-related tasks.
By ensuring you have these tools and materials readily available, you can approach the task of adjusting the water level in your toilet bowl with confidence and preparedness. This comprehensive list equips you to handle various aspects of the adjustment process, from accessing and adjusting components to ensuring a smooth and efficient operation. With these tools at your disposal, you are well-prepared to tackle the task of adjusting the water level in your toilet bowl, promoting optimal functionality and performance.
Steps to Adjust the Water Level in the Toilet Bowl
-
Turn Off the Water Supply: Begin by locating the shut-off valve near the base of the toilet and turning it clockwise to shut off the water supply. This crucial step prevents water from flowing into the toilet tank during the adjustment process.
-
Flush the Toilet: Once the water supply is turned off, flush the toilet to remove most of the water from the tank and bowl. This step reduces the water level in the bowl, making it easier to access and adjust the components inside the tank.
-
Access the Fill Valve: Lift the toilet tank lid and locate the fill valve, which is typically positioned on the left side of the tank. The fill valve is responsible for refilling the tank after each flush and plays a key role in regulating the water level in the bowl.
-
Adjust the Water Level: Using a flathead screwdriver, locate the water level adjustment screw on the fill valve. Turn the screw clockwise to lower the water level or counterclockwise to raise it. Make gradual adjustments and periodically flush the toilet to test the water level until it reaches the desired height.
-
Check the Overflow Tube: While adjusting the water level, ensure that the water level does not exceed the height of the overflow tube. The overflow tube prevents overfilling by directing excess water into the toilet bowl. Adjust the water level to align with the recommended level indicated on the overflow tube.
-
Test the Flushing Performance: After making the necessary adjustments, flush the toilet multiple times to assess the flushing performance and ensure that the water level remains consistent. Observe the water flow and verify that the bowl refills to the adjusted level after each flush.
-
Fine-Tune if Necessary: If the water level is still not within the recommended range or if the flushing performance is suboptimal, fine-tune the adjustment screw as needed. It may require several iterations of adjustment and testing to achieve the ideal water level and flushing efficiency.
-
Turn On the Water Supply: Once you are satisfied with the water level and flushing performance, turn the water supply back on by rotating the shut-off valve counterclockwise. This allows the tank to refill, and the toilet is ready for regular use.
By following these step-by-step instructions, homeowners can confidently adjust the water level in their toilet bowl, promoting efficient flushing, optimal water usage, and a well-maintained toilet system. This proactive approach to toilet maintenance empowers individuals to address minor issues and ensure the smooth operation of this essential fixture in the home.
Testing the Water Level
Once the water level in the toilet bowl has been adjusted, it is crucial to conduct thorough testing to ensure that the adjustments have been successful and that the toilet is functioning optimally. Testing the water level involves several key steps to verify the effectiveness of the adjustments and to address any potential issues that may arise.
After completing the adjustment process, the first step in testing the water level is to flush the toilet multiple times. This allows for a comprehensive assessment of the flushing performance and the consistency of the water level in the bowl. Observing the water flow and the subsequent refill of the bowl after each flush provides valuable insights into the effectiveness of the adjustments made to the water level.
During the testing phase, it is essential to pay close attention to the water level in the bowl after each flush. The water should reach an optimal level, typically indicated by a marked water line or the recommended level specified on the overflow tube. This ensures that the bowl has an adequate amount of water for efficient flushing while preventing potential overfilling.
In addition to observing the water level after each flush, it is important to check for any signs of water leakage or irregularities in the flushing process. Inspect the area around the base of the toilet and the connections to identify any leaks that may have been inadvertently caused during the adjustment process. Addressing leaks promptly is essential to prevent water wastage and potential damage to the surrounding areas.
Furthermore, testing the water level involves assessing the overall flushing performance of the toilet. Pay attention to the force and consistency of the flush, ensuring that waste is effectively removed from the bowl with each flush cycle. A well-adjusted water level contributes to efficient flushing, preventing potential clogs and promoting optimal waste removal.
If, during testing, it is observed that the water level is not within the recommended range or if the flushing performance is suboptimal, it may be necessary to fine-tune the adjustments. This iterative process of adjustment and testing allows for precise calibration of the water level to achieve the desired functionality and efficiency.
By conducting thorough testing of the water level in the toilet bowl, homeowners can verify the success of the adjustment process and address any potential issues that may impact the toilet's performance. This proactive approach to testing ensures that the toilet is functioning optimally, with an appropriate water level and efficient flushing capabilities.
Read more: How To Curve A Bowling Ball
Troubleshooting Common Issues
Even after adjusting the water level in the toilet bowl, homeowners may encounter common issues that can affect the functionality and efficiency of the toilet. Understanding these issues and knowing how to troubleshoot them is essential for maintaining a well-operating toilet system. Here are some common problems that may arise and the corresponding troubleshooting steps:
-
Inconsistent Water Level: If the water level in the toilet bowl fluctuates or does not remain consistent after adjustments, it may indicate a problem with the fill valve. To troubleshoot this issue, inspect the fill valve for any signs of damage or debris that may be obstructing its proper operation. Clean the fill valve and ensure that it is functioning smoothly. If the problem persists, it may be necessary to replace the fill valve to maintain a consistent water level.
-
Low Water Level: A consistently low water level in the toilet bowl can lead to inadequate flushing and potential odors due to a compromised trap seal. If the water level remains low after adjustments, check for any obstructions in the toilet's rim feed holes or the trapway. These obstructions can impede the flow of water into the bowl, resulting in a low water level. Use a wire hanger or a small brush to clear any debris from these areas and restore the proper water level.
-
Excessive Water Level: Conversely, an excessively high water level in the toilet bowl can lead to inefficient flushing and potential overflows. If the water level remains consistently high, it may indicate a problem with the fill valve or the water level adjustment mechanism. Check for any obstructions or misalignments in the fill valve and the adjustment screw. Make necessary adjustments to ensure that the water level aligns with the recommended range, as indicated on the overflow tube.
-
Flushing Issues: If the toilet experiences inconsistent or weak flushing despite adjustments to the water level, it may be indicative of a larger issue with the toilet's components. Inspect the flapper, flush valve, and the flush handle for any signs of wear or damage. A faulty flapper or flush valve can impede the flushing process, leading to incomplete waste removal. Replace any worn or damaged components to restore the toilet's flushing performance.
-
Persistent Leaks: After adjusting the water level, if there are persistent leaks around the base of the toilet or from the connections, it is crucial to address these leaks promptly. Leaks can lead to water wastage and potential damage to the surrounding areas. Inspect the wax ring and the connections to identify the source of the leaks. Replace the wax ring if it shows signs of deterioration and ensure that all connections are secure to prevent leaks.
By troubleshooting these common issues, homeowners can effectively address potential problems that may arise even after adjusting the water level in the toilet bowl. This proactive approach to troubleshooting ensures that the toilet operates smoothly and efficiently, promoting a well-maintained and functional fixture in the home.
Conclusion
In conclusion, mastering the art of adjusting the water level in the toilet bowl is a valuable skill that empowers homeowners to take proactive measures in maintaining a well-functioning and efficient toilet system. By understanding the significance of the water level and the role it plays in the toilet's overall functionality, individuals can confidently tackle the adjustment process, promoting optimal flushing performance, water conservation, and a hygienic bathroom environment.
The comprehensive guide provided in this article equips homeowners with the knowledge and practical steps needed to adjust the water level in the toilet bowl. From understanding the importance of the water level to the tools required and the step-by-step adjustment process, this guide serves as a valuable resource for individuals looking to enhance their home maintenance skills.
By following the outlined steps, homeowners can effectively adjust the water level in their toilet bowl, ensuring that it aligns with the recommended range for optimal functionality. The testing phase allows for thorough assessment of the adjustments, ensuring that the toilet operates efficiently with a consistent water level and effective flushing capabilities.
Furthermore, the troubleshooting tips provided offer valuable insights into addressing common issues that may arise even after adjusting the water level. By understanding how to troubleshoot inconsistent water levels, flushing issues, and persistent leaks, homeowners can maintain a well-operating toilet system and address potential problems promptly.
Ultimately, the ability to adjust the water level in the toilet bowl empowers homeowners to take charge of their home maintenance, promoting sustainability, water efficiency, and cost savings. By incorporating this essential skill into their repertoire, individuals can contribute to a well-maintained household and a more sustainable living environment.
In essence, the knowledge and practical insights shared in this guide serve to demystify the process of adjusting the water level in the toilet bowl, empowering homeowners to proactively manage their toilet maintenance with confidence and proficiency. This newfound skill not only enhances the functionality of the toilet but also fosters a sense of self-reliance and practical capability in maintaining a crucial fixture within the home.