Home>Home and Garden>How To Remove A TV From A Wall Mount
Home and Garden
How To Remove A TV From A Wall Mount
Published: March 4, 2024
Learn how to safely remove a TV from a wall mount with our step-by-step guide. Get expert tips for a smooth and hassle-free process. Perfect for home and garden enthusiasts!
(Many of the links in this article redirect to a specific reviewed product. Your purchase of these products through affiliate links helps to generate commission for Noodls.com, at no extra cost. Learn more)
Table of Contents
Introduction
Removing a TV from a wall mount may seem like a daunting task, but with the right tools and a methodical approach, it can be a straightforward process. Whether you're relocating, upgrading your TV, or simply need to access the wall behind it, knowing how to safely remove your TV from its mount is essential.
In this guide, we'll walk you through the step-by-step process of removing a TV from a wall mount, ensuring that you can complete the task with confidence and minimal hassle. From gathering the necessary tools to safely detaching the TV from the mount and preparing the wall for any touch-ups, we've got you covered.
By following these instructions, you'll be able to remove your TV from the wall mount without any mishaps, ensuring that both your TV and wall remain undamaged throughout the process. So, let's dive in and get started with the first step: gathering the necessary tools.
Step 1: Gather Necessary Tools
Before embarking on the task of removing your TV from the wall mount, it's crucial to gather the necessary tools to ensure a smooth and efficient process. Here's a comprehensive list of tools you'll need:
-
Screwdriver: Depending on the type of wall mount, you may require a Phillips or flat-head screwdriver to loosen and remove the screws securing the TV to the mount.
-
Helper: Enlist the assistance of a family member or friend to provide an extra pair of hands. This is especially important for larger TVs, as they can be heavy and unwieldy to handle alone.
-
Packaging Materials: Prepare soft padding such as blankets or towels to protect the TV during removal and transportation. Additionally, have some plastic wrap or bubble wrap on hand to secure the TV for transit.
-
Cable Management: Gather cable ties or Velcro straps to neatly secure and organize the cables connected to the TV. This will prevent any tangling or damage to the cables during the removal process.
-
Stud Finder: If the wall mount is attached to studs, a stud finder will be essential for locating and marking the positions of the studs to ensure a safe and secure removal.
-
Flashlight: A flashlight will come in handy for illuminating the area behind the TV, especially if the room lighting is insufficient.
-
Touch-Up Paint (Optional): In case the wall behind the TV requires any touch-ups or patching, having matching paint and a paintbrush ready will allow you to address any blemishes once the TV is removed.
By ensuring that you have all these tools at your disposal, you'll be well-prepared to tackle the task of removing your TV from the wall mount. With the necessary tools gathered, you're now ready to proceed to the next step of disconnecting the cables.
Step 2: Disconnect Cables
Before removing the TV from the wall mount, it's crucial to disconnect all cables and cords connected to the TV. This step is essential to prevent any damage to the cables and ensure a smooth removal process. Here's a detailed guide on how to disconnect the cables safely and efficiently:
-
Power Off: Start by turning off the TV and unplugging it from the power outlet. This will eliminate the risk of electrical shock and allow you to handle the cables without any safety concerns.
-
Labeling: If there are multiple cables connected to the TV, consider labeling them with masking tape or stickers. This simple step can save you time and frustration when reconnecting the TV in its new location. Labeling the cables based on their respective ports (e.g., HDMI, power, audio) will streamline the reinstallation process.
-
Untangling: Carefully untangle any intertwined cables to ensure smooth disconnection. Gently separate the cables to prevent any strain on the connectors or ports.
-
Remove Cable Ties: If the cables are secured with cable ties or Velcro straps, carefully remove them to free the cables. Be mindful not to yank or pull the cables forcefully, as this can damage the connectors.
-
Disconnecting: With a firm grip on each connector, gently disconnect the cables from the TV. It's important to exert even pressure on both sides of the connector to avoid bending or damaging the pins.
-
Secure Cables: Once the cables are disconnected, secure them using cable ties or Velcro straps. Bundling the cables together will prevent them from dragging or getting caught during the TV removal process.
By following these steps, you can ensure that the cables are safely disconnected and ready for the next phase of removing the TV from the wall mount. With the cables detached and secured, you're now prepared to proceed to the next step of physically removing the TV from its mount.
Remember, taking the time to disconnect the cables properly will not only safeguard the TV and cables from damage but also streamline the reinstallation process. With the cables safely disconnected, you're one step closer to successfully removing your TV from the wall mount.
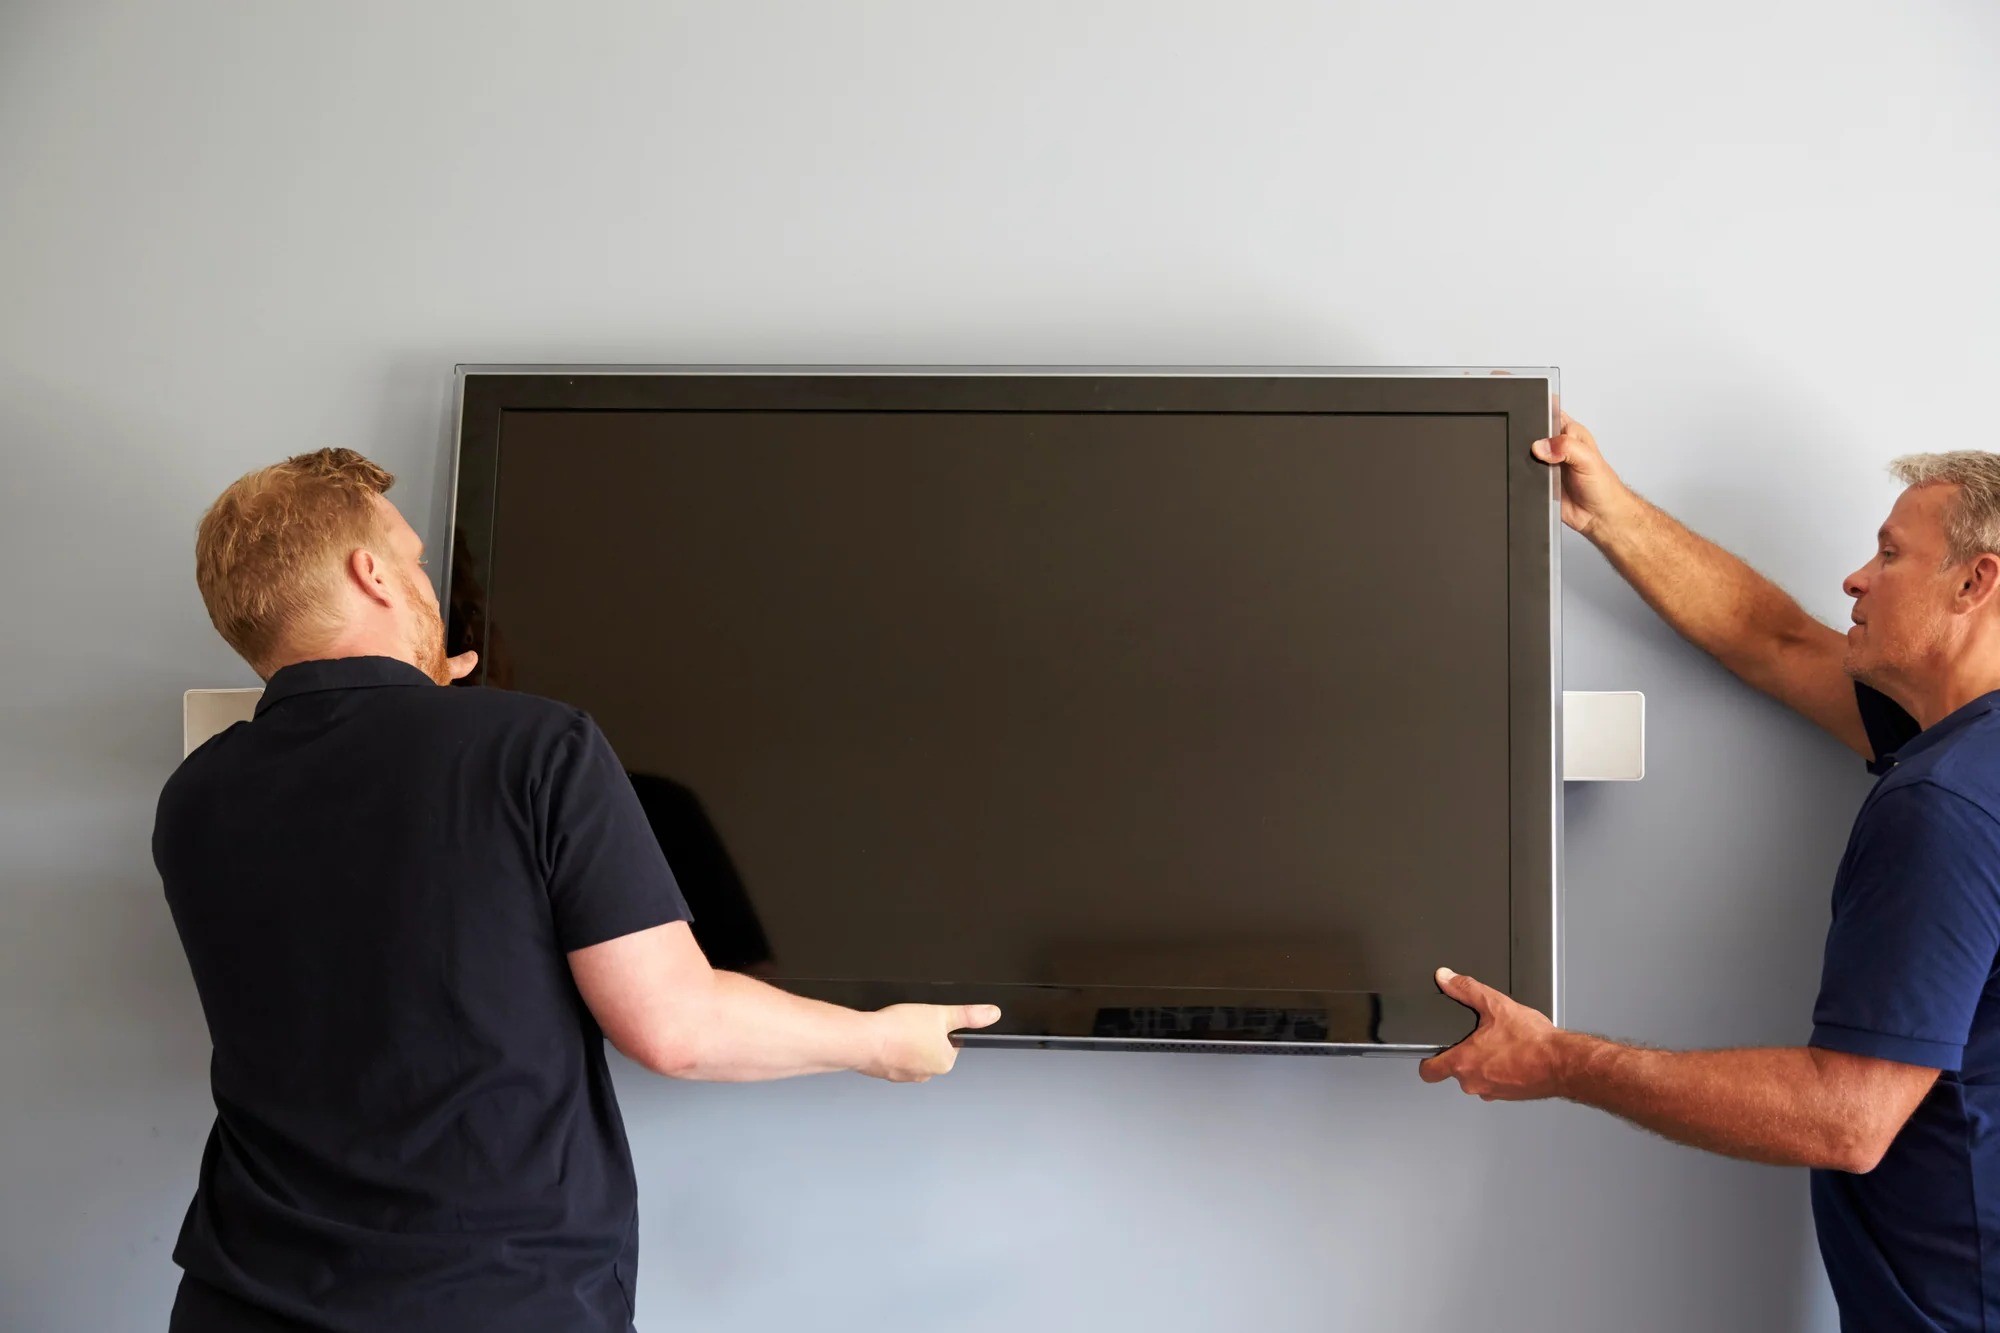
Step 3: Remove TV from Mount
With the cables safely disconnected and the necessary tools at hand, it's time to proceed with the pivotal step of removing the TV from its wall mount. This process requires careful attention to ensure the safety of both the TV and the surrounding area. Here's a detailed guide on how to effectively remove the TV from the wall mount:
-
Assess the Mounting Mechanism: Before initiating the removal, take a moment to understand the specific type of wall mount securing your TV. Whether it's a fixed mount, tilting mount, or articulating mount, familiarizing yourself with the mechanism will inform the appropriate approach for detachment.
-
Enlist Assistance: If your TV is sizable or heavy, it's advisable to have a helper present to provide support during the removal process. This additional pair of hands can help stabilize the TV and prevent any accidental mishaps.
-
Locate Mounting Latches or Screws: Depending on the type of wall mount, you'll need to identify the latches, screws, or release tabs that secure the TV in place. These are typically located at the bottom of the TV brackets and may require a screwdriver for removal.
-
Release Security Mechanisms: If your wall mount features additional security mechanisms such as locking levers or safety screws, ensure that these are disengaged before attempting to lift the TV off the mount. Following the manufacturer's instructions for your specific wall mount is crucial at this stage.
-
Lift the TV Carefully: With the assistance of your helper, gently lift the TV upwards and away from the wall mount. It's essential to maintain a steady grip and lift evenly to prevent any tilting or imbalance that could lead to accidental damage.
-
Inspect for Remaining Attachments: Once the TV is lifted from the mount, check for any remaining attachments or cables that may still be connected to the wall or the mount itself. Ensuring that the TV is completely detached will prevent any unexpected snags during the next steps.
By following these steps meticulously, you can successfully remove your TV from the wall mount without encountering any complications. With the TV now detached, the next step involves securing it for safe transportation to its new location. This pivotal phase ensures that the TV remains protected and undamaged during the relocation process.
Step 4: Secure TV for Transport
Now that the TV is successfully detached from the wall mount, it's crucial to secure it properly for safe transportation. This step is essential to prevent any damage to the TV during the relocation process. Here's a detailed guide on how to secure the TV for transport:
-
Padding and Protection: Begin by placing a soft blanket or towel on a flat, stable surface. Carefully lay the TV face down on the padding to protect the screen and ensure that it remains stable during the securing process.
-
Secure with Straps or Wrapping: Use adjustable straps or heavy-duty plastic wrap to secure the TV to a sturdy backing, such as a piece of cardboard or a specialized TV transport box. This will prevent the TV from shifting or sliding during transit, reducing the risk of impact damage.
-
Corner Protection: Consider using foam corner protectors to shield the vulnerable corners of the TV. These protective guards provide an additional layer of cushioning, safeguarding the TV from accidental bumps or knocks.
-
Bubble Wrap for Fragile Components: If the TV has delicate components, such as a protruding stand or intricate bezels, wrap these areas with bubble wrap to provide extra protection against potential impacts.
-
Stabilize within Transport Vehicle: When loading the TV into a vehicle for transportation, ensure that it is positioned securely and surrounded by additional padding, such as pillows or blankets, to prevent any movement or jostling during transit.
-
Handle with Care: Whether you're transporting the TV in a personal vehicle or entrusting it to a moving service, communicate the fragile nature of the TV to anyone involved in the transportation process. Emphasize the importance of gentle handling and avoiding any rough or abrupt movements.
By meticulously following these steps to secure the TV for transport, you can significantly reduce the risk of damage during the relocation process. Ensuring that the TV is well-protected and stabilized for transit will provide peace of mind and contribute to a successful and stress-free relocation.
With the TV securely prepared for transport, the final consideration involves addressing any touch-ups or repairs to the wall from which the TV was removed. This ensures that the wall is restored to its original condition, ready for any future use or modifications.
Step 5: Patch and Paint Wall (if necessary)
After removing the TV from the wall mount, it's essential to assess the condition of the wall and address any blemishes or damage that may have resulted from the mounting hardware or the TV itself. This step ensures that the wall is restored to its original state, ready for a seamless and aesthetically pleasing finish. Here's a detailed guide on how to patch and paint the wall if necessary:
-
Inspect for Wall Damage: Begin by carefully examining the wall surface behind where the TV was mounted. Look for any visible holes, scratches, or marks that may have been concealed by the TV or caused during the mounting process. It's essential to identify these imperfections to address them effectively.
-
Fill Holes and Indentations: If there are screw holes or indentations left by the mounting hardware, use a high-quality wall filler or spackling compound to fill these imperfections. Apply the filler with a putty knife, ensuring that it is smoothed and leveled with the surrounding wall surface. Allow the filler to dry completely as per the manufacturer's instructions.
-
Sand and Smooth: Once the filler is dry, lightly sand the patched areas with fine-grit sandpaper to achieve a smooth and even finish. This step is crucial for blending the patched areas seamlessly with the rest of the wall, creating a uniform surface ready for painting.
-
Select Matching Paint: If the wall behind the TV requires repainting, it's important to choose a paint color that matches the existing wall color. Take a sample of the existing paint or consult the paint manufacturer's color chart to ensure a precise match. Acquiring the correct paint color is essential for achieving a cohesive and flawless result.
-
Apply Paint with Care: Using a paintbrush or roller, carefully apply the matching paint to the patched areas, ensuring that the coverage is even and consistent with the surrounding wall. Multiple thin coats may be necessary to achieve a seamless blend, allowing each coat to dry completely before applying the next.
-
Blend the Edges: To seamlessly integrate the newly painted areas with the existing wall, feather the paint along the edges of the patched sections. This technique helps to create a gradual transition, minimizing any visible demarcation between the patched and original areas.
By meticulously following these steps to patch and paint the wall if necessary, you can ensure that any imperfections resulting from the TV mounting process are effectively addressed. This attention to detail contributes to a polished and pristine wall surface, ready to accommodate any future installations or modifications.
Conclusion
In conclusion, the process of removing a TV from a wall mount involves a series of systematic steps aimed at ensuring the safety of both the TV and the surrounding environment. By following the outlined guidelines, you can successfully navigate through each phase of the removal process with confidence and precision.
From the initial gathering of essential tools to the meticulous disconnection of cables and the careful detachment of the TV from the wall mount, every step is crucial in safeguarding the integrity of the TV and the wall. Enlisting the assistance of a helper, when necessary, further enhances the safety and efficiency of the removal process, especially for larger and heavier TVs.
Securing the TV for transportation is a critical phase that cannot be overlooked. By employing proper padding, strapping, and protective measures, you can minimize the risk of damage during transit, ensuring that the TV arrives at its new location unscathed. Communicating the fragile nature of the TV to anyone involved in the transportation process is equally important, emphasizing the need for gentle handling and stability during transit.
Furthermore, addressing any wall imperfections resulting from the TV mounting process is essential for restoring the wall to its original condition. By meticulously patching and painting the wall, you can achieve a seamless and visually appealing finish, ready for any future use or modifications.
Overall, the process of removing a TV from a wall mount demands careful attention to detail, a methodical approach, and a commitment to ensuring the safety and preservation of both the TV and the wall. By adhering to the steps outlined in this guide, you can navigate through the removal process with ease, confidence, and a clear understanding of the necessary precautions.
With the TV successfully removed from the wall mount and the wall restored to its pristine state, you are now equipped to proceed with your relocation, TV upgrade, or any other modifications with the assurance that the removal process has been executed with precision and care.