Home>Home and Garden>How To Remove Wall Anchors
Home and Garden
How To Remove Wall Anchors
Published: March 4, 2024
Learn how to remove wall anchors easily and efficiently with our step-by-step guide. Perfect for your home and garden projects.
(Many of the links in this article redirect to a specific reviewed product. Your purchase of these products through affiliate links helps to generate commission for Noodls.com, at no extra cost. Learn more)
Table of Contents
Introduction
Removing wall anchors can be a daunting task, especially if you're unsure of the best approach. Whether you're redecorating, renovating, or simply want to get rid of an old wall anchor, it's essential to know the proper techniques to avoid damaging your walls. Wall anchors come in various types, including plastic and metal, and each requires a specific method for safe removal. Additionally, once the anchors are removed, you'll want to ensure that the resulting holes are properly filled and patched to restore the wall's smooth surface.
In this comprehensive guide, we'll explore three effective methods for removing wall anchors, covering both plastic and metal varieties. We'll also delve into the essential steps for filling and patching holes left behind by the anchors, ensuring a seamless finish. By following these techniques, you can successfully remove wall anchors without compromising the integrity of your walls, allowing you to achieve a clean and polished look for your home.
Now, let's dive into the step-by-step methods for removing wall anchors and learn how to seamlessly restore your walls to their original state.
Read more: How To Remove A TV From A Wall Mount
Method 1: Removing Plastic Wall Anchors
Removing plastic wall anchors requires a delicate approach to prevent damage to the wall. Here's a step-by-step guide to safely and effectively remove plastic wall anchors:
-
Assess the Anchor: Before starting the removal process, examine the plastic wall anchor to determine its type and condition. Some plastic anchors have a flange that prevents them from being pulled through the wall, while others are designed to collapse when pressure is applied. Understanding the anchor's design will help you choose the most suitable removal method.
-
Loosen the Anchor: If the plastic anchor has a flange, use a pair of pliers to grip and gently rotate it counterclockwise. This rotational movement will gradually loosen the anchor from the wall. Be cautious not to apply excessive force, as this can cause the anchor to break or damage the wall.
-
Pull Out the Anchor: Once the anchor is sufficiently loosened, carefully pull it out of the wall. Apply steady and even pressure to avoid causing any unnecessary stress to the surrounding wall area. If the anchor resists, continue rotating it with the pliers while gently pulling until it releases from the wall.
-
Patch the Hole: After successfully removing the plastic wall anchor, you may notice a small hole left in the wall. To prepare the area for patching, use a putty knife to remove any protruding plastic remnants and ensure the surface is smooth. This step is crucial for achieving a seamless finish once the hole is filled and patched.
-
Sand and Fill: Once the hole is prepped, use a lightweight spackling compound to fill the void left by the anchor. Apply the spackling compound with a putty knife, ensuring the surface is level and smooth. After the compound dries, lightly sand the area to create a uniform surface that blends seamlessly with the surrounding wall.
By following these steps, you can effectively remove plastic wall anchors without causing damage to your walls. This method ensures a clean and polished result, allowing you to seamlessly prepare the wall for any future decorating or renovation projects.
Method 2: Removing Metal Wall Anchors
Removing metal wall anchors necessitates a different approach compared to their plastic counterparts. These anchors are often more robust and firmly secured, requiring specific techniques to ensure safe and effective removal. Here's a detailed guide on how to remove metal wall anchors without causing damage to your walls:
-
Assess the Anchor: Before initiating the removal process, carefully examine the metal wall anchor to understand its design and attachment to the wall. Metal anchors can vary in size and structure, and some may have flanges or protrusions that secure them firmly in place. Understanding the anchor's configuration is crucial for determining the most suitable removal method.
-
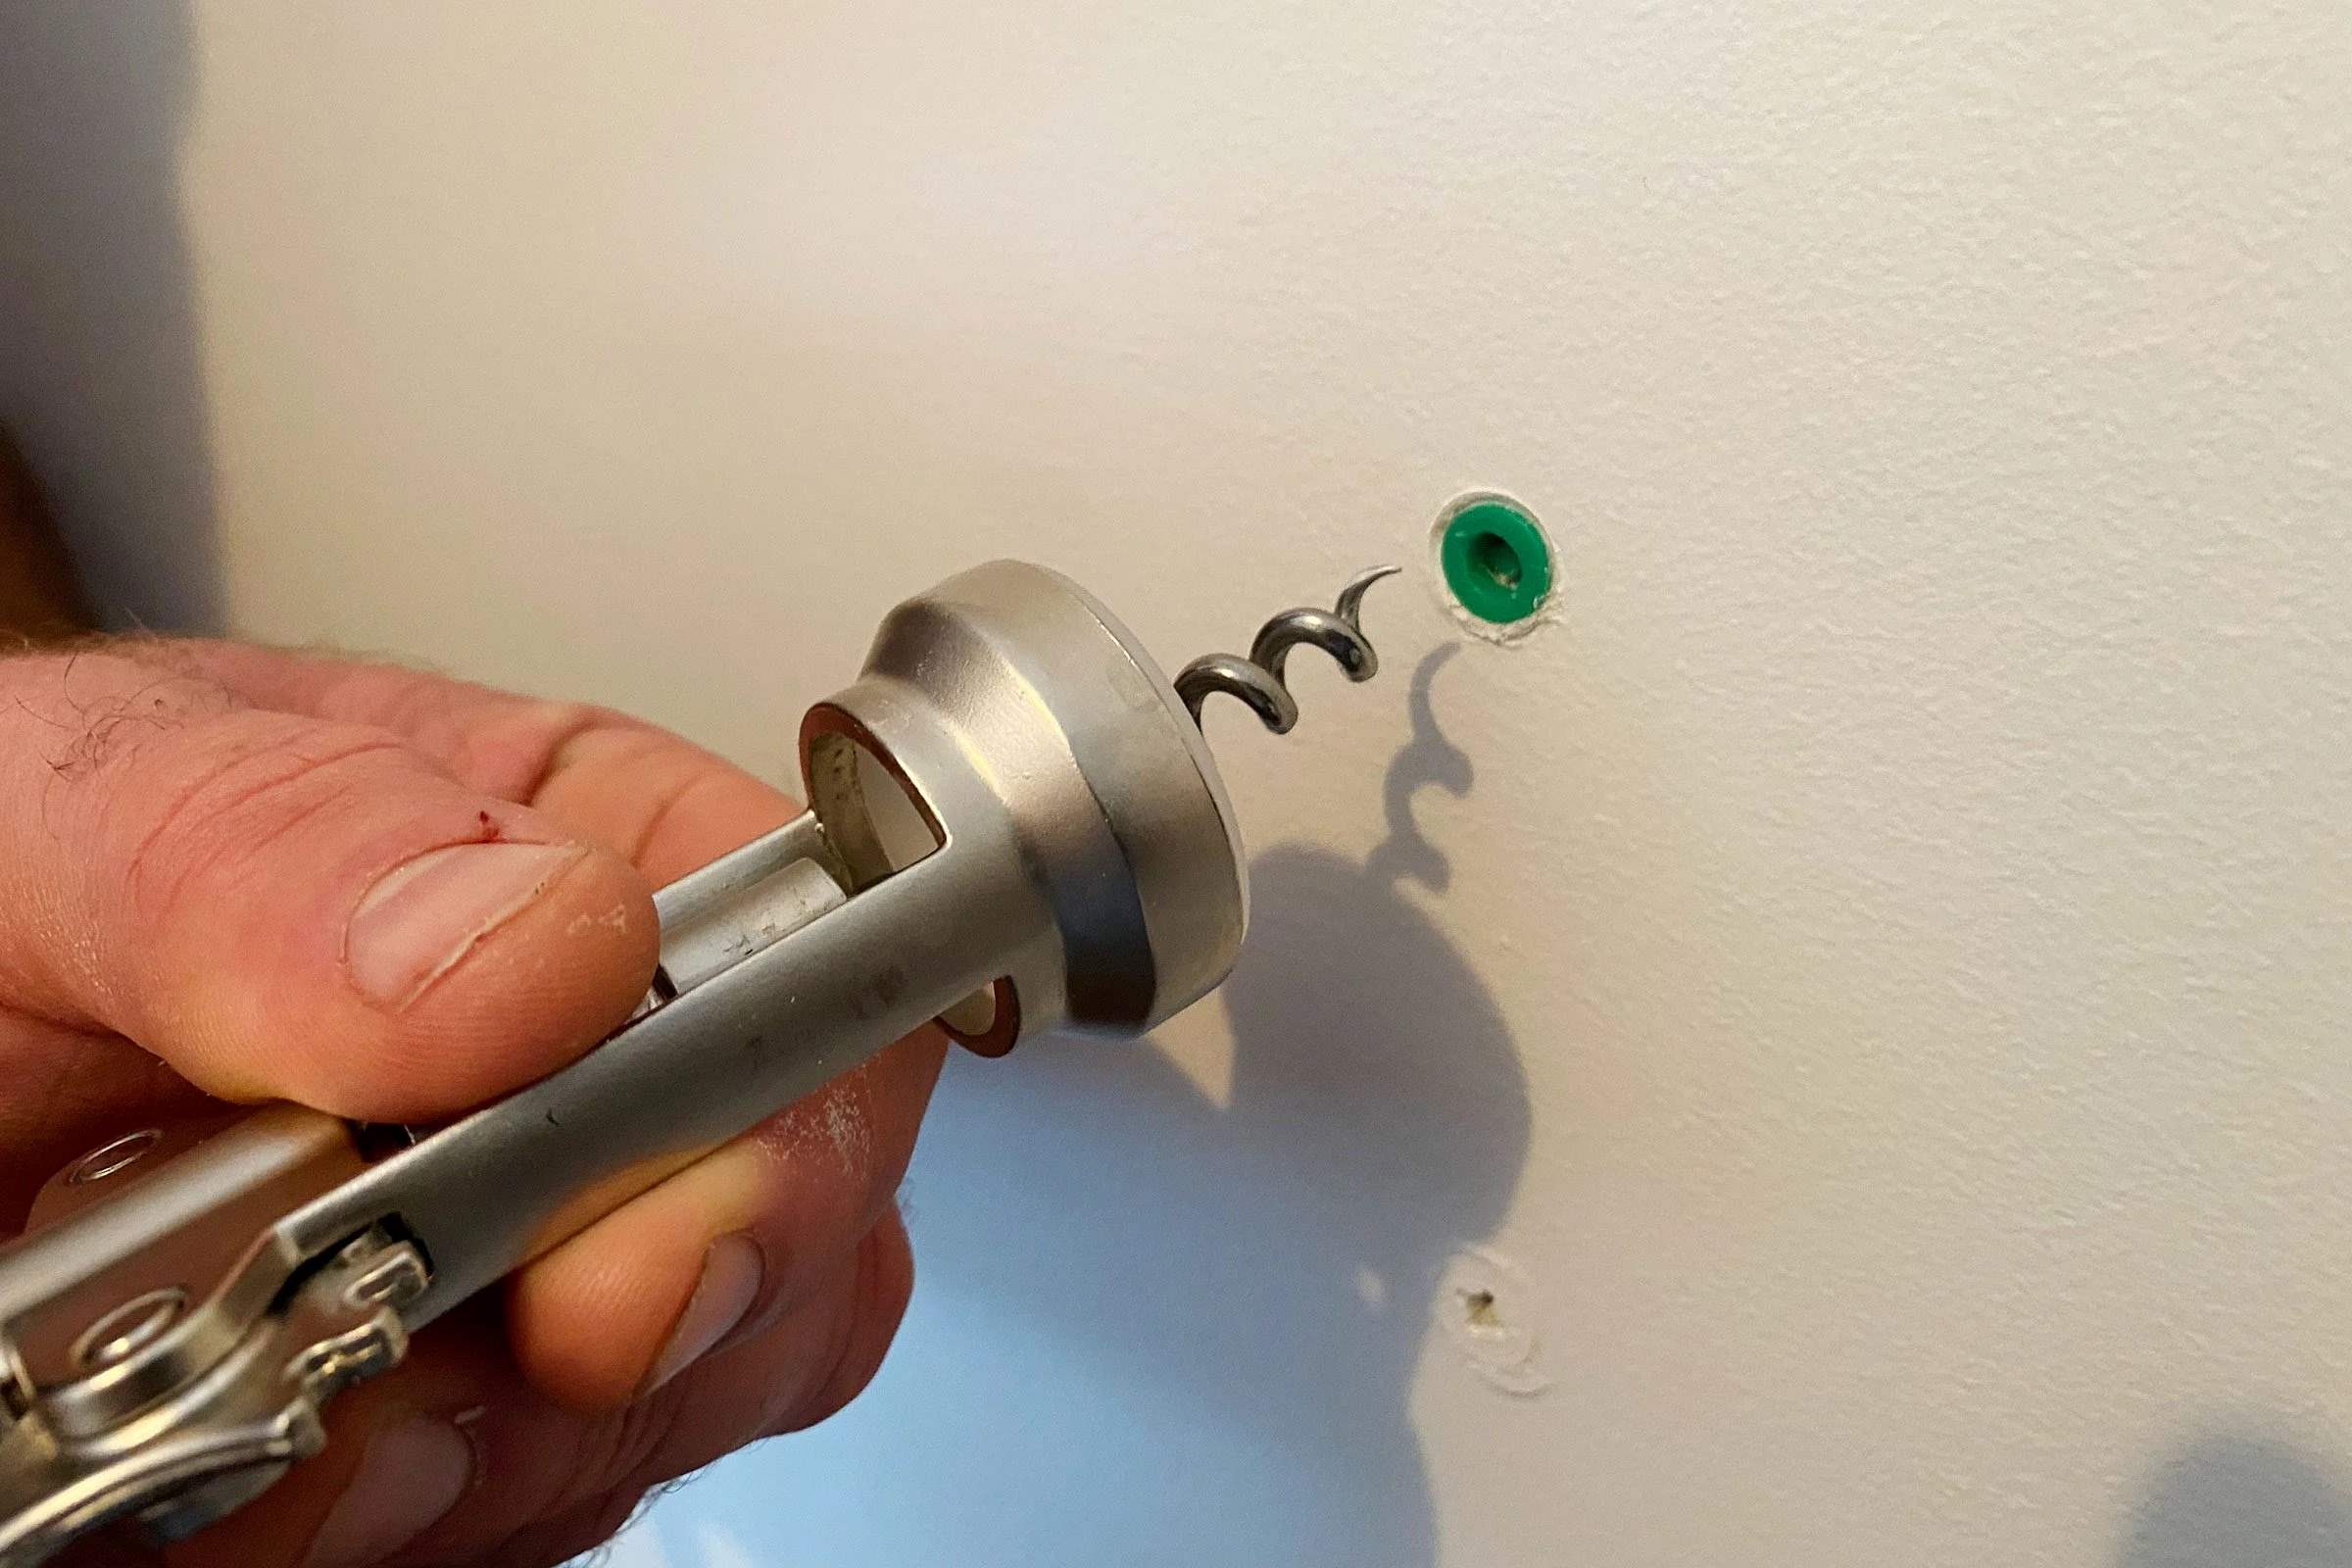
Loosen the Anchor: Using a pair of pliers, grip the metal anchor firmly and rotate it counterclockwise. This rotational movement helps to gradually loosen the anchor from the wall. Exercise caution to avoid applying excessive force, as this can lead to damage to the wall surface or the anchor breaking off inside the wall.
-
Apply Lubricant (if necessary): In cases where the metal anchor is firmly lodged in the wall, applying a small amount of lubricant, such as WD-40, around the base of the anchor can help loosen it further. Allow the lubricant to penetrate the area for a few minutes before attempting to rotate and remove the anchor again.
-
Use a Claw Hammer: If the metal anchor remains firmly secured after attempting to rotate it with pliers, gently tap the base of the anchor with a claw hammer. The aim is to create a slight gap between the anchor and the wall, facilitating its removal. Exercise caution to avoid striking the wall directly, as this can cause damage.
-
Remove the Anchor: Once the metal anchor is sufficiently loosened, carefully pull it out of the wall using the pliers. Apply steady and even pressure to prevent unnecessary stress on the surrounding wall area. If the anchor proves resistant, continue tapping and rotating it until it releases from the wall.
-
Patch the Hole: After successfully removing the metal wall anchor, you may notice a small hole left in the wall. Use a putty knife to remove any protruding metal remnants and ensure the surface is smooth. This step is crucial for achieving a seamless finish once the hole is filled and patched.
-
Fill and Sand: Utilize a suitable wall patching compound to fill the void left by the metal anchor. Apply the compound evenly, ensuring the surface is level and smooth. Once the compound dries, lightly sand the area to create a uniform surface that seamlessly blends with the surrounding wall.
By following these steps, you can effectively remove metal wall anchors without compromising the integrity of your walls. This method ensures a clean and polished result, allowing you to seamlessly prepare the wall for any future decorating or renovation projects.
Method 3: Filling and Patching Holes after Removing Wall Anchors
After successfully removing wall anchors, whether plastic or metal, it's essential to address the resulting holes to restore the wall's smooth and seamless appearance. Filling and patching these holes is a crucial step in the process, ensuring that the wall is ready for any future decorating or renovation projects. Here's a detailed guide on how to effectively fill and patch holes left behind by removed wall anchors:
-
Assess the Hole: Begin by examining the hole left in the wall after the anchor's removal. Ensure that any protruding remnants of the anchor are removed, leaving a clean and smooth surface around the hole. This assessment sets the stage for the subsequent filling and patching steps.
-
Select a Suitable Filler: Choose an appropriate wall filler or patching compound based on the wall's material and the size of the hole. For smaller holes, lightweight spackling compounds are ideal, while larger voids may require the use of wall patch kits or joint compound. Selecting the right filler ensures a strong and seamless repair.
-
Apply the Filler: Using a putty knife or a suitable applicator, carefully fill the hole with the chosen compound. Ensure that the filler is evenly distributed and slightly overfilled to account for any shrinkage during drying. Smooth the surface of the filler to match the surrounding wall, creating a flush and uniform finish.
-
Allow for Drying Time: Once the hole is filled, allow the filler to dry completely according to the manufacturer's instructions. Drying times may vary based on the type of compound used and the size of the repair. It's crucial to exercise patience during this phase to ensure a durable and long-lasting result.
-
Sand and Smooth: After the filler has dried, lightly sand the patched area to create a smooth and level surface. Use fine-grit sandpaper to gently feather the edges of the repair, blending it seamlessly with the surrounding wall. This step is essential for achieving a professional finish.
-
Prime and Paint (if necessary): Depending on the wall's finish and the extent of the repair, applying a coat of primer to the patched area can help ensure uniform paint absorption and color consistency. Once the primer is dry, the patched area can be painted to match the rest of the wall, seamlessly concealing the repair.
By following these steps, you can effectively fill and patch holes left behind by removed wall anchors, restoring the wall to its original state. This meticulous approach ensures that the repaired areas seamlessly blend with the surrounding wall, providing a polished and professional finish.
Conclusion
In conclusion, the process of removing wall anchors and restoring the wall to its original state is a task that requires careful consideration and precise execution. Whether dealing with plastic or metal wall anchors, the methods outlined in this guide provide a comprehensive approach to safely and effectively removing these fixtures without compromising the integrity of the walls. By following the step-by-step instructions for each method, homeowners and DIY enthusiasts can confidently tackle the task of wall anchor removal, knowing that they can achieve a clean and polished finish.
Furthermore, the importance of addressing the resulting holes left by removed wall anchors cannot be overstated. The meticulous process of filling and patching these voids ensures that the wall is seamlessly restored, ready for any future decorating or renovation projects. By carefully selecting the appropriate filler, applying it with precision, and meticulously smoothing and blending the repaired areas, individuals can achieve professional-quality results that seamlessly integrate with the surrounding wall surface.
It's crucial to emphasize that patience and attention to detail are key throughout the entire process. From assessing the type of wall anchor to selecting the right tools and materials for removal, every step plays a vital role in achieving a successful outcome. Additionally, allowing for proper drying and taking the time to sand and smooth the patched areas are essential for creating a flawless finish that seamlessly blends with the existing wall surface.
By mastering the techniques outlined in this guide, individuals can confidently tackle the task of removing wall anchors and restoring their walls to a pristine condition. Whether it's for redecorating, renovating, or simply maintaining the aesthetics of the home, the knowledge and skills gained from this comprehensive guide empower individuals to take on this task with confidence and precision.
In essence, the process of removing wall anchors and addressing the resulting holes is not only about maintenance and repair; it's about transforming the walls into a canvas ready for new possibilities. With the right approach and attention to detail, individuals can achieve a seamless and professional finish, setting the stage for a myriad of future creative endeavors within their living spaces.