Home>Home and Garden>How To Make Rosemary Oil

Home and Garden
How To Make Rosemary Oil
Published: March 3, 2024
Learn how to make rosemary oil at home with this simple guide. Enhance your home and garden with this natural and aromatic DIY project.
(Many of the links in this article redirect to a specific reviewed product. Your purchase of these products through affiliate links helps to generate commission for Noodls.com, at no extra cost. Learn more)
Table of Contents
Introduction
Creating your own rosemary oil is a delightful and rewarding endeavor that allows you to harness the natural benefits of this aromatic herb. Rosemary oil is renowned for its versatility, as it can be used for culinary, medicinal, and cosmetic purposes. Whether you are a seasoned herbalist or a novice enthusiast, crafting your own rosemary oil can be a fulfilling and enjoyable experience.
This article will guide you through the step-by-step process of making rosemary oil at home. By following these simple instructions, you can produce a high-quality oil that captures the essence and therapeutic properties of fresh rosemary. From gathering the necessary materials to infusing the oil, each step is designed to help you create a fragrant and potent rosemary oil that can be used in various applications.
As you embark on this aromatic journey, you will discover the art of transforming fresh rosemary into a versatile and valuable oil. Whether you intend to use it in culinary creations, homemade skincare products, or for its therapeutic benefits, the process of making rosemary oil is both practical and enjoyable. So, roll up your sleeves, gather your supplies, and let's delve into the enriching process of crafting your very own rosemary oil.
Read more: How To Make Oregano Oil
Step 1: Gather the necessary materials
Before embarking on the journey of creating your own rosemary oil, it's essential to gather the necessary materials to ensure a smooth and successful process. Here's a comprehensive list of items you'll need:
-
Fresh Rosemary: The star of the show, fresh rosemary sprigs are the primary ingredient for making rosemary oil. Opt for organic rosemary if possible, as it ensures a higher quality oil without any pesticide residues.
-
Carrier Oil: Select a high-quality carrier oil such as olive oil, grapeseed oil, or jojoba oil. These oils serve as the base for infusing the rosemary's aromatic and beneficial properties.
-
Glass Jar: Choose a clean, dry glass jar with a tight-sealing lid to house the infusion process. The transparency of the glass allows you to monitor the progress of the infusion.
-
Cheesecloth or Fine Mesh Strainer: To strain the rosemary oil once the infusion process is complete, you'll need a piece of cheesecloth or a fine mesh strainer to remove the plant material and obtain a clear, pure oil.
-
Dark Glass Bottle: After straining the oil, it's crucial to store it in a dark glass bottle to protect it from light exposure, which can degrade the oil's quality over time.
-
Cutting Board and Knife: For preparing the fresh rosemary, a cutting board and a sharp knife are essential for chopping or bruising the herb to release its aromatic oils.
-
Labels and Marker: To keep track of the creation date and type of oil, having labels and a marker on hand will help you stay organized and informed about your homemade rosemary oil.
By ensuring that you have all these materials at your disposal, you can proceed with confidence and enthusiasm, knowing that you are fully equipped to begin the process of making your own fragrant and versatile rosemary oil.
Step 2: Prepare the rosemary
Preparing the rosemary is a crucial step in the process of making rosemary oil, as it sets the stage for infusing the aromatic and beneficial properties of the herb into the carrier oil. To ensure the best results, follow these detailed steps to prepare the rosemary for infusion:
-
Clean the Rosemary: Begin by gently rinsing the fresh rosemary under cold running water to remove any dirt, debris, or impurities. Pat the sprigs dry with a clean kitchen towel to eliminate excess moisture, as water can introduce unwanted elements into the oil during the infusion process.
-
Bruise or Chop the Rosemary: Using a sharp knife and a cutting board, lightly bruise the rosemary sprigs by gently pressing and twisting them. This action helps release the essential oils and aromatic compounds present in the herb, enhancing the infusion process. Alternatively, you can finely chop the rosemary to further expose its aromatic essence.
-
Fill the Glass Jar: Place the prepared rosemary sprigs into the clean glass jar, ensuring that they fit comfortably without overcrowding. The quantity of rosemary used can vary based on personal preference and the desired potency of the infused oil. As a general guideline, aim to fill the jar about halfway with rosemary to achieve a balanced infusion.
-
Select the Carrier Oil: Once the rosemary is in place, carefully pour the chosen carrier oil over the herb, ensuring that it completely covers the rosemary sprigs. The carrier oil acts as a medium for extracting the aromatic and therapeutic properties of the rosemary, resulting in a fragrant and potent infusion.
-
Seal the Jar: After adding the carrier oil, securely seal the glass jar with its lid, ensuring a tight closure to prevent any contaminants from entering the infusion. The sealed jar creates an optimal environment for the rosemary and oil to meld together, allowing the infusion process to unfold naturally.
By meticulously preparing the rosemary according to these steps, you establish the foundation for a successful infusion, setting the stage for the development of a rich and aromatic rosemary oil. This thoughtful preparation ensures that the essence of the herb is effectively captured and preserved, leading to a high-quality homemade oil with a myriad of uses and benefits.
Step 3: Infuse the oil
Infusing the oil with the aromatic essence of rosemary is a transformative process that requires patience and attention to detail. The infusion period allows the carrier oil to absorb the flavorful and beneficial properties of the herb, resulting in a fragrant and potent rosemary oil. To ensure a successful infusion, follow these steps:
-
Choose the Infusion Method: There are several methods for infusing oil with rosemary, each offering unique advantages. The most common methods include the cold infusion and the heat infusion. For a cold infusion, the jar of rosemary and carrier oil is placed in a cool, dark location for an extended period, allowing the oil to naturally absorb the herb's essence. On the other hand, a heat infusion involves gently heating the jar of oil and rosemary to expedite the infusion process. Both methods yield excellent results, and the choice between them depends on personal preference and time constraints.
-
Monitor the Infusion: Regardless of the chosen method, it's essential to monitor the infusion progress regularly. For a cold infusion, check the jar periodically to observe the gradual transformation of the oil as it takes on the aromatic qualities of the rosemary. If using the heat infusion method, maintain a gentle heat and stir the mixture occasionally to ensure a consistent infusion. The duration of the infusion process can vary, typically ranging from a few days to several weeks, depending on the desired intensity of the rosemary flavor and aroma.
-
Harness the Power of Time: Infusing oil with rosemary is a testament to the power of time and patience. As the infusion progresses, the carrier oil gradually becomes imbued with the herb's distinctive fragrance and beneficial compounds. This slow and steady process allows the oil to develop a rich and complex aroma, making it a versatile and valuable addition to your culinary and wellness endeavors.
-
Embrace the Aromatic Transformation: Throughout the infusion period, you will witness the remarkable transformation of the carrier oil as it absorbs the essence of the rosemary. The infusion process is a sensory journey, as the air surrounding the jar becomes infused with the herb's delightful fragrance. This aromatic evolution serves as a testament to the natural synergy between the rosemary and the carrier oil, culminating in the creation of a beautifully infused oil that reflects the essence of the herb.
By following these steps and embracing the infusion process with attentiveness and appreciation, you can create a high-quality rosemary oil that embodies the aromatic essence and therapeutic benefits of this beloved herb. The infusion period is a time of anticipation and excitement, as the oil gradually matures into a fragrant and versatile elixir that can elevate your culinary creations, skincare routines, and holistic wellness practices.
Step 4: Strain and store the oil
Once the infusion period has concluded, it's time to proceed with the crucial steps of straining and storing the freshly infused rosemary oil. This phase marks the culmination of the infusion process, where the aromatic essence and beneficial properties of the rosemary are captured in a pure and potent form. Follow these detailed steps to ensure the successful completion of this final stage:
-
Strain the Infused Oil: Carefully position a piece of cheesecloth or a fine mesh strainer over a clean, dry glass bowl or container. With steady hands, pour the infused oil through the cheesecloth or strainer, allowing the liquid to flow through while capturing and separating the spent rosemary sprigs and any residual plant material. The straining process is essential for achieving a clear and pristine rosemary oil, free from any particulates or impurities.
-
Gently Press the Rosemary: To extract every precious drop of the infused oil, gently press the spent rosemary sprigs against the cheesecloth or strainer using the back of a spoon or spatula. This gentle pressure helps release any remaining oil trapped within the herb, maximizing the yield of the infused oil and ensuring that no aromatic essence is left behind.
-
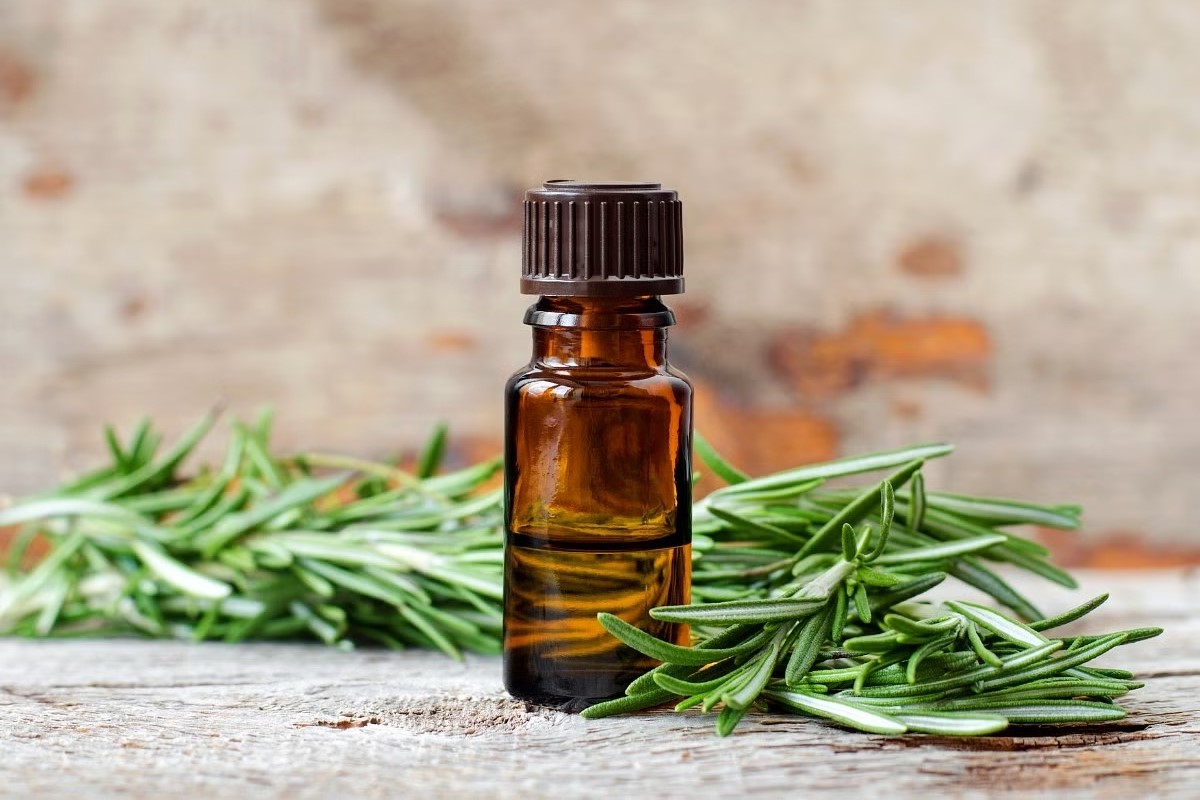
Transfer the Oil to a Dark Glass Bottle: Once the oil has been successfully strained and purified, carefully pour it into a dark glass bottle using a small funnel. The dark glass bottle serves as a protective vessel, shielding the oil from light exposure, which can degrade its quality over time. Ensure that the bottle is clean and dry before transferring the oil, and use a funnel to minimize spills and waste.
-
Label and Date the Bottle: To maintain organization and track the oil's creation date, affix a label to the dark glass bottle and clearly mark it with the type of oil (rosemary-infused), as well as the date of creation. This simple yet crucial step helps you stay informed about the oil's freshness and usage timeline, ensuring that you can enjoy its optimal quality and potency.
-
Store in a Cool, Dark Place: After sealing the dark glass bottle, store the freshly infused rosemary oil in a cool, dark place away from direct sunlight and heat sources. Proper storage conditions help preserve the oil's aromatic integrity and extend its shelf life, allowing you to enjoy its benefits for an extended period.
By meticulously following these steps, you can successfully strain and store the freshly infused rosemary oil, ensuring that it remains pure, potent, and ready for a myriad of culinary, cosmetic, and wellness applications. This final phase represents the culmination of your efforts, resulting in a valuable and versatile creation that reflects the essence and benefits of fresh rosemary.
Conclusion
As you conclude the enriching journey of creating your own rosemary oil, it's essential to reflect on the rewarding process and the valuable creation that now graces your kitchen or apothecary. The art of making rosemary oil at home is a testament to the harmonious synergy between nature's bountiful offerings and the creativity of the human spirit. Through meticulous preparation, patient infusion, and attentive care, you have transformed fresh rosemary and carrier oil into a fragrant and versatile elixir that holds a myriad of uses and benefits.
The journey of crafting rosemary oil is not merely a practical endeavor but a sensory and contemplative experience. From the moment you gathered the fresh rosemary to the gradual infusion process, each step was imbued with the essence of this beloved herb. The gentle bruising of the rosemary, the patient monitoring of the infusion, and the aromatic transformation that unfolded within the glass jar all contributed to the creation of a potent and aromatic oil that encapsulates the spirit of the herb.
As you hold the dark glass bottle containing the freshly infused rosemary oil, you are in possession of a versatile and valuable creation. This aromatic elixir can elevate your culinary creations, adding depth and flavor to dishes ranging from roasted vegetables to savory marinades. In the realm of natural skincare and wellness, the rosemary oil becomes a potent ingredient, offering its beneficial properties to homemade balms, salves, and hair care products. Its invigorating aroma can also be harnessed for aromatherapy, infusing living spaces with a sense of vitality and clarity.
Furthermore, the process of making rosemary oil at home fosters a deeper connection with nature's gifts and the art of herbal craftsmanship. It invites you to slow down, savor the sensory nuances, and appreciate the transformative power of botanical infusion. The creation of rosemary oil is a celebration of tradition and innovation, as ancient herbal wisdom meets modern creativity in your own kitchen.
As you embark on the journey of utilizing your homemade rosemary oil, remember the care and intention that went into its creation. Embrace its aromatic embrace and harness its versatile benefits, knowing that you have unlocked the essence of fresh rosemary in a pure and potent form. Whether it graces your culinary creations, skincare rituals, or moments of relaxation, the homemade rosemary oil stands as a testament to your creativity, resourcefulness, and appreciation for the natural world.
